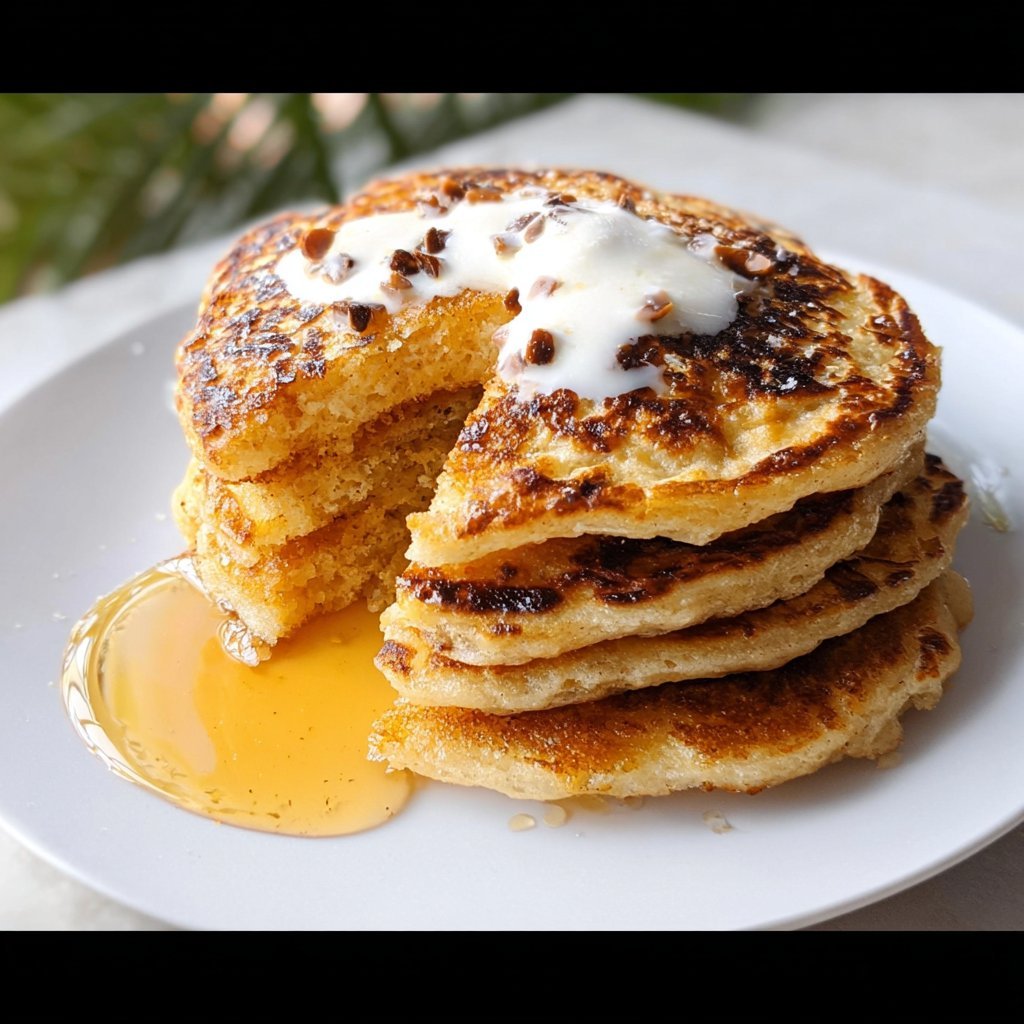
Catching Up Over Pancakes (And Why Sourdough Discard Is My Secret Weapon)
Okay, so you know those mornings where you wake up craving something that’s basically a warm hug on a plate? Well, that’s when I whip out my stash of sourdough starter discard – you know, the stuff you usually toss out if you’re not sure what to do with it (guilty as charged for ages). Honestly, these pancakes have become my weekend ritual. The first time I made these, I totally forgot the sugar, but the tang from the starter saved me and, weirdly, nobody even noticed. Also: my dog once tried to steal one off the cooling rack, so take that as a vote of confidence, I guess.
Why I Keep Coming Back to This
I make this when I’ve got a jar of sourdough discard staring accusingly at me from the fridge, or when my family’s grumbling about “the same old breakfast” (which, let’s face it, happens often enough). My partner goes a bit bonkers for these topped with peanut butter and honey – and even my picky nephew, who claims he hates anything “sour,” devours them. Oh, and there’s just something satisfying about not wasting that starter (because, honestly, tossing it used to make me irrationally grumpy). These pancakes are thick, fluffy, and the tiniest bit tangy – just enough to make them interesting without scaring off the kids. I used to mess up the flipping part, but now… okay, I still mess it up sometimes. They still taste good, though; that’s what counts.
Here’s What You’ll Need (And What You Can Swap)
- 1 cup (about 240g) sourdough starter discard – I just use whatever’s on hand, but once I tried it with rye starter and it was actually pretty great.
- 3/4 cup milk – Any milk works, even oat or almond. I’ve even used watered-down yogurt in a pinch (don’t ask).
- 1 large egg – I’ve used two small eggs instead when that’s all I had. No disasters yet.
- 2 tablespoons melted butter – Or oil. My gran swears by sunflower oil, but I think butter’s tastier.
- 1 tablespoon sugar – I sometimes skip it if I know there’s a syrup avalanche coming.
- 1 cup all-purpose flour – I’ve mixed in a handful of wholewheat before. It’s fine, just a bit denser.
- 1½ teaspoons baking powder – Don’t leave it out, unless you enjoy sad pancakes.
- ½ teaspoon baking soda
- ½ teaspoon salt
- Optional add-ins: A handful of blueberries, chocolate chips, walnuts (totally optional, but fun if you’re feeling fancy)
How I Make ‘Em (No Panic If It Looks Weird)
- Mix the wet stuff: In a big bowl (seriously, bigger than you think – batter has a mind of its own), whisk together the sourdough discard, milk, egg, and melted butter. I usually do this while half-listening to the weather report. If it looks a bit streaky, don’t panic.
- Add the dry: In another bowl, toss together the flour, sugar, baking powder, baking soda, and salt. I just dump it in and give it a quick mix with a fork.
- Combine but don’t overthink: Gently stir the dry into the wet. Lumps are fine! Actually, I think it’s better if you don’t mix it till it’s totally smooth. Fold in any extras at this stage (or just eat a handful of chocolate chips, up to you).
- Let it rest (if you have patience): Sometimes I let the batter sit for ten minutes so it puffs up a bit. But honestly, when everyone’s hungry, I just start cooking straight away.
- Cook ‘em up: Heat a nonstick pan (or a griddle if you’re posh) over medium heat. A dab of butter or oil helps things along. Pour batter – about a 1/4 cup per pancake – and cook until bubbles form and the edges look set. Flip! This part used to stress me out. If you mess up, just call it “rustic.” Another minute or so and you’re golden.
- Keep going: Repeat with the rest of the batter. Sometimes I munch on the wonkiest one as “quality control.” Classic cook’s tax.
Stuff I’ve Learned the Hard Way
- If your starter’s super thick, add a splash more milk. Too thin? More flour. It’s not rocket science, but it took me a while to stop worrying.
- Don’t flip too early – they fall apart (learned that the hard way, pancake carnage everywhere).
- You can keep them warm in a low oven if you’re feeding a crowd, but I usually just stack them and cover with a tea towel.
Variations I’ve Tried (Plus One Flop)
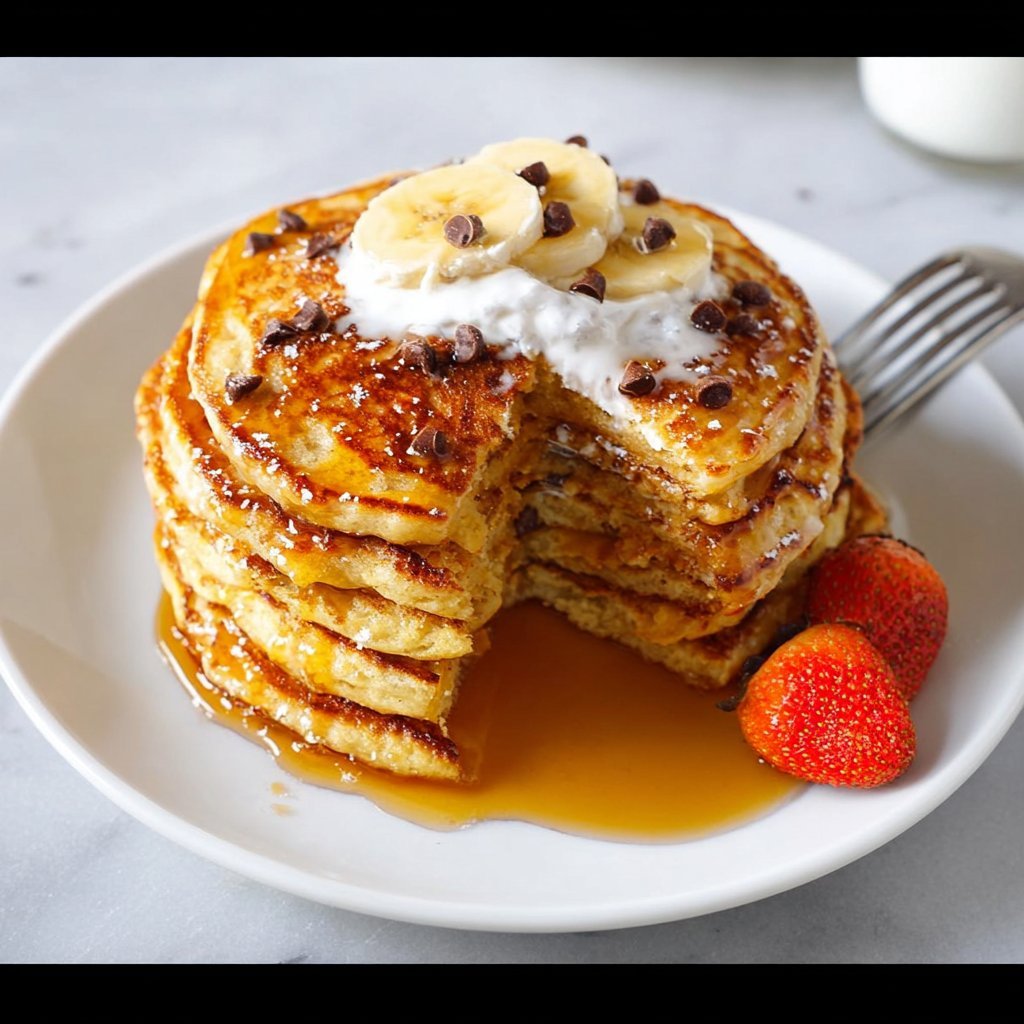
- Banana Nut: Smoosh up a ripe banana and toss in some walnuts. Makes them taste like banana bread, sort of.
- Choc-chip & Orange: Add chocolate chips and a grating of orange zest – this is my sister’s favorite, though I find it a bit much before noon.
- Sourdough Buckwheat: Sub out half the flour for buckwheat flour. More earthy, but quite filling.
- Epic fail: Once I tried to make savory pancakes with cheddar and chives; they stuck to the pan and tasted like regret. Would not recommend (or maybe I’ll try again with less cheese?).
Gear You’ll Need (Sort Of)
- Big mixing bowl – Or just a soup pot if you’re low on clean dishes, honestly.
- Nonstick pan or griddle – If you don’t have one, well, a heavy frying pan with a bit of extra butter does the trick.
- Spatula – Not essential if you’re feeling brave; I survived with a butter knife once (don’t recommend).
How I Store Them (But They Never Last Long)
You can stack these pancakes between bits of baking paper and keep them in a sealed container in the fridge for up to two days—though honestly, in my house it never lasts more than a day! To reheat, I just pop them in a toaster or dry pan. They’re actually pretty nice cold, too, if you’re into that sort of thing.
The Best Ways to Serve (According to My Chaos Household)
I love mine with salted butter and a drizzle of maple syrup (the real deal, if I can splurge, but the cheap stuff works fine too). My aunt likes yogurt and berries on top, and my partner’s all about the peanut butter. To be honest, sometimes I just eat them plain with my coffee. Oh – and once we sandwiched bacon between two, which was ridiculous and amazing.
Lessons Learned (Or: Pancake Pro Tips From a Serial Mistake-Maker)
- Don’t rush the resting step if you have the patience – it actually does make them fluffier, but I get why you’d skip it.
- Careful with the heat. I once cranked it up to speed things up and ended up with pancakes that were burnt outside, raw inside. Bad times.
- Don’t stress about perfect circles. Wonky pancakes have more character (and corners to nibble on).
People Always Ask Me…
- Can I make these vegan? Sure thing – swap the egg for a flax egg and use non-dairy milk. They’re a bit less fluffy, but still tasty.
- What if my discard is really sour? Well, I say taste it first. If it’s super tangy, maybe skip the sugar or add a splash more milk. Or just embrace the tang (I like it, but not everyone does!).
- Can I freeze them? Yep, they freeze fine – just layer with parchment. Reheat in the toaster (or microwave if you must, but they get a bit chewy).
- What do you do with leftover starter? Besides these pancakes, sometimes I make crackers or even these sourdough crackers. Or check out this resource for more ideas: Cultures for Health – Using Sourdough Discard.
- Do I really need to let the batter rest? Eh, it helps, but if you’re starving (or have impatient kids), just make them right away.
Anyway, hope these pancakes bring a bit of joy to your table. If you tweak the recipe or discover a new variation, tell me about it – I’m always looking for an excuse to make another batch, or, you know, just procrastinate on doing the dishes.
Ingredients
- 1 cup sourdough starter discard (unfed)
- 1 cup all-purpose flour
- 2 tablespoons granulated sugar
- 1 teaspoon baking powder
- 1/2 teaspoon baking soda
- 1/2 teaspoon salt
- 3/4 cup milk
- 1 large egg
- 2 tablespoons melted butter (plus more for cooking)
Instructions
-
1In a large bowl, whisk together the sourdough starter discard, milk, egg, and melted butter until well combined.
-
2In a separate bowl, mix the flour, sugar, baking powder, baking soda, and salt.
-
3Add the dry ingredients to the wet ingredients and stir until just combined. Do not overmix; a few lumps are okay.
-
4Heat a non-stick skillet or griddle over medium heat and lightly grease with butter.
-
5Pour 1/4 cup of batter for each pancake onto the skillet. Cook until bubbles form on the surface and the edges look set, about 2-3 minutes. Flip and cook for another 1-2 minutes until golden brown.
-
6Serve warm with your favorite toppings such as maple syrup, fresh fruit, or extra butter.
Approximate Information for One Serving
Nutrition Disclaimers
Number of total servings shown is approximate. Actual number of servings will depend on your preferred portion sizes.
Nutritional values shown are general guidelines and reflect information for 1 serving using the ingredients listed, not including any optional ingredients. Actual macros may vary slightly depending on specific brands and types of ingredients used.
To determine the weight of one serving, prepare the recipe as instructed. Weigh the finished recipe, then divide the weight of the finished recipe (not including the weight of the container the food is in) by the desired number of servings. Result will be the weight of one serving.
Did you make this recipe?
Please consider Pinning it!!