How These Fudgy Brownies with Rich Chocolate Mousse Topping Became a Family Ritual
I’ll be honest, brownies have been my Achilles’ heel. For years, every batch was either too cakey (which, by the way, my uncle Steve would claim is just “a sad cake”) or so dense you could build a shed with them. But then—after much trial, error, and, well, a few evenings spent kneeling in front of the oven muttering—I stumbled into this recipe. The real kicker: it’s not just the brownies. The chocolate mousse on top? That was a happy accident at about 11pm when I realized I was out of frosting and just didn’t feel like walking to the shop. Big win. Now, whenever I make these, my sister practically camps out in my kitchen. She calls dibs on the corner pieces (I don’t get it, but hey, families are weird).
Why You’ll Love This (Or At Least, Why I Definitely Do…)
I make this whenever I want to bribe my kids into tidying up (it works a treat, most of the time!). My family goes bananas for it, especially because the mousse sets up all pillowy on top of that super-fudgy base—honestly, it’s a little over-the-top, but in the best way. I used to find brownies intimidating until I realized you don’t need fancy chocolate or a degree in patisserie.
And those times when the mousse split? I just called it “rustic.” Nobody complained.
So, if you want something that looks impressive but is really just a bit of whisking and melting (plus licking the bowl, obviously), you’re in the right place.
Stuff You’ll Need (But Feel Free to Improvise!)
- 200g dark chocolate – I usually grab whatever’s on offer, but if I’m feeling flush I’ll use Lindt or Green & Black’s. Truth be told, even the really cheap stuff works fine.
- 150g unsalted butter – Salted in a pinch (just skip the extra salt later).
- 250g sugar – White, brown, a mix… I’ve tried them all. Brown gives a bit more chew.
- 3 eggs (room temp if you remember; if not, no big deal)
- 100g plain flour – Wholemeal works if you’re feeling virtuous, but honestly, who makes healthy brownies?
- 30g cocoa powder – Dutch process if you have it, or just your standard supermarket tub.
- 1/2 tsp salt (or just a big pinch)
- 1 tsp vanilla extract – My gran swore by Nielsen-Massey, but whatever’s in your cupboard is fine.
- For the mousse: 150g dark chocolate, 2 eggs (again, room temp), 200ml double cream, 1–2 tbsp icing sugar (depends how sweet you like it)
Directions (The Casual Guide, Not the Professional One)
- Get yourself set up: Oven to 180°C (350°F). Line an 8×8 inch tin with parchment so you don’t have to chisel brownies out later. Or, if you forget (like I do, half the time), just grease it well.
- Melt the chocolate with butter: Either in a saucepan over low heat or the microwave in 30-second bursts. Stir until it’s glossy. Try not to eat it yet. (I always have a little taste here, though.)
- Stir in sugar: Add the sugar right into the warm chocolate-butter mixture. It’ll look a bit grainy, but that’s fine.
- Add eggs & vanilla: Beat in the eggs, one at a time. If the mix looks split, don’t panic—it comes together with the flour. Vanilla in, too.
- Fold in dry ingredients: Sift in flour, cocoa, and salt. Or just dump them in (I usually do, don’t tell Mary Berry). Fold gently. Don’t overmix unless you like rubbery brownies.
- Bake: Into the tin and bake for 22–28 min. It should wobble slightly in the middle if you jiggle the tin. A toothpick should come out with a few crumbs, not clean. Actually, I find it works better if you slightly underbake it and let it set as it cools.
- Cool completely. This is the bit I’m rubbish at waiting for, but if you want mousse to go on top, you really do need a cold base.
- Mousse time: Melt chocolate and let cool a bit (otherwise you’ll have scrambled eggs). Whip double cream with icing sugar to soft peaks. In a separate bowl, whip the 2 eggs till pale and thick-ish. Fold everything together—start with eggs into chocolate, then fold in cream. Or do it the other way round; I honestly can’t tell the difference.
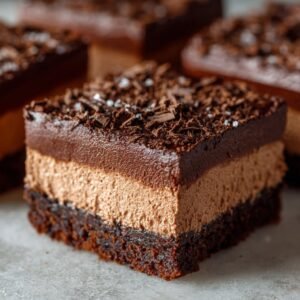
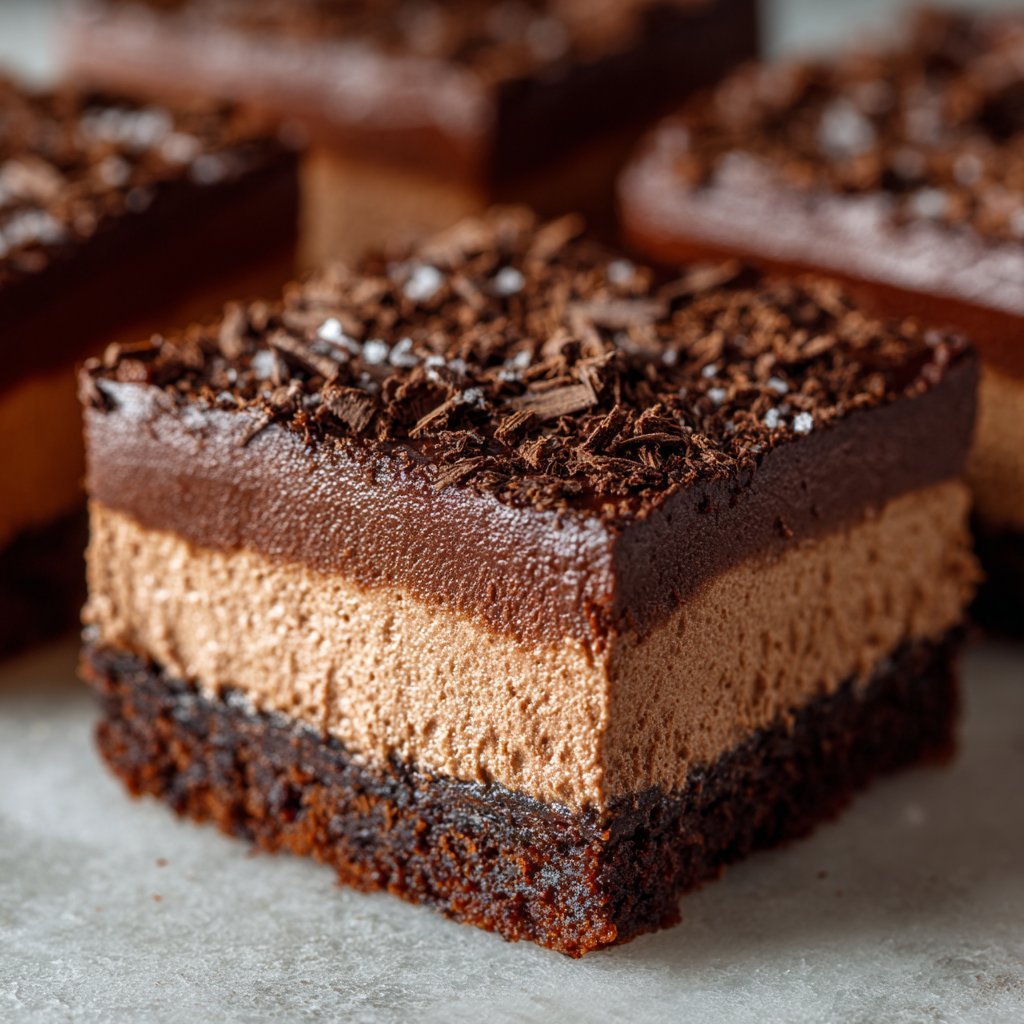
- Spread mousse on cooled brownies. Don’t worry if it’s not perfectly smooth—shabby chic, right?
- Chill for at least an hour. Or 20 min if you’re really impatient, but it’s softer.
Notes from My (Not Always Successful) Experiments
- If you’re out of cream, I tried using Greek yoghurt once – the mousse turned out weirdly tangy, but not bad.
- The brownies freeze surprisingly well, but the mousse gets a bit odd after thawing. Just a heads up.
- I always think these taste better the next day, but they rarely last that long in my house.
- If your mousse splits, just call it “deconstructed.” Worked for me at a dinner party, anyway.
Things I’ve Tried (And Some I Wouldn’t Recommend)
- Swapped peanut butter chips for chocolate—works, but honestly makes it a whole new beast.
- Espresso powder in the brownies—YES, depth of flavor.
- Once tried a white chocolate mousse topping. It was… let’s say, not a repeat performance.
Equipment—But Don’t Stress If You’re Missing Stuff
- 8×8 inch tin or whatever’s close enough (I used a lasagna dish once, just watched the baking time)
- Mixing bowls—a big one helps, but you can always do it in stages
- Hand whisk, stand mixer, or just a good old fork and some elbow grease
- Spatula (or a big spoon; I lost mine for weeks and just improvised)
Storage (But, Honestly…)
Keep brownies in the fridge because of the mousse—airtight is best, they’ll last 3 days (in theory). In practice, my lot eat them by day two, tops. If you want to make ahead, you can freeze the brownie base, but as I said, mousse gets a bit funky after thawing.
How I Like to Serve These Up
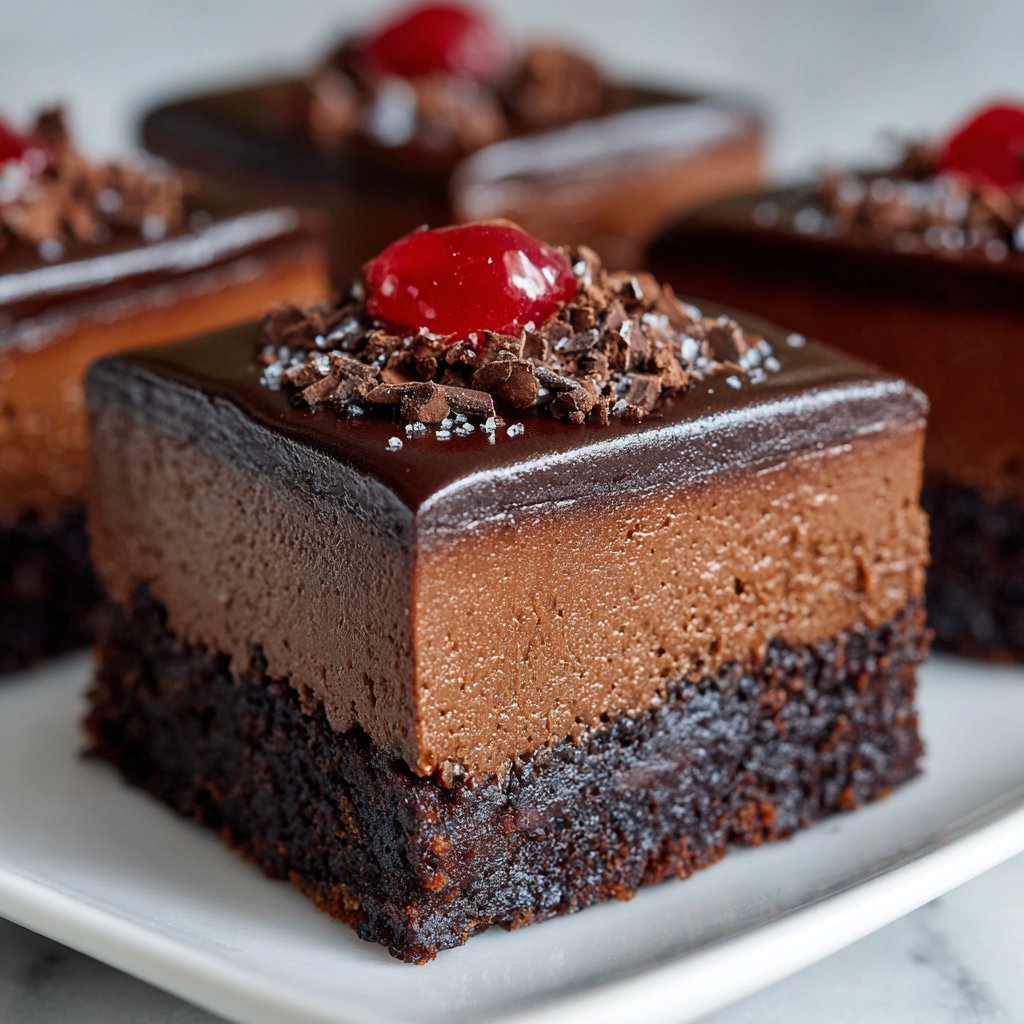
My favorite way: straight from the fridge with a coffee, or maybe a scoop of vanilla ice cream if I’m feeling fancy. Sometimes I dust a bit of cocoa powder or even some flaky sea salt on top—my daughter says that’s “extra,” but she always eats it anyway.
If I Could Go Back in Time: Pro Tips I Wish I’d Known
- Don’t rush cooling the brownies. I once tried to put the mousse on while they were warm and, well, it turned into chocolate puddle cake. Still edible, but not quite the showstopper.
- Use parchment, seriously. I spent years chiseling brownies out of pans and now I just pull up the edges and boom—done.
- Letting the mousse set properly in the fridge is worth it. Otherwise, it’s messy, and not in a good way.
Questions People Actually Ask Me (And My Real Answers)
- Do I really need fancy chocolate?
- Honestly, no. I’ve used everything from supermarket own-brand to the stuff you buy in little gold boxes. As long as it’s dark (50%+), you’re fine.
- Can I make these gluten-free?
- Yep! Switch out the flour for your fave GF blend. They’re a bit more fragile, so go easy on the slicing.
- What if I don’t have a whisk?
- Use a fork and just beat everything a bit longer (think of it as exercise before dessert).
- How do I know when the brownies are done?
- Toothpick test works, but I like to go by jiggle: if the edges are set but the middle just wobbles, you’re golden.
- Why is my mousse grainy?
- Probably the chocolate was too hot when you mixed it with the eggs. Next time, let it cool a bit more first. Or just call it “textured”—nobody will know.
Oh, and if you want a deep dive on mousse technique, Serious Eats has a mega-guide I’ve used. For more ideas on brownie mix-ins, Sally’s Baking Addiction is always inspiring (and has amazing photos I can only dream of recreating).
Anyway. Give these a go, tweak, and make them your own. And if you manage to save me a piece, I’ll be genuinely impressed.
Ingredients
- 1 cup (225g) unsalted butter
- 8 oz (225g) semisweet chocolate, chopped
- 1 1/4 cups (250g) granulated sugar
- 3 large eggs
- 1 tsp vanilla extract
- 3/4 cup (95g) all-purpose flour
- 1/4 tsp salt
- 1 cup (240ml) heavy cream
- 6 oz (170g) bittersweet chocolate, chopped
- 2 tbsp powdered sugar
Instructions
-
1Preheat the oven to 350°F (175°C). Grease and line an 8×8-inch baking pan with parchment paper.
-
2Melt the butter and semisweet chocolate together in a heatproof bowl over simmering water, stirring until smooth. Remove from heat and let cool slightly.
-
3Whisk in the granulated sugar, then add eggs one at a time, mixing well after each addition. Stir in vanilla extract.
-
4Fold in the flour and salt until just combined. Pour the batter into the prepared pan and bake for 25 minutes, or until a toothpick inserted in the center comes out with a few moist crumbs. Let cool completely.
-
5For the mousse, heat the heavy cream in a saucepan until just simmering. Pour over the bittersweet chocolate and let sit for 2 minutes, then whisk until smooth. Chill until slightly thickened, then whip with powdered sugar until light and fluffy.
-
6Spread the chocolate mousse evenly over the cooled brownies. Refrigerate for at least 1 hour before slicing and serving.
Approximate Information for One Serving
Nutrition Disclaimers
Number of total servings shown is approximate. Actual number of servings will depend on your preferred portion sizes.
Nutritional values shown are general guidelines and reflect information for 1 serving using the ingredients listed, not including any optional ingredients. Actual macros may vary slightly depending on specific brands and types of ingredients used.
To determine the weight of one serving, prepare the recipe as instructed. Weigh the finished recipe, then divide the weight of the finished recipe (not including the weight of the container the food is in) by the desired number of servings. Result will be the weight of one serving.
Did you make this recipe?
Please consider Pinning it!!