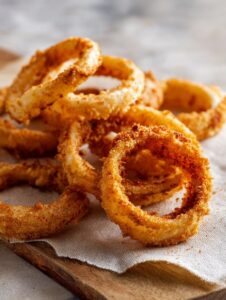
If you’ve got onions, you need to try these air fryer onion rings!
Alright, so let’s get one thing straight: my kids basically think onion rings are the eighth wonder of the world. Seriously. We went to a diner once and they ordered three sides of onion rings, barely even touched their burgers. That’s when I realized, hang on—why not try making them at home? Enter: the air fryer. (And if I’m honest, less deep-frying oil splashed on the stove means less muttering under my breath while cleaning.)

It’s not rocket science, but my first go-round ended with a gluey, not-so-great mess (in my defense, I underestimated how messy bread crumbs can be). Anyway, after some tweaks, they’re not just edible—now we get that crunchy snap that makes everyone crowd the kitchen. Sometimes I double the batch, because, well… teenagers.
Why you’ll love making these at home (spoiler, it’s not just because they’re easy)
I pull out this recipe when:
- My family gets that “snack attack” but I cannot handle another trip to the drive-thru.
- We want something crunchy but don’t feel like heating the whole house with the oven—plus no vat of oil.
- We need an appetizer that makes people hover around the counter (dips in hand, obviously).
And honestly, I’ve tried making them on the stovetop—what a mess. Air fryer wins every time (well, unless the dog tries to nab one too soon…)
The ingredients (plus a few swaps Grandma wouldn’t mind)
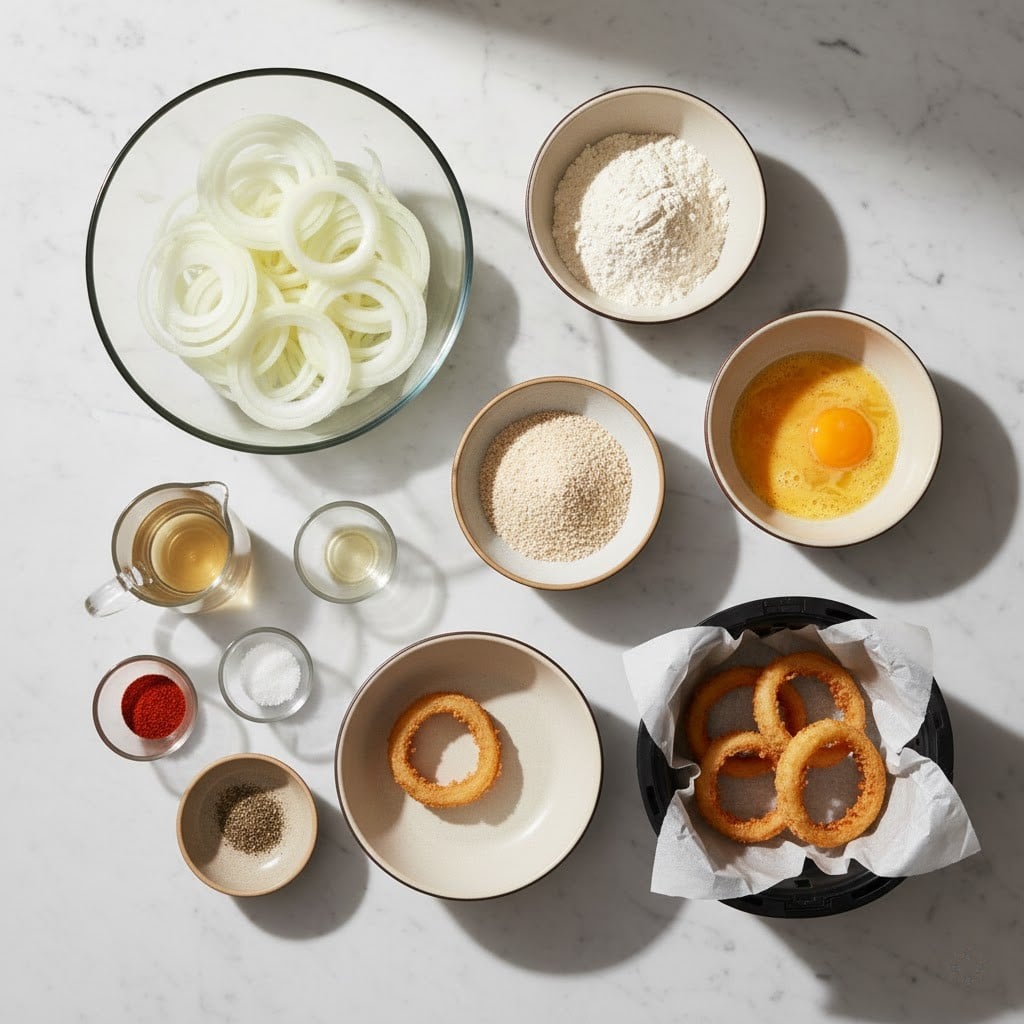
- 2 large yellow onions (sweet onions, like Vidalia, are awesome too—sometimes I just use whatever’s rolling around the crisper drawer)
- 1 cup all-purpose flour (but if you’re out, half plain white and half whole wheat works—did that once when the cupboard was bare)
- 2 teaspoons smoked paprika (sometimes I just use regular paprika if that’s what I can grab)
- 1 teaspoon garlic powder
- 1/2 teaspoon kosher salt, plus extra for sprinkling
- 2 large eggs, beaten (or honestly, 3 smaller ones if that’s what’s in the carton)
- 3/4 cup buttermilk (milk with a splash of lemon juice works fine in a pinch)
- 2 cups panko bread crumbs (regular bread crumbs can work, but panko gives better crunch—my neighbor tries crushed cornflakes for kicks)
- 1/2 teaspoon black pepper
- (cooking spray—for the actual air fryer bit)
The step-by-step (and where it might get a tiny bit messy)
- Slice those onions into thick rings—nothing too wimpy, about half an inch thick. Then, gently separate them; save those teeniest inner ones for a salad or, well, snack now if you want.
- In a bowl, toss together the flour, paprika, garlic powder, salt, and pepper. (This is where the flavor starts, so don’t skimp!)
- Whisk eggs and buttermilk together in another bowl. Sometimes I wonder why I dirty so many bowls, but hey—worth it.
- Pour your panko out onto a plate or shallow dish.
- Take each onion ring and dunk it first in the flour mixture, then the egg/buttermilk bath, and finally roll it around in the panko. Use one hand for wet, one for dry if you can—otherwise, panko monster hands are inevitable. If a ring loses its panko, just press more on; no one’s judging.
- I usually preheat the air fryer for 2-3 minutes at 375°F (190°C), though to be honest, sometimes I forget—haven’t noticed a disaster yet.
- Arrange the breaded rings in a single layer in your air fryer basket (don’t overcrowd them; crammed rings don’t crisp up the same, trust me). Spray a light coating of cooking spray over them.
- Air fry for 8-10 minutes, maybe give them a little shake or flip halfway if you’re feeling ambitious. They’ll go golden brown and crunchy (this is where I always sneak a tasting ring—chef’s privilege!).
- Sprinkle with extra salt as soon as they’re out. Let them cool for just a minute or two—burnt tongues are a rite of passage, but not a fun one.
Some notes I learned the hard way
- If your onion rings aren’t picking up enough panko, try pressing it on a bit more—don’t be shy with it.
- Onion size matters. Too thin, they sort of disappear into crumbs. Too thick, they can taste a bit… raw still. Half an inch is my sweet spot.
- I used to crowd the air fryer thinking I could save time, but they come out funny—sort of soggy. More batches, less regret.
Variations I’ve played around with (some winners, one total flop)
- Crush up some potato chips or pretzels and use them with the panko for a wild crunch. My youngest said it tasted “epic.”
- I once tried almond meal for a gluten-free batch—honestly, didn’t crisp up the way I wanted. Panko still reigns supreme here.
- Add a pinch of chili powder or cayenne if you’re after more heat. Or do a dash of Parmesan cheese in the crumbs; my sister swears by it.
Equipment (but don’t worry if you don’t have it all)
- Air fryer (obviously, but a convection oven sort of works too—it just takes longer)
- Mixing bowls (if you only have one, just rinse it between steps; honestly, I’ve done this with coffee mugs in a pinch)
- Cooking spray (or oil and a pastry brush if you’re feeling fancy)
How to store (if you somehow have leftovers—which, let’s be real, rarely happens here)
If you do have leftovers, store the onion rings in an airtight container in the fridge. They’ll be best if you reheat them in the air fryer (3-4 minutes at 350°F does the trick), but the microwave makes them go floppy, so I’d avoid that if you can. In my house, they’re usually a distant memory by the end of the night, but hey, it’s possible.
How I serve ’em (and how my family makes it a whole thing)
We do ketchup and ranch, sure, but there’s a running joke here that “fancy sauce” (equal parts mayo and sriracha) is a must. Sometimes we pile them on a burger as well—onion ring perfection, right? I even dip mine in honey mustard when I feel unpredictable.
Lessons from trial (or: “Pro tips” that come from minor disasters)
- Don’t rush the breading step. I once slapped the panko on too fast and ended up with a balding onion ring—sad day!
- Definitely give them space in the air fryer. Honestly, I once stacked ‘em up thinking I’d save time, but nope, just ended up soggy and a bit grouchy about it.
- If you bake instead of air frying, up the temp and double the time, but… it’s just not quite the same.
Real-life Q&A (these came up last family brunch)
- Can I make these ahead? You can prep and bread them a day before, just keep ’em covered and refrigerated. Fry just before eating—otherwise, they go sort of limp. Not fun.
- Help! My coating keeps falling off? Pat your onion rings dry before dredging—they stick better. And don’t skip the flour. Actually, if you do, they’ll just be slippy little things.
- Can I use red onions? Yep, but I personally think the strong flavor is better for salsa. Sweet onions win for rings, at least in my book.
- What if I don’t have buttermilk? Just mix milk with a squeeze of lemon juice or vinegar, give it a minute, and you’ll never know the difference.
- Do I need to flip them halfway? Not strictly necessary, but it gives a more even color. I forget sometimes and haven’t heard complaints, so up to you!
There we go. Air fryer onion rings. Slightly messy, always crunchy, and honestly, the kind of “cooking project” that’s just about as much fun as eating them. If you try them, let me know—especially if you add a wild twist. (Or if you somehow resist eating half the batch before they’re even at the table—I salute you!)
Ingredients
- 2 large yellow onions (sweet onions, like Vidalia, are awesome too—sometimes I just use whatever’s rolling around the crisper drawer)
- 1 cup all-purpose flour (but if you’re out, half plain white and half whole wheat works—did that once when the cupboard was bare)
- 2 teaspoons smoked paprika (sometimes I just use regular paprika if that’s what I can grab)
- 1 teaspoon garlic powder
- 1/2 teaspoon kosher salt, plus extra for sprinkling
- 2 large eggs, beaten (or honestly, 3 smaller ones if that’s what’s in the carton)
- 3/4 cup buttermilk (milk with a splash of lemon juice works fine in a pinch)
- 2 cups panko bread crumbs (regular bread crumbs can work, but panko gives better crunch—my neighbor tries crushed cornflakes for kicks)
- 1/2 teaspoon black pepper
- (cooking spray—for the actual air fryer bit)
Instructions
-
1Slice those onions into thick rings—nothing too wimpy, about half an inch thick. Then, gently separate them; save those teeniest inner ones for a salad or, well, snack now if you want.
-
2In a bowl, toss together the flour, paprika, garlic powder, salt, and pepper. (This is where the flavor starts, so don’t skimp!)
-
3Whisk eggs and buttermilk together in another bowl. Sometimes I wonder why I dirty so many bowls, but hey—worth it.
-
4Pour your panko out onto a plate or shallow dish.
-
5Take each onion ring and dunk it first in the flour mixture, then the egg/buttermilk bath, and finally roll it around in the panko. Use one hand for wet, one for dry if you can—otherwise, panko monster hands are inevitable. If a ring loses its panko, just press more on; no one’s judging.
-
6I usually preheat the air fryer for 2-3 minutes at 375°F (190°C), though to be honest, sometimes I forget—haven’t noticed a disaster yet.
-
7Arrange the breaded rings in a single layer in your air fryer basket (don’t overcrowd them; crammed rings don’t crisp up the same, trust me). Spray a light coating of cooking spray over them.
-
8Air fry for 8-10 minutes, maybe give them a little shake or flip halfway if you’re feeling ambitious. They’ll go golden brown and crunchy (this is where I always sneak a tasting ring—chef’s privilege!).
-
9Sprinkle with extra salt as soon as they’re out. Let them cool for just a minute or two—burnt tongues are a rite of passage, but not a fun one.
Approximate Information for One Serving
Nutrition Disclaimers
Number of total servings shown is approximate. Actual number of servings will depend on your preferred portion sizes.
Nutritional values shown are general guidelines and reflect information for 1 serving using the ingredients listed, not including any optional ingredients. Actual macros may vary slightly depending on specific brands and types of ingredients used.
To determine the weight of one serving, prepare the recipe as instructed. Weigh the finished recipe, then divide the weight of the finished recipe (not including the weight of the container the food is in) by the desired number of servings. Result will be the weight of one serving.
Did you make this recipe?
Please consider Pinning it!