Just Pull Up a Chair—Let’s Talk Mac and Cheese
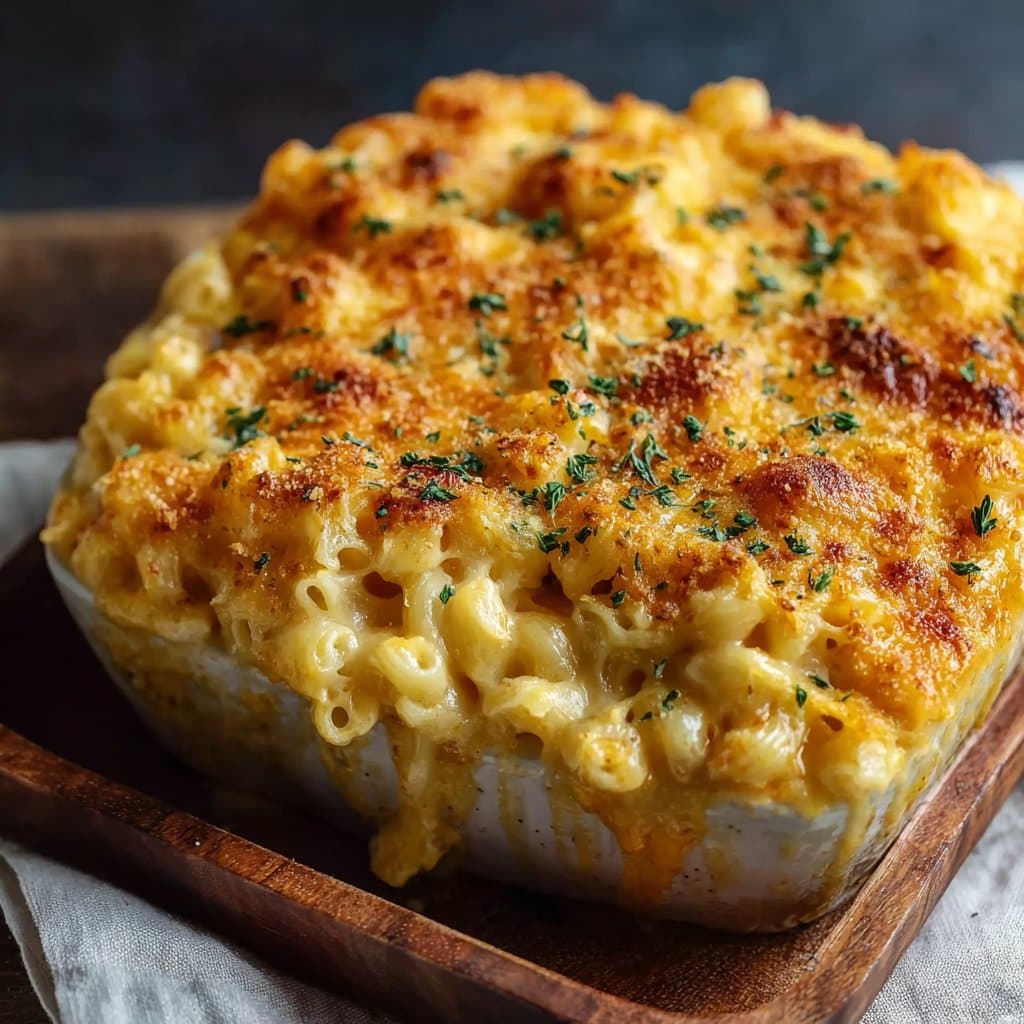
You ever get that craving for gooey, bubbling, slightly-crispy-on-top mac and cheese that hits like a ton of bricks on a rainy evening? Yeah, same here. This cheesy baked mac and cheese recipe is the one I always circle back to—usually when I need a hug in dinner form or, honestly, just something ridiculously comforting (especially after one of those days). I remember the very first time I made this, my cousin nearly inhaled half the pan before anyone else could get a fork in. No judgment, it happens to the best of us. Pro tip: don’t wear a white shirt while making this—unless you like a bit of cheese fashion, which, respect.
Why I Keep Coming Back to This (and My Family Can’t Get Enough)
I make this when my fridge is looking a bit sad but I’ve still got some cheese lurking around (some of it questionable, let’s be honest). My family goes absolutely bonkers for this because it’s got that stick-to-your-ribs richness, but also—don’t ask me why—turns even the blandest Tuesday into a bit of a party. Even the pickiest nibling (that’s my nephew, in my case) will eat seconds. And if you’ve ever run out of patience for flimsy stovetop mac, like I have, wait till you get a bite of that golden, practically hypnotic cheese crust. (There’s really only one downside: everyone fights over the corners—good luck!)
What You’ll Need (and What I’ve Subbed When in a Pinch)
- 1 box (about 450g or 1lb) elbow macaroni (honestly, any short pasta shape will work—shells, cavatappi, whatever’s lounging in the cupboard)
- 3 cups grated sharp cheddar (okay, my gran swore by Kraft, but I use whatever’s on sale—sometimes a mix. Pepper jack is wild in here!)
- 1 heaping cup mozzarella (I grab pre-shredded if I’m feeling lazy, sue me)
- 2 cups whole milk (I’ve used 2% in a pinch, or even half evaporated milk when the store trip just wasn’t happening)
- 4 tbsp butter (margarine actually melts fine, but the flavor is less cozy)
- 1/4 cup all-purpose flour
- 1/2 tsp garlic powder (or, on a brave day, fresh minced garlic—it’s a bit punchier)
- 1/2 tsp salt (though I definitely toss in more when pretending to ‘season to taste’)
- 1/4 tsp black pepper
- 1/2 tsp smoked paprika (optional, but wow—game changer)
- 1/2 cup panko breadcrumbs (sometimes I just crumble up stale crackers—don’t tell the foodies)
- 2 tbsp grated Parmesan (totally optional, but gives a nice salty kick on top)
How I Make It—Step-by-Step but Not Fussy
- Set your oven to 190°C (375°F). Grab a big old baking dish—something like 9×13 inches works. (I have an ancient one with a suspicious chip but I still use it, just don’t serve from the chipped part.)
- Boil your pasta in a giant pot of salted water till just shy of al dente. Like, maybe a minute less than the package says. Drain. And here’s where I usually sneak a noodle, for… quality control.
- While pasta’s boiling, melt butter over medium heat in a saucepan. Toss in flour and whisk like your life depends on it for 1-2 minutes (it will look a bit like paste; don’t panic).
- Slowly pour in the milk, whisking the whole time so you don’t get weird lumps. If you do get lumps, just pretend it’s rustic. Keep stirring till it thickens—you want it about the texture of a milkshake—should only take a few minutes.
- Now, take the pot off the heat. Stir in all that grated cheddar and mozzarella (save a handful for later). Watch it swirl and melt and try not to drool on your wooden spoon. Toss in the garlic powder, salt, pepper, and paprika. If it tastes bland, add a bit more salt. If you’ve tried it already, join the club.
- Dump your cooked pasta into the cheese sauce and stir till it’s all dressed up. If you under-milked it and it looks a bit too thick, add another splash of milk (I’ve had to do this more times than I care to admit).
- Pour the gooey goodness into your baking dish. Sprinkle with the breadcrumbs, leftover cheese, and parmesan if using. Don’t smooth the top too much—the lumpy bits get crispy.
- Bake for 25-35 minutes till bubbling and golden brown on top. If you want it even crispier, flick on the broiler for the last 2 minutes (but don’t walk away or you’ll have charred cheese. Learned that the hard way).
- Let it cool for about 10 minutes. Or don’t, but you’ll burn your mouth (ask me how I know—actually, maybe don’t).
The Real-Life Notes (Weird Things I’ve Discovered by Accident)
- This dish honestly improves if you let it sit for a bit. Sort of like revenge, but cheesier.
- If you use pre-shredded cheese, don’t stress about the anti-caking stuff. The apocalypse hasn’t happened yet.
- Sometimes I mix in a splash of hot sauce, but my family side-eyes me, so I usually don’t.
- If it’s too thick the next day, just microwave with a splash of milk. Problem solved.
How I’ve Changed It Up
- I’ve tried adding broccoli. Worked out great, but the five-year-old caught on and staged a protest.
- Diced ham or cooked bacon additions are always crowd-pleasers. I dump in whatever is hiding in my fridge drawer—except once too much blue cheese and… oof. Maybe don’t do that.
- Sometimes a swirl of Sriracha on top before baking (just for the adults).
What You’d Actually Need (and What’s Not Strictly Necessary)
- Large pot (if you only have a small one, cook half the pasta at a time—slow but doable)
- Saucepan (I’ve survived with a frying pan before, but you gotta be quick with the whisking)
- Whisk (fork works, just takes more elbow grease)
- Baking dish (I once used a cast iron skillet. Worked decently, but a bit of sticking.)
Keeping (or Not Keeping) the Leftovers
This keeps fine, covered, in the fridge for 3 days, but honestly, in my house it never lasts more than a day. I read somewhere people freeze portions, but, uh, teach me your self-control ways if you get that far. Serious Eats has some more tips if you want to freeze it. But to me it’s best fresh.
Serving—Do What You Feel
I serve this as an all-out main with a pile of green beans tossed in olive oil, maybe salad if we’re pretending to be healthy. My uncle (hi Mike) insists on ketchup, but I prefer a bit of hot sauce or just black pepper on top. Sometimes, for birthdays, we eat it straight from the dish, family style, everyone shoveling bites and laughing. Good times.
Lessons Learned the Hard Way (You Can Skip These Mistakes)
- Don’t rush the sauce or you’ll get grainy bits. I once turned the heat up to get dinner on the table quick—let’s just say I think I invented cheese pudding.
- If you skip preheating your oven, the top won’t get that crispy magic.
- Using only mild cheddar makes it, well, kind of boring. Sharp is better (learned form experience!)
- And actually, I find it works better if you stir the cheese in off the heat. Less greasy, more creamy. Don’t ask me why, just does.
Wait, But What About…? (FAQs from Friends and Family)
- Is it okay to make this ahead? Oh absolutely. I think it tastes better the next day, weird as that sounds. Just reheat with a splash of milk so it’s not dry.
- Can I use gluten-free pasta? Yep, but watch your cooking time—it gets mushy quick. My sister-in-law tried it and actually, it worked fine, but the texture was a bit different. Not bad, just… different.
- Do I need to use three cheeses? Nah. Sometimes I only use cheddar and still get the thumbs-up. More cheese, funkier flavor. Less, bit simpler.
- How do you crumb the topping if I have no panko? Old bread blitzed in the blender does the trick, or even cornflakes in a pinch (that actually came from a neighbor’s grandma—thanks Sheila!).
- What about a vegan version? I tried once with that fancy vegan cheese. The results were, let’s say, mixed. I’d look up Minimalist Baker’s version if you want it animal-free.
- Can I freeze leftovers? Well, I’ve been told you can, but… mine’ve never made it to the freezer, so you’ll have to let me know how that goes.
So that’s more or less my not-so-secret mac and cheese blueprint. Sure, someone somewhere on the internet probably does it fancier (and they probably don’t knock a little wine onto their shirt in the process), but for my money, nothing beats simple, gooey, homemade comfort food you don’t need a culinary degree to whip up.

Ingredients
- 12 oz elbow macaroni
- 3 cups shredded sharp cheddar cheese
- 1 cup shredded mozzarella cheese
- 1/4 cup unsalted butter
- 1/4 cup all-purpose flour
- 3 cups whole milk
- 1/2 cup grated Parmesan cheese
- 1 teaspoon salt
- 1/2 teaspoon ground black pepper
- 1/2 teaspoon paprika
- 1 cup panko breadcrumbs
Instructions
-
1Preheat oven to 350°F (175°C). Grease a 9×13 inch baking dish with butter or non-stick spray.
-
2Cook the elbow macaroni according to package instructions until al dente. Drain and set aside.
-
3In a large saucepan, melt the butter over medium heat. Whisk in flour and cook for 1-2 minutes to form a roux.
-
4Gradually whisk in the milk until smooth and thickened, about 3-5 minutes. Stir in cheddar, mozzarella, Parmesan, salt, pepper, and paprika until cheese is melted and sauce is creamy.
-
5Combine cooked pasta and cheese sauce in a large bowl. Pour mixture into the prepared baking dish and top evenly with panko breadcrumbs.
-
6Bake for 30-35 minutes or until the top is golden brown and bubbling. Let cool slightly before serving.
Approximate Information for One Serving
Nutrition Disclaimers
Number of total servings shown is approximate. Actual number of servings will depend on your preferred portion sizes.
Nutritional values shown are general guidelines and reflect information for 1 serving using the ingredients listed, not including any optional ingredients. Actual macros may vary slightly depending on specific brands and types of ingredients used.
To determine the weight of one serving, prepare the recipe as instructed. Weigh the finished recipe, then divide the weight of the finished recipe (not including the weight of the container the food is in) by the desired number of servings. Result will be the weight of one serving.
Did you make this recipe?
Please consider Pinning it!!