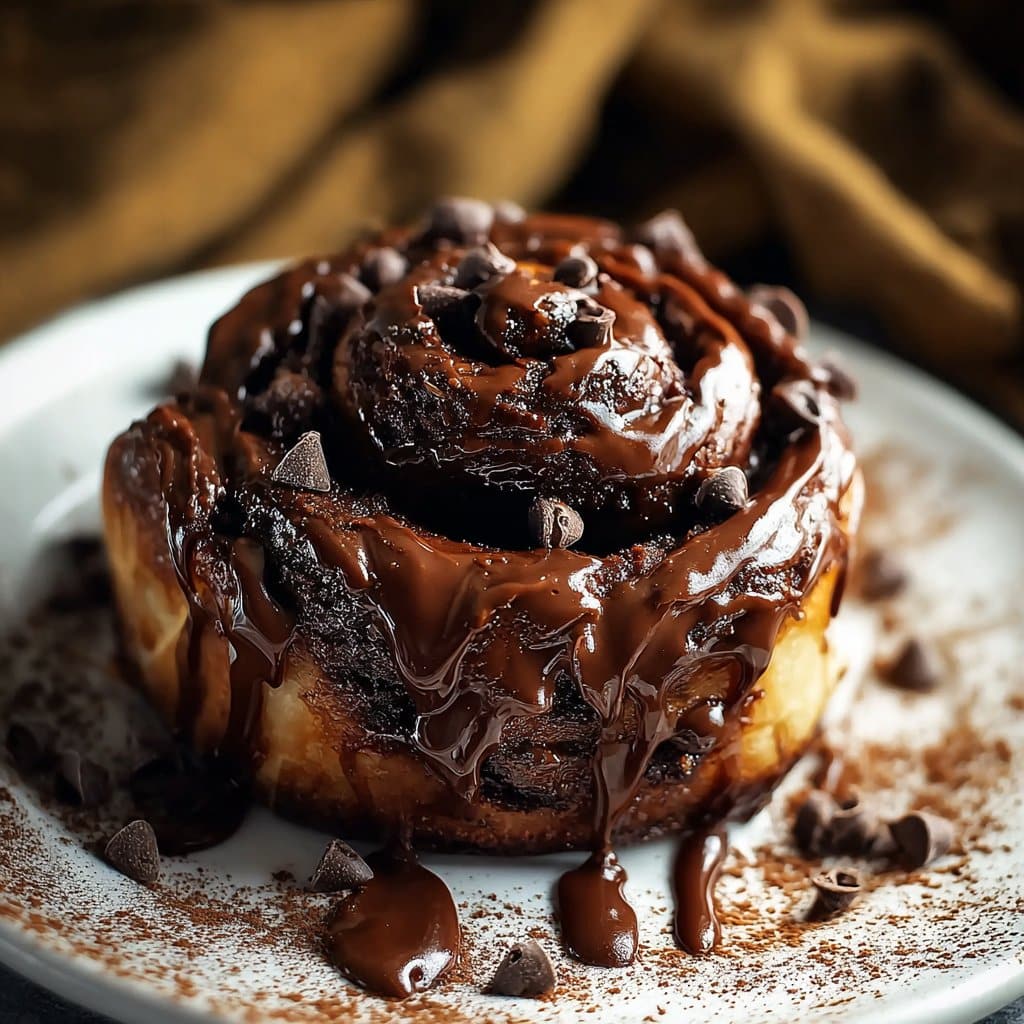
If you popped by my kitchen on a rainy Saturday, you’d probably find me in slippers, humming some old tune, trying not to eat the chocolate filling with a spoon. These Chocolate Cinnamon Rolls started as a make it up as I go thing when I wanted a proper cozy bake without fuss. The first batch came out wonky squares, my kid called them chocolate pillows and honestly that name stuck for a while. They’re soft, a little messy, very worth it. And yes, I’ve burned my tongue taste testing the center roll more than once. Oops.
Why I keep making these on sleepy weekends
I make this when the house is quiet and I need something that smells like a hug. My family goes a bit mad for the middle rolls because the chocolate pools there like a secret stash. When I’m low on time, I’ll prep the dough the night before and chill it, then shape in the morning, although it does take a minute to loose its chill. Also, I used to be nervous about yeast, and the whole proofing thing felt fraught, but actually, I find it works better if I stop fussing and let the dough do its thing. A tiny frustration I had was the filling oozing out, but I learned to leave a small clean edge and it behaves. Mostly.
What you need in the bowl
These are the ingredients I reach for. Substitutions tucked in because life happens.
- All purpose flour 3 and 1 4 cups about 430 g. My grandmother always insisted on Brand X, but honestly any unbleached flour works fine. If you love nerdy flour talk, I like this guide from King Arthur Baking: flour basics.
- Whole milk 1 cup 240 ml warmed to about bath water warm. I sometimes use half and half when I’m in a hurry, or even oat milk, no biggie.
- Instant yeast 2 and 1 4 teaspoons one packet. If you have active dry, use the same amount and proof it in the warm milk first. Yeast questions pop up a lot, this page helped me: yeast basics.
- Granulated sugar 1 4 cup 50 g for the dough.
- Eggs 2 large room temp if you remember.
- Unsalted butter 6 tablespoons 85 g very soft for the dough.
- Fine salt 1 teaspoon.
- For the filling: softened butter 5 tablespoons 70 g, brown sugar 3 4 cup 150 g, cinnamon 1 tablespoon, unsweetened cocoa powder 2 tablespoons. I like Dutch process, some folks prefer natural cocoa, both are tasty. Curious about cocoa types I learned a lot here: Serious Eats.
- Mini chocolate chips 3 4 cup a good handful. I sometimes chop a bar instead for melty pockets.
- For the glaze: cream cheese 85 g room temp, powdered sugar 1 to 1 and 1 2 cups 120 to 180 g, a splash of milk, pinch of salt, vanilla 1 teaspoon. If you want it extra chocolatey, stir in 1 tablespoon cocoa and a tiny drizzle of espresso.
How I roll, step by step
- Warm the milk until just warm to the touch, not hot. In a large bowl or stand mixer bowl, combine warm milk, sugar, and yeast. Let it sit for about 5 minutes until it gets a bit foamy. If it does nothing, your milk was too cool or the yeast is tired, try again. It happens.
- Add eggs, soft butter, salt, and about 2 and 1 2 cups of the flour. Mix until a shaggy dough forms. This is where I switch to the dough hook and mix on medium for 2 minutes, then add the remaining flour little by little until the dough is soft and slightly sticky but clearing the sides. Knead 5 to 7 minutes until smooth and stretchy. No mixer Sure, use a sturdy spoon then knead by hand 8 to 10 minutes. Cue elbow grease.
- First rise. Pop the dough into a lightly greased bowl, cover, and let it rise in a warm spot until puffy and nearly doubled, about 60 to 90 minutes. Do not stress if it takes longer, dough has a mind of its own.
- Make the filling. Stir softened butter, brown sugar, cinnamon, and cocoa into a paste. This is where I usually sneak a taste. For research.
- Shape. Roll the dough on a lightly floured counter into a big rectangle about 14 by 18 inches. I am hopeless at perfect rectangles and it’s fine. Spread the filling over the surface, leaving a 1 centimeter border on the long edge farthest from you. Sprinkle on the chocolate chips.
- Roll it up starting from the long side closest to you, snug but not tight. Pinch the seam to seal. Now slice into 12 to 14 rolls using a sharp knife or unflavored dental floss works a charm. Don’t worry if some look chubby and some look petite, they bake up beautifully.
- Second rise. Arrange rolls in a buttered 9 by 13 pan, cover, and let them puff until they look marshmallowy, about 35 to 50 minutes depending on the room. If you refrigerated the dough earlier, give it more time so it can wake up.
- Bake. Heat the oven to 375°F 190°C. Bake the rolls for 18 to 22 minutes until the tops are just turning golden and the centers read about 190°F on an instant read thermometer. If the tops are browning too fast, tent loosely with foil. Pull the pan and let the rolls cool for 10 minutes so the filling settles. If you try to yank the middle one straight away, you’ll learn why I keep spoons nearby.
- Glaze time. Beat cream cheese, powdered sugar, pinch of salt, vanilla, and a splash of milk until smooth and spreadable. I like it a tad loose so it drips into the swirls. Spread over warm rolls. Eat one. Then another. Who’s counting
Notes from my slightly floury brain
- If the dough feels tight and springy when rolling, let it rest 5 minutes and try again. It relaxes, like me after a cup of tea.
- Using room temp eggs helps the dough rise more evenly. On second thought, I have cracked cold eggs straight in and it was fine, just slower.
- To get neat slices, chill the rolled log for 10 minutes. I forget half the time and the floss still saves the day.
- Leaving a clean edge when spreading the filling keeps it form flooding out the seam. A small detail that changed my life, mildly dramatic but true.
Variations I played with
- Mocha swirl: add 1 teaspoon instant espresso to the filling and a bit to the glaze. It wakes up the chocolate in a lovely way.
- Orange vibe: rub the zest of 1 orange into the sugar for the filling. The kitchen smells like a holiday market, in a good way.
- Hazelnut crunch: scatter chopped toasted hazelnuts over the filling. Fancy without trying.
- Whole wheat half and half: swapped 1 and 1 2 cups of the flour for white whole wheat. Rolls were a touch heartier, still soft. I liked them more the next day, I think the flavors settle.
- What did not work great: cocoa in the dough plus cocoa heavy filling made them a bit dry for me. If you try cocoa in the dough, add an extra tablespoon of butter and a splash more milk.
Tools I swear by, and how to fake it
- A stand mixer makes the dough easy. That said, a bowl, wooden spoon, and your hands still do the trick. Promise.
- Rolling pin. Or a clean wine bottle, been there, no shame.
- 9 by 13 metal pan for even browning. Glass works too, just watch the last few minutes.
- Instant read thermometer is helpful for checking doneness, but you can also poke the center roll, it should feel set not squishy.
Keeping them fresh, sort of
Store cooled rolls tightly covered at room temp for 2 days, or in the fridge up to 4. Rewarm in a low oven 5 to 8 minutes or in the microwave for a few seconds. They also freeze well undecorated, up to 2 months, then thaw and glaze. Though honestly, in my house it never lasts more than a day.
How we serve them
I like a warm roll with a little extra glaze and a pinch of flaky salt on top, sounds odd but that tiny sparkle of salt makes the chocolate sing. My partner dunks theirs in coffee because they are a dunker by nature. If friends pop over, I add a bowl of berries and call it brunch, sorted.
Pro tips I learned the hard way
- I once tried rushing the first rise by blasting the oven light and shoving the bowl too close to the heat, regretted it because the butter melted out and the dough turned greasy. Warm but not hot is the move.
- Another time I sliced giant rolls and packed them tight, the middles were underbaked. Give them a little space and check temp if you can.
- Do not overflour the counter. More flour makes the dough stiff. If it sticks slightly, use a bench scraper. Or a thin spatula if that is what you have.
FAQ straight from my inbox
Can I make these overnight
Yes. After kneading, let the dough rise about 30 minutes, then cover and refrigerate up to 16 hours. Next day, let it warm up until soft, shape, rise, and bake. Or shape the rolls, cover the pan, chill overnight, and bake in the morning. I prefer the second way because I am sleepy pre coffee.
Do I have to use instant yeast
Nope. Active dry works. Dissolve it in the warm milk with a pinch of sugar until foamy, then carry on. If it does not foam in 10 minutes, the yeast is likely done for.
Can I skip the cream cheese glaze
Absolutely. A simple powdered sugar glaze with milk and vanilla is lovely. Or go chocolate glaze with cocoa. Sometimes I leave them bare and just dust with sugar for a lighter vibe.
Why are my rolls leaking filling
Totally normal, some syrupy goodness will pool in the pan. To minimize, leave that clean border, pinch the seam well, and do not roll too tight.
How do I know they are baked
The tops will be lightly golden, the center should not jiggle, and an instant read thermometer in the middle should read around 190°F. If you do not have a thermometer, pull a roll from the edge and peek, the dough should look set not doughy.
Can I make these smaller for a crowd
Sure thing. Roll the dough slightly thinner, slice into 16 to 18 pieces, bake about 15 to 18 minutes. Keep an eye on them, small rolls can brown fast.
Small digression before you go try these, I once tried to measure cinnamon with the same spoon my kid had just used as a drumstick, the rhythm was good but the measurement was not. Use the right spoon if you can, but if not, a regular teaspoon and a pinch of common sense go far. Now, go make your Chocolate Cinnamon Rolls and save that center roll for yourself, I will not tell.