Let Me Tell You About This Cozy Crockpot Magic
So, there was this one cold Tuesday, right? The kind of day where you wish your slippers had a turbo mode. I came home, had some ground beef defrosting (because I never remember to plan ahead), and a random bag of cheese tortellini sort of glaring at me. In a bold act of culinary spontaneity, I tossed them both into the crockpot with a bunch of stuff I could find in the fridge. Two hours later, the house smelled like I’d channeled a nonna and, honest to goodness, my partner asked if I’d secretly ordered fancy takeout. Nope, just pure cozy magic bubbling away. Plus, almost zero dishes—that alone makes this a winner in my book.
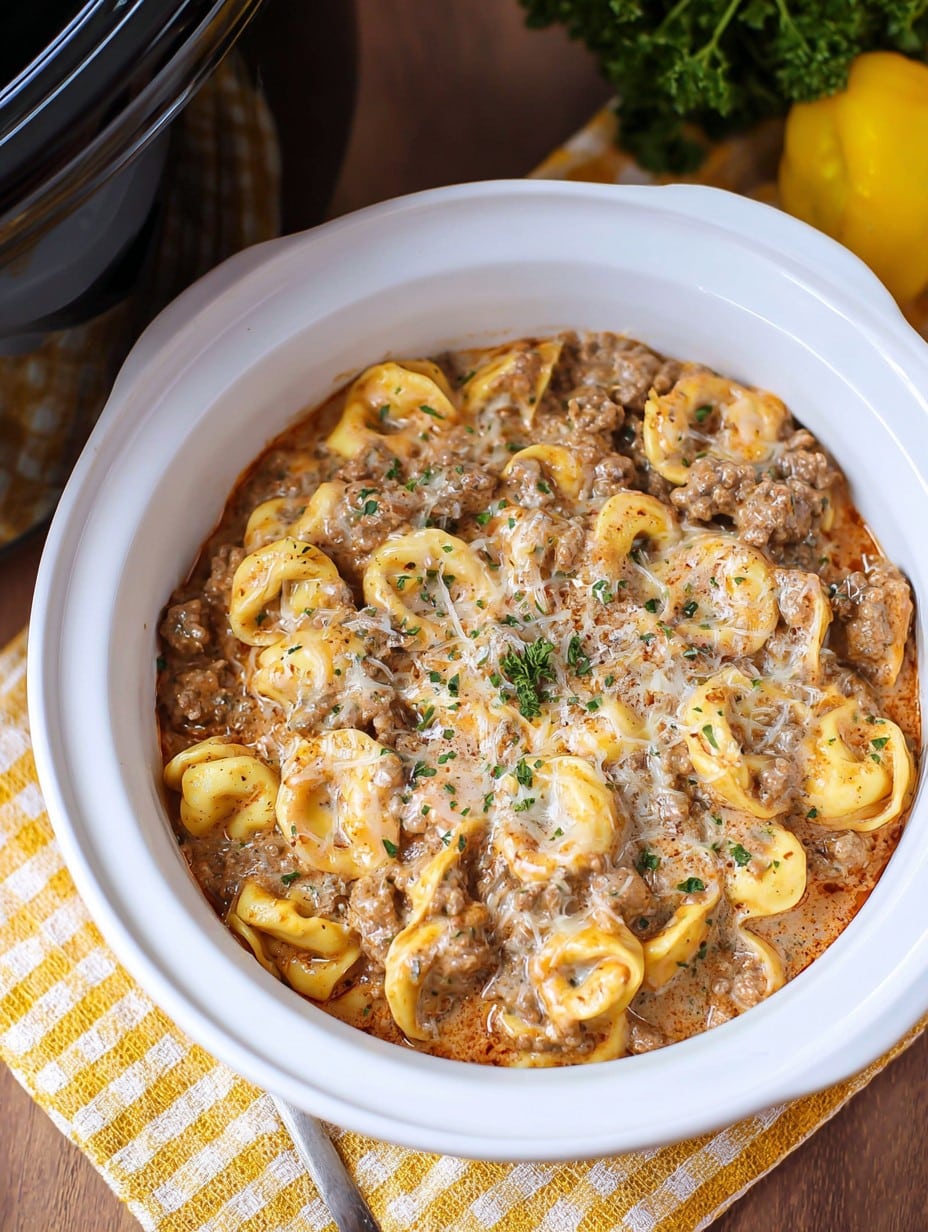
Why You’ll Love Making This (Even When Life’s a Bit Messy)
I make this Crockpot Creamy Ground Beef Tortellini when I’m juggling work deadlines, or when the only thing my teenager claims is “edible” is pasta draped in serious cheese. My family goes absolutely bonkers for it—partly because it tastes like rich, creamy comfort, but maybe also because it just looks like I put in more effort than I actually did (don’t tell them I said that). And, honestly, when I want leftovers for lunch the next day? This is my go-to. Unless someone gets up for a midnight snack and poaches it, which, yes, does happen. And I’ve even tried it with turkey instead of beef, so it’s pretty forgiving if you need to scramble a bit.
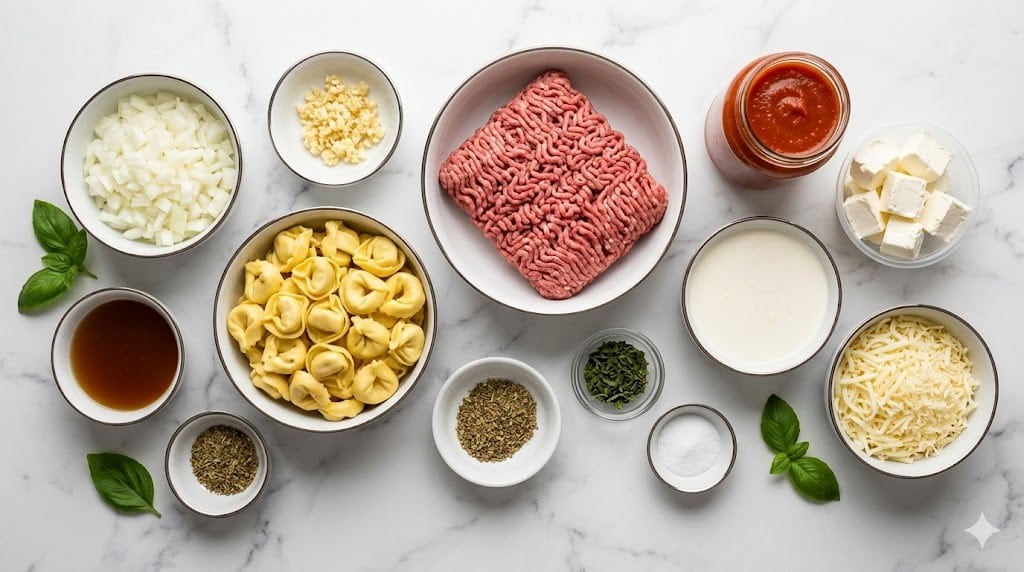
Ingredients (Plus a Few of My Occasional Swaps)
- 1 pound ground beef (I’ve used ground turkey before when the beef fairy didn’t visit)
- 1 medium yellow onion, diced (or the pre-diced frozen onion cubes when I’m desperate—or lazy, no judgment)
- 3 cloves garlic, minced (sometimes I use that garlic-in-a-jar stuff; nobody notices)
- 24 oz jar marinara sauce (Grandma swore by Rao’s, but honestly, store brand is just fine)
- 1 cup beef broth (chicken broth if that’s what’s skulking in your fridge)
- 1 teaspoon Italian seasoning (or just a pinch of oregano and basil mixed together)
- 1/2 teaspoon black pepper
- 1/2 teaspoon salt (eh, taste first if your broth is salty)
- 8 oz cream cheese, cubed (cream cheese makes it ALL happen, but I’ve used mascarpone once when I was feeling fancy)
- 1 bag (20 oz) refrigerated cheese tortellini (frozen works, just plan for a tad more time)
- 1 1/2 cups shredded mozzarella (I eyeball this, but measuring makes me feel responsible)
- Fresh parsley, chopped, for garnish (optional, but if you’re feeling chef-y go for it)
How to Throw This Together (With a Dose of Real-Life Chaos)
- First, brown the ground beef in a hot skillet with the diced onion. I usually go medium-high—it gets done faster, but don’t wander away because it can go from golden-brown to charcoal if you get sidetracked. Drain off the fat (I’ve made the mistake of skipping this… major regret!)
- Now, layer the browned beef-onion mixture straight into your crockpot. If you’re extra ambitious, scrape up any little brown bits from the skillet and toss those in, too. That’s flavor!
- Add the minced garlic, marinara, beef broth, Italian seasoning, pepper, and salt right on top. Give it a quick stir; it’ll look weird, kind of messy, but trust me. This is where the magic starts (and where I occasionally sneak a taste—be careful, it’s not cooked yet!)
- Scatter the cream cheese cubes all around. Don’t worry if they just kind of float; they’ll melt eventually.
- Pop the lid on and cook on LOW for about 3 hours. You can do HIGH for about 1.5 hours if you’re running behind, but I think the flavors mesh better when you’re a bit patient. Up to you!
- About 30 minutes before you’re ready to eat (or when you remember—no judgement), stir in the tortellini. Make sure it’s all sunk down in the saucy goodness so it actually cooks.
- Sprinkle the shredded mozzarella over the top. Re-lid and let it all melt and get bubbly, about 20-30 minutes more. This is when it’ll start smelling so good, people wander in asking “Is it done yet?”
- Give everything a gentle stir—it may look like a hot mess, but it comes together, I promise. Taste and add a sprinkle more salt or pepper if it needs (sometimes mine just wants a bit more oomph).
- Scoop into bowls, scatter with parsley if you’re feeling it, and serve hot. Try not to burn your tongue in your excitement like I do.
Some Notes I Learned the Fun (and Sometimes Messy) Way
- If you forget to soften the cream cheese, it’ll still melt, but you might have to stir a bit more. Or just embrace the cream cheese surprises.
- Letting the tortellini sit too long in the crockpot? Turns a bit mushy. Eat promptly for best texture, but honestly no one at my place complains.
- Sometimes, I add a handful of spinach at the end as a token gesture to nutrition. Even my veggie-adverse kid doesn’t mind it much.
Variations From My (Sometimes Not-So-Genius) Experiments
- Once I used spicy Italian sausage instead of ground beef—wow, flavor bomb, but maybe skip it if you’ve got folks who can’t do heat.
- I tried using almond milk instead of cream cheese for a “healthier vibe”—yeah, don’t do that. Turned out weirdly grainy.
- Extra veggies (like mushrooms or zucchini) can totally work, just chop small so they actually blend in instead of feeling like a side dish crashed the party.
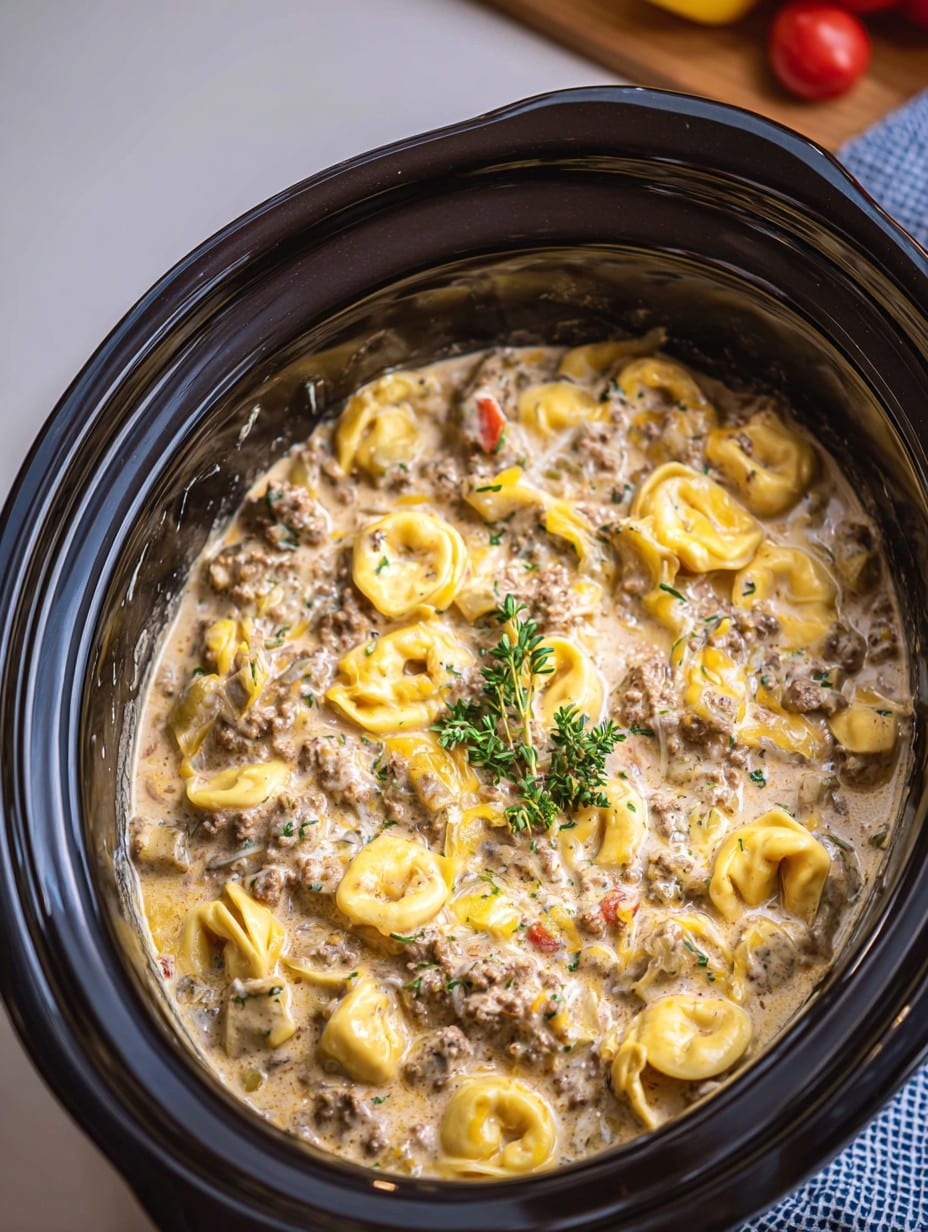
Handy Gear – and a Few Workarounds
- 6-quart slow cooker (That’s what I use, but if yours is smaller just watch for sauce spillage. Don’t ask how I know!)
- Skillet for browning (If you’ve only got a saucepan, it works too. I’ve used whatever was clean—it isn’t fancy, but it gets the job done)
- Big spoon for stirring
How to Store – Unless Your Crew Eats It All First
Technically, leftovers keep in the fridge for about 3 days. But honestly, in my house it never lasts past lunch the next day. If you miraculously have extra, just plop it into an airtight container — it thickens up as it chills, so add a splash of milk or broth to loosen it when you reheat.
How I Love to Serve It (Texas Garlic Bread, Anyone?)
Big, hearty bowls with a shower of fresh parsley on top. My family insists on side salads “for balance” (ha), but I’ll take mine with thick slices of crunchy Texas garlic bread instead, please and thank you. If you want to get downright fancy, a little drizzle of good olive oil or extra parmesan never hurt anybody.
Lessons I Learned The Hard Way (And You Don’t Have To)
- I once tried tossing in the tortellini right at the start, thinking it would “save me a step.” Nope – turned into pasta pudding. Don’t do it.
- Browning the beef fully before it hits the crockpot makes such a difference. I rushed that once. Regretted it. Greasy city.
- If the sauce looks too runny after adding the tortellini, just let it sit with the lid off for 10 min—it thickens up as it cools.
FAQ: Actual Questions From Actual Hungry People
- Can I use frozen tortellini? Yup! Just toss them in frozen—add about 10 extra minutes of cooking. They’re pretty forgiving, and hey, frozen is cheaper where I live.
- Does this freeze well? Sort of. The texture gets a little funky, I won’t lie. We’re talking school lunch throwback vibes. I’d stick to eating it fresh if you can.
- What if I only have chicken? Use it! Just brown cubed chicken breast and toss it in. Or don’t brown it, if you like living on the edge and softer textures.
- Can I make this on the stove? Sure can, my friend. Just simmer everything together in a Dutch oven for about 30 min, toss in the tortellini, cover, and cook until they’re tender. Easy peasy.
- My sauce looks separated, did I ruin it? Nope. Just stir, and if it still looks odd, splash in a bit of cream or milk until it smooths out. Happens to me whenever my cream cheese is extra cold.
- What sides work with this? Salad, sure; but honest, give me crusty bread and I’m set. Or a few roasted green beans if you’re feeling posh.
Side note: I once ate this for breakfast. Don’t judge—sometimes, life demands a bowl of warm, cheesy pasta at 8 a.m. and honestly, it hit the spot. Anyway, hope this Crockpot Creamy ground beef tortellini brings some cozy to your week (and maybe even a free evening if you time it right)!
Ingredients
- 1 pound ground beef (I’ve used ground turkey before when the beef fairy didn’t visit)
- 1 medium yellow onion, diced (or the pre-diced frozen onion cubes when I’m desperate—or lazy, no judgment)
- 3 cloves garlic, minced (sometimes I use that garlic-in-a-jar stuff; nobody notices)
- 24 oz jar marinara sauce (Grandma swore by Rao’s, but honestly, store brand is just fine)
- 1 cup beef broth (chicken broth if that’s what’s skulking in your fridge)
- 1 teaspoon Italian seasoning (or just a pinch of oregano and basil mixed together)
- 1/2 teaspoon black pepper
- 1/2 teaspoon salt (eh, taste first if your broth is salty)
- 8 oz cream cheese, cubed (cream cheese makes it ALL happen, but I’ve used mascarpone once when I was feeling fancy)
- 1 bag (20 oz) refrigerated cheese tortellini (frozen works, just plan for a tad more time)
- 1 1/2 cups shredded mozzarella (I eyeball this, but measuring makes me feel responsible)
- Fresh parsley, chopped, for garnish (optional, but if you’re feeling chef-y go for it)
Instructions
-
1First, brown the ground beef in a hot skillet with the diced onion. I usually go medium-high—it gets done faster, but don’t wander away because it can go from golden-brown to charcoal if you get sidetracked. Drain off the fat (I’ve made the mistake of skipping this… major regret!)
-
2Now, layer the browned beef-onion mixture straight into your crockpot. If you’re extra ambitious, scrape up any little brown bits from the skillet and toss those in, too. That’s flavor!
-
3Add the minced garlic, marinara, beef broth, Italian seasoning, pepper, and salt right on top. Give it a quick stir; it’ll look weird, kind of messy, but trust me. This is where the magic starts (and where I occasionally sneak a taste—be careful, it’s not cooked yet!)
-
4Scatter the cream cheese cubes all around. Don’t worry if they just kind of float; they’ll melt eventually.
-
5Pop the lid on and cook on LOW for about 3 hours. You can do HIGH for about 1.5 hours if you’re running behind, but I think the flavors mesh better when you’re a bit patient. Up to you!
-
6About 30 minutes before you’re ready to eat (or when you remember—no judgement), stir in the tortellini. Make sure it’s all sunk down in the saucy goodness so it actually cooks.
-
7Sprinkle the shredded mozzarella over the top. Re-lid and let it all melt and get bubbly, about 20-30 minutes more. This is when it’ll start smelling so good, people wander in asking “Is it done yet?”
-
8Give everything a gentle stir—it may look like a hot mess, but it comes together, I promise. Taste and add a sprinkle more salt or pepper if it needs (sometimes mine just wants a bit more oomph).
-
9Scoop into bowls, scatter with parsley if you’re feeling it, and serve hot. Try not to burn your tongue in your excitement like I do.
Approximate Information for One Serving
Nutrition Disclaimers
Number of total servings shown is approximate. Actual number of servings will depend on your preferred portion sizes.
Nutritional values shown are general guidelines and reflect information for 1 serving using the ingredients listed, not including any optional ingredients. Actual macros may vary slightly depending on specific brands and types of ingredients used.
To determine the weight of one serving, prepare the recipe as instructed. Weigh the finished recipe, then divide the weight of the finished recipe (not including the weight of the container the food is in) by the desired number of servings. Result will be the weight of one serving.
Did you make this recipe?
Please consider Pinning it!




