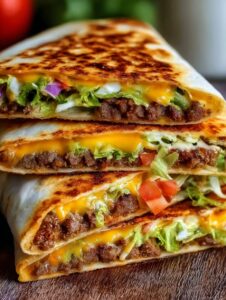
Just Sharing: My Keto Crunchwrap Obsession
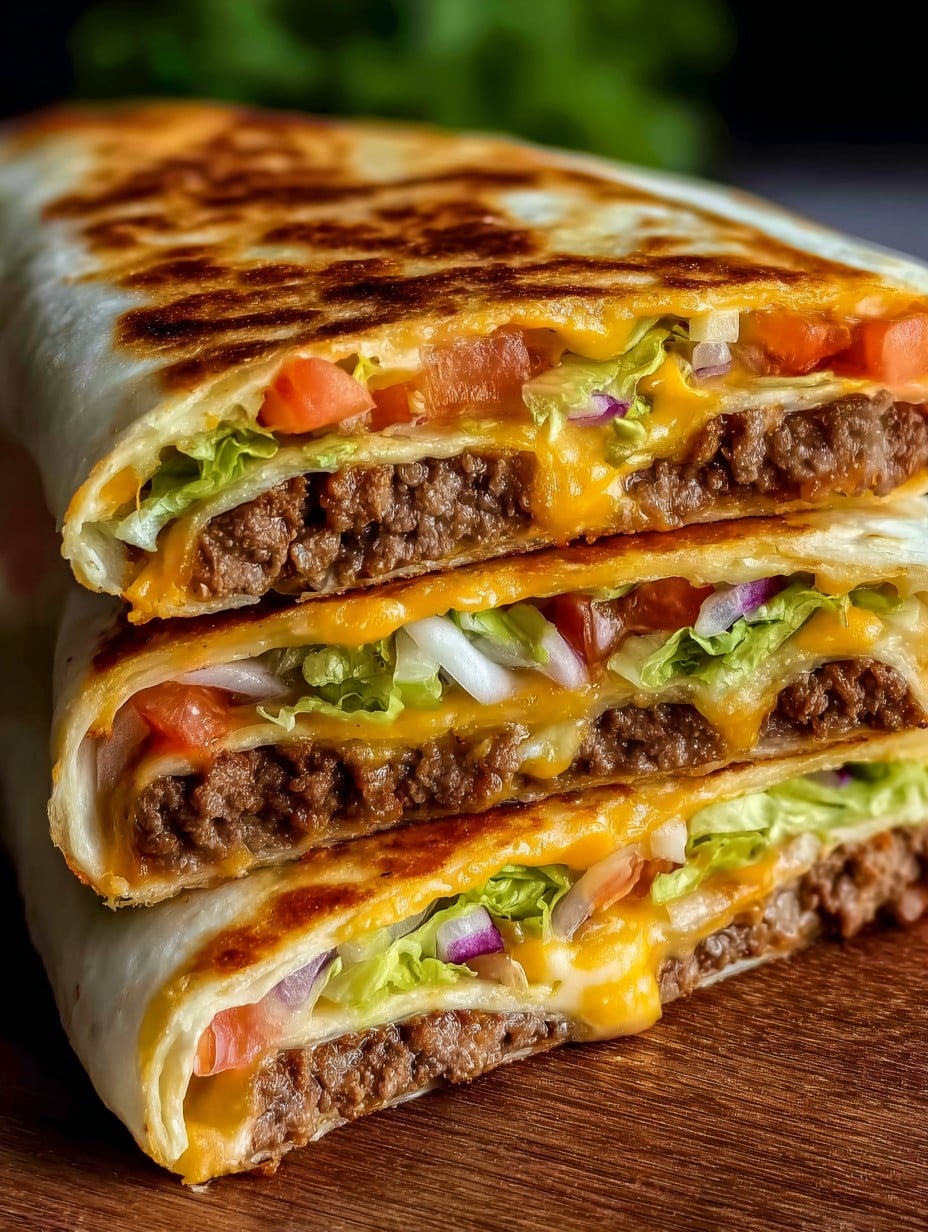
So, let me tell you, these Delicious Keto Crunchwraps came about during a week I’d promised (maybe mostly to myself) not to order takeout again, honest. The craving for something crunchy, cheesy, and just a tiny bit outrageous hit—if you’re anything like me, once you get the idea in your head, there’s no turning back. My first go-around was… well, I’ll just say the dog got lucky that night. But with a bit of stubbornness (and a cheese emergency), I cracked the code. I now make these whenever I’m in the mood for Taco Bell vibes without the carb guilt trips. I’ve probably eaten more cheese wraps in the past year than I did in the previous ten, but hey, for science, right?

Why You’ll Flip for These Crunchwraps
I make this when I want the comfort food fix without the sugar-shakes later. My family wants extra whenever I do a movie night; they barely realize it’s keto (well, except for my oldest, who claims she “can taste health” in everything but still grabs thirds). Honestly, I love that these are so forgiving—run out of ground beef? I just use leftover chicken or even turkey. Oh, and they’re not fussy. Kinda a weeknight savior for when I forget to defrost anything for dinner (which, between us, is like every other Wednesday).
What You’ll Need (Ingredients, With Options!)
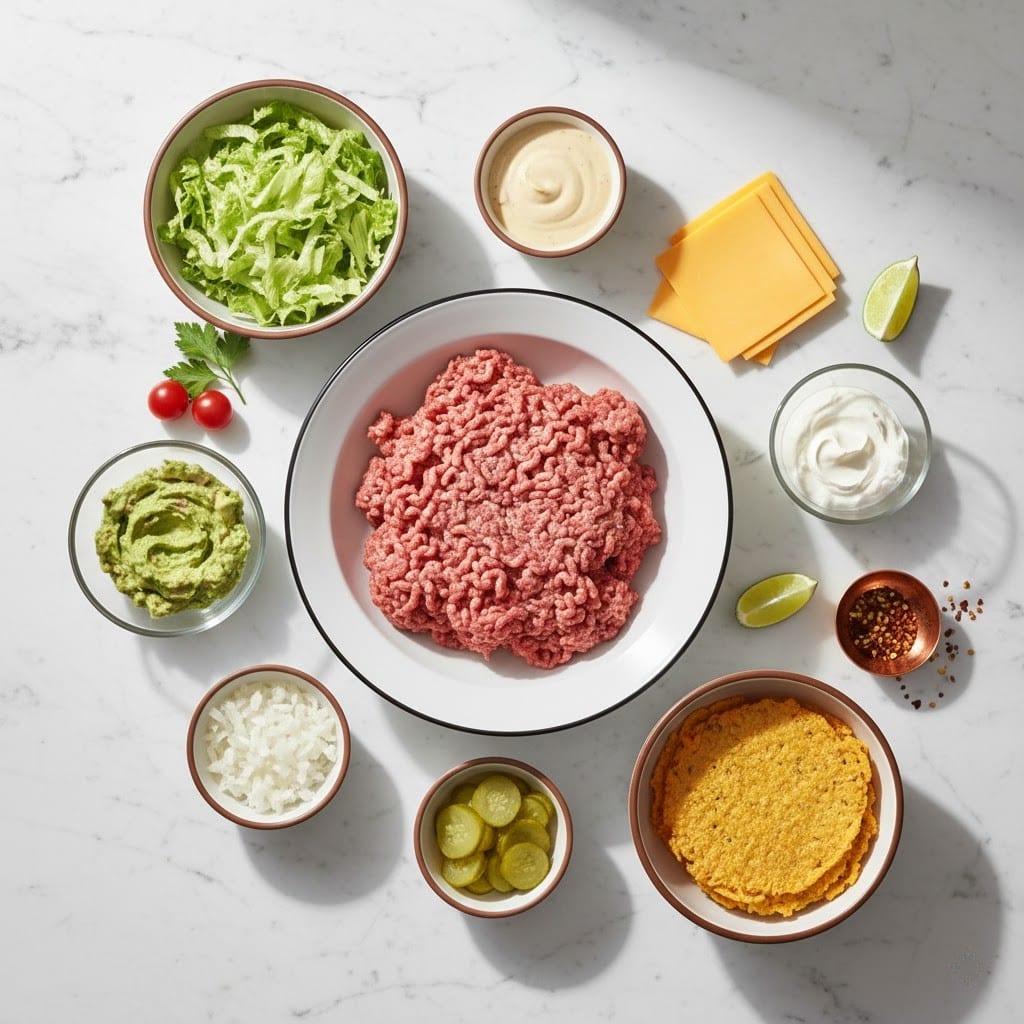
- 1 pound ground beef (sometimes I use ground turkey if that’s what’s in the freezer)
- 1 tablespoon taco seasoning (store-bought works, but I’ll toss in cumin and chili powder if I’m out)
- 1 cup shredded cheddar cheese (I swap in Monterey Jack if I’m feeling fancy)
- 6 large low-carb tortillas (or make your own—I’m no hero; I buy mine)
- 1/2 cup sour cream (Greek yogurt works if you want a bit of tang)
- 1 cup shredded lettuce (sometimes just a handful because who measures lettuce?)
- 1 medium tomato, diced (my grandmother swears by Roma, but anything ripe is good)
- 1/4 cup salsa (use your favorite, or skip if you’re not a salsa person—I’m here for no judgment)
- Coconut oil or butter, for frying (I’ll be honest, I use whatever is closest to the stove)
Let’s Cook These Up (Directions With Personal Touches)
- Heat a large skillet over medium heat. Add the ground beef and cook, breaking it up as you go. You want it nice and browned—no gray mystery meat, please. Drain the fat; I just tilt the pan and spoon it off, super high-tech.
- Add taco seasoning to the beef and a splash (maybe a couple tablespoons) of water. Stir it all up—I usually sneak a bite right about now because I can’t help myself.
- Warm the low-carb tortillas if you want them more pliable (10 seconds in the microwave under a damp paper towel usually does it).
- Lay one tortilla flat, and in the center, layer: a scoop of seasoned beef, a handful of cheddar, some lettuce, tomatoes, a dollop of sour cream, and a spoonful of salsa (order doesn’t really matter, but cheese towards the bottom gets all melty—so good).
- Fold the edges up and around the filling to make a sort of hexagon (or dodecagon? Geometry wasn’t my strong suit—just fold it anyway so the goodies stay inside).
- Heat a bit of coconut oil or butter in your skillet, then place the crunchwrap seam side down. Press gently with a spatula. Fry until golden and crisp, about 2–3 minutes per side. Don’t worry if some filling tries to escape—mess means flavor in my kitchen.
- Transfer to a plate, let cool for a minute (though usually everyone just dives in too soon, ouch), then slice in half and serve with extra salsa or sour cream if you like.
Things I Wish I’d Known (Notes)
- Low-carb tortillas can burn pretty fast; keep an eye on them—actually, smell is my best timer.
- If you overload the wrap, it might bust open… not a tragedy, but makes for messier eating (happens to me like, every time I overdo the cheese).
- Cheese-to-beef ratio is personal; I go heavy on cheese because, well, happiness.
Wild Experiments (Variations)
- I tried cauliflower rice instead of meat for a veg version, and it was… okay, but a bit soggy. I’d call it semi-successful.
- Swapped beef for shredded rotisserie chicken—worked a treat, and I was out of beef anyway.
- For some heat, toss chopped jalapeños in. (Whew, tried ghost peppers once—never again.)
Do I Really Need Special Gear? (Equipment)
- A big frying pan or skillet is best, but honestly, I made one in a sandwich press in a pinch. Not perfect, but it worked.
- Microwave helps for tortilla-softening, but you could use a warm oven if yours is already on.
How to Store (If They Survive That Long)
These keep in the fridge for about two days, just wrap them up tight. Reheat in a pan to get the crunch back. That said, in my house, leftovers are more urban legend than reality—I’ve never actually seen one last 24 hours.
Here’s How We Serve ‘Em (Serving Suggestions)
We usually pile them high on a cutting board, everyone grabs their own. Sometimes I serve with a quick guacamole or just a mountain of jalapeños. On rare, responsible evenings: a side salad sneaks in. Oh, my youngest dips hers in ketchup—no idea where she got that form.
Lessons Learned So You Don’t Have To (Pro Tips)
- Rushing the pan-frying step makes for floppy wraps—one time I tried on too-high heat and let’s just say, smoke alarm city. Medium heat is your mate.
- Don’t try to wrap these with cold tortillas. They tear, filling escapes, and frustration ensues—I learned the hard way.
People Have Asked Me (FAQ)
- Can I freeze these? Sort of. They freeze, but the lettuce gets withery and weird. If you do, leave the lettuce out and add it after reheating (if you remember).
- Can I do this dairy-free? Yep, just use your favorite cheese sub. I did it once when my cousin visited—she said it “almost tastes like the real thing,” which I’ll take as a win!
- What if I don’t have taco seasoning? Shake in chili powder, cumin, garlic powder, salt, a bit of paprika if you have it. I just eyeball it—some days it’s better than the packet!
- Do these actually taste ‘keto’? Maybe it’s me but, honestly, not at all. The crunch hides a lot.
- Can I make these in the oven? Sure! Bake at about 400°F for 10–12 minutes, flipping halfway. They come out crisp-ish (though pan is better, if I’m honest).
Oh, I almost forgot—this one time I tried to air fry them and somehow ended up with a tortilla Frisbee. Moral: stick to the skillet unless you like tossing food like it’s sports night. Happy crunchwrapping!
Ingredients
- 1 pound ground beef (sometimes I use ground turkey if that’s what’s in the freezer)
- 1 tablespoon taco seasoning (store-bought works, but I’ll toss in cumin and chili powder if I’m out)
- 1 cup shredded cheddar cheese (I swap in Monterey Jack if I’m feeling fancy)
- 6 large low-carb tortillas (or make your own—I’m no hero; I buy mine)
- 1/2 cup sour cream (Greek yogurt works if you want a bit of tang)
- 1 cup shredded lettuce (sometimes just a handful because who measures lettuce?)
- 1 medium tomato, diced (my grandmother swears by Roma, but anything ripe is good)
- 1/4 cup salsa (use your favorite, or skip if you’re not a salsa person—I’m here for no judgment)
- Coconut oil or butter, for frying (I’ll be honest, I use whatever is closest to the stove)
Instructions
-
1Heat a large skillet over medium heat. Add the ground beef and cook, breaking it up as you go. You want it nice and browned—no gray mystery meat, please. Drain the fat; I just tilt the pan and spoon it off, super high-tech.
-
2Add taco seasoning to the beef and a splash (maybe a couple tablespoons) of water. Stir it all up—I usually sneak a bite right about now because I can’t help myself.
-
3Warm the low-carb tortillas if you want them more pliable (10 seconds in the microwave under a damp paper towel usually does it).
-
4Lay one tortilla flat, and in the center, layer: a scoop of seasoned beef, a handful of cheddar, some lettuce, tomatoes, a dollop of sour cream, and a spoonful of salsa (order doesn’t really matter, but cheese towards the bottom gets all melty—so good).
-
5Fold the edges up and around the filling to make a sort of hexagon (or dodecagon? Geometry wasn’t my strong suit—just fold it anyway so the goodies stay inside).
-
6Heat a bit of coconut oil or butter in your skillet, then place the crunchwrap seam side down. Press gently with a spatula. Fry until golden and crisp, about 2–3 minutes per side. Don’t worry if some filling tries to escape—mess means flavor in my kitchen.
-
7Transfer to a plate, let cool for a minute (though usually everyone just dives in too soon, ouch), then slice in half and serve with extra salsa or sour cream if you like.
Approximate Information for One Serving
Nutrition Disclaimers
Number of total servings shown is approximate. Actual number of servings will depend on your preferred portion sizes.
Nutritional values shown are general guidelines and reflect information for 1 serving using the ingredients listed, not including any optional ingredients. Actual macros may vary slightly depending on specific brands and types of ingredients used.
To determine the weight of one serving, prepare the recipe as instructed. Weigh the finished recipe, then divide the weight of the finished recipe (not including the weight of the container the food is in) by the desired number of servings. Result will be the weight of one serving.
Did you make this recipe?
Please consider Pinning it!