You ever have one of those recipes you bust out every single holiday, even when you swear this year you’ll do something fancy? That’s me with Easter Oreos. I started making these when my kids were tiny (they’re not so tiny now, but they still ask for them). And honestly, I think they’re more fun to make than eat—which is saying something because, well, Oreos. So, if you’re after something dead simple but guaranteed to make folks smile, grab a bag and let’s get messy. Oh—and don’t wear white. Learned that the chocolatey way.

Why I Keep Making These (And Why You’ll Want To, Too)
I make this recipe every year when I’m short on time but want something on the table that says, ‘Yes, I participated in the holiday cheer.’ My family goes a bit wild for these; honestly, I think it’s just the combo of sugar rush and nostalgia (or maybe it’s because they can pinch the decorations before I notice). Honestly, I used to fuss with homemade cookies, but every time I reach for these, I’m relieved – no rolling pins, no dough sticking where it shouldn’t, no drama. If you’ve got little helpers—they’ll love dunking and decorating. Word of warning: your kitchen may look like a sprinkle tornado roared through.
Stuff You’ll Need (No Stress)
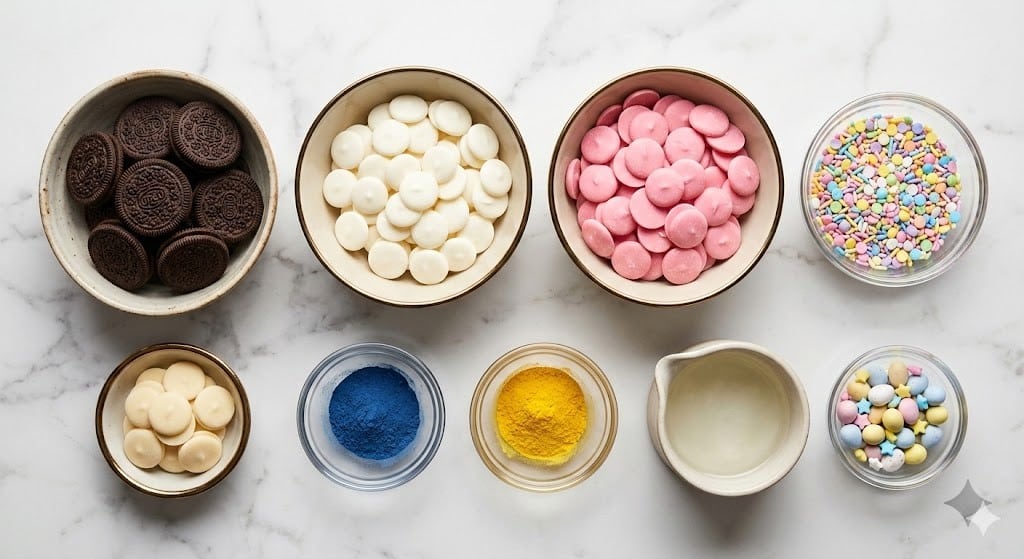
- 1 package of regular Oreos (Family size if you’re feeding a crowd or hungry teens)
- 1 cup white chocolate melting wafers (sometimes I just use white candy melts, honestly they taste the same to me)
- 1 cup pastel candy melts (yellow, pink, blue—go wild or whatever looks best at the shop)
- Assorted Easter sprinkles (or use whatever sprinkles you find at the back of your cupboard… I’m guilty)
- 1 tablespoon coconut oil or shortening (makes the chocolate smoother, but you can totally skip this if you forgot)
- Wax or parchment paper for drying
How To Make Easter Oreos (My Way)
- Line a baking sheet with wax or parchment paper. If you don’t have a sheet pan, the backside of a tray does the trick, promise.
- Melt the white chocolate wafers with half the coconut oil in a microwave-safe bowl. Go in 30-second bursts, stirring each time. Don’t freak if it seems lumpy at first—it sorts itself out with patience.
- Repeat the melting with the pastel candy melts and the rest of the coconut oil in a second bowl. In a pinch, you can do one color at a time (I get impatient and try to multitask… doesn’t always work out haha).
- Dip the Oreos halfway into the melted white chocolate, then lay them on the prepared paper. This is where I usually sneak an extra Oreo for myself. Gotta keep the quality in check.
- With a clean fork or a spoon, drizzle the pastel candy melts over the dipped Oreos. Don’t overthink your art—random squiggles look great.
- Decorate with sprinkles fast, before the chocolate sets. Sometimes I get distracted and end up gluing sprinkles down with leftover melts…
- Let them set at room temp for about 30-40 minutes, or stick the tray in the fridge if you’re in a rush. Don’t worry if they look a bit wonky; they always do and still get gobbled up.
Extra Notes from My Kitchen
- I found out the hard way that using regular chocolate chips without coconut oil can get clumpy. Candy melts are weirdly forgiving.
- If your Oreos crack a little when dipping, try not to stress. A bit of extra chocolate covers everything.
- And if you accidentally eat a few cookies before decorating—welcome to the club!
Variations: What I’ve Tried (The Good, the Bad, and the Yikes)
- Golden Oreos work just as well. Actually, my grandma prefers them (though no one else does, shh).
- Tried using dark chocolate once… looked fancy but tasted, I dunno, too grown up for the crowd.
- Kids experimented with crushed mini eggs on top one year, and now it’s a weird tradition—messy, but fun.

Equipment (And Improv Moves)
If you don’t have a legit baking sheet, use a big plate or even just the parchment on your counter. No microwave? A heatproof bowl over simmering water gets the job done—takes longer, but you can pretend you’re on Bake Off.
Storage: How Long Do They Last?
Keep these in an airtight container for up to 5 days, though honestly, in my house, they rarely last more than a day! If it’s super warm where you are, fridge is best.
How We Serve Easter Oreos at My Place
I love piling these on a big plate right in the middle of the table (bonus points if you do a mix of colors). Sometimes, we wrap a few in bags for impromptu neighbor gifts—saves explaining why half the box of Oreos went missing!
Pro Tips (Aka: Oops, Don’t Do Like I Did)
- I tried rushing the chocolate-melting step and scorched it—nasty flavor. Low and slow is key.
- Let them cool fully or the decorations slide right off. Trust me, patience really is a virtue here (even though I have none).
- Don’t microwave with kids underfoot—last year I managed to dump half a bowl on the floor, and the dog was thrilled.
Easter Oreo Questions I’ve Actually Been Asked
- Can I use double-stuffed Oreos?
Yes, but be aware they’re a tad heftier, so sometimes they break when you dunk. Just be gentle, or double up your dipping grip. - Do I have to use coconut oil?
Nope! I do when I remember, but it’s not essential—the chocolate just spreads a bit easier with it. - What type of sprinkles?
Whatever you’ve got. Honestly, at Easter, folks don’t judge your sprinkle game. - Can you freeze these?
You can, they’re fine, though sometimes the chocolate sweats when thawing. Still tastes ace. - Do they really taste better the next day?
I think so, but the real battle is making them last that long.
(Oh, totally unrelated—but did you ever notice how melting chocolate is WAY more satisfying than melting cheese? Just me? Anyway… Happy Easter, and don’t forget to keep a few cookies aside for yourself!)
Ingredients
- 1 package of regular Oreos (Family size if you’re feeding a crowd or hungry teens)
- 1 cup white chocolate melting wafers (sometimes I just use white candy melts, honestly they taste the same to me)
- 1 cup pastel candy melts (yellow, pink, blue—go wild or whatever looks best at the shop)
- Assorted Easter sprinkles (or use whatever sprinkles you find at the back of your cupboard… I’m guilty)
- 1 tablespoon coconut oil or shortening (makes the chocolate smoother, but you can totally skip this if you forgot)
- Wax or parchment paper for drying
Instructions
-
1Line a baking sheet with wax or parchment paper. If you don’t have a sheet pan, the backside of a tray does the trick, promise.
-
2Melt the white chocolate wafers with half the coconut oil in a microwave-safe bowl. Go in 30-second bursts, stirring each time. Don’t freak if it seems lumpy at first—it sorts itself out with patience.
-
3Repeat the melting with the pastel candy melts and the rest of the coconut oil in a second bowl. In a pinch, you can do one color at a time (I get impatient and try to multitask… doesn’t always work out haha).
-
4Dip the Oreos halfway into the melted white chocolate, then lay them on the prepared paper. This is where I usually sneak an extra Oreo for myself. Gotta keep the quality in check.
-
5With a clean fork or a spoon, drizzle the pastel candy melts over the dipped Oreos. Don’t overthink your art—random squiggles look great.
-
6Decorate with sprinkles fast, before the chocolate sets. Sometimes I get distracted and end up gluing sprinkles down with leftover melts…
-
7Let them set at room temp for about 30-40 minutes, or stick the tray in the fridge if you’re in a rush. Don’t worry if they look a bit wonky; they always do and still get gobbled up.
Approximate Information for One Serving
Nutrition Disclaimers
Number of total servings shown is approximate. Actual number of servings will depend on your preferred portion sizes.
Nutritional values shown are general guidelines and reflect information for 1 serving using the ingredients listed, not including any optional ingredients. Actual macros may vary slightly depending on specific brands and types of ingredients used.
To determine the weight of one serving, prepare the recipe as instructed. Weigh the finished recipe, then divide the weight of the finished recipe (not including the weight of the container the food is in) by the desired number of servings. Result will be the weight of one serving.
Did you make this recipe?
Please consider Pinning it!