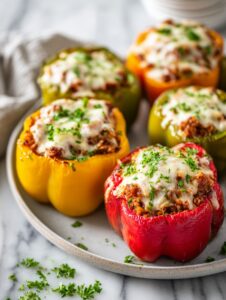
How These Stuffed Peppers Became My Weeknight Secret
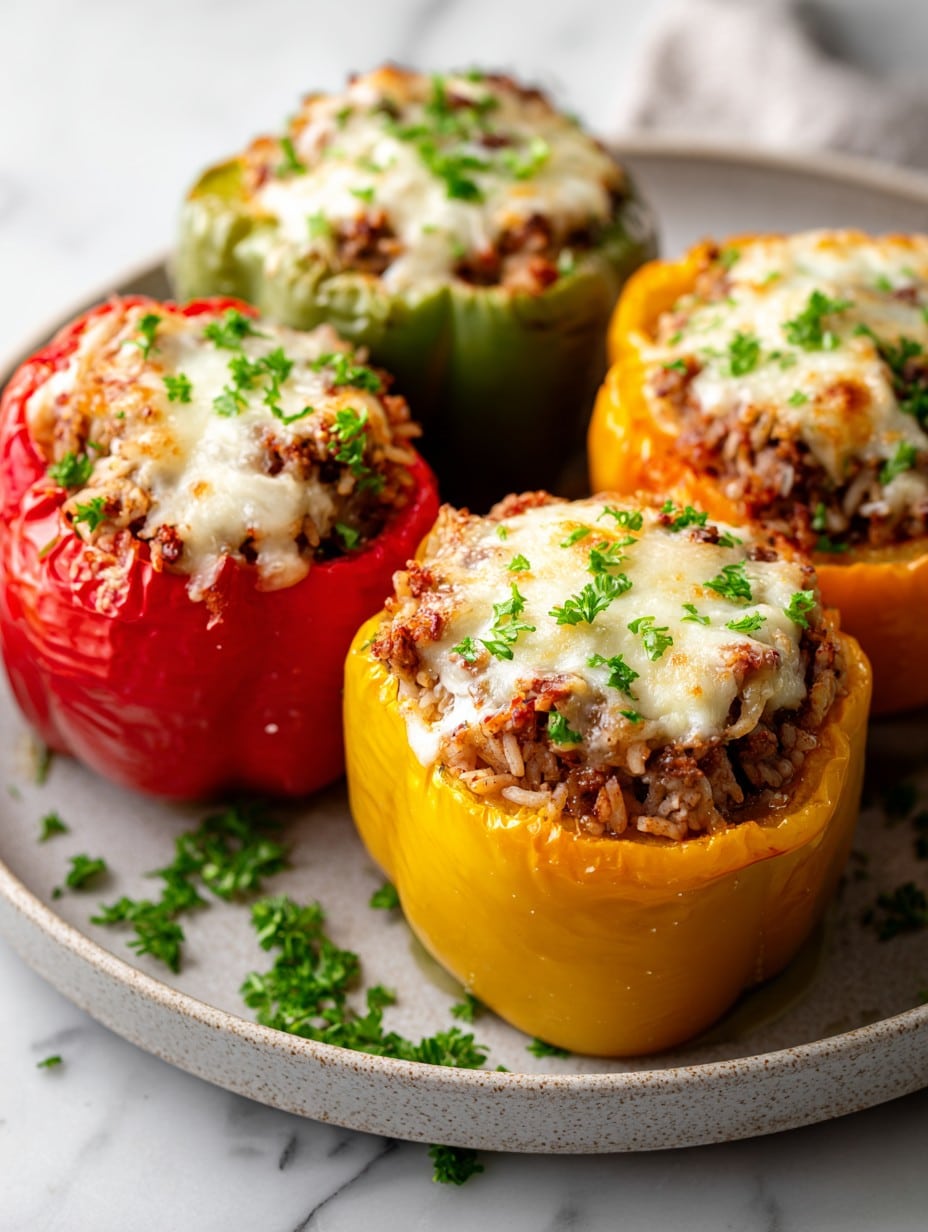
Okay, so here’s the deal: I’m not exactly what you’d call a “meal prep enthusiast.” Actually, most weeks, I’m scrambling just to figure out what’s for dinner by the time the kids are crashing in through the door. But these Easy Make-Ahead Stuffed Bell Peppers? Total lifesaver. The first time I tried freezing stuffed peppers, I was convinced they’d come out sad and mushy — but plot twist, they reheat like an absolute dream. Now, they’re the one meal my oldest will eat without bartering for more screen time (which is honestly its own little miracle).

Once, I accidentally doubled the batch and ended up feeding my book club and my neighbor — who still raves about “those magic peppers.” Plus, there’s just something homey about pulling out a color-packed tray from the freezer and thinking “Huh. Maybe I do have my act together.” Don’t worry, I usually don’t.
Why I Always Come Back to This Recipe
I make these on any night when the calendar’s basically shouting at me with sports schedules and work deadlines. My family goes nuts for the cheesy tops (even though some folks scrape off all the veggies underneath, ahem). Honestly, these peppers have rescued me from the dreaded 6 p.m. “what’s for dinner?” panic more times than I’d care to admit. You can prep a big batch, freeze half, and boom — future you will be grateful, trust me. (Truth: once I forgot them in the oven and they got extra browned but, you know, some of us like a crispy top…right?)
What You’ll Need (Plus My Fussy Substitutions)
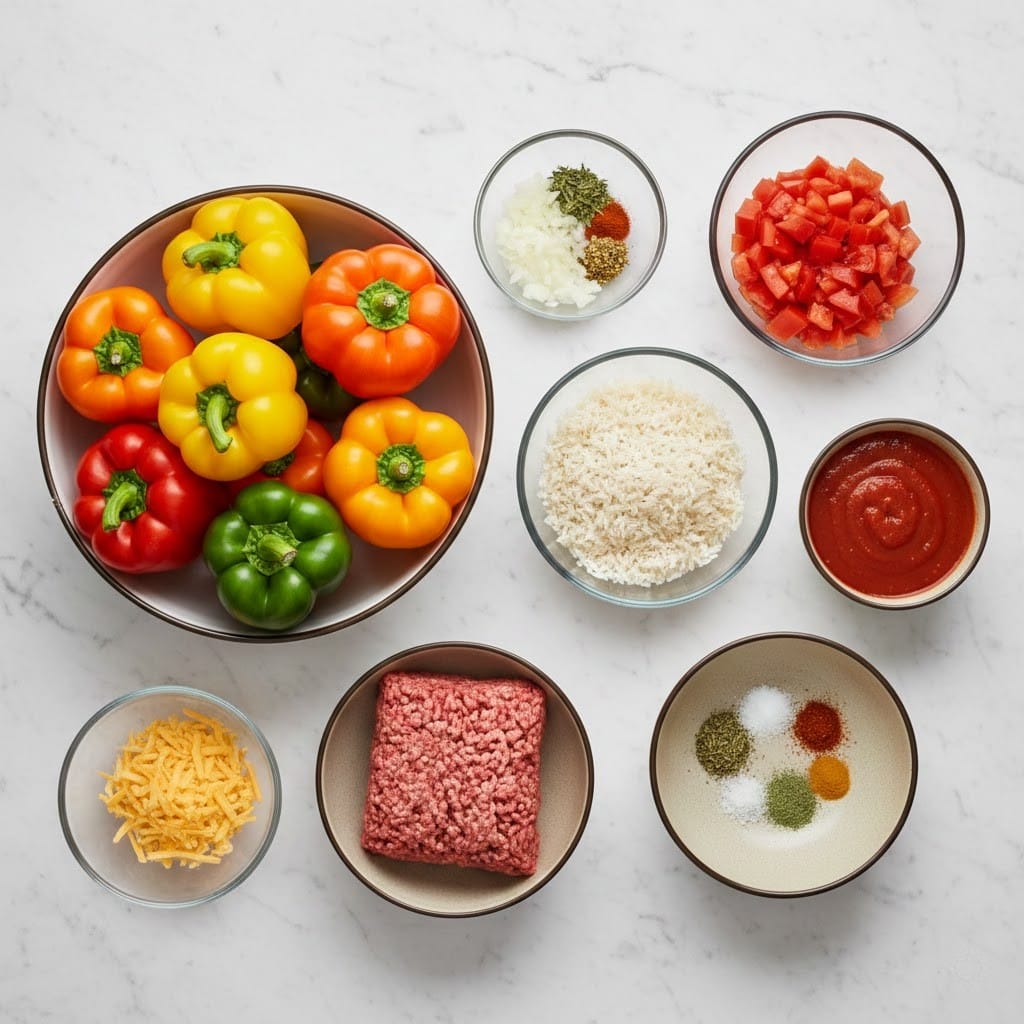
- 6 large bell peppers (any color — green’s cheapest, but I grab red or yellow if they’re on sale. My aunt swears by orange, but I can never taste the difference.)
- 1 lb ground beef (sometimes I swap in ground turkey or lentils when I’m pretending to be healthy)
- 1 cup cooked rice (white, brown, or last night’s quinoa if it’s chilling in the fridge)
- 1 small onion, finely diced (no shame if you use frozen pre-diced onions; I do when I’m wiped out)
- 2 cloves garlic, minced (or a big spoon of the jarred stuff; my grandmother would haunt me for this, but it works fine)
- 1 (14 oz) can diced tomatoes, drained (fire-roasted if I’m feeling fancy)
- 1 cup shredded mozzarella cheese (cheddar is great too; use up what’s lurking in your cheese drawer)
- 2 tablespoons tomato paste
- 1 teaspoon dried Italian herbs (or a random shake of oregano; who’s counting?)
- Salt and black pepper, to taste
- Olive oil, for sautéing
>
How To Make These Stuffed Peppers (My Not-So-Perfect Method)
- Preheat your oven to 375°F (190°C), unless you’re freezing them uncooked — in which case, skip this and grab a freezer bag (or three) instead.
- Slice the tops off the bell peppers and scoop out the seeds and white bits. If they wobble, shave a tiny bit off the bottoms so they stand up straight. Or just wedge ’em together in the pan so they can’t fall.
- Heat a biggish skillet over medium heat and splash in some olive oil. Add the diced onion and cook until soft (about 3-4 minutes, or until you get impatient).
- Dump in the ground beef. Cook, stirring (I use a wooden spoon, but honestly, anything works) until browned. No need to get every crumb perfectly crumbled.
- Stir in the minced garlic, tomato paste, Italian herbs, and a good pinch of salt and pepper. Sauté for about a minute, until your kitchen smells amazing (sometimes I stand here a bit longer just for the aroma).
- Add the drained diced tomatoes and cooked rice. Mix everything up really well. Lower the heat, let it simmer for a couple minutes; give it a taste. If you want, maybe toss in a handful of cheese at this point, too (I do this when I want it extra gooey).
- Spoon the filling into each prepared pepper. This is where I tend to overstuff — honestly, it’s fine if they’re over the top.
- Top each one with a sprinkle of your shredded cheese. Don’t stress if it falls all over the pan; those crispy cheesy bits are gold.
- If Freezing Now: Let the peppers cool, then pack in a freezer-safe baking dish or bag. (Individually-wrapped in foil is my trick for grab-and-go lunches.)
- To Bake Right Away: Arrange peppers in a baking dish, pour a little water (about 1/4 cup) in the bottom to keep them tender. Cover with foil and bake for 30 minutes; then uncover and bake another 10-15 minutes until cheese is bubbling and brown around the edges.
- From Frozen: Thaw overnight in the fridge for best results, or bake straight from frozen (add an extra 20 minutes – keep ’em covered so they don’t dry out).
Random Notes From My Kitchen
- Browning the beef properly does make a difference, but I’ve rushed it and nobody noticed except me.
- If you forget to pre-cook the rice (guilty), the filling turns out pretty chewy. Not in a good way.
- I always regret skimping on the cheese — more is more, in my opinion.
Stuffed Peppers Tinkering: What Worked (and Didn’t)
- I once replaced the beef with black beans and corn — actually pretty tasty for a “Meatless Monday” vibe.
- Used cauliflower rice instead of regular rice… it was just okay. Maybe if you love cauliflower (I don’t, really).
- Trying to freeze unbaked peppers with raw beef? Wouldn’t recommend. The texture got kind of weird, if I’m honest.
So, What Do You Really Need?
- Baking dish (ceramic is fancy, but a metal tray works — you can even use disposable foil pans if you took the day off from dishes)
- Skillet for browning stuff (my nonstick pan’s been with me through thick and thin)
- Chef’s knife. Or steak knife, if that’s what’s clean — peppers aren’t picky
No lid for your baking dish? I’ve just covered with foil and squished it down. Works fine. One time, I even used a baking sheet on top.
How to Store and, Yeah, Sometimes Hide Them
Once baked (or cooled, if freezing), toss the peppers in an airtight container or wrap ’em up in foil. Store in the fridge for 3-4 days (though honestly, they never last more than a day in my house; my partner “sneaks” one at midnight every single time).
For freezer storage, I find individually wrapping is best for grabbing lunches, but a big tray works if you plan to reheat the whole batch for dinner.
Serving These Up (Or Just Standing at the Stove Nibbling)
I love these peppers with a big salad on the side — maybe some crusty bread to mop up the juice if I’m feeling proper. My kid likes ketchup with everything (don’t judge). Actually, it’s a family tradition to serve these with a dollop of plain yogurt instead of sour cream; blame my cousin in Ireland for that one.
If Only I’d Known: My Top Peppers Lessons
- I once tried to skip draining the tomatoes — soup city. Always drain, even if you’re in a hurry.
- Rushing the baking just gives you crunchy peppers and cold centers. Slow and steady really does win here.
- Don’t try to stuff the peppers while the filling’s piping hot, unless you want singed fingertips (thank me later!).
The Most Asked Questions I Actually Get
- Can I make these vegetarian? Yup. I swap the beef for lentils, black beans, or just more veggies — it’s surprisingly hearty.
- Do they get mushy after freezing? Not really, as long as you don’t overbake them after thawing. They’re never as crisp as day one, but who cares?
- Can I use brown rice instead of white? Of course. Sometimes I mix both if I need to use up leftovers. Or even wild rice — it’s all fair game.
- What if my peppers tip over while baking? Just crowd them together in the pan, or prop them up with a balled-up bit of foil. Did that once, never looked back.
- How long can I freeze these? I’d say about 3 months for peak flavor, but I’ve accidentally unearthed one at six months and it was “fine.”
So there you have it — my not-so-fancy, always reliable, make-ahead stuffed bell pepper freezer meal prep. If you give it a shot, let me know how it goes (unless it flops, in which case, let’s just pretend it never happened!). Oh, and if you discover any weirdly genius variations, you have to share. Scouts honor.
Ingredients
- 6 large bell peppers (any color — green’s cheapest, but I grab red or yellow if they’re on sale. My aunt swears by orange, but I can never taste the difference.)
- 1 lb ground beef (sometimes I swap in ground turkey or lentils when I’m pretending to be healthy)
- 1 cup cooked rice (white, brown, or last night’s quinoa if it’s chilling in the fridge)
- 1 small onion, finely diced (no shame if you use frozen pre-diced onions; I do when I’m wiped out)
- 2 cloves garlic, minced (or a big spoon of the jarred stuff; my grandmother would haunt me for this, but it works fine)
- 1 (14 oz) can diced tomatoes, drained (fire-roasted if I’m feeling fancy)
- 1 cup shredded mozzarella cheese (cheddar is great too; use up what’s lurking in your cheese drawer)
- 2 tablespoons tomato paste
- 1 teaspoon dried Italian herbs (or a random shake of oregano; who’s counting?)
- Salt and black pepper, to taste
- Olive oil, for sautéing
Instructions
-
1Preheat your oven to 375°F (190°C), unless you’re freezing them uncooked — in which case, skip this and grab a freezer bag (or three) instead.
-
2Slice the tops off the bell peppers and scoop out the seeds and white bits. If they wobble, shave a tiny bit off the bottoms so they stand up straight. Or just wedge ’em together in the pan so they can’t fall.
-
3Heat a biggish skillet over medium heat and splash in some olive oil. Add the diced onion and cook until soft (about 3-4 minutes, or until you get impatient).
-
4Dump in the ground beef. Cook, stirring (I use a wooden spoon, but honestly, anything works) until browned. No need to get every crumb perfectly crumbled.
-
5Stir in the minced garlic, tomato paste, Italian herbs, and a good pinch of salt and pepper. Sauté for about a minute, until your kitchen smells amazing (sometimes I stand here a bit longer just for the aroma).
-
6Add the drained diced tomatoes and cooked rice. Mix everything up really well. Lower the heat, let it simmer for a couple minutes; give it a taste. If you want, maybe toss in a handful of cheese at this point, too (I do this when I want it extra gooey).
-
7Spoon the filling into each prepared pepper. This is where I tend to overstuff — honestly, it’s fine if they’re over the top.
-
8Top each one with a sprinkle of your shredded cheese. Don’t stress if it falls all over the pan; those crispy cheesy bits are gold.
-
9If Freezing Now: Let the peppers cool, then pack in a freezer-safe baking dish or bag. (Individually-wrapped in foil is my trick for grab-and-go lunches.)
-
10To Bake Right Away: Arrange peppers in a baking dish, pour a little water (about 1/4 cup) in the bottom to keep them tender. Cover with foil and bake for 30 minutes; then uncover and bake another 10-15 minutes until cheese is bubbling and brown around the edges.
-
11From Frozen: Thaw overnight in the fridge for best results, or bake straight from frozen (add an extra 20 minutes – keep ’em covered so they don’t dry out).
Approximate Information for One Serving
Nutrition Disclaimers
Number of total servings shown is approximate. Actual number of servings will depend on your preferred portion sizes.
Nutritional values shown are general guidelines and reflect information for 1 serving using the ingredients listed, not including any optional ingredients. Actual macros may vary slightly depending on specific brands and types of ingredients used.
To determine the weight of one serving, prepare the recipe as instructed. Weigh the finished recipe, then divide the weight of the finished recipe (not including the weight of the container the food is in) by the desired number of servings. Result will be the weight of one serving.
Did you make this recipe?
Please consider Pinning it!