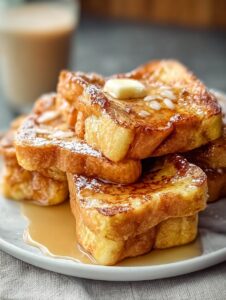
Let’s Talk Hawaiian Roll French Toast
Ever have one of those lazy Sunday mornings where you want something spectacular without starting a kitchen fire? That was me the first time I threw together Hawaiian Roll French Toast. I’d bought those irresistibly soft rolls (you know the ones, with the orange-y bag?) for pulled pork, but… forgot the pork. French toast was my on-the-fly rescue. Thing is, it ended up being such a hit that my son actually licked his plate. Not my proudest parenting moment, but hey—no food waste, right?

Why I Always Come Back to This
I make this when my crew needs real cheer-up breakfast vibes, but pancakes feel like a hassle. My family loses their minds for it, probably because those sweet little rolls soak up the eggy custard like sponges (I mean, in a good way). Plus, if you accidentally burn it a hair, it still tastes dreamy, which takes the edge off my distracted-cook syndrome. Even my notoriously picky aunt tried to “borrow” the recipe (but I saw her scribbling notes under the table—love you, Aunt Marge).
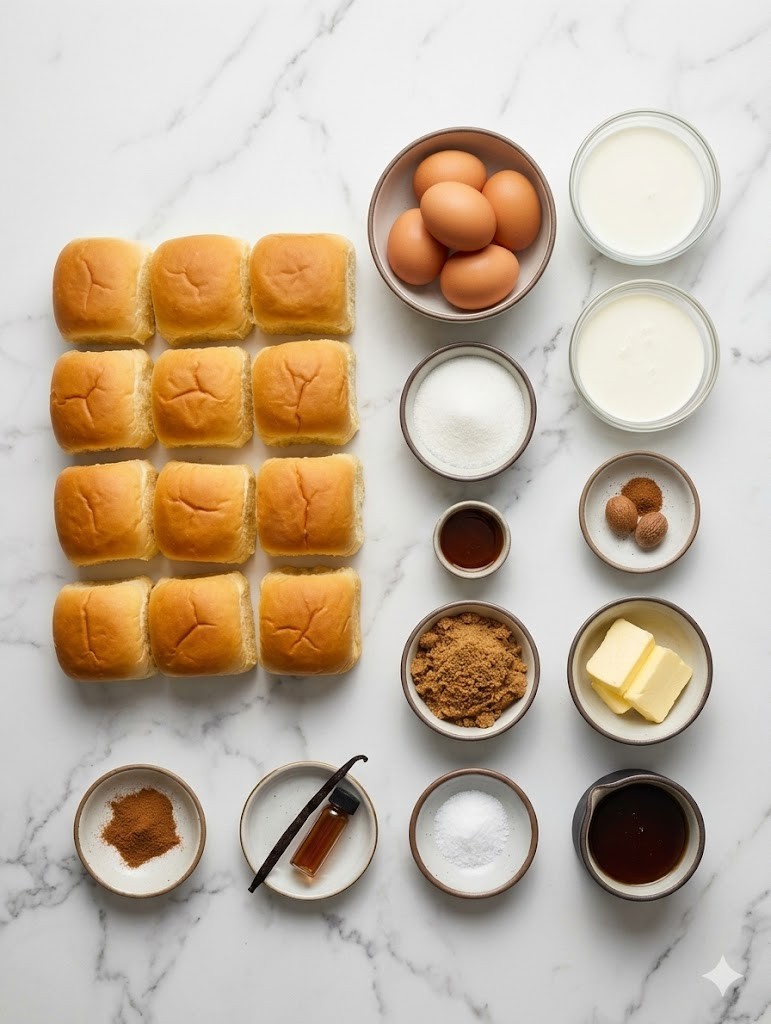
Stuff You’ll Need (With Honest Shortcuts)
- 1 package (12-count) Hawaiian sweet rolls (I’ve used the store-brand ones when King’s Hawaiian is MIA, and no one riots)
- 3 large eggs (medium eggs or even liquid eggs in a pinch—did that once, works fine)
- 1/2 cup whole milk (almond milk gets it a touch lighter, but use what you have—Grandma claims 2% is for “cowards,” but ignore her)
- 2 tablespoons heavy cream (optional, but rich—sometimes I just up the milk instead)
- 1 tablespoon granulated sugar (or brown sugar if you’re feeling wild)
- 1 teaspoon vanilla extract (I once used maple extract after running out; not bad!)
- 1/2 teaspoon ground cinnamon (or a few shakes more—depends on mood, honestly)
- Pinch salt
- Butter for frying (as much as you fancy—about 2-3 tablespoons works)
- Powdered sugar and maple syrup, for serving (I throw fresh berries on sometimes, too)
Making It, More or Less
- Start by tearing the Hawaiian rolls apart—no need to slice, just separate ’em gently. Not rocket science! (I leave them whole if I’m feeling lazy and just dunk them one at a time.)
- In a wide bowl, whisk the eggs, milk, heavy cream (if using), sugar, vanilla, cinnamon, and that pinch of salt. Give it a good swirl—watch out for eggy clumps. (I once left a giant blob of egg white floating—looked odd, tasted fine.)
- Dunk each roll in the batter so it gets coated all over, about 15 seconds per roll. If they look like little yellow sponges, you’re on the right track; don’t soak them to oblivion, though—they’ll fall apart faster than a house of cards in a windstorm.
- Heat a nonstick skillet or griddle over medium heat and melt a knob of butter (enough to make things sizzle). Place dipped rolls on the hot pan.
- Cook for about 2 minutes per side, rotating so you hit all the edges. Sneak a peek underneath to check for that golden color. If it looks a touch too dark, lower your heat (learned this the hard way—smoke alarm city).
- Transfer the finished rolls to a plate and keep warm, or just start eating because patience isn’t always a virtue in my kitchen.
- Dust with powdered sugar, drizzle maple syrup all over, and top with berries, whipped cream, or, heck, rainbow sprinkles if you’re in a festive mood.
Notes from My Many Mishaps
- If you let the battered rolls sit too long before frying, they’ll get soggy (still edible, just… pudding-like). Fry stat!
- I once tried baking them all at once to “save time”—nah. Too dense, kind of sad inside. Stick to the skillet for now.
- Ripping the rolls vs. slicing: tearing gives more craggy bits to get crispy and soak up syrup. Highly recommend!
Variations I’ve Actually Tried
- Chocolate chips in the dipping batter—kids cheered, though they get messy. Expect chocolate streaks everywhere.
- Banana slices tucked inside the rolls before dunking—delicious, but slippery. Banana projectile at breakfast is a thing now.
- I once tried a savory version with cheese and chives; honestly, not my jam. But, you do you.
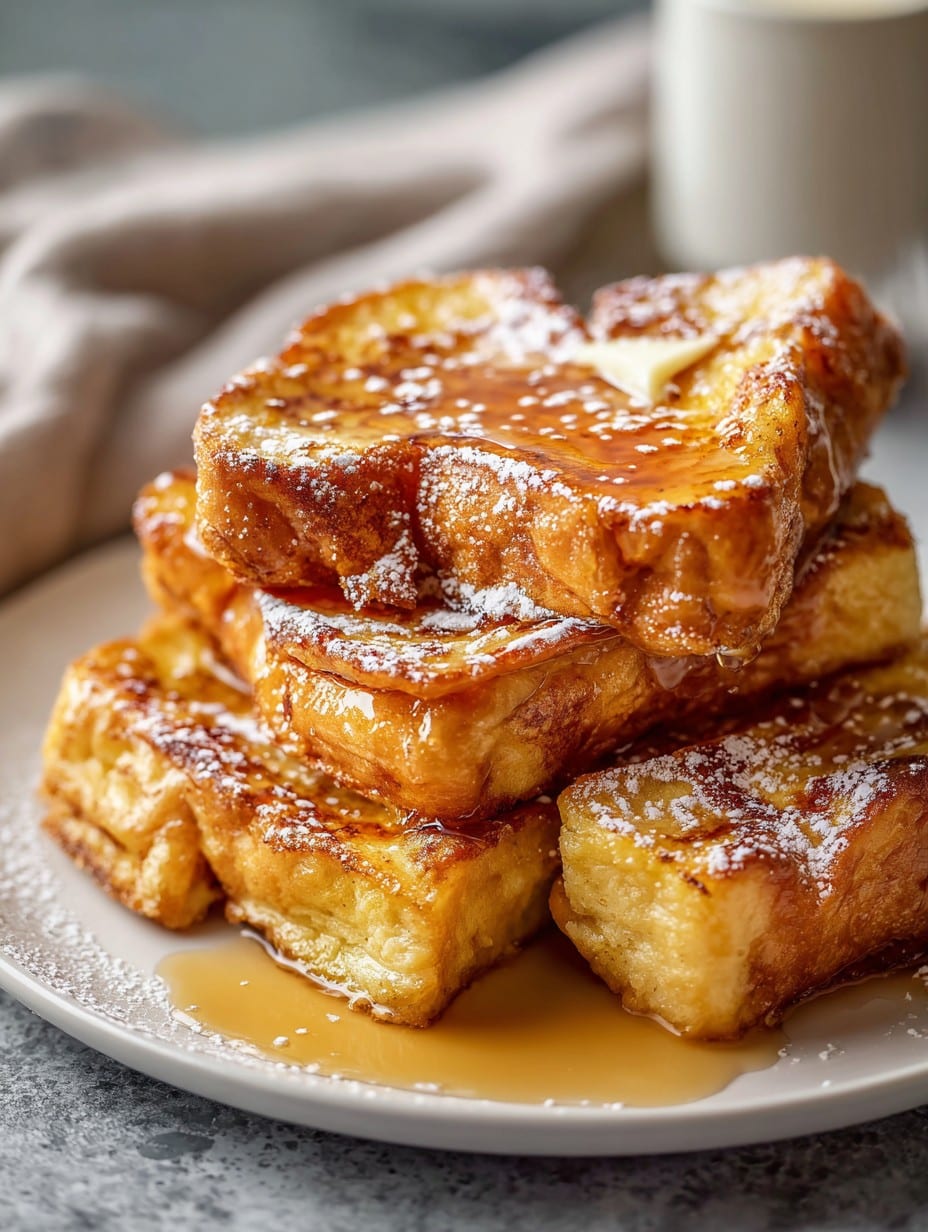
What You Need—Or a Clever Workaround
- Wide, shallow bowl for batter (if not, a pie plate does the trick)
- Nonstick skillet or griddle (cast iron works, but I always set off the smoke detector… maybe that’s just me?)
- Spatula—don’t use a fork or you’ll squish the rolls flat as a pancake
How to Store (If There’s Any Left)
Pop leftovers in an airtight container in the fridge—should last a day or two, tops. They reheat pretty well in a toaster oven. But honestly, in my house it never lasts past brunch, so maybe just invite fewer people?
How We Serve ‘Em
I like setting up a “breakfast bar” with a bunch of toppings—fruit, chocolate chips, little bowls of nuts, you name it. But classic syrup and that dusting of powdered sugar, can’t beat it. On very lucky days, someone makes coffee to go with it (paging my partner… hint hint). Also, my cousin likes his with peanut butter—don’t ask, just try it.
Look, I Learned the Hard Way (Pro Tips)
- Don’t rush the frying! I once tried to crank the heat to finish faster—outside burned, inside was raw. Whoops.
- If you skimp on the butter, they stick. Then you spend twice as long scraping them off, and good luck cleaning that pan.
- Actually, leaving the rolls out for about 30 minutes before you start helps them soak up more custard. I never remember until I’ve already cracked the eggs, but it’s worth a shot.
Real Questions I Get (and My Real Answers)
- Can I make this ahead?
Technically, yes—you can assemble and chill overnight, but it’s a bit soggier the next day. My neighbor freezes the cooked rolls and swears it’s fine, but honestly, thawed bread always tastes odd to me. - Do you really have to use Hawaiian rolls?
No! Any fluffy, sweet-ish bread should work. I’ve used leftover challah, even those mini brioche buns (fancy, right?); results may vary, but it’s all tasty. - Why is my French toast kind of raw in the middle?
Two culprits here: soaked too long, or heat was too high. Try less time in the batter and lower heat next time. It’s fixable—just griddle a bit longer with foil on top to finish the inside. - Can I make it dairy-free?
Yup! Swap in almond or oat milk, and use oil instead of butter—tastes lighter, but it passes the breakfast crowd test. - What’s the weirdest topping you’ve tried?
Hot sauce—on a dare. Would not recommend. But hey, some like it hot!
Alright, hope you have fun with this Hawaiian Roll French Toast! If anything goes hilariously sideways, just remember—breakfast is supposed to be a little messy anyway.
Ingredients
- 1 package (12-count) Hawaiian sweet rolls (I’ve used the store-brand ones when King’s Hawaiian is MIA, and no one riots)
- 3 large eggs (medium eggs or even liquid eggs in a pinch—did that once, works fine)
- 1/2 cup whole milk (almond milk gets it a touch lighter, but use what you have—Grandma claims 2% is for “cowards,” but ignore her)
- 2 tablespoons heavy cream (optional, but rich—sometimes I just up the milk instead)
- 1 tablespoon granulated sugar (or brown sugar if you’re feeling wild)
- 1 teaspoon vanilla extract (I once used maple extract after running out; not bad!)
- 1/2 teaspoon ground cinnamon (or a few shakes more—depends on mood, honestly)
- Pinch salt
- Butter for frying (as much as you fancy—about 2-3 tablespoons works)
- Powdered sugar and maple syrup, for serving (I throw fresh berries on sometimes, too)
Instructions
-
1Start by tearing the Hawaiian rolls apart—no need to slice, just separate ’em gently. Not rocket science! (I leave them whole if I’m feeling lazy and just dunk them one at a time.)
-
2In a wide bowl, whisk the eggs, milk, heavy cream (if using), sugar, vanilla, cinnamon, and that pinch of salt. Give it a good swirl—watch out for eggy clumps. (I once left a giant blob of egg white floating—looked odd, tasted fine.)
-
3Dunk each roll in the batter so it gets coated all over, about 15 seconds per roll. If they look like little yellow sponges, you’re on the right track; don’t soak them to oblivion, though—they’ll fall apart faster than a house of cards in a windstorm.
-
4Heat a nonstick skillet or griddle over medium heat and melt a knob of butter (enough to make things sizzle). Place dipped rolls on the hot pan.
-
5Cook for about 2 minutes per side, rotating so you hit all the edges. Sneak a peek underneath to check for that golden color. If it looks a touch too dark, lower your heat (learned this the hard way—smoke alarm city).
-
6Transfer the finished rolls to a plate and keep warm, or just start eating because patience isn’t always a virtue in my kitchen.
-
7Dust with powdered sugar, drizzle maple syrup all over, and top with berries, whipped cream, or, heck, rainbow sprinkles if you’re in a festive mood.
Approximate Information for One Serving
Nutrition Disclaimers
Number of total servings shown is approximate. Actual number of servings will depend on your preferred portion sizes.
Nutritional values shown are general guidelines and reflect information for 1 serving using the ingredients listed, not including any optional ingredients. Actual macros may vary slightly depending on specific brands and types of ingredients used.
To determine the weight of one serving, prepare the recipe as instructed. Weigh the finished recipe, then divide the weight of the finished recipe (not including the weight of the container the food is in) by the desired number of servings. Result will be the weight of one serving.
Did you make this recipe?
Please consider Pinning it!