So, Let’s Talk Holiday Cookie Shenanigans…
I don’t know about you, but sugar cookies basically announce the holiday season in my kitchen—like, loud and clear, usually accompanied by the flour snowstorm I create. My earliest baking memory is of trying to sneak raw dough when my gran turned her back (she always caught me, though). The best part? Decorating with so many sprinkles, you’d think I was trying to hide the cookie completely. And oh, once I tried to pipe a tiny reindeer… let’s just say it ended up looking more like a brown blob with antlers. But anyway, that’s half the fun, right?

Why I Keep Coming Back To These
I make these when the holidays roll around and the house needs to smell like ‘memories’ (or at least, that’s what my niece says). My family goes wild for these because everyone gets their own gob of frosting and, inevitably, at least one person makes a wonky snowman. Sometimes the dough sticks, sometimes the shapes mutate in the oven, but you know, that’s all part of the charm. And—bit of honesty—I used to dread rolling out dough; it felt like wrestling a stubborn bedsheet. But actually, with enough flour and a bit of elbow grease, it’s not that bad.
What You’ll Need (and Substitutes, Because Life)
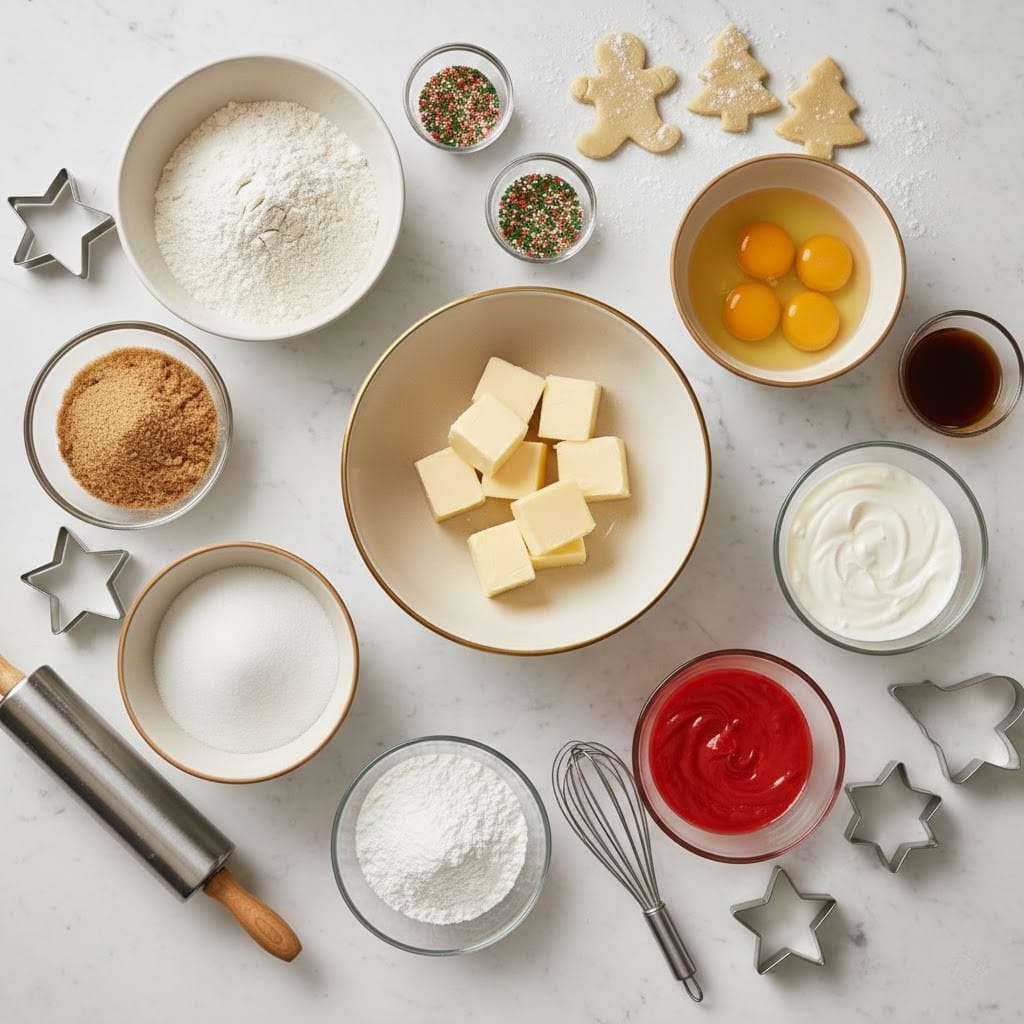
- 2 and 3/4 cups (340g) all-purpose flour (my gran swore by Gold Medal, but honestly, the store brand works fine)
- 1 teaspoon baking powder (if you’re desperate, a pinch less isn’t the end of the world)
- 1/2 teaspoon salt
- 1 cup (225g) unsalted butter, room temperature (on a mad dash, I’ve used salted and just halved the salt)
- 1 and 1/4 cups (250g) granulated sugar
- 1 large egg (sometimes I use two smaller eggs if that’s all I’ve got – seems to work!)
- 2 teaspoons pure vanilla extract (okay, extract is classic, but almond extract, a half teaspoon, is also really good if you’re feeling bold)
- Optionals: 1/2 teaspoon almond extract, zest of an orange for a twist
- For decorating: royal icing or buttercream (store-bought in a pinch), food coloring gels, loads of sprinkles (my rule: the more the merrier)
Alright, Let’s Make Some Cookie Magic
- Whisk together your flour, baking powder, and salt in a big bowl. I usually use the same fork I stirred my coffee with earlier. Set aside.
- In another bowl (stand mixer time, or a sturdy wooden spoon and arm workout), beat the butter and sugar together until it’s pale and fluffy—thoroughly mixed. This is where I sneak a tiny spoonful, but don’t tell anyone.
- Add the egg (or eggs, if you’re like me and work with what’s in the fridge) and vanilla. Optional: that almond extract or orange zest. Mix just until it’s all incorporated—over-beating is the enemy of tender cookies, or so I’ve read (and believe after some flat batch disasters).
- Toss in the dry mixture a cup at a time, but don’t throw literal flour clouds all over your kitchen. Go slow. It’ll seem dry at the end, but just keep the faith—it comes together eventually.
- Split the dough in half, flatten each into a kind of chunky disc (or chonky, as my kid says), and wrap ’em in cling film. Chill for at least an hour. Overnight works too, I think they taste better the next day anyway. If you skip the chill, the dough goes rogue in the oven—trust me.
- Preheat your oven to 350°F (175°C); line some trays with parchment (baking paper for my UK friends). Roll one dough disc out on a floured surface to about 1/4 inch thick. Not gonna lie, sometimes mine’s a funky shape. That’s OK! Cut out your festive shapes—trees, stars, weird blobs that could be polar bears if you squint.
- Transfer cookies to the trays, spacing them out. Bake for 8-10 minutes, until the very edges just hint at golden. I pull them at 9 minutes, usually. They’ll look slightly underbaked—good! Soft sugar cookies are the goal here. Let cool on the tray a few mins, then onto a rack to finish.
- Time to decorate: Whisk up your royal icing (or open the can, no judgment). Color it up, go wild. Pipe, flood, sprinkle, or just spread icing with a butter knife if you’ve had one of those days. I sometimes set up a whole decorating station so everyone can make a mess. Have fun with it—ugly cookies taste just as good!
Stuff I’ve Learned (and Sometimes Ignored)
- If you skip chilling, you’re basically risking the cookie equivalent of roadkill. But I get it, sometimes time escapes you.
- Overbaking is the enemy; underbaking is your friend here.
- I used to think more flour was always better for rolling—actually, it can make things dry. Dust your surface, but go easy on the top of the dough.
Cookie Experiments I’ve Tried
- Adding a splash of lemon extract to the icing—surprisingly zippy, everyone liked it!
- Tried dyeing the whole dough one time (made blue polar bear cookies); looked weird, tasted great though.
- Once attempted whole wheat flour for ‘health’; nobody wanted seconds. That’s all I’ll say.

What If You Don’t Own Every Gadget?
I swear by my rolling pin, but once, when mine mysteriously vanished, I used a chilled wine bottle. Worked a treat! For cookie cutters: drinking glasses or random lids make nice circles.
How to Store (But They Disappear Here…)
Stack decorated cookies in an airtight tin, parchment between layers. They’ll keep fresh-ish for 4-5 days. Actually, they rarely last more than 24 hours with my kids around, so I guess you’ll have to test that on your own family.
Best Ways to Serve ’Em (Or Just Eat Out of Hand)
We set these out on a big platter with mugs of cocoa and—just my thing—a little bowl of leftover frosting for dunking. My sister claims it’s excessive, but what does she know. Stack them up, add a bow, and suddenly you’ve got the perfect homemade gift (well, if any survive the feeding frenzy).
Some Hard-Won Cookie Wisdom
- Don’t rush the chilling step, whatever you do; last time I did, my stars melted into sad amoebas.
- Also—let cookies cool completely before icing or you’ll have frosting puddles.
- And don’t try to decorate while on a Zoom call—voice of experience.
Questions I Actually Get (Plus a Ramble)
- Can I freeze the dough? Yep! Form it into discs, wrap tightly, and freeze up to a month. Thaw overnight in the fridge; it rolls out best when still cold.
- Why are my cookies spreading too much? Probably the dough wasn’t chilled long enough, but, uh, oven spotting can do weird things too. Maybe your butter was super soft? Happens!
- What’s the difference between royal icing and buttercream for decorating? Royal icing dries hard (good for stacking or mailing), buttercream stays soft and is tastier, but smears if you stack ’em. Both make a mess—just in different ways.
- Can I halve or double this recipe? Sometimes I do, and sometimes I forget about baking times for bigger/smaller cookies and it gets a bit dodgy. But sure, just keep an eye on the oven.
- Semi-related: I once dropped an entire tray upside down on the floor trying to carry it with oven mitts too big for my hands. If you’re clumsy, transfer them with a spatula, trust me.
And there you go! Make a mess, have a laugh, and don’t fuss over cookie perfection—a wonky star with a googly candy eye is still the soul of the holidays around here.
Ingredients
- 2 and 3/4 cups (340g) all-purpose flour (my gran swore by Gold Medal, but honestly, the store brand works fine)
- 1 teaspoon baking powder (if you’re desperate, a pinch less isn’t the end of the world)
- 1/2 teaspoon salt
- 1 cup (225g) unsalted butter, room temperature (on a mad dash, I’ve used salted and just halved the salt)
- 1 and 1/4 cups (250g) granulated sugar
- 1 large egg (sometimes I use two smaller eggs if that’s all I’ve got – seems to work!)
- 2 teaspoons pure vanilla extract (okay, extract is classic, but almond extract, a half teaspoon, is also really good if you’re feeling bold)
- Optionals: 1/2 teaspoon almond extract, zest of an orange for a twist
- For decorating: royal icing or buttercream (store-bought in a pinch), food coloring gels, loads of sprinkles (my rule: the more the merrier)
Instructions
-
1Whisk together your flour, baking powder, and salt in a big bowl. I usually use the same fork I stirred my coffee with earlier. Set aside.
-
2In another bowl (stand mixer time, or a sturdy wooden spoon and arm workout), beat the butter and sugar together until it’s pale and fluffy—thoroughly mixed. This is where I sneak a tiny spoonful, but don’t tell anyone.
-
3Add the egg (or eggs, if you’re like me and work with what’s in the fridge) and vanilla. Optional: that almond extract or orange zest. Mix just until it’s all incorporated—over-beating is the enemy of tender cookies, or so I’ve read (and believe after some flat batch disasters).
-
4Toss in the dry mixture a cup at a time, but don’t throw literal flour clouds all over your kitchen. Go slow. It’ll seem dry at the end, but just keep the faith—it comes together eventually.
-
5Split the dough in half, flatten each into a kind of chunky disc (or chonky, as my kid says), and wrap ’em in cling film. Chill for at least an hour. Overnight works too, I think they taste better the next day anyway. If you skip the chill, the dough goes rogue in the oven—trust me.
-
6Preheat your oven to 350°F (175°C); line some trays with parchment (baking paper for my UK friends). Roll one dough disc out on a floured surface to about 1/4 inch thick. Not gonna lie, sometimes mine’s a funky shape. That’s OK! Cut out your festive shapes—trees, stars, weird blobs that could be polar bears if you squint.
-
7Transfer cookies to the trays, spacing them out. Bake for 8-10 minutes, until the very edges just hint at golden. I pull them at 9 minutes, usually. They’ll look slightly underbaked—good! Soft sugar cookies are the goal here. Let cool on the tray a few mins, then onto a rack to finish.
-
8Time to decorate: Whisk up your royal icing (or open the can, no judgment). Color it up, go wild. Pipe, flood, sprinkle, or just spread icing with a butter knife if you’ve had one of those days. I sometimes set up a whole decorating station so everyone can make a mess. Have fun with it—ugly cookies taste just as good!
Approximate Information for One Serving
Nutrition Disclaimers
Number of total servings shown is approximate. Actual number of servings will depend on your preferred portion sizes.
Nutritional values shown are general guidelines and reflect information for 1 serving using the ingredients listed, not including any optional ingredients. Actual macros may vary slightly depending on specific brands and types of ingredients used.
To determine the weight of one serving, prepare the recipe as instructed. Weigh the finished recipe, then divide the weight of the finished recipe (not including the weight of the container the food is in) by the desired number of servings. Result will be the weight of one serving.
Did you make this recipe?
Please consider Pinning it!