Let’s Talk About This Lemon Poppy Seed Cake (And Why My Socks Are Sometimes Still Dusty)
Alright, let me set the scene for you: it’s springtime, my kitchen smells vaguely of lemons (and, if I’m being honest, the dogs), and I’m dodging the flour cloud that explodes every time I attempt baking. But you know what? I keep coming back to this lemon poppy seed cake. Something about the bright citrus hit and those tiny crunchy seeds feels so fresh—plus, it’s one of the few bakes my best friend hasn’t judged me for burning. Once, I dropped half the batter on the floor and decided to call it “rustic.” Still tasted amazing. Just, don’t tell my family. Or do. They probably suspect something anyway.

Why You’ll Love Making This (Even If You’re Distracted)
I pull this recipe out when I need to look like I have it together. Like last summer, when the neighbor popped by with her impossibly perfect cookies—I just whipped this cake up and suddenly I’m the queen of desserts. My family goes crazy for it because it’s tangy and sweet, and honestly, it’s forgiving. I’ve swapped ingredients (ran out of yogurt, so used sour cream, oops), underbaked it by five minutes, and it still vanishes faster than you can say “where’s the cake?” You don’t even need a mixer if you’re feeling strong-armed (or stubborn). The only real annoyance? Cleaning up poppy seeds that stick everywhere. I find them in the oddest places for days.
What You’ll Need: The Real Ingredients List
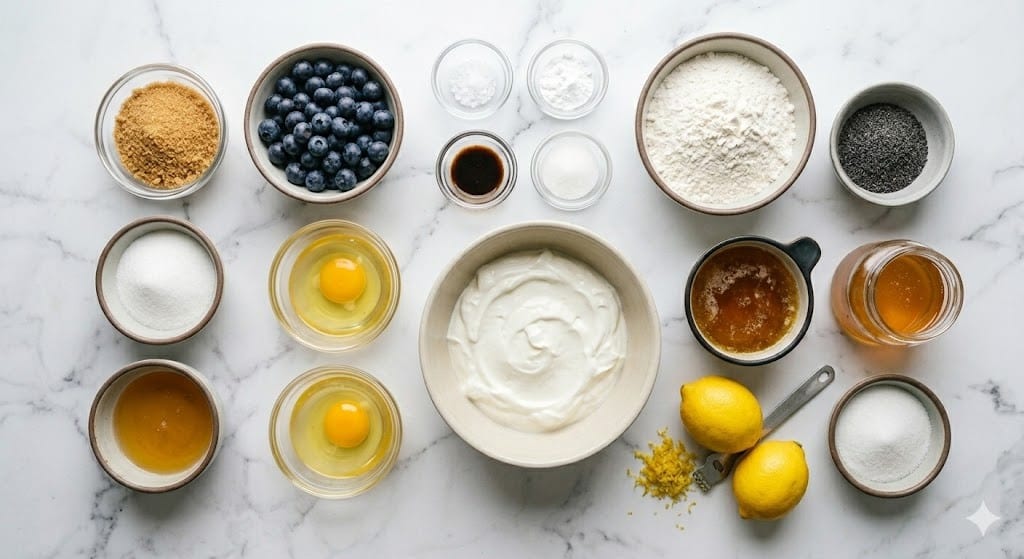
- 1 1/2 cups (190g) all-purpose flour (sometimes I use half whole wheat if I’m feeling virtuous, but full AP is the classic)
- 1 cup (200g) granulated sugar (honestly, caster or superfine works just as well, but don’t tell my grandmother)
- 2 tablespoons poppy seeds (I eyeball it, but this is pretty close)
- 1 teaspoon baking powder
- 1/2 teaspoon baking soda
- 1/2 teaspoon salt
- 2 large eggs, room temp (I use whatever’s in the fridge, but room temp is the gold standard)
- 1 cup plain Greek yogurt (full fat is best, but I’ve subbed in sour cream or even regular yogurt in a pinch)
- 1/2 cup (120ml) vegetable oil (or melted butter, but oil keeps it extra moist)
- 2 tablespoons lemon zest (from 2 big lemons, but there’s been afternoons when I only had one and it was…fine)
- 1/4 cup (60ml) fresh lemon juice (bottled in a real emergency; the taste is a bit off, but we all survive)
- 1 teaspoon vanilla extract (my bottle leaks so it’s sometimes a generous teaspoon—no regrets)
>
A (Mostly Logical) Set of Directions
- Preheat your oven to 350°F (175°C). Grease a standard loaf pan. Or, honestly, a cake tin works too—I’ve even used a square pan once. It was quirky.
- In a big-ish bowl, whisk together the flour, sugar, poppy seeds, baking powder, baking soda, and salt. I usually spill at least one—just scoop it back in, no big deal.
- In another bowl, beat the eggs until they’re getting foamy. Add yogurt, oil, lemon zest, lemon juice, and vanilla. Give it a good mix (sometimes I use a fork because my whisk is always in the dishwasher).
- Now, pour your wet stuff into the dry. Stir it gently—a few lumps won’t hurt anyone, but don’t overmix or it gets tough. This is where I usually sneak a taste (egg warning, if that bothers you.)
- Scrape the batter into your greased pan (try not to eat too much raw batter, it’s so lemony and tempting). Smooth the top with a spatula or the back of a spoon.
- Bake for 45-55 minutes. Mine’s usually perfect just after 50, but ovens are odd, so check with a toothpick. If it comes out mostly clean, call it done. If your cake is wobbly in the middle, give it another five mins (don’t panic, happens to the best of us).
- Let it cool in the pan for 15 min, then run a butter knife around the edges and tip it out onto a rack (or, uh, a clean-ish tea towel). Cool completely before slicing, though I can never wait that long.
>
Notes: Lessons I’ve (Eventually) Learned
- Getting all the lemon flavor means zest AND juice—if I forget the zest, the cake’s just sweet, not zingy.
- I once made this with margarine. It didn’t taste great. Stick to oil or butter if you can.
- Leaving it overnight (if possible…) actually makes the texture even better. Moist, without being heavy. I have no idea why. Cake magic?
Weird Variations I Have Actually Tried
- Swap orange for lemon—surprisingly tasty, kind of brunchy
- Add a handful of blueberries to the batter—sometimes they sink, but so what?
- Once I tried adding chia seeds instead of poppy. It looked odd and tasted… chewy in a funny way. Wouldn’t recommend unless you love chia.
No Fancy Equipment? Here’s What I Use
- Loaf pan (mine is ancient, with a dent, but still works)
- Mixing bowls
- Whisk (or a sturdy fork—don’t sweat it!)
- Zester or microplane (if not, carefully use the fine side of a box grater)
- Measuring cups (I’ve eyeballed spoons when mine are all missing, shh)
>
No stand mixer required! But, if you have one, knock yourself out.
How I Store This (Though Good Luck Making It Last)
In theory, it keeps in an airtight container at room temp for three days. In practice, it’s usually demolished within 24 hours. If you do have leftovers (miracle!), pop slices in the freezer, wrap them up—future you will be happy about it.
Serving Ideas: The Fun Bit
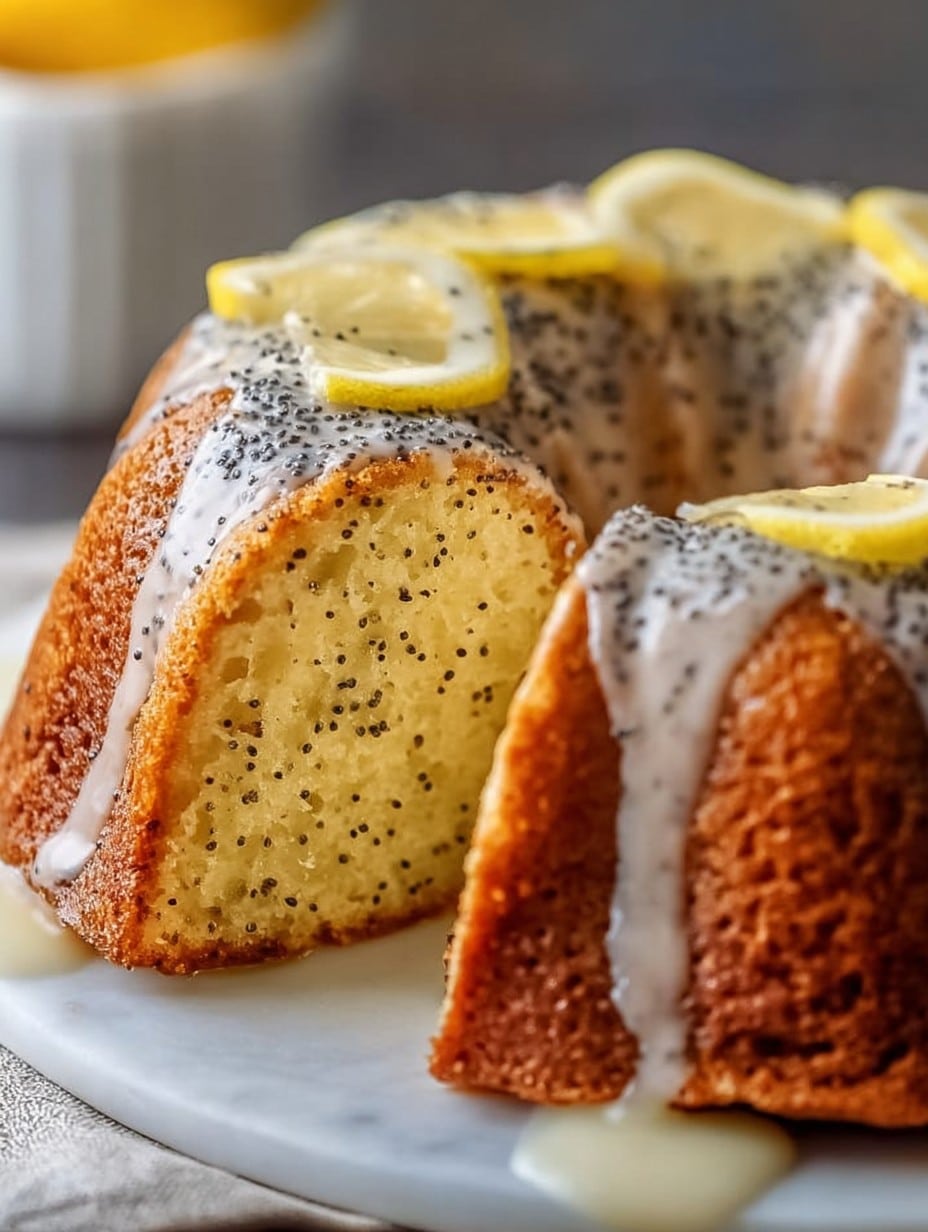
We serve thick slices with a mug of milky tea for brunch. I sometimes top it with a quick lemon glaze (just mix powdered sugar with some lemon juice until it’s thick but pourable—honestly, eyeball it), especially if it’s for guests. For a proper treat, try a dollop of whipped cream. My aunt will eat it toasted with butter (a bit decadent but I can’t knock it until I’ve tried it… which I have).
Pro Tips I Learned the Hard Way
- Don’t skip lining your pan if it’s old like mine. I once tried to turn the cake out with nothing but hope and a spatula—disaster. Parchment paper, friends.
- Letting it cool fully makes slicing so much easier. I used to rush, then wondered why it squished. Patience (ugh) is worth it.
Baking: FAQs That People Actually Ask Me (Yes, I’m the Family Baker Now…)
Can I make this dairy-free?
Yeah! Use a dairy-free yogurt and oil, skip the butter. Tastes just as zippy.
My cake sank. Did I mess up?
Not necessarily—sometimes it just means a bit too much liquid or maybe overmixing. Or, maybe your baking powder’s hiding in the back of the cupboard for too long?
Do I have to use poppy seeds?
You don’t have to, but, um, then it’s just lemon cake. Which is also delicious! But maybe not the same vibe.
Can I double the recipe?
Yep! Just use two pans, or make an oversized cake and adjust the bake time. Keep an eye on it after 50 mins.
Some days, I think I’ve got baking all figured out. Other days, I end up with flour on my face and a cake that’s still a family favorite anyway. That’s the magic, right?
Ingredients
- 1 1/2 cups (190g) all-purpose flour (sometimes I use half whole wheat if I’m feeling virtuous, but full AP is the classic)
- 1 cup (200g) granulated sugar (honestly, caster or superfine works just as well, but don’t tell my grandmother)
- 2 tablespoons poppy seeds (I eyeball it, but this is pretty close)
- 1 teaspoon baking powder
- 1/2 teaspoon baking soda
- 1/2 teaspoon salt
- 2 large eggs, room temp (I use whatever’s in the fridge, but room temp is the gold standard)
- 1 cup plain Greek yogurt (full fat is best, but I’ve subbed in sour cream or even regular yogurt in a pinch)
- 1/2 cup (120ml) vegetable oil (or melted butter, but oil keeps it extra moist)
- 2 tablespoons lemon zest (from 2 big lemons, but there’s been afternoons when I only had one and it was…fine)
- 1/4 cup (60ml) fresh lemon juice (bottled in a real emergency; the taste is a bit off, but we all survive)
- 1 teaspoon vanilla extract (my bottle leaks so it’s sometimes a generous teaspoon—no regrets)
Instructions
-
1Preheat your oven to 350°F (175°C). Grease a standard loaf pan. Or, honestly, a cake tin works too—I’ve even used a square pan once. It was quirky.
-
2In a big-ish bowl, whisk together the flour, sugar, poppy seeds, baking powder, baking soda, and salt. I usually spill at least one—just scoop it back in, no big deal.
-
3In another bowl, beat the eggs until they’re getting foamy. Add yogurt, oil, lemon zest, lemon juice, and vanilla. Give it a good mix (sometimes I use a fork because my whisk is always in the dishwasher).
-
4Now, pour your wet stuff into the dry. Stir it gently—a few lumps won’t hurt anyone, but don’t overmix or it gets tough. This is where I usually sneak a taste (egg warning, if that bothers you.)
-
5Scrape the batter into your greased pan (try not to eat too much raw batter, it’s so lemony and tempting). Smooth the top with a spatula or the back of a spoon.
-
6Bake for 45-55 minutes. Mine’s usually perfect just after 50, but ovens are odd, so check with a toothpick. If it comes out mostly clean, call it done. If your cake is wobbly in the middle, give it another five mins (don’t panic, happens to the best of us).
-
7Let it cool in the pan for 15 min, then run a butter knife around the edges and tip it out onto a rack (or, uh, a clean-ish tea towel). Cool completely before slicing, though I can never wait that long.
Approximate Information for One Serving
Nutrition Disclaimers
Number of total servings shown is approximate. Actual number of servings will depend on your preferred portion sizes.
Nutritional values shown are general guidelines and reflect information for 1 serving using the ingredients listed, not including any optional ingredients. Actual macros may vary slightly depending on specific brands and types of ingredients used.
To determine the weight of one serving, prepare the recipe as instructed. Weigh the finished recipe, then divide the weight of the finished recipe (not including the weight of the container the food is in) by the desired number of servings. Result will be the weight of one serving.
Did you make this recipe?
Please consider Pinning it!