Honestly, Orange Creamsicle Milkshakes Are My Summer Shortcut
Alright, let me just tell you: the first time I made this Orange Creamsicle Milkshake, I was trying to cheer myself up after a truly rotten Monday. I remembered chasing the ice cream truck barefoot down my block for those striped orange Popsicle bars (I was always the slowest—my neighbor Timmy outran us all, show-off). So I figured, why not recreate that vibe at home, only minus the sticky hands? What you end up with is, I swear, summer in a glass. Also, one time I made this, my blender nearly took flight because I left the lid loose—consider that my PSA to double-check before blending, unless you want orange splatter art on your kitchen tiles.

Why This Milkshake Makes Even Rainy Days Bright
I make this when I need a break from chocolate everything, or when my niece is over and asking for “orange ice cream” for breakfast (I don’t say yes, but I understand her logic). My family goes a bit wild for this because it tastes exactly like those Orange Creamsicle bars. And, well, sometimes (okay, often) I’m just too lazy to go to the store. This is my shortcut. I used to fuss over perfectly chilled glasses but—let’s be honest—sometimes you just want to drink right out of the blender with a straw and call it a day. No judgement.
Here’s What You Need to Make It
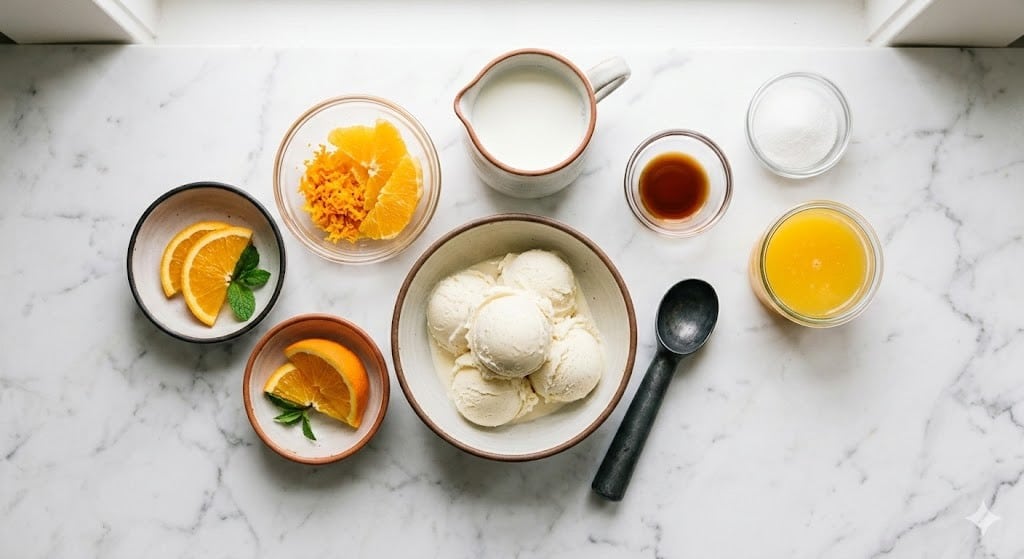
- 2 large scoops vanilla ice cream (I use classic, but honestly, whatever’s in the freezer goes—my grandma swears by French vanilla, but I can never taste the difference)
- 1/2 cup orange juice (store-bought is fine, but if you’ve got fresh, even better)
- 1/3 cup milk (whole milk makes it rich, but skim works when I’m pretending to be healthy)
- 1 teaspoon orange zest (sometimes I skip this if I don’t have oranges—don’t tell anyone)
- Optional: splash of vanilla extract (totally not essential, but gives it that “old-school soda shop” vibe)
- Whipped cream, for topping (the kind from a can will do, but homemade is great if you’re feeling fancy)
- Orange slices, for garnish—if you want to make it look Instagram-worthy
How I Throw It All Together
- Drop the ice cream, orange juice, milk, orange zest, and vanilla extract (if using) into your blender. Incidentally, I once tried to mix this by hand during a power outage—not my best idea; it needs a blender, trust me.
- Blend until things look smooth and creamy. If your blender starts to sound like it’s chewing gravel, add another splash of milk. This is honestly where I lean in and take a whiff, because it smells just like summer fairs.
- Do a quick taste test (yes, with your finger; who has time for clean spoons?), and add a bit more orange juice if you want more tartness or ice cream if you like it thicker. It’s all by feel here.
- Pour into one big glass or two smaller ones—sometimes I split it, sometimes not, depending on how my day’s gone.
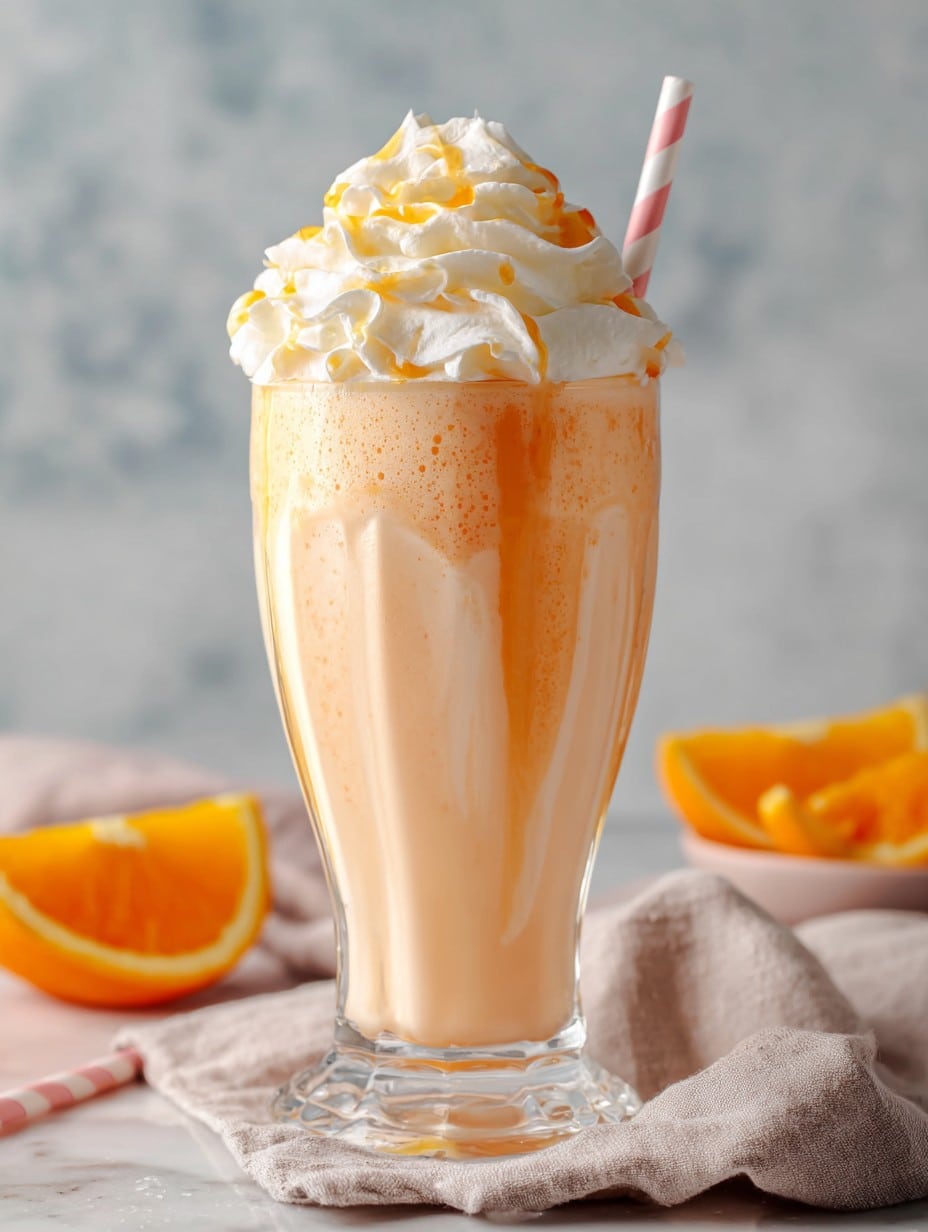
- Dollop with whipped cream, plop on a slice of orange, then snap a photo if that’s your thing. Sucking it through a straw is basically required.
Random Notes From Chaos in My Kitchen
- Actually, I find it works better if I zest the orange before juicing it. Otherwise, it’s a pain.
- If your ice cream is super hard, stick it in the microwave for ten seconds. Not a minute—ask me how I know.
- This is a great use for orange juice that’s gone a tad sour (not off, just a bit tangy—gives good zing).
Some Variations I’ve Dabbled With (and One Fail)
- Swapped vanilla ice cream for coconut—gives a tropical twist. My cousin swears by it (but I think it’s too much like a beach cocktail for breakfast).
- Added a glug of orange liqueur for a grown-up treat. Only when the kids are in bed, obviously.
- Tried substituting frozen yogurt once—came out too icy, so I don’t really recommend unless you’re out of options.
- If you’re dairy-free, almond or oat milk and vegan ice cream totally work, though the blend takes a few seconds longer.
What If You Don’t Have a Blender?
I said blender is essential earlier, but on second thought, you can mash everything up in a big jar and shake the living daylights out of it. It’s a bit lumpy but does the trick in a pinch. Good wrist workout.
How To Store (Like Anyone Has Leftovers)
Okay, technically you could keep any leftovers in the fridge for a day or two, but the texture gets a bit melty. Honestly, it rarely lasts an hour over here. If by some miracle you have extra, freeze it in popsicle molds for a tasty treat later—my niece loves this.
How We Serve ‘Em at My Place
The classic move is a tall glass with a fat straw, whipped cream mountains on top, and sometimes sprinkles (my niece is obsessed with them, so they end up everywhere). If it’s just me, I drink straight form the blender with a spoon. Side of cookies is never a mistake. Oh, and someone always steals the orange slice before I even sit down.
If You Want to Not Mess Up—Read This
- I once tried using warm orange juice (no idea why)—big mistake, melted the ice cream fast and it turned soupy.
- Let the ice cream soften a bit, but not fully melt. Too soupy, and it tastes like orange milk.
- If you forget the orange zest, don’t panic—it’s still delicious. Just a bit less zingy.
Questions My Friends Have Actually Asked (With Honest Answers)
- Can I use orange soda instead of juice? You can. It’s super sweet and pretty different, but if you like a more classic Creamsicle pop taste, it’ll do in a pinch. I did it once for a party—nobody complained!
- What if I don’t have whipped cream? Skip it or use marshmallow fluff, or just go plain. There’s no rule.
- Why is mine a weird color? Could just be your OJ or ice cream brand. Don’t worry—it’ll taste grand either way!
- Can I double it? For sure. Just make sure your blender’s big enough (and lid is on tight, trust me).
- Does this taste better after sitting? I actually think it’s best right away—gets a bit icy if left in the freezer too long, but the popsicles are a solid backup!
Anyway, now you know all my Creamsicle secrets. Orange you glad you gave this a shot? (Sorry, couldn’t help myself!)
Ingredients
- 2 large scoops vanilla ice cream (I use classic, but honestly, whatever’s in the freezer goes—my grandma swears by French vanilla, but I can never taste the difference)
- 1/2 cup orange juice (store-bought is fine, but if you’ve got fresh, even better)
- 1/3 cup milk (whole milk makes it rich, but skim works when I’m pretending to be healthy)
- 1 teaspoon orange zest (sometimes I skip this if I don’t have oranges—don’t tell anyone)
- Optional: splash of vanilla extract (totally not essential, but gives it that “old-school soda shop” vibe)
- Whipped cream, for topping (the kind from a can will do, but homemade is great if you’re feeling fancy)
- Orange slices, for garnish—if you want to make it look Instagram-worthy
Instructions
-
1Drop the ice cream, orange juice, milk, orange zest, and vanilla extract (if using) into your blender. Incidentally, I once tried to mix this by hand during a power outage—not my best idea; it needs a blender, trust me.
-
2Blend until things look smooth and creamy. If your blender starts to sound like it’s chewing gravel, add another splash of milk. This is honestly where I lean in and take a whiff, because it smells just like summer fairs.
-
3Do a quick taste test (yes, with your finger; who has time for clean spoons?), and add a bit more orange juice if you want more tartness or ice cream if you like it thicker. It’s all by feel here.
-
4Pour into one big glass or two smaller ones—sometimes I split it, sometimes not, depending on how my day’s gone.
-
5Dollop with whipped cream, plop on a slice of orange, then snap a photo if that’s your thing. Sucking it through a straw is basically required.
Approximate Information for One Serving
Nutrition Disclaimers
Number of total servings shown is approximate. Actual number of servings will depend on your preferred portion sizes.
Nutritional values shown are general guidelines and reflect information for 1 serving using the ingredients listed, not including any optional ingredients. Actual macros may vary slightly depending on specific brands and types of ingredients used.
To determine the weight of one serving, prepare the recipe as instructed. Weigh the finished recipe, then divide the weight of the finished recipe (not including the weight of the container the food is in) by the desired number of servings. Result will be the weight of one serving.
Did you make this recipe?
Please consider Pinning it!