Let Me Tell You About Pesto Grilled Cheese (It’s Worth the Mess)
Alright, you know how some days you just stare into the fridge like you’re waiting for inspiration to hit you in the face? (Been there more times than I care to admit.) That’s how my love affair with pesto grilled cheese got started. One rainy afternoon, the bread was looking a little sad, there was half a jar of pesto sulking in the corner, and—boom—lunch revelation. My first one was a glorious mess; cheese everywhere, but honestly, that just made it better. My younger sister still claims the pesto got her through finals week, so there you go, it’s brain food too—probably.

Why You’ll Love This (Or At Least My Family Does!)
I make this when I want something cozy but also a little bit fancy, you know? My family goes bonkers for anything with melty cheese, but the pesto just takes it to that “wow, did you really just make this at home?” place. If you’ve ever been bored by plain grilled cheese, or been personally victimized by dry sandwiches, this is the rescue boat. Plus, when my bread’s starting to go a bit…vintage, this is its last hurrah (not that there’s anything wrong with slightly stale bread—actually, it works better for this!).
What You’ll Need (Substitutions Totally Welcome)
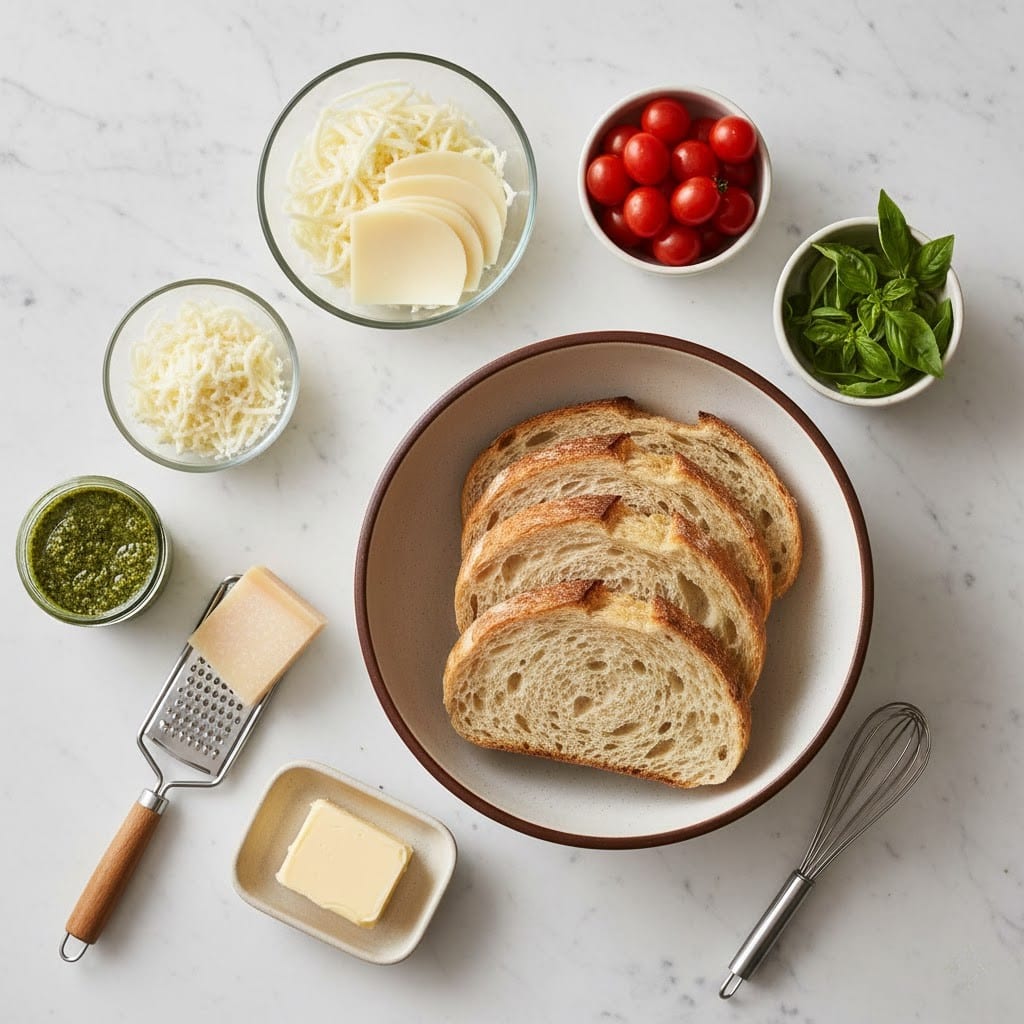
- 4 slices of bread (sourdough is dreamy, but basic sandwich bread totally works—my gran swears by Wonderbread. No judgment.)
- 2 tablespoons unsalted butter, softened (honestly, margarine works if that’s all you have—it’s happened)
- 4 slices mozzarella cheese (or try sharp cheddar if you’re feeling cheffy; even Swiss in a pinch!)
- 2 tablespoons pesto (homemade is great, but the jar from Aldi is what I usually grab)
- 1 tablespoon grated parmesan cheese (optional, but trust me—it gets all crispy and nutty)
- 1 tomato, thinly sliced (sometimes I skip this if I’m in a rush, but it really is nice)
- Pinch of black pepper (or a sneaky sprinkle of chili flakes when you want a little kick)
How To Make My Pesto Grilled Cheese (With Honest Commentary)
- Spread butter on one side of each bread slice. I usually make a bit of a mess here. Don’t panic if it’s uneven.
- On the other side of two bread slices, slather on a spoonful of pesto. If you’ve only got a silicone spatula, use that; I’ve even done this with the back of a soup spoon.
- Layer on the mozzarella slices over the pesto side, then add tomato slices if you like. Sprinkle on parmesan (don’t worry if some falls onto the counter). Finish with a pinch of black pepper.
- Close with the other bread slices, buttered side out—like a sandwich, obviously. This is where I always double-check that the butter’s facing out. It’s a rookie mistake, but I’ve done it more than once.
- Heat a frying pan (or skillet, whatever you call it) over medium-low heat. If you’ve got a non-stick, great! If not, add a tiny bit more butter just in case.
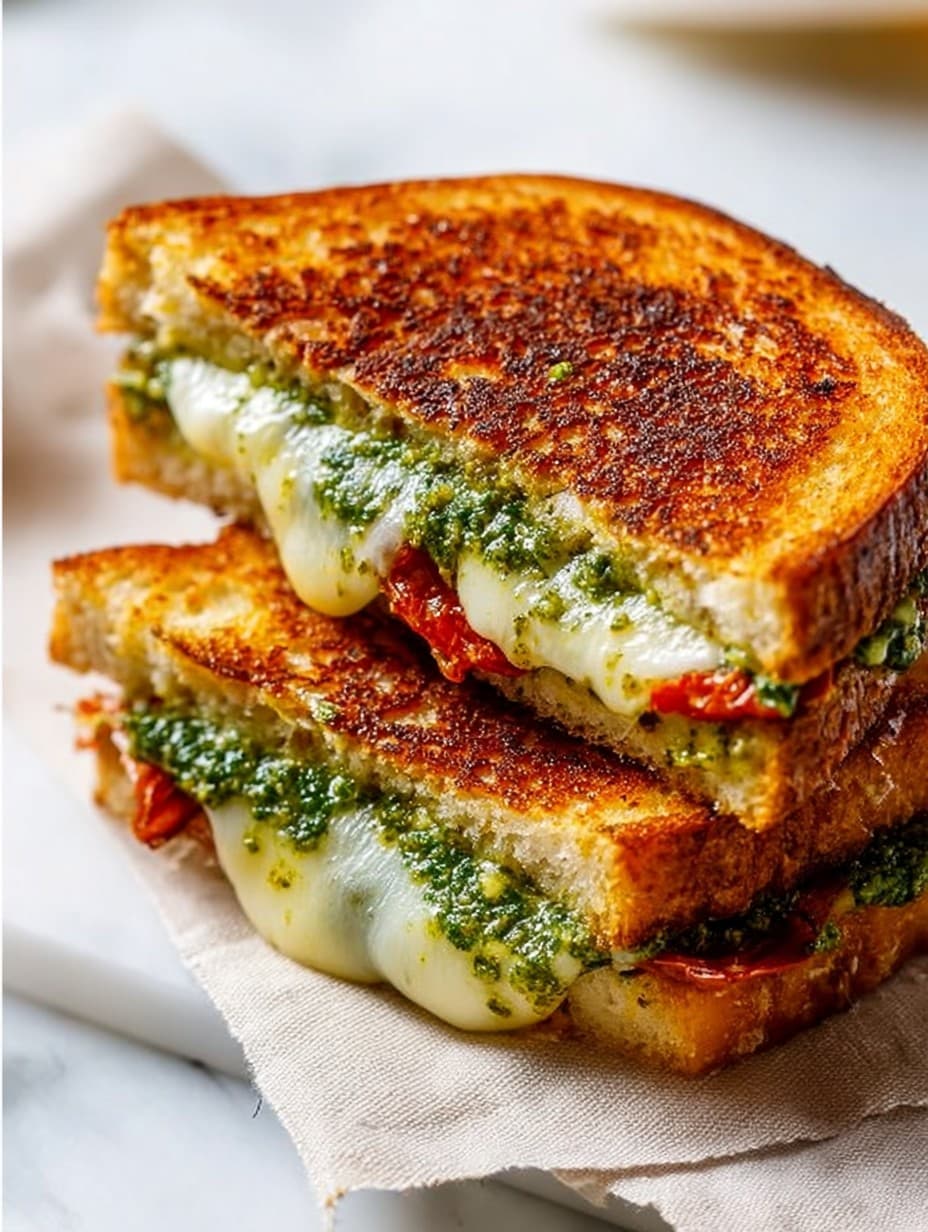
- Gently place your sandwiches in the pan. Cook for about 3–4 minutes per side. And hey, if you have to squish them down with a spatula, that’s legit—crispier edges! If the cheese escapes a little, just eat that crispy bit straight from the pan; it’s the cook’s treat.
- When both sides are golden and the cheese is gooey, pull them out and let them rest for a hot minute (I burned my tongue more than once rushing this).
- Slice diagonally if you’re feeling extra, or just bite in—no one’s judging.
Notes from My Messy Kitchen
- Bread that’s a day or two old tinges everything with nostalgia (and doesn’t get soggy as fast). Actually, fresh bread makes things a bit trickier.
- Homemade pesto is awesome, but honestly, half those jarred pestos are just fine—and far less work.
- I once tried this with vegan cheese because my cousin can’t do dairy. It melted, kind of… but definitely don’t expect the same gooeyness. Still tasty though.
Variations I’ve Tried (Some Good, Some…Less So)
- Added roasted red peppers—10/10 recommend!
- Swapped in goat cheese (got a bit too tangy for me, but my neighbor raved)
- Tried it with rye bread. Honestly, wasn’t my favorite; something about the pesto and rye was arguing on my tastebuds.
- If you’ve got leftover grilled veggies, just smoosh them in before grilling—this is how I cleaned out the fridge last Thursday.
Equipment You’ll Need (But Don’t Panic)
- Frying pan or skillet (no panini press? Who cares, a heavy plate on top works)
- Butter knife or spoon for spreading (I’ve legit used a clean finger before—don’t tell anyone)
- Spatula to flip (but sometimes, a pair of tongs is even easier, just watch your wrists)
How to Store It—If You Even Need To
Technically, you can keep leftovers in the fridge, wrapped up, for a day or two. They reheat okay in a toaster oven, not so much in the microwave. That said, in my house, they usually vanish off the plate before there’s even a crumb left. But if you’ve got superhuman willpower, try popping them back in a hot pan for maximum crispiness.
Serving Ideas (My Family’s Favorite Rituals)
- I always serve mine with tomato soup when it’s miserable outside. Dunking is basically mandatory.
- If it’s sunny and you wanna feel fancy, a bit of arugula on the side and a lemon wedge makes it brunchy.
- This is also weirdly good with a handful of crisps (potato chips) on the side. Or so my little brother claims.
Pro Tips I Learned the Hard Way
- Don’t crank the heat too high. I’ve rushed and burned the outside before the cheese even melted, and it’s a sad, sad thing.
- Let it sit for 2-3 minutes after cooking; otherwise you’ll lose a layer of skin off the roof of your mouth. Trust me, I have the scars.
- If the pesto starts leaking, that’s totally normal; it’s just spreading the flavor. Also, if you overdo the butter, your pan will get a little smoky—open a window if you’re going wild.
FAQ (Seriously, These Have All Come Up Before!)
- Can I use gluten-free bread? Yep, absolutely! It might not get quite as crunchy, but it’ll still be dreamy. Just watch your frying pan—some gluten-free slices can be a bit more delicate.
- Which cheese melts best? Mozzarella’s my go-to, but honestly, cheddar gets excellent mega-melty too. Havarti was… okay. (Bit bland though.)
- My pesto’s super oily—am I doing something wrong? Nah, that’s normal! Just give the jar a stir before using. Actually, sometimes I even dab a bit off if it’s extra greasy that day.
- Can I make this vegan? For sure! Use plant-based cheese and either vegan pesto or just smash up some basil with olive oil and garlic. Is it exactly the same? Not quite—but it’s good, promise.
- How do you keep the cheese from escaping? Big slices help. Or, don’t stress it—those crispy cheese stragglers are kind of the best part, aren’t they?
- Ever tried adding protein? Oh, only about a million times. Sliced roast chicken, prosciutto, or—I know it sounds odd—leftover roasted chickpeas; it all works, just don’t overload or you’ll be wrestling your sandwich closed.
Anyway, next time you’re staring at your fridge and wondering what to make for lunch, give this pesto grilled cheese a go. If nothing else, it’ll give you an excuse to clean out a shelf or two, and who knows—maybe you’ll start a new sandwich tradition, too. (And yes, that was definitely a piece of crispy cheese I just ate while writing this.)
Ingredients
- 4 slices of bread (sourdough is dreamy, but basic sandwich bread totally works—my gran swears by Wonderbread. No judgment.)
- 2 tablespoons unsalted butter, softened (honestly, margarine works if that’s all you have—it’s happened)
- 4 slices mozzarella cheese (or try sharp cheddar if you’re feeling cheffy; even Swiss in a pinch!)
- 2 tablespoons pesto (homemade is great, but the jar from Aldi is what I usually grab)
- 1 tablespoon grated parmesan cheese (optional, but trust me—it gets all crispy and nutty)
- 1 tomato, thinly sliced (sometimes I skip this if I’m in a rush, but it really is nice)
- Pinch of black pepper (or a sneaky sprinkle of chili flakes when you want a little kick)
Instructions
-
1Spread butter on one side of each bread slice. I usually make a bit of a mess here. Don’t panic if it’s uneven.
-
2On the other side of two bread slices, slather on a spoonful of pesto. If you’ve only got a silicone spatula, use that; I’ve even done this with the back of a soup spoon.
-
3Layer on the mozzarella slices over the pesto side, then add tomato slices if you like. Sprinkle on parmesan (don’t worry if some falls onto the counter). Finish with a pinch of black pepper.
-
4Close with the other bread slices, buttered side out—like a sandwich, obviously. This is where I always double-check that the butter’s facing out. It’s a rookie mistake, but I’ve done it more than once.
-
5Heat a frying pan (or skillet, whatever you call it) over medium-low heat. If you’ve got a non-stick, great! If not, add a tiny bit more butter just in case.
-
6Gently place your sandwiches in the pan. Cook for about 3–4 minutes per side. And hey, if you have to squish them down with a spatula, that’s legit—crispier edges! If the cheese escapes a little, just eat that crispy bit straight from the pan; it’s the cook’s treat.
-
7When both sides are golden and the cheese is gooey, pull them out and let them rest for a hot minute (I burned my tongue more than once rushing this).
-
8Slice diagonally if you’re feeling extra, or just bite in—no one’s judging.
Approximate Information for One Serving
Nutrition Disclaimers
Number of total servings shown is approximate. Actual number of servings will depend on your preferred portion sizes.
Nutritional values shown are general guidelines and reflect information for 1 serving using the ingredients listed, not including any optional ingredients. Actual macros may vary slightly depending on specific brands and types of ingredients used.
To determine the weight of one serving, prepare the recipe as instructed. Weigh the finished recipe, then divide the weight of the finished recipe (not including the weight of the container the food is in) by the desired number of servings. Result will be the weight of one serving.
Did you make this recipe?
Please consider Pinning it!