Let’s Talk About Sheet Pan Pizza (aka Life Saver Pizza)
Sheet pan pizza and I? We go way back – like movie-nights-with-mismatched-pajamas far back. It’s the first thing I cooked with my little cousin who, at the time, thought sauce belonged on everything (even toast). If you’re ever craving that “I just want a big ‘ol shareable pizza” feeling, but maybe you don’t feel like leaving the house, this is the recipe. Seriously, I’ve made this for impromptu hangouts, school lunchboxes, and more than one “I forgot to grocery shop” night. It’s foolproof, except the time my dog licked half the cheese while it cooled (no worries, we ended up ordering takeout that night).

Why You’ll Love (Or At Least Like) My Sheet Pan Pizza
I make this when I can’t be bothered to think about dinner (which is, well, often). My family goes bananas for crispy edges and the endless topping combos – sometimes too many, really – but that’s kinda the point. This thing can feed a crowd or, if you live solo, you’ll end up with lunch for days. Plus: it’s all on one pan, so cleanup is a breeze. I used to hate scrubbing burnt cheese as much as the next person, but honestly, it just peels right off the parchment, and then you snack on it. Is this my best cooking confession? Maybe.
What You’ll Need (But Honestly, Feel Free To Wing It)
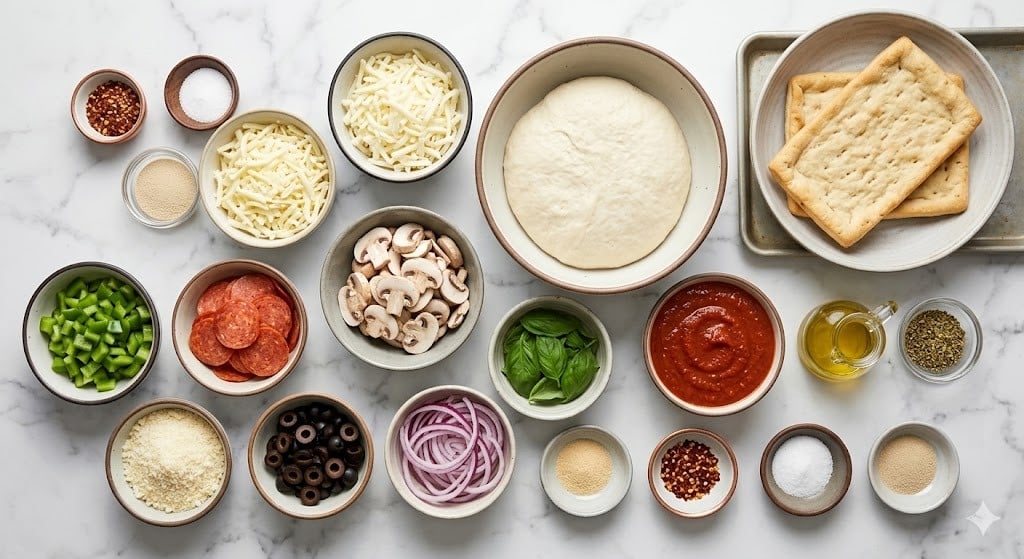
- 1 pound pizza dough (store-bought is totally fine – my grandmother always insisted on making it form scratch, but I can’t always be bothered)
- 1 cup pizza sauce (you could use marinara, or even that jar of tomato basil – I won’t judge)
- 2 cups shredded mozzarella cheese (sometimes I go wild and use a pizza blend, or whatever’s lurking in the fridge)
- 1/2 cup grated parmesan cheese (optional, but my uncle swears by it)
- 1 to 2 cups assorted toppings (think pepperoni, mushrooms, onions, peppers, olives – honestly, anything goes, even pineapple if you’re brave)
- 2 tablespoons olive oil
- 1 teaspoon dried oregano (optional, though I always seem to forget it and nobody notices)
- Flour, for dusting
- Parchment paper (if you don’t have it, just oil the pan a bit extra – works fine in a pinch)
Making Your (No Fuss) Sheet Pan Pizza
- Preheat your oven to 475°F (245°C) – it needs to be hot, like “I just got in the car wearing black jeans in July” hot.
- Grab a rimmed baking sheet (approx. 13×18 inches). Line with parchment, or just oil it up, whatever you’ve got going.
- Sprinkle flour on your counter (not too much, or everything gets caked to your hands). Plop out your dough, stretch and press it into a rough rectangle – does not have to be perfect, mine rarely is. If it keeps shrinking back, let it rest a minute; dough gets cranky sometimes.
- Lay the dough onto your sheet pan. Pour a little olive oil on top and spread it with your fingers, making sure the edges get some love – this is how you get those delicious crispy bits.
- Spoon the pizza sauce over the dough. Spread it almost to the edges (I leave about half an inch for a crisp border). This is where I usually sneak a taste – entirely necessary, I promise.
- Sprinkle the mozzarella on, then parmesan. Go heavy or light, honestly depends on my mood. I always drop a little on the pan itself and call it the “chef’s treat” if it crisps up.
- Add your toppings, evenly-ish. Too many and it gets a bit soggy, but that’s a personal debate in my house. (Sausage and peppers is my jam; my cousin puts corn. I still love him.)
- Finish with oregano, if you have it. Or not. Who’s judging?
- Bake 15-18 minutes, but start checking at 15. Most times, I rotate the pan halfway through (unless I’m distracted by Netflix) for an even golden crust and bubbly cheese.
- Let it cool for a few minutes – if you can wait. Slide pizza onto a big board, slice it up, and watch it disappear.
Lil’ Notes from Someone Who’s Been There
- If your dough tears, just pinch it back together. No biggie.
- Sometimes I brush the crust with garlic butter before baking… game changer, though messy fingers are guaranteed.
- Don’t panic if the edges look a little too brown. They always taste better a little crispier (at least in my opinion).
Variations I’ve Tried So You Don’t Have To (Or Maybe You Should)
- Buffalo chicken pizza: swap marinara for buffalo sauce, scatter cooked chicken and blue cheese. Once tried with leftover rotisserie chicken – not bad!
- Veggie overload: literally every vegetable in the fridge, but, word of warning, zucchini makes it a bit watery; maybe skip it or dry it off first (ask me how I know…)
- White pizza: skip the red sauce, slather with ricotta, parmesan, garlic, and spinach – so good, but ricotta sometimes pushes crust edges over the top in the oven (which is, honestly, kinda fun to pick off and eat)
Do You Really Need Special Equipment?
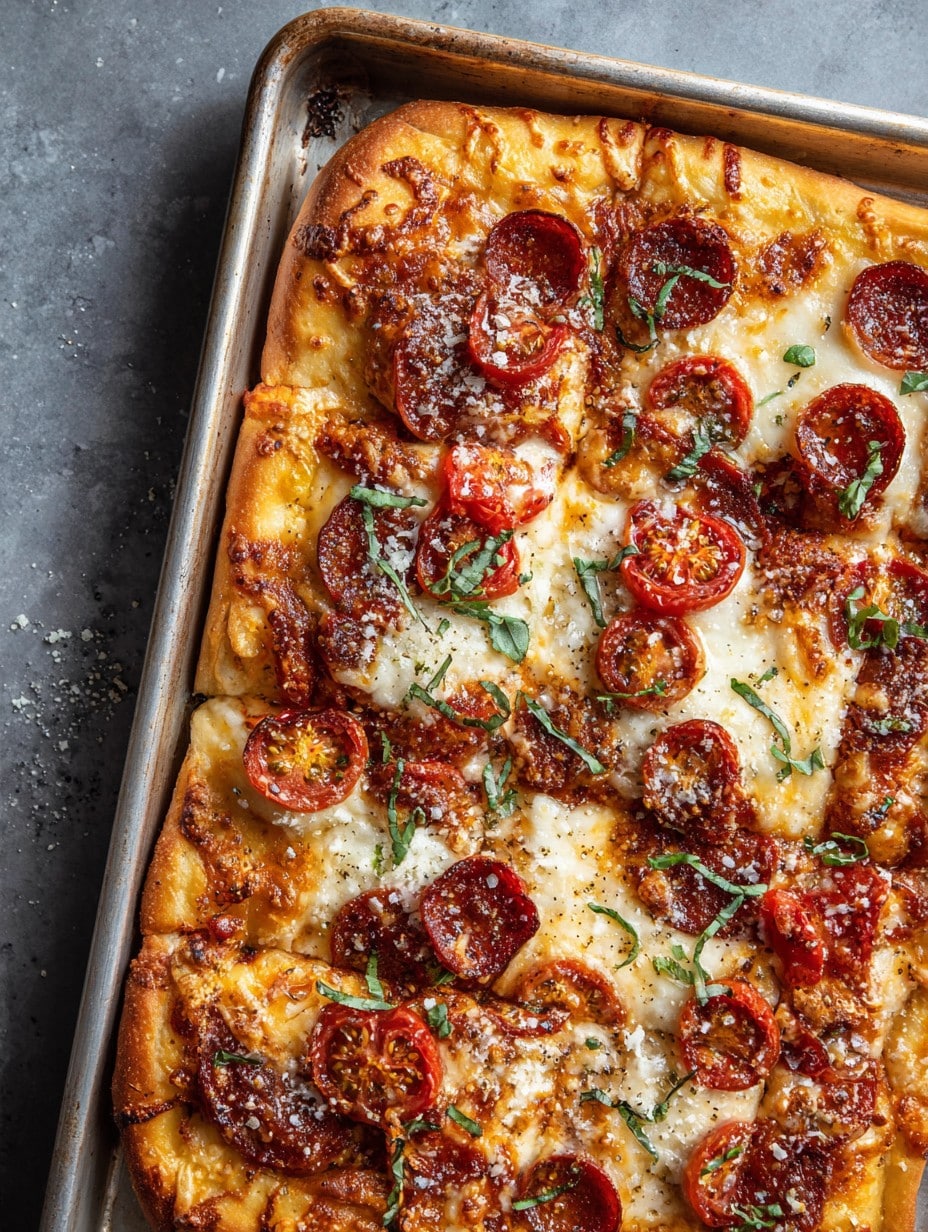
You just need a baking sheet, honestly. Rolling pin? Sure, but I’ve pressed out dough with my hands plenty of times. Parchment paper is nice for easy cleanup, but a little extra oil does the trick if you’re out (I’ve done both while half-asleep).
How To Store (If You Miraculously Have Leftovers)
Tuck any left over slices in an airtight container and pop them in the fridge; they’re good for 2 or 3 days. Reheat in the oven (or toaster oven), gets the cheese all bubbly again. But honestly, in my house it never lasts more than a day! Cold pizza for breakfast is a thing here – don’t knock it till you’ve tried it.
Best Ways to Serve Sheet Pan Pizza
Most times, we slice it into big rectangles and scoop it on paper plates, eat straight off the pan if no one’s looking. If friends are over, I’ll pile up a salad and some crunchy pickles on the side. Sometimes there’s ranch, sometimes there’s hot honey (I highly recommend the hot honey – just trust me, okay?).
Lessons Learned So You Don’t Have To Repeat My Mistakes
- I once tried rushing the dough and didn’t let it warm up from the fridge – pizza turned out more like a thick cracker. Let the dough rest a bit (10-15 minutes on the counter is enough).
- Go light on the sauce unless you really like things messy. Too much and you’ll need a fork, which defeats the purpose, right?
- Don’t overload the toppings, or risk the dreaded “soggy center” – been there, not worth it, unless you like floppy pizza.
FAQ (Yes, People Actually Ask Me These)
- Q: Can I use whole wheat dough?
A: Yup, but it’s a bit denser. I, um, sometimes cheat and do half-and-half just to keep everyone happy. - Q: What size sheet pan works if mine’s a bit smaller?
A: Don’t stress! Just press the dough a bit thicker, it’ll be more like Sicilian-style. Bake a tad longer (maybe another minute or two). - Q: Cheese alternatives?
A: Oh absolutely. I’ve tried vegan mozz—actually works pretty well, but melts different. Goat cheese can be fun too, especially if you pile on roasted veggies. - Q: Can I freeze this?
A: Oh, totally. Assemble the whole thing (uncooked), then wrap it up and freeze. Bake it straight from frozen, just add maybe 5-8 minutes to the cooking time, check it after 20 min to be safe. - Q: The crust sticks! What gives?
A: Are you oiling the pan or using parchment? Both work—if it still sticks, next time crank up the oil a bit (but honestly, I once used wax paper and yeah, don’t do that, it’s a mess!).
It’s a pizza night, except you get to choose all the pizza rules. That’s the best part, isn’t it?
Ingredients
- 1 pound pizza dough (store-bought is totally fine – my grandmother always insisted on making it form scratch, but I can’t always be bothered)
- 1 cup pizza sauce (you could use marinara, or even that jar of tomato basil – I won’t judge)
- 2 cups shredded mozzarella cheese (sometimes I go wild and use a pizza blend, or whatever’s lurking in the fridge)
- 1/2 cup grated parmesan cheese (optional, but my uncle swears by it)
- 1 to 2 cups assorted toppings (think pepperoni, mushrooms, onions, peppers, olives – honestly, anything goes, even pineapple if you’re brave)
- 2 tablespoons olive oil
- 1 teaspoon dried oregano (optional, though I always seem to forget it and nobody notices)
- Flour, for dusting
- Parchment paper (if you don’t have it, just oil the pan a bit extra – works fine in a pinch)
Instructions
-
1Preheat your oven to 475°F (245°C) – it needs to be hot, like “I just got in the car wearing black jeans in July” hot.
-
2Grab a rimmed baking sheet (approx. 13×18 inches). Line with parchment, or just oil it up, whatever you’ve got going.
-
3Sprinkle flour on your counter (not too much, or everything gets caked to your hands). Plop out your dough, stretch and press it into a rough rectangle – does not have to be perfect, mine rarely is. If it keeps shrinking back, let it rest a minute; dough gets cranky sometimes.
-
4Lay the dough onto your sheet pan. Pour a little olive oil on top and spread it with your fingers, making sure the edges get some love – this is how you get those delicious crispy bits.
-
5Spoon the pizza sauce over the dough. Spread it almost to the edges (I leave about half an inch for a crisp border). This is where I usually sneak a taste – entirely necessary, I promise.
-
6Sprinkle the mozzarella on, then parmesan. Go heavy or light, honestly depends on my mood. I always drop a little on the pan itself and call it the “chef’s treat” if it crisps up.
-
7Add your toppings, evenly-ish. Too many and it gets a bit soggy, but that’s a personal debate in my house. (Sausage and peppers is my jam; my cousin puts corn. I still love him.)
-
8Finish with oregano, if you have it. Or not. Who’s judging?
-
9Bake 15-18 minutes, but start checking at 15. Most times, I rotate the pan halfway through (unless I’m distracted by Netflix) for an even golden crust and bubbly cheese.
-
10Let it cool for a few minutes – if you can wait. Slide pizza onto a big board, slice it up, and watch it disappear.
Approximate Information for One Serving
Nutrition Disclaimers
Number of total servings shown is approximate. Actual number of servings will depend on your preferred portion sizes.
Nutritional values shown are general guidelines and reflect information for 1 serving using the ingredients listed, not including any optional ingredients. Actual macros may vary slightly depending on specific brands and types of ingredients used.
To determine the weight of one serving, prepare the recipe as instructed. Weigh the finished recipe, then divide the weight of the finished recipe (not including the weight of the container the food is in) by the desired number of servings. Result will be the weight of one serving.
Did you make this recipe?
Please consider Pinning it!




