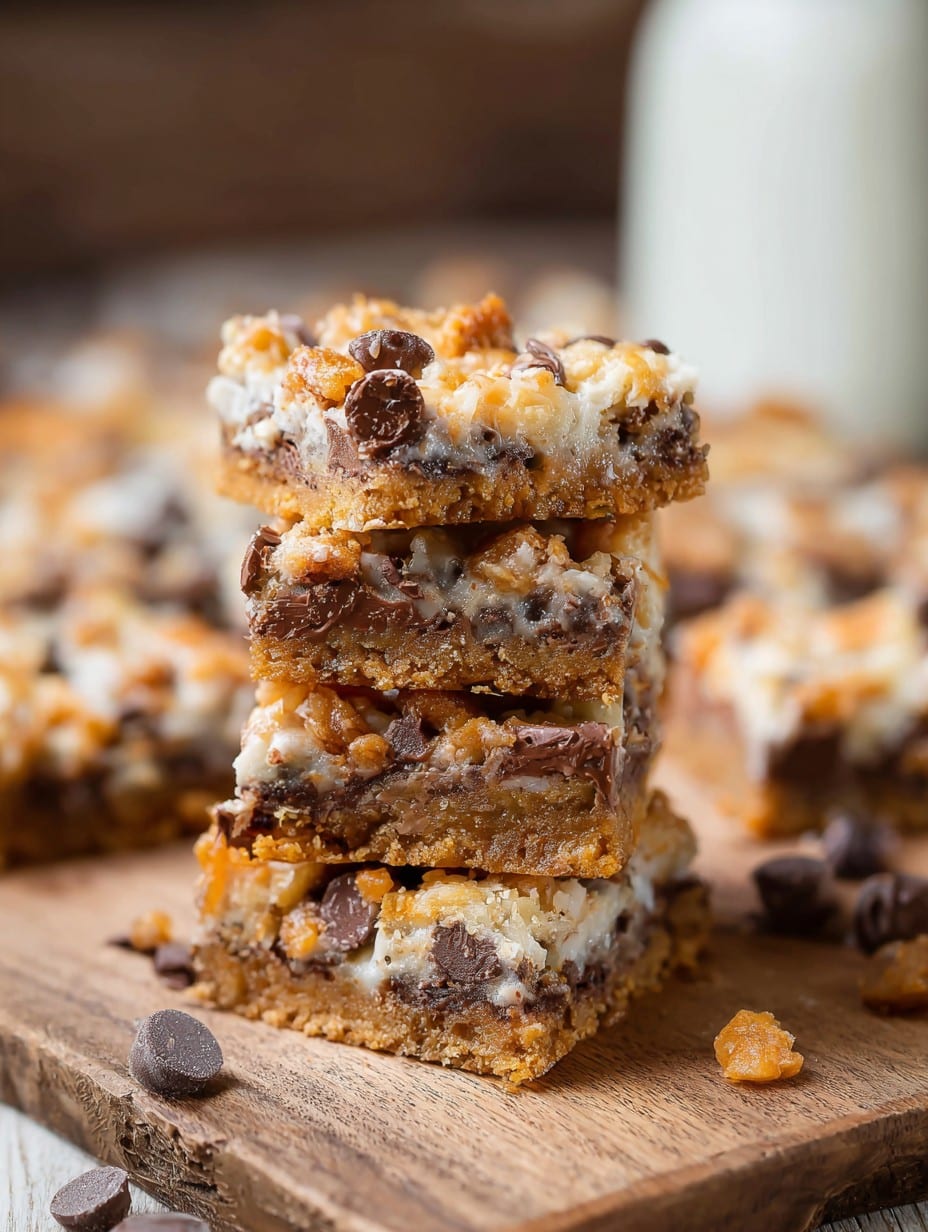
Alright, let me tell you about 7 Layer Bars, because if ever there was a recipe that brought out the snack gremlins in my household, it’s this one. The first time I made these, I actually burned the coconut (blame an overenthusiastic phone call from my cousin). But honestly, they’re so foolproof it nearly takes effort to mess them up too badly—my kind of dessert. They’re ooey, gooey, sweet, and crunchy—all the good snack adjectives in one pan. Oh, and pro tip: do not leave them unattended unless you want to find just a mysterious trail of crumbs later. Not that I’m naming names, but you know who you are.

Why You’ll Love This (Or at Least Crave It!)
I make these bars when, frankly, I need to bribe my family into forgiving me for not cooking dinner (again). My kids go nuts for them, and they’re usually fighting over the last sticky square (the pan corners are prime real estate, by the way). If you’re suspiciously eyeing the sweetened condensed milk, trust me, I used to think it was too much too; and then I tasted the magic. Also, let’s be honest—these bars are basically an edible hug. No one has to know you made them in your pajamas.
What You’ll Need (with my swaps and confessions)
- 1/2 cup (1 stick) butter, melted (I used to use salted, now I just use whatever’s on sale)
- 1 1/2 cups graham cracker crumbs (sometimes I smash up digestive biscuits if that’s all I have—just whack ’em with a rolling pin)
- 1 cup semisweet chocolate chips (use milk chocolate if you love sweet on sweet, or if that’s what is lurking in the pantry)
- 1 cup butterscotch chips (or swap for white chocolate; once I tried peanut butter chips, and, well, not my greatest moment)
- 1 cup sweetened shredded coconut (my grandma swore by the fine-cut stuff, but the regular sort works fine—don’t stress it)
- 1 cup chopped nuts (pecans, walnuts, or even slivered almonds, although sometimes I go rogue and skip them altogether for my nut-averse pal)
- 1 (14 oz) can sweetened condensed milk (Brand doesn’t matter; if you get the low-fat version, the universe won’t implode… but maybe you’ll notice)
How to Throw These Together (with my asides)
- Preheat your oven to 350F (175C). Stick a rack more or less in the middle—if yours is wonky and off-centre, don’t sweat it.
- Line a 9×13-inch baking pan with parchment paper, leaving some overhanging on the sides (helps you yank the bars out later). No parchment? Just grease the life out of your pan with butter.
- Pour melted butter into the pan. Sprinkle the graham cracker crumbs on top. Mix and mash them into a pretty even layer. Pat it down with your hand or the back of a spoon—this is where I always get some stuck under my fingernails.
- Layer on the chocolate chips, then the butterscotch chips. No need for perfection—just sort of scatter them all over. The coconut goes next, then the nuts. Pile them up, or be tidy if that’s your thing.
- Now, drizzle that sweetened condensed milk all over the top. Try to hit every corner (I once missed a spot and ended up with a dry edge, so now I just squeeze the can, tip to tip).
- Bake for 25 to 30 minutes—tops should turn golden and bubbly. Don’t panic if the corners look a bit more toasted; that’s just extra-crispy goodness. Also, your kitchen will smell like a sweet shop exploded, in a good way.
- Let them cool completely in the pan, if you can wait—which I never do, so I’m warning you, hot bars are a lava hazard.
- Once cool, lift them out (that parchment trick), then slice into squares. This is when I shamelessly eat the uneven pieces “for quality control.”
Notes (aka things I learned the sticky way)
- If you accidentally use less butter in the crust, they’ll still hold together. They’re surprisingly forgiving.
- Coconut browning before the bars are done? Tent with a bit of foil for the last 10 minutes. Actually, I find it works better if you loosely cover it rather than press the foil down; otherwise, the coconut kind of welds to the foil. Learned that one the, er, crunchy way.
- The bars might look a bit wobbly or oily when they come out of the oven—let them cool! They firm up as they chill. I used to panic and overbake, but patience pays off here.
Variations I’ve Tried (…the good, the bad, and the ugly)
- Swapping butterscotch chips for peanut butter chips was a little intense—unless you’re unreasonably into peanut butter, maybe think twice.
- Tried a gluten-free graham cracker and honestly, it tasted just as good! Not all experiments end in disaster.
- Adding a layer of mini marshmallows sounded genius in my head. In real life? Turned into a sticky mess that glued itself to the pan, so maybe don’t go that way.
Do You Really Need Fancy Equipment?
I say 9×13-inch pan, but, listen—if all you’ve got is an 11×7, just layer it a bit thicker. Did it once in a square brownie tin; took a bit longer in the oven, but still tasted ace. No parchment? Butter the bejeezus out of the pan and make an offering to the kitchen fairies.
How Do You Store ‘Em? (If They Survive That Long)
In airtight containers, at room temp, they’re good for 4 days. But to be honest, a tray’s never survived more than 24 hours at my place. Fridge? They’ll firm up nice and chewy, which I kind of love with coffee. Or—just eat them straight out of the tin. No one’s judging here (except maybe my nosy neighbor who always “drops by” when I’m baking).
Serving Ideas—For When You’re Feeling Fancy
We usually just pile them on a plate and dig in, but for birthdays, I’ll cut them into triangles and arrange in a spiral because it makes me feel like I’ve got my life together. Or crumble a bar over vanilla ice cream, which is, I’m sorry, better than most sundae toppings from the shops.
Pro Tips I’ve Learned (ahem, sometimes painfully)
- Let them cool completely before trying to slice… I once tried to cut hot bars, and what I got was more of a goo avalanche than anything sliceable.
- Don’t skip greasing the corners of the pan. I did once, and found myself chiseling bars out with a butter knife—still ate them, but they weren’t pretty.
Questions I’ve Actually Heard (& My Real Answers)
Can you freeze 7 Layer Bars?
Yep! Cut into squares, freeze on a tray, then toss in a container. They keep for a month or two. Thaw at room temp—or eat frozen, if you’re into that sort of thing.
Why are my bars runny?
Didn’t let them cool, did you? Happens to the best of us. They set up as they cool, so patience is the name of the game.
Can you skip the nuts?
Sure can. Or switch them for more chips, if you want. My friend hates nuts, so I usually make a “nutless” batch just for her (not that I’m enabling her pickiness or anything…)
Why are they sometimes called Magic Bars?
Honestly, I have no idea who started that. Probably someone who thought 7 Layer Bars didn’t sound whimsical enough. Same thing, different name!
And, random aside—did you ever read ingredient lists for fun as a kid? Or just me? These bars, seven layers or not, were a real math challenge as a child… I always lost count and just dumped everything in. Still worked.
Ingredients
- 1 1/2 cups graham cracker crumbs
- 1/2 cup unsalted butter, melted
- 1 cup semi-sweet chocolate chips
- 1 cup butterscotch chips
- 1 cup sweetened shredded coconut
- 1 cup chopped walnuts or pecans
- 1 (14 oz) can sweetened condensed milk
- 1/2 cup white chocolate chips
Instructions
-
1Preheat the oven to 350°F (175°C). Grease a 9×13 inch baking pan or line with parchment paper.
-
2In a medium bowl, combine graham cracker crumbs and melted butter. Press the mixture evenly into the bottom of the prepared pan to form the crust.
-
3Sprinkle semi-sweet chocolate chips, butterscotch chips, white chocolate chips, shredded coconut, and chopped walnuts evenly over the crust.
-
4Drizzle the sweetened condensed milk evenly over all the layers.
-
5Bake in the preheated oven for 25 minutes, or until the top is golden and bubbly. Allow to cool completely in the pan before cutting into bars.
Approximate Information for One Serving
Nutrition Disclaimers
Number of total servings shown is approximate. Actual number of servings will depend on your preferred portion sizes.
Nutritional values shown are general guidelines and reflect information for 1 serving using the ingredients listed, not including any optional ingredients. Actual macros may vary slightly depending on specific brands and types of ingredients used.
To determine the weight of one serving, prepare the recipe as instructed. Weigh the finished recipe, then divide the weight of the finished recipe (not including the weight of the container the food is in) by the desired number of servings. Result will be the weight of one serving.
Did you make this recipe?
Please consider Pinning it!!




