Alright, here’s how I usually make Peppermint Bark
Let me tell you, nothing says “the holidays are here” to me quite like that first whiff of chocolate melting on the stove and the loud, extremely satisfying sound of smashing candy canes with a rolling pin (pro tip: do it inside a dish towel or else, well, let’s just say, you’ll find peppermint bits until summer!). My kids get way too involved whenever I make this; one year, my son tried using his tiny plastic hammer, which was cute, but also a questionable choice for the candy’s health… Anyway, peppermint bark just feels like the most cheerful, unfussy treat I can whip up, whether in December or, let’s be real, when I’m rooting through the pantry and find leftover canes in March.
Why You’re Going to Totally Love This
I make Peppermint Bark when I’m in the mood for something sweet but can’t be bothered to measure flour or preheat the oven for 20 minutes straight. My family goes mad for this (especially since it’s basically chocolate topped with more chocolate and candy). Honestly, I’ve had rounds where my white chocolate seized and I thought I’d ruined it—turns out, even wonky bark gets gobbled up. And if you need a cheap-ish gift, pop some bark in a tin and people will think you’re Martha Stewart’s secret cousin.
The Stuff You’ll Need
- 250g (about 1.5 cups) semi-sweet chocolate chips (Sometimes I just use a regular ol’ chocolate bar and break it up—Trader Joe’s works, but so does the cheap grocery brand. My grandma swore by Hershey’s, but I don’t fuss much.)
- 200g (a big cup) white chocolate chips or chunks (Ghirardelli is fancy, but honestly, whatever’s on sale)
- About 6–8 peppermint candy canes (or a handful of peppermint candies—sometimes I use whatever’s lurking in the candy drawer)
- 1/2 tsp vegetable oil (optional—it helps with melting if your chocolate’s grumpy)
- 1/4 tsp peppermint extract (honestly, sometimes I forget this and it’s still good; Nielsen-Massey is my splurge, if you’re curious)
How I Actually Make This—Step by Step (Well, Mostly Step by Step)
- Line a pan: Grab a baking sheet and line it with parchment. Foil works in a pinch (I’ve even used wax paper when desperate—don’t judge me).
- Smash your candy: Pop those candy canes in a zip-top bag, wrap it with a tea towel, and bash away. Go wild. You want small chunks and a little peppermint dust.
- Melt the dark chocolate layer: Either microwave chocolate in 30-second bursts (stir like crazy after each round) or use a double boiler on the stove. If your chocolate looks dry or stubborn, pour in a splash of vegetable oil. Spread it evenly over the parchment—doesn’t have to be perfect. I use an offset spatula if I’m feeling fancy; otherwise, a butter knife works just fine.
- Chill it: Toss the tray in the fridge for 10-ish minutes. Or leave it on the patio if it’s cold where you live—works just as well. (This is where I usually sneak a taste of the bowl, not gonna lie.)
- Melt white chocolate: This part can be tricky. White chocolate is fussy—it seizes if water gets in, and sometimes I get distracted and let it go too long in the microwave. If this happens, just stir in a bit more oil and cross your fingers. Melt in 20-second bursts and don’t walk away!
- Stir in peppermint extract: Add it right after melting, then quickly spread the white layer over your cooled dark chocolate. Try not to press too hard or the layers will swirl together (unless you’re feeling artsy—that’s cool too).
- Sprinkle with peppermint bits: Do this fast while it’s still gooey on top, or the candy won’t stick. You can press them down a wee bit if you like.
- Chill again: Back into the fridge for, I don’t know, 30 minutes? Go have a cuppa tea and let it firm up like a proper slab.
- Break into pieces: Snap it up by hand, or cut with a big sharp knife if you want ‘nice’ edges (personally, I like jagged bits—looks more homemade, right?).
Notes, Because I’ve Learned the Hard Way
- I used to think white chocolate was impossible to melt—actually, I find it works better if I ignore the instructions and just go slow with the microwave, 20 seconds at a time, no more.
- Don’t overthink the candy cane chunks: if some bits are dusty or uneven, that’s totally normal (my cousin once tried sifting them—don’t bother!).
- Sometimes my layers swirl together, usually when I get hasty—it tastes the same, promise.
If You Fancy Mixing Things Up
- One year, I tossed in crushed Oreos on top with the candy. It looked wild, but the kids loved it.
- I tried using milk chocolate once instead of semi-sweet; it was okay, but I think it turns out a bit too sweet this way—depends if you have a mega sweet tooth.
- Dropped a handful of pretzels on the white chocolate once in a moment of madness. Wouldn’t recommend it, but it was…interesting.
- You can use almond bark instead of chocolate chips if you can find it (it melts fuss-free; can’t get it where I live anymore, though—go figure).
Equipment—Or, What I Use When I Can Find It
- Baking sheet (I’ve also used a pizza pan, and once just lined a big chopping board and stuck it in the fridge; works fine!)
- Parchment paper (or foil, or even wax paper, if that’s what you’ve got)
- Microwave-safe bowls (but if all you’ve got is a saucepan, just melt on the hob over low heat)
- Rolling pin for crushing canes—wine bottle once did the trick for me when I couldn’t find mine

How to Store It (If It Even Lasts)
Stick pieces in an airtight box or tin. It’ll last a week or two at room temp—or longer in the fridge if you don’t mind it extra cold. Though honestly, in my house it never lasts more than a day; no joke. Oh, and if you want to gift it, pop a piece of parchment between the layers to stop the candy bits sticking to everything.
How We Serve It (And Why the Dog Shouldn’t Have Any)
I like to break it up onto a big plate and pretend I made it all from scratch five minutes ago. Great for nibbling with a cuppa, or, as my brother-in-law does, hiding at the back of the fridge behind some limp lettuce. Tradition in our house: it shows up on Christmas Eve, but weirdly, someone will always sneak a chunk for breakfast on Boxing Day. Absolutely not dog-friendly, though—just saying.
Lessons I’ve Picked Up Along the Way (AKA: Don’t Do What I Did)
- I once tried rushing the chilling step and ended up with a weird, marbled mess—not the end of the world, but definitely less pretty. Patience, as my nan used to say, really is a virtue.
- If you use cheap white chocolate, sometimes it’s a bit yellowy, but once the candy canes are piled on who’s going to notice?
Wait, Is That a Real Question? (FAQs I Actually Get Asked)
- Can I use different flavors? Yep! I’ve tried orange extract in the white chocolate and, actually, it was surprisingly good. Just go easy on it so you don’t overpower the mint.
- Does it freeze well? Sort of. It technically works, but sometimes the candy canes get weirdly sticky when you thaw them—I’d just make it fresh if you can.
- How do I make sure my chocolate doesn’t burn? Oh mate, just don’t microwave too long. Start with less time and check. You can find detailed chocolate-melting tips at Serious Eats (I’ve burnt enough chocolate to know…)
- What if I don’t have a microwave? Just set a bowl over simmering water on the hob. Here’s a handy guide from Sally’s Baking Addiction—her photos are way fancier than anything I can manage.
- Can I make this dairy-free? Probably? I’ve not done it, but a mate of mine swears by Enjoy Life chocolate chips and vegan white chocolate from Vivo Life. Let me know if you try it!
(And if you’ve read down this far, you deserve a piece—even if it’s just virtual!)
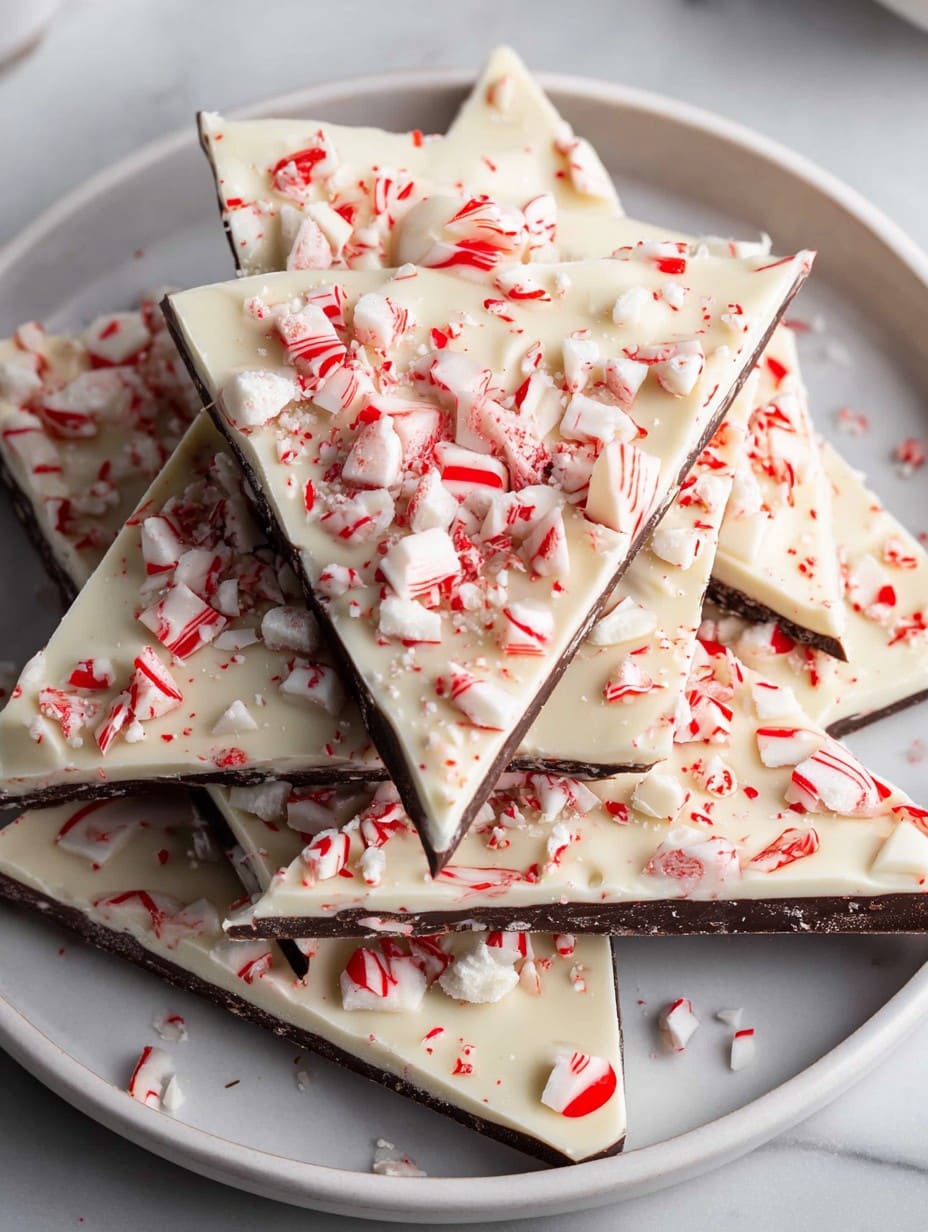
Ingredients
- 8 oz bittersweet or semisweet chocolate, chopped
- 8 oz white chocolate, chopped
- 1/2 tsp peppermint extract
- 2/3 cup crushed peppermint candies or candy canes
- 1 tbsp coconut oil or vegetable shortening (optional, for smoother chocolate)
- Pinch of fine sea salt
Instructions
-
1Line a baking sheet with parchment paper or a silicone baking mat.
-
2Melt the bittersweet chocolate and 1/2 tbsp coconut oil in a microwave-safe bowl in 30-second intervals, stirring until smooth. Stir in a pinch of sea salt.
-
3Spread the melted dark chocolate evenly over the prepared baking sheet. Refrigerate for 10-15 minutes or until just set.
-
4Melt the white chocolate and remaining coconut oil in a clean microwave-safe bowl. Stir in the peppermint extract.
-
5Pour the melted white chocolate over the set dark chocolate layer, spreading gently to cover. Sprinkle crushed peppermint candies evenly on top and press lightly to adhere.
-
6Chill the bark in the refrigerator for 15-20 minutes or until completely set. Break into pieces and serve or store in an airtight container.
Approximate Information for One Serving
Nutrition Disclaimers
Number of total servings shown is approximate. Actual number of servings will depend on your preferred portion sizes.
Nutritional values shown are general guidelines and reflect information for 1 serving using the ingredients listed, not including any optional ingredients. Actual macros may vary slightly depending on specific brands and types of ingredients used.
To determine the weight of one serving, prepare the recipe as instructed. Weigh the finished recipe, then divide the weight of the finished recipe (not including the weight of the container the food is in) by the desired number of servings. Result will be the weight of one serving.
Did you make this recipe?
Please consider Pinning it!!




