Hello from My (Slightly Chaotic) Kitchen
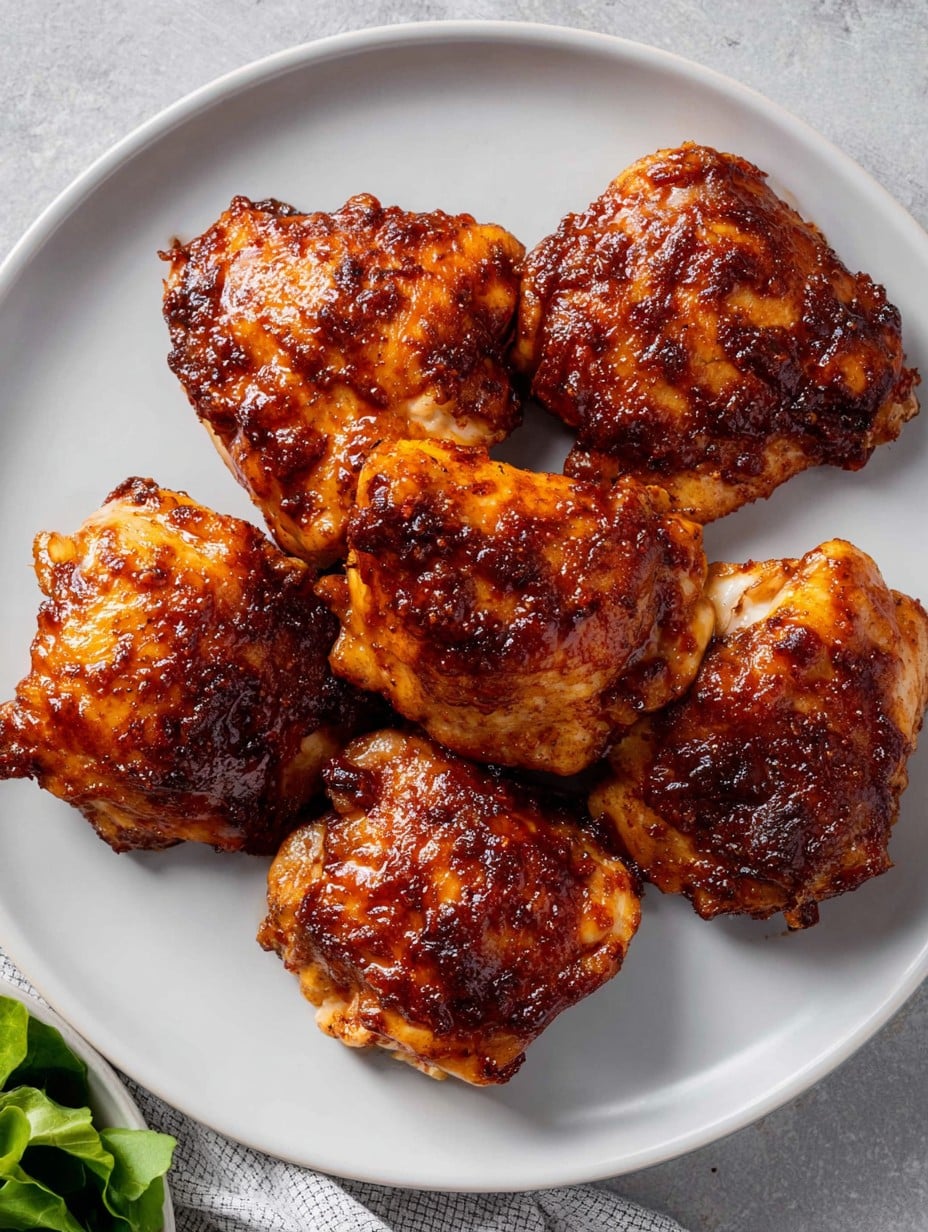
Alright, so you know how every family has at least one meal that everybody just expects you to pull out of a hat when hunger strikes? For me, that’s these air fryer BBQ chicken thighs. I started making these when my oven died and my kids were on some sort of unofficial chicken boycott—go figure. Now the air fryer is my sidekick and, honestly, these sticky, saucy thighs kind of steal the show. Even my brother-in-law, who’s suspiciously fussy about chicken, has given them his mysterious head-nod of approval. By the way: if you ever want to win friends and influence relatives at a potluck, bring these. (And don’t judge me for licking the tongs, please.)

Why You’ll Love This (Or At Least, Why I Do)
I make these chicken thighs when I don’t want to fuss (which is, like, three nights a week). My family goes a bit wild for them because they’re wicked juicy, and the BBQ sauce gets all caramelized and sticky—sort of like you worked way harder than you actually did; that’s my secret weapon. The whole house smells fantastic, too—even if you, say, forgot to take out the trash first (I may or may not be speaking from experience). Also, they’re great for when you forget to defrost chicken ahead of time—I do that so often, I’ve almost convinced myself it’s a personality trait. Just don’t ask me to grill outside in the rain. Not happening.
What You’ll Need (Substitutions Welcome!)
- 5-6 bone-in, skin-on chicken thighs (about 2 pounds, but honestly, I’ve thrown in 7 before—just squish ’em in)
- 2 teaspoons smoked paprika (or regular paprika if all you’ve got—I sometimes use a bit of chipotle powder for more kick)
- 1 teaspoon garlic powder
- 1 teaspoon onion powder
- 1/2 teaspoon salt (my grandmother always insisted on Kosher salt, but sea salt works fine, too)
- Black pepper to taste (heavy on the pepper is my go-to)
- 1 tablespoon olive oil (I’ve definitely used canola oil in a pinch—no shame)
- About 1 cup of your favorite BBQ sauce (sometimes I mix two sauces together—living dangerously)
How I Actually Make These (with a Few Shortcuts)
- First off, blot the chicken thighs dry with paper towels. I know, boring step. But it’s worth it, trust me.
- Dump the thighs in a big bowl. Add olive oil and all those magical spices. Use your hands (or a big spoon, if you’re not feeling up to chicken fingers). Get them coated; it’s fun!
- Preheat your air fryer to 380°F—or don’t; sometimes I forget, and it’s fine, but preheating means crispier skins.
- Arrange the thighs in the basket, skin side down. Try not to cram them in, but—I’ve done it—it just means crispiness will be a bit uneven. Whatevs.
- Air fry 12 minutes. Flip ’em (this is where I usually sneak a taste of the crispy bits), then slather on a generous layer of BBQ sauce. Not too neat, it’ll get everywhere anyway.
- Stick them back in for 8-10 more minutes, until they’re looking sticky and glorious. I sometimes baste them again at the last two minutes with even more sauce. Chicken should hit 175°F at the thickest part, but if you don’t have a meat thermometer, just cut into one and check. Juices should run clear (I once served pink chicken and no one ever lets me forget it).
- Let them rest for 3-5 minutes before you dig in—unless you’re me and can’t wait. Actually, I find it tastes better if you wait, but I rarely do.
Notes Straight Form My Kitchen (Learned the Hard Way)
- Skin-on chicken is best, but if you use skinless, the meat’s still juicy, just misses that crispy vibe.
- I tried using the parchment liners—you know, to avoid scrubbing the basket. Sometimes it messes with crispiness, though. Just grease the basket instead; works every time.
- BBQ sauce with extra sugar will caramelize faster (sometimes burns if you’re not careful). My kids like the sweet stuff, but I prefer the tangy kind—honestly, you do you.
I’ve Tried Some Variations (One Flop Included)
- Boneless thighs cook up faster—around 14 minutes total. They taste great, but you miss out on that crazy-good skin.
- Sometimes I swap out BBQ sauce for teriyaki or buffalo, and hey, that’s always a hit (even though my cousin says it’s not real BBQ if there’s no smoke. Ignore him).
- I once rubbed the thighs with honey and mustard instead of BBQ sauce. The basket kind of turned into a sticky disaster; don’t recommend unless you like cleaning more than eating.
What If You Don’t Have an Air Fryer?
I do think an air fryer does make these kind of magical, but you can use a really hot oven (say, 425°F). They won’t get quite as crisp, but hey, still good. Or, if you happen to have one of those toaster ovens with an “air fry” function—absolutely, give it a go! I’ve even done these on a grill pan in a pinch—just takes more babysitting.
Storing Leftovers (If You Have Any…)
Store in a sealed container in the fridge—I say they’ll keep 3 days, though, honestly, in my house, it never lasts more than a day or two. You can reheat in the air fryer (375°F for a few minutes), but no shame in cold BBQ chicken straight from the fridge.
This Is How I Serve Them (All About That Plate)
If it’s just us, I pile the thighs up with some cornbread and coleslaw—classic Southern combo. But every so often I put out extra sauce, some pickles, and ask the kids what vegetable they’ll grumble at the least. One time, we did these on top of rice bowls with scallions and, actually, it was top notch. I think it tastes even better the next day. Or maybe that’s just me.
Pro Tips (AKA Things I Messed Up First)
- Don’t rush preheating; I once skipped it and the skin just kind of… boiled. Nope.
- Try to blot the chicken really dry. Skipped this step once, ended up with kind of sad, watery sauce.
- Don’t use too much sauce at the start—save most for when you flip. Otherwise, the sauce burns more than it browns (been there, smelled that).
Real-Life FAQ With Real Answers
- Q: Can I use frozen chicken thighs?
A: Yes, but add a few extra minutes and make sure to blot dry any extra liquid after the first 5 minutes. Actually, thawed is better if you can swing it. - Q: Can I double this recipe?
A: Well, yes, but only if your air fryer’s big enough. Otherwise, do batches—though I’ve squeezed them before; they just end up kind of steamy instead of crispy. - Q: Is there a secret to making them really sticky?
A: Baste twice! Once after flipping and again a minute before the end. Or, toss the thighs in warm sauce after cooking if you want that saucy, sticky effect. Trust me, I’ve made this mistake more than once. - Q: Can I use drumsticks?
A: Sure, but cook time will be a bit longer and they like to roll around—just set them before you start (or use a skewer to keep ’em lazy bones in place). - Q: Is BBQ sauce necessary?
A: Necessary for the “BBQ” part, but honestly, plain seasoned thighs are amazing, too. Or toss with whatever sauce hijinks you like. Let your taste buds decide.
Oh—and one last thing. If you, like me, sometimes get too caught up in podcasts and forget about the thighs till the air fryer dings, let them rest a couple minutes anyway; they deserve it. And so do you! Happy eating, mate.
Ingredients
- 4 bone-in, skin-on chicken thighs
- 1 tablespoon olive oil
- 1 teaspoon garlic powder
- 1 teaspoon smoked paprika
- 1/2 teaspoon salt
- 1/2 teaspoon black pepper
- 1 cup BBQ sauce
- 1/2 teaspoon onion powder
Instructions
-
1Pat chicken thighs dry with paper towels. In a large bowl, toss the chicken with olive oil.
-
2Season the chicken thighs with garlic powder, smoked paprika, onion powder, salt, and black pepper. Rub the seasonings evenly over each piece.
-
3Preheat the air fryer to 380°F (193°C). Place the chicken thighs skin side down in the air fryer basket in a single layer.
-
4Cook for 10 minutes, then flip the thighs and brush with half of the BBQ sauce. Continue cooking for another 8-10 minutes until cooked through and crispy.
-
5Brush the remaining BBQ sauce over the thighs and air fry for an additional 1-2 minutes to caramelize the sauce.
-
6Remove the chicken, let rest for a few minutes, and serve hot with your favorite sides.
Approximate Information for One Serving
Nutrition Disclaimers
Number of total servings shown is approximate. Actual number of servings will depend on your preferred portion sizes.
Nutritional values shown are general guidelines and reflect information for 1 serving using the ingredients listed, not including any optional ingredients. Actual macros may vary slightly depending on specific brands and types of ingredients used.
To determine the weight of one serving, prepare the recipe as instructed. Weigh the finished recipe, then divide the weight of the finished recipe (not including the weight of the container the food is in) by the desired number of servings. Result will be the weight of one serving.
Did you make this recipe?
Please consider Pinning it!!




