Let Me Tell You About My Baked Mac and Cheese
I swear, there’s nothing quite like coming home on a rainy Thursday, ditching my shoes (and probably one sock that got lost somewhere in the hallway), and whipping up a cheesy, creamy baked mac and cheese. It just feels like a warm hug—seriously, if I could bottle the smell, I’d spritz it on my coat for gloomy days. The first time I made this, I accidentally used twice the cheese—I honestly thought it was going to be a disaster. Turns out, my family hasn’t let me make it any other way since. Also, my dog, Max, once tried to jump onto the counter for a taste; he’s still eyeing the oven every time it comes out.
Why You’ll Love This Cheesy Mac (Or at Least, Why I Do)
I make this baked mac and cheese when I want something that makes everyone at the table forget their phones (except for my nephew, but he’s a lost cause). My family goes wild for it because it’s not dry (I hate when mac and cheese is dry, don’t you?) and the golden, crunchy topping is like the cherry on top—or, well, the breadcrumbs on cheese. Sometimes, when I’m feeling lazy, I just mix it all together in the pot and skip the baking, but honestly, it’s just not the same. I used to get super annoyed when the cheese sauce clumped up, but after a few accidental fixes (like stirring with a fork when I couldn’t find the whisk), it somehow got even creamier. Go figure.
What You’ll Need (With Some Substitutes, Because Life Happens)
- 250g (about half a box) elbow macaroni — or just grab a couple of good handfuls; penne or shells work too if you’re out of elbows
- 2 cups sharp cheddar cheese, shredded — I sometimes use half cheddar and half Monterey Jack if that’s what’s lurking in the fridge
- 1 cup whole milk — actually, 2% is fine in a pinch, or I’ve even used oat milk once (it was… okay, not my favorite, but not a disaster either)
- 2 tablespoons butter (salted or unsalted, doesn’t matter much; Grandma swore by Kerrygold, but honestly, any butter’s fine)
- 2 tablespoons all-purpose flour
- 1/2 cup sour cream — Greek yogurt also works if you’re feeling virtuous
- 1/2 teaspoon salt (I just toss in a generous pinch)
- 1/4 teaspoon black pepper (honestly, I eyeball it)
- 1/2 teaspoon mustard powder (can skip if you don’t have it, or swap in a tiny squirt of Dijon)
- 1/2 cup panko breadcrumbs — or crush up some Ritz crackers for a treat (trust me!)
- Optional: a pinch of smoked paprika for that extra oomph or, if you like a kick, a dash of cayenne
Alright, Here’s What You Do (But Don’t Stress!)
- Cook the pasta: Boil a big pot of salted water and toss in your macaroni. Stir it now and then (so it doesn’t glue itself together). Cook just until al dente—don’t let it get mushy; it’ll cook more in the oven. Drain and set aside. I usually end up with a few noodles stuck to the bottom. Oh well.
- Make the cheese sauce: In a saucepan, melt the butter over medium heat. Sprinkle in the flour and stir like you mean it—cook for about a minute until it looks kind of like a paste (don’t panic if it smells a bit nutty). Gradually whisk in the milk. It’ll look weird at first, but just keep whisking; it smooths out. Once it thickens up (like a thin custard), add in the shredded cheese in handfuls. Stir until melted and super silky. At this point, I usually sneak a spoonful. Add sour cream, salt, pepper, and mustard powder; give it another good stir.
- Combine: Pour the drained pasta into the sauce. Mix it up until every noodle’s got a good cheese coat. I always check for taste here—sometimes more salt, sometimes a bit of paprika, depending on my mood.
- Bake: Tip everything into a greased baking dish (an 8×8 works, but any casserole dish is fine, honestly). Sprinkle breadcrumbs or cracker crumbles all over the top—don’t skimp! Pop it in a preheated oven at 180°C (350°F) for 20-25 minutes, or until the top is golden and bubbling. If you want it extra crunchy, broil for the last 2-3 minutes (just don’t wander off, trust me).
Some Notes from My Many Attempts
- The sauce sometimes looks lumpy before the cheese melts fully—don’t freak out; it’ll come together.
- I tried skipping the sour cream once and it was a little less creamy, but still edible; probably just not as lush.
- If you’re out of breadcrumbs, potato chips crushed on top are actually delicious (learned this one late night after a grocery run fail).
Things I’ve Messed With (Variations That Worked… or Not)
- Adding cooked bacon bits—huge hit, but only if you’re into that sort of thing.
- Swapping all the cheese for smoked gouda—eh, a bit too strong for me, but my uncle loved it.
- I once tried adding peas (don’t ask why). It was… not my finest hour. They just rolled everywhere.
- Pepper jack for half the cheese if you like some fire—so good on chilly nights.
Gear You Really Need (But You Can Improvise)
- A large pot for boiling pasta (if you don’t have one, just do it in batches—been there).
- A medium saucepan for the cheese sauce.
- A whisk—though, like I said, a fork totally works in a pinch.
- A baking dish—can be glass, ceramic, or even a big oven-safe skillet (I once used a loaf pan, and it was fine!).
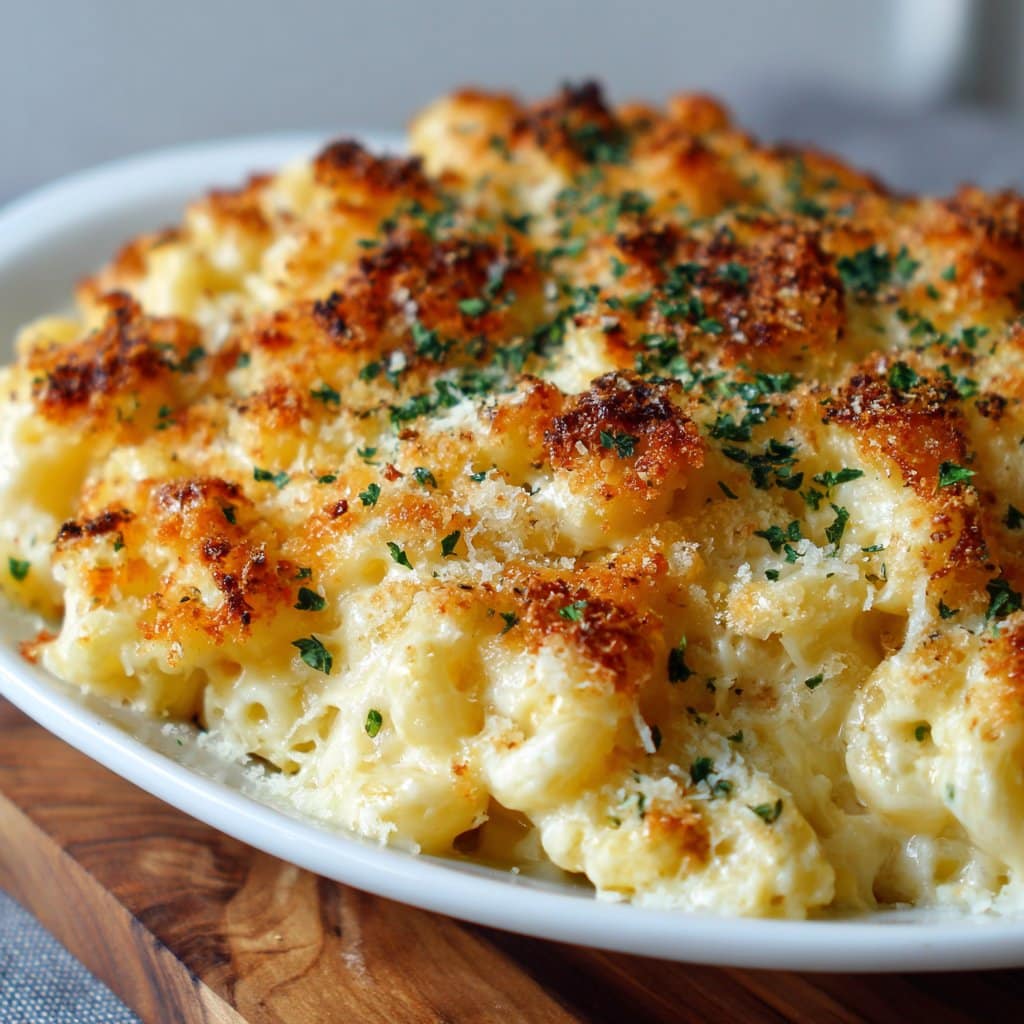
How to Store (But Honestly, Ours Never Makes It to Day Two)
If by some miracle you have leftovers, just cover the dish with foil or pop it in a container. It’ll keep in the fridge for up to 3 days. Reheat in the oven or zap it in the microwave. I think it tastes better the next day—though my teenager says that’s “weird.”
Serving Ideas (Or What We Actually Do)
I usually let it cool for about 5 minutes (sometimes more because I forget). You can serve this as a main with a crisp salad—here’s a link to my go-to salad guide—or as a side at family BBQs. Every Christmas Eve, we have it alongside ham; I’m not even sure how that tradition started, but now it’s the thing.
Lessons Learned (My So-Called “Pro Tips”)
- Don’t rush the cheese sauce. I once turned up the heat to hurry things along—ended up with burnt milk at the bottom. The whole kitchen smelled like sadness.
- If you grate your own cheese, it melts much better than the pre-shredded stuff. But if you, like me, sometimes just want dinner on the table, the bagged stuff works fine. No shame.
- Oh, and always taste before you bake. I once forgot the salt—bland city.
Some Real Questions I’ve Gotten (And What I Actually Said)
- Can I use gluten-free pasta? Yup, just keep an eye on it when boiling; it goes mushy quick if you’re not careful.
- Can I freeze baked mac and cheese? It’s doable, but the sauce can get a bit grainy when you reheat. Honestly, I’m not a huge fan of freezing this. Maybe try it once and see how you feel?
- What if I don’t have sour cream? Greek yogurt, crème fraîche, or even just more milk in a pinch. Or leave it out and add a splash more milk. It won’t be quite as rich, but still totally good.
- How can I make this lighter? Uh, well, you could use less cheese and low-fat milk, but then it’s not really my baked mac and cheese. Maybe, make a smaller batch and just eat more salad? (Check out these easy veggie salads.)
- Why does my cheese sauce split? Oh, I used to get this all the time! Usually, the heat’s too high or you add the cheese too fast. Try lowering the temp and go slow. Actually, I find it works better if the cheese is at room temp before adding it.
And that’s it! If you try this, let me know how it goes—or if you wind up with peas everywhere, too.
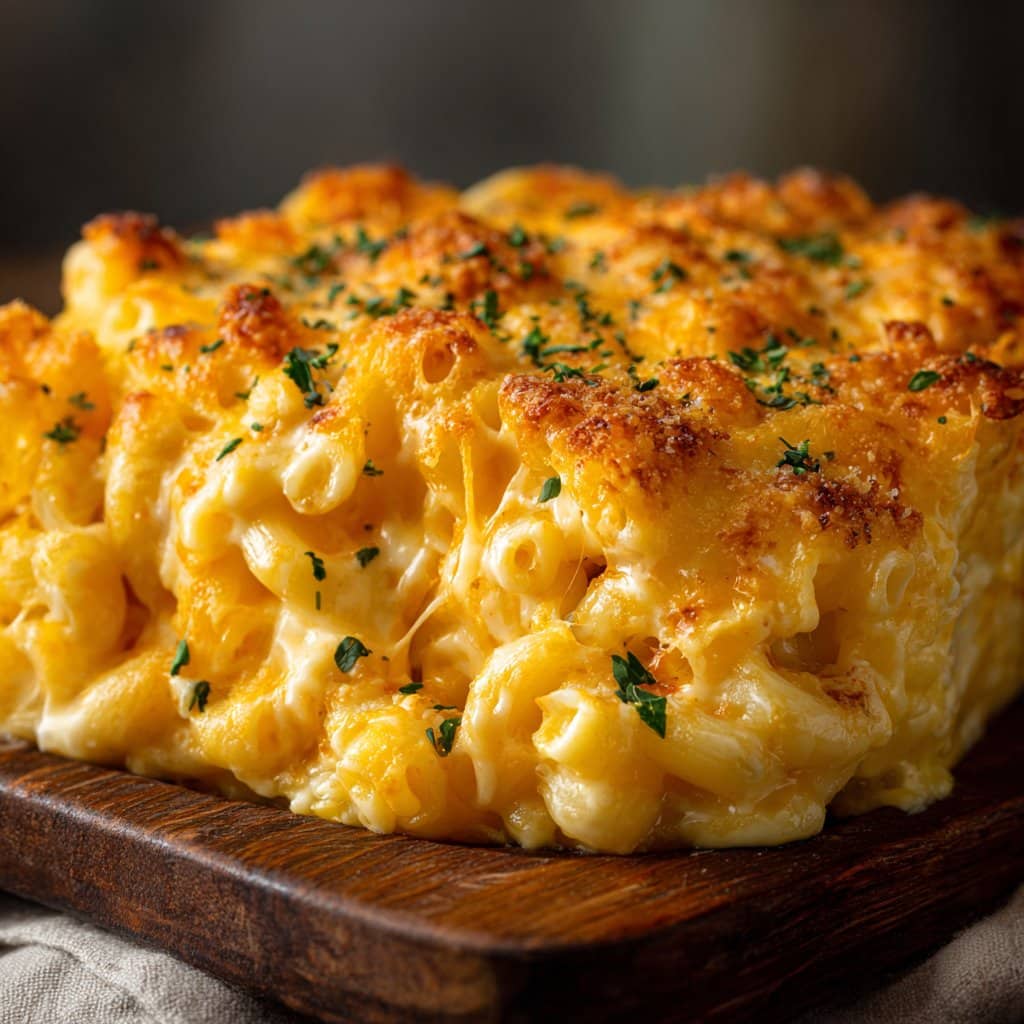
Ingredients
- 12 oz elbow macaroni
- 3 cups shredded sharp cheddar cheese
- 1 cup shredded mozzarella cheese
- 1/2 cup grated Parmesan cheese
- 1/4 cup unsalted butter
- 1/4 cup all-purpose flour
- 3 cups whole milk
- 1/2 teaspoon salt
- 1/2 teaspoon black pepper
- 1/2 teaspoon paprika
- 1 cup panko breadcrumbs
Instructions
-
1Preheat the oven to 350°F (175°C). Grease a 9×13-inch baking dish.
-
2Cook the elbow macaroni according to package instructions until al dente. Drain and set aside.
-
3In a large saucepan, melt the butter over medium heat. Whisk in the flour and cook for 1-2 minutes until lightly golden.
-
4Gradually whisk in the milk, stirring constantly until the mixture thickens, about 5 minutes. Add salt, pepper, and paprika.
-
5Remove from heat and stir in 2 cups cheddar, mozzarella, and Parmesan cheese until melted and smooth.
-
6Combine the cooked macaroni with the cheese sauce and pour into the prepared baking dish. Top with remaining cheddar cheese and panko breadcrumbs.
-
7Bake for 25-30 minutes until the top is golden and bubbly. Let cool slightly before serving.
Approximate Information for One Serving
Nutrition Disclaimers
Number of total servings shown is approximate. Actual number of servings will depend on your preferred portion sizes.
Nutritional values shown are general guidelines and reflect information for 1 serving using the ingredients listed, not including any optional ingredients. Actual macros may vary slightly depending on specific brands and types of ingredients used.
To determine the weight of one serving, prepare the recipe as instructed. Weigh the finished recipe, then divide the weight of the finished recipe (not including the weight of the container the food is in) by the desired number of servings. Result will be the weight of one serving.
Did you make this recipe?
Please consider Pinning it!!




