So, About Baked Yogurt… Let Me Tell You
Alright, friend, picture this: it’s a sticky summer evening, the AC’s half-hearted, I want something cool but not too fiddly, and—honestly—I’m too lazy to deal with anything that involves gelatin sheets or fancy blenders. That’s when I started making baked yogurt (sometimes called Bhapa Doi if I’m feeling a bit fancy and mildly nostalgic about my uni roommate’s family dinners). I remember the first time I whipped this up—I’d completely misread the recipe and, surprise, it still came out edible! Creamy, mildly sweet, and unreasonably simple. Maybe that’s why it stuck. Plus, my aunt still asks for the recipe every time she visits, which is wild, because she’s the “proper cook” in the family. True story: once I overbaked it while IM-ing on my phone. Still tasted great. So you’re in good hands (ish?).

Why You’ll Love Making This
I make this when the craving for dessert hits but motivation is nowhere to be found—like, I want something better than just plain old yogurt out of the fridge, but I’m also in absolutely no mood to whip egg whites or bother with chilled water baths. My family pretty much goes nuts for this, mostly because it tastes sort of like cheesecake but needs zero effort. And you know those days when you have leftover yogurt and a half-empty can of condensed milk? Perfect! (Though, ugh, opening condensed milk tins is always a hassle. Why can’t they all have those pull tabs? Anyway…)
Gathering Your Ingredients (Substitutions Welcome)
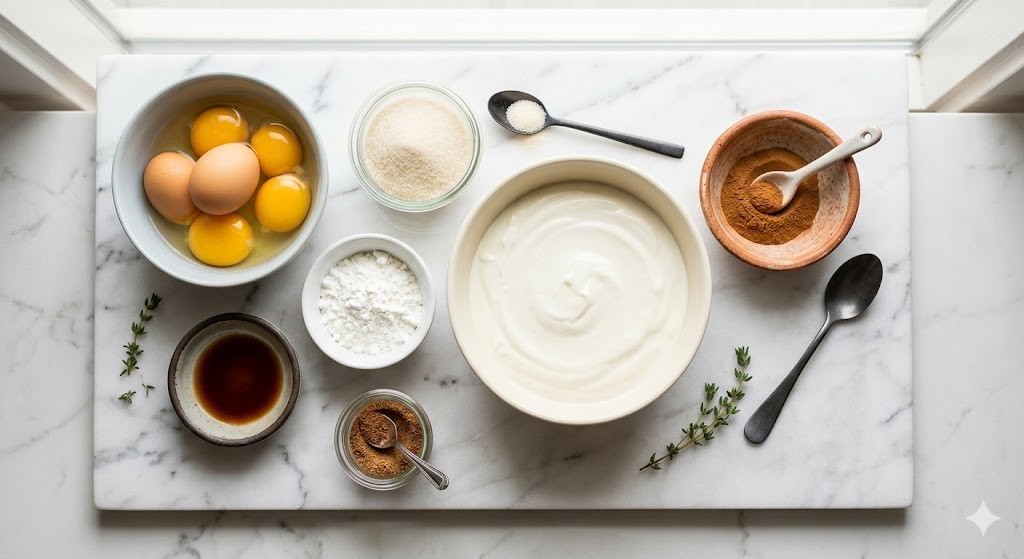
- 1 cup thick yogurt (Greek, regular, or hung curd—all work. I’ve even used homemade dahi when I’m feeling patient, but that’s rare!)
- 1 cup sweetened condensed milk (I use whatever’s cheapest. My grandmother swears by Milkmaid, but honestly—brand snobbery isn’t needed!)
- 1/2 cup cream (heavy or thick. Have used malai scrapped off boiled milk in a pinch—it makes it extra rich, by the way)
- 1/2 teaspoon vanilla extract (optional; sometimes I toss in cardamom powder instead!)
- Pinch of salt (this is my trick; my cousin says it’s pointless, but I think it brightens the flavor)
- (Optional) A handful of chopped nuts or some fresh berries for topping
How to Pull This Off (Don’t Overthink It)
- Preheat your oven to 350°F (or about 180°C). If you forget and start mixing first, no stress—just let it heat while you finish step 2.
- In a biggish bowl, dump in the yogurt, condensed milk, and cream. Give it a really good whisk. I use a fork if I can’t find the balloon whisk—it’s all the same in the end.
- Add in the vanilla (or cardamom) and pinch of salt. Mix again. This is where I usually sneak a taste, not gonna lie.
- Pour the mixture into an ovenproof dish (a glass Pyrex, ramekins, whatever you’ve got—once I even used a steel bowl when I couldn’t find anything else). Smooth the top a bit if you feel fancy.
- Place the dish in a larger tray with about an inch of hot water (a baking tray with sides works). This makes it bake gently, but if you skip the water once in a while—I’ve done that too—it still sets, just gets a little crackly on top.
- Bake for about 30-35 minutes. It should be just set in the middle but still a tiny bit wobbly. Don’t worry if it looks a bit weird at this stage—it always does!
- Let it cool to room temp, then chill in the fridge for at least 2 hours. The waiting is honestly the hardest part.
- Before serving, throw on those nuts or berries if you want. Or not. Up to you!
Some Notes, Straight from My Trial-and-Error Brain
- If your yogurt is too watery, just strain it in a muslin cloth for 30 minutes. I skipped this once and it was more like yogurt soup. Live and learn.
- Baking time can be wonky depending on your oven—older ovens can be moody (like mine, ugh).
- Actually, I find it works better if you use full-fat everything, but if you’re watching calories, go half cream and replace the rest with milk. It’s slightly less decadent but still genuinely good.
- Takes on flavors really well! I once accidentally added rose water instead of vanilla—it was, let’s say, interesting.
Variations I’ve Tangled With (for Better or Worse)
- Citrus zest: Grate in some orange or lemon zest for a fresh twist—kids liked it, I thought it was a little too dessert-is-now-breakfast-ish, but to each their own.
- Chocolate: Adding a tablespoon of cocoa powder makes it almost like mousse. Not my thing but my neighbor’s little boy requests it every time.
- Mango puree: Swirling in some fresh mango puree looks gorgeous—just don’t overdo it or it’ll get runny (yep, learned the hard way).
- I once tried making a coffee version—honestly, it tasted like licking a bean. Would not recommend.

Equipment (Workarounds Welcome)
- Mixing bowl—any biggish one, even an old saucepan will do in a pinch.
- Whisk or fork—use what’s handy.
- Ovenproof dish—ramekins, glass or steel bowl, whatever’s not being used for leftovers.
- Baking tray for water bath—though sometimes, I just use a deep roasting pan that normally holds chicken. Scrub it well!
How to Store (But Good Luck Making It Last)
Should you, by some miracle, have leftovers, just pop it covered in the fridge. I think it tastes even better the next day, but honestly, in my house, it never lasts more than a day! If it gets a bit watery on top, just blot it with a paper towel. No biggie.
Serving Ideas (Our Family’s Quirks)
I like to serve it cold, straight from the fridge, with a tumble of berries or a drizzle of honey (if I’ve remembered to buy any). Sometimes my sister insists on crushed pistachios—adds nice crunch. Once, we set up a yogurt bar and let everyone pick their own toppings. Seriously fun for a group!
Pro Tips: Learn Form My Mishaps
- Don’t try to rush the chilling—it needs at least 2 hours or it’ll taste kind of warm and sad. I once tried freezing to speed things up: don’t. It just gets icy.
- Taste your yogurt before you start—once mine was a little too sour and, yeah, it did overpower everything (but still edible!).
- Don’t stress about perfection. Some days it’ll come out with bubbles or a crack on top, but just call it “rustic” and carry on.
FAQ—Because Folks Keep Asking
Can I make this without condensed milk?
You can, sort of—you’ll have to up the sugar and it’ll be less creamy. I’ve tried with honey and sugar combo; it’s okay, just not classic baked yogurt.
Is it okay to use low-fat yogurt?
Sure! It just won’t be as thick or rich, but honestly, still tasty. If you’re going lower fat, maybe skip the cream or use less.
Does this really taste like cheesecake?
It’s kind of in the ballpark—sort of a cousin to cheesecake, but tangier and lighter, I’d say. No crust, though!
Can I make this ahead of time?
Absolutely. Day-before is fine (actually, better), just keep it in the fridge and add toppings when you’re ready to serve.
What about microwave baking?
Yeah, I’ve tried it once or twice. You can microwave at 80% power for about 7-8 minutes in a glass dish. Texture’s not quite the same, but delicious in a pinch!
Anyway, I hope you give this a bash. If it turns out a bit wonky, just blame it on your oven—works for me every time!
Ingredients
- 1 cup thick yogurt (Greek, regular, or hung curd—all work. I’ve even used homemade dahi when I’m feeling patient, but that’s rare!)
- 1 cup sweetened condensed milk (I use whatever’s cheapest. My grandmother swears by Milkmaid, but honestly—brand snobbery isn’t needed!)
- 1/2 cup cream (heavy or thick. Have used malai scrapped off boiled milk in a pinch—it makes it extra rich, by the way)
- 1/2 teaspoon vanilla extract (optional; sometimes I toss in cardamom powder instead!)
- Pinch of salt (this is my trick; my cousin says it’s pointless, but I think it brightens the flavor)
- (Optional) A handful of chopped nuts or some fresh berries for topping
Instructions
-
1Preheat your oven to 350°F (or about 180°C). If you forget and start mixing first, no stress—just let it heat while you finish step 2.
-
2In a biggish bowl, dump in the yogurt, condensed milk, and cream. Give it a really good whisk. I use a fork if I can’t find the balloon whisk—it’s all the same in the end.
-
3Add in the vanilla (or cardamom) and pinch of salt. Mix again. This is where I usually sneak a taste, not gonna lie.
-
4Pour the mixture into an ovenproof dish (a glass Pyrex, ramekins, whatever you’ve got—once I even used a steel bowl when I couldn’t find anything else). Smooth the top a bit if you feel fancy.
-
5Place the dish in a larger tray with about an inch of hot water (a baking tray with sides works). This makes it bake gently, but if you skip the water once in a while—I’ve done that too—it still sets, just gets a little crackly on top.
-
6Bake for about 30-35 minutes. It should be just set in the middle but still a tiny bit wobbly. Don’t worry if it looks a bit weird at this stage—it always does!
-
7Let it cool to room temp, then chill in the fridge for at least 2 hours. The waiting is honestly the hardest part.
-
8Before serving, throw on those nuts or berries if you want. Or not. Up to you!
Approximate Information for One Serving
Nutrition Disclaimers
Number of total servings shown is approximate. Actual number of servings will depend on your preferred portion sizes.
Nutritional values shown are general guidelines and reflect information for 1 serving using the ingredients listed, not including any optional ingredients. Actual macros may vary slightly depending on specific brands and types of ingredients used.
To determine the weight of one serving, prepare the recipe as instructed. Weigh the finished recipe, then divide the weight of the finished recipe (not including the weight of the container the food is in) by the desired number of servings. Result will be the weight of one serving.
Did you make this recipe?
Please consider Pinning it!




