So, You Want Banana Cake Without an Oven? Me Too.
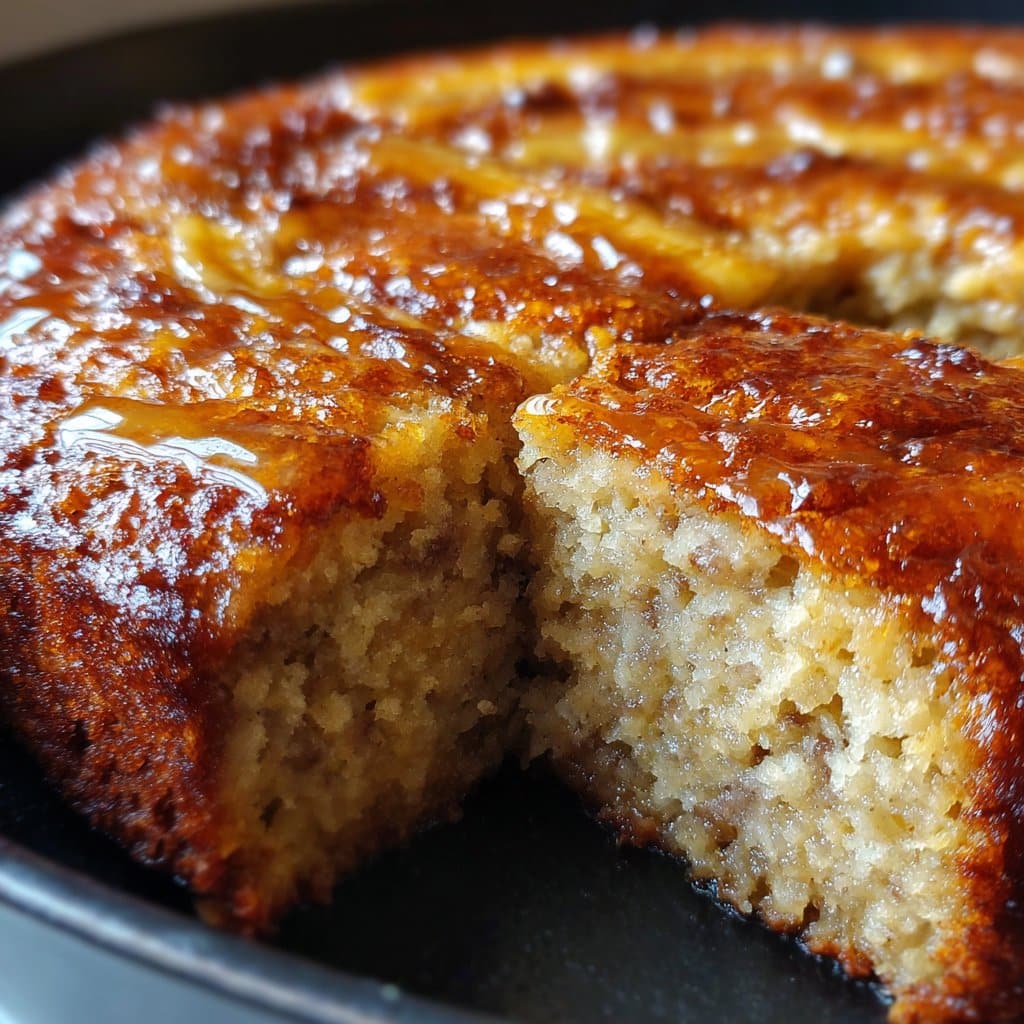
Alright, so let me tell you—this banana cake in a fry pan thing started because my oven was basically just a cabinet for storing pans (long story involving a small kitchen and a failed DIY repair). But the banana craving? That was very real. I tried this recipe on a rainy afternoon when the only thing louder than the rain was my stomach. My first attempt was a bit, well, dodgy—but you know what, that’s half the fun! Now, this fry pan banana cake is something I whip up whenever I have some brown bananas staring me down from the counter. My niece calls it ‘pancake’s cooler cousin,’ which I guess is a compliment?
Why You’ll Love This (Or At Least Why I Do)
I make this when the oven seems like too much faff or it’s just too hot to bother. My family goes a bit wild for it—maybe it’s because I slice it thick and pretend it’s a proper cake (shh, don’t tell them). Plus, it’s a one-bowl, one-pan wonder; minimal washing up, maximum banana flavor. Also, if you’ve ever baked banana cake and had it come out too dry (been there, done that), you might like how soft this stays—sort of pudding-y in the best way. And let’s be honest, it’s a life saver for those ‘oops, I forgot to buy eggs’ moments.
What You’ll Need (And What You Can Swap)
- 2 overripe bananas (the blacker, the better—if yours are looking a bit sad, you’re golden)
- 1/2 cup sugar (granulated is classic, though brown sugar gives a nice caramel thing; I once used coconut sugar and nobody noticed)
- 1 large egg (sometimes I skip it and add a splash of milk instead—doesn’t rise as much but still yummy)
- 1 cup all-purpose flour (self-raising works in a pinch, just go easy on the baking powder below)
- 1/2 tsp baking powder (my gran always tossed in a bit more, but I find that’s risky…)
- 1/4 cup melted butter (or oil—I’ve definitely used olive oil when I was out of butter, which was… interesting)
- Pinch of salt (I forget this half the time and it’s still fine)
- Optional: a handful of chopped nuts, a sprinkle of cinnamon, or even a dash of vanilla if you fancy
Let’s Make It: Directions You Can Actually Follow
- Mash the bananas in a bowl until they’re mostly smooth—some lumps are fine. I sometimes mash right in the pan to save a dish, but you do you.
- Add in the sugar and mix it up. This is where I sneak a little taste. No shame.
- Crack in the egg (or splash in some milk, see above), then stir in your melted butter. It should look gloopy—don’t panic.
- Tip in the flour, baking powder, and salt. Give it all a mix—not too much, just until it’s barely combined. If you’re adding nuts or cinnamon, toss them in now.
- Heat up a non-stick fry pan on low. Actually, I think medium-low is best—too hot and it burns underneath before the middle sets. Grease with a bit of butter or oil (I sometimes use that paper from the butter wrap—so handy!).
- Pour the batter into the pan and smooth it out. Clap on a lid or cover with foil. Set a timer for about 18-22 minutes. I tend to check at 15, just in case.
- If it looks a bit wobbly in the center, let it go longer. But if it’s firm and a toothpick (or chopstick, or whatever’s clean) comes out with crumbs not batter, you’re golden.
- Now for the tricky bit—flipping! I slide mine onto a flat plate, then invert back into the pan. Or, you know, just leave it top-side a bit pale and go with ‘rustic.’
- Cook for another 5-7 minutes uncovered, then let it cool a smidge before trying to slice (unless you love molten banana cake, in which case, dive in!).
Some Notes (a.k.a. What I’ve Messed Up Before)
- If your cake is sticking, it probably just needs a bit more butter/oil. Or maybe you rushed the flip (been there!)
- Don’t worry if it rises unevenly—sometimes one side sort of puffs up and the other doesn’t. That’s fry pan life.
- I once used four bananas because I got carried away… it was more like pudding, but still tasty!
Variations (and a Slight Misadventure)
- Chocolate chips: stirred in at the end, they melt like little treasure pockets.
- Coconut: a handful in the batter makes it extra chewy.
- Vegan: Skip the egg, use dairy-free milk and oil. Works fine, but the texture is softer.
- I tried adding grated carrot once—honestly, wouldn’t recommend. Weirdly stringy.
Equipment (And the “No Pan? No Problem” Fix)
- Non-stick fry pan (mine’s about 9 inches—if yours is smaller, just make two batches or risk the overflow. Up to you!)
- Lid or foil (a pizza pan balanced on top will do in a pinch—I’ve done it and lived to tell the tale)
- Mixing bowl (or just use the pan for everything and feel like a rebel)
How to Store It (Though It Seldom Makes It That Far)
Keep leftovers (if you’re luckier than me and have any) in a container at room temperature for up to two days. Or the fridge if you want it to last longer, but honestly, it never lasts more than a day in my place. If it dries out, a quick zap in the microwave brings it back to life.
How I Like to Serve It (And the Family’s Odd Habit)
I love it warm with a dollop of thick yogurt—my mum likes it with a drizzle of honey. My cousin, for some reason, eats it with cheddar. Don’t ask. If you want to go fancy, try a scoop of vanilla ice cream. Bliss.
Pro Tips (AKA Lessons Learned the Hard Way)
- Don’t rush the cooking. I once cranked up the heat thinking it’d speed things up—nope, just got a burnt bottom and a gooey middle.
- Actually, I find it works better if I leave the lid off for the last five minutes. Helps the top set up.
- Let it cool before slicing, unless you want banana mush (not the worst thing, but still).
FAQ (Answering Real Questions from Fellow Cake Lovers)
- Can I use a different fruit? You can try mashed sweet potato or pumpkin, but the flavor’s quite different. Someone once asked me about applesauce; I haven’t tried it, but I bet it’d be tasty.
- What if my cake sticks? Ugh, it happens. Use more butter next time or a better non-stick pan. Sometimes I just scrape up the stuck bits—they’re the best part, honestly!
- Is this really cake? Well, in my book, yes. My brother calls it ‘giant sweet pancake,’ which is… not wrong, I guess.
- Can I double it? Kinda—just do two batches so you don’t end up with banana lava everywhere.
- Where do you get your vanilla? I usually get mine here. If you can’t find any, just skip it; the banana is doing the heavy lifting.
- Do I need to sift the flour? Nah, life’s too short. I never do, and it’s always fine.
- Any tips for making it healthier? Swap part of the flour for whole wheat if you like, or check out these healthy banana ideas! Just watch out—whole wheat makes it a bit denser.
One last thing, talking about banana cake always reminds me of the time my dad tried to hide a slice for himself and forgot about it until two days later. Well, let’s just say: eat it fresh. Or don’t let anyone hide the last piece. If you’re after more easy non-oven bakes, you might like these no-oven dessert ideas too. Happy frying, mate!

Ingredients
- 2 ripe bananas, mashed
- 1 cup all-purpose flour
- 1/2 cup granulated sugar
- 1/4 cup vegetable oil
- 2 large eggs
- 1/2 teaspoon baking powder
- 1/4 teaspoon baking soda
- 1/4 teaspoon salt
- 1/2 teaspoon vanilla extract
Instructions
-
1In a large bowl, mash the ripe bananas until smooth. Add eggs, sugar, vegetable oil, and vanilla extract. Mix well until combined.
-
2In a separate bowl, whisk together the flour, baking powder, baking soda, and salt.
-
3Gradually add the dry ingredients to the wet mixture, stirring until just combined. Do not overmix.
-
4Grease a non-stick fry pan with a little oil and pour the batter evenly into the pan. Cover with a lid.
-
5Cook on low heat for 25-30 minutes, or until a toothpick inserted in the center comes out clean. Let the cake cool slightly before serving.
Approximate Information for One Serving
Nutrition Disclaimers
Number of total servings shown is approximate. Actual number of servings will depend on your preferred portion sizes.
Nutritional values shown are general guidelines and reflect information for 1 serving using the ingredients listed, not including any optional ingredients. Actual macros may vary slightly depending on specific brands and types of ingredients used.
To determine the weight of one serving, prepare the recipe as instructed. Weigh the finished recipe, then divide the weight of the finished recipe (not including the weight of the container the food is in) by the desired number of servings. Result will be the weight of one serving.
Did you make this recipe?
Please consider Pinning it!!




