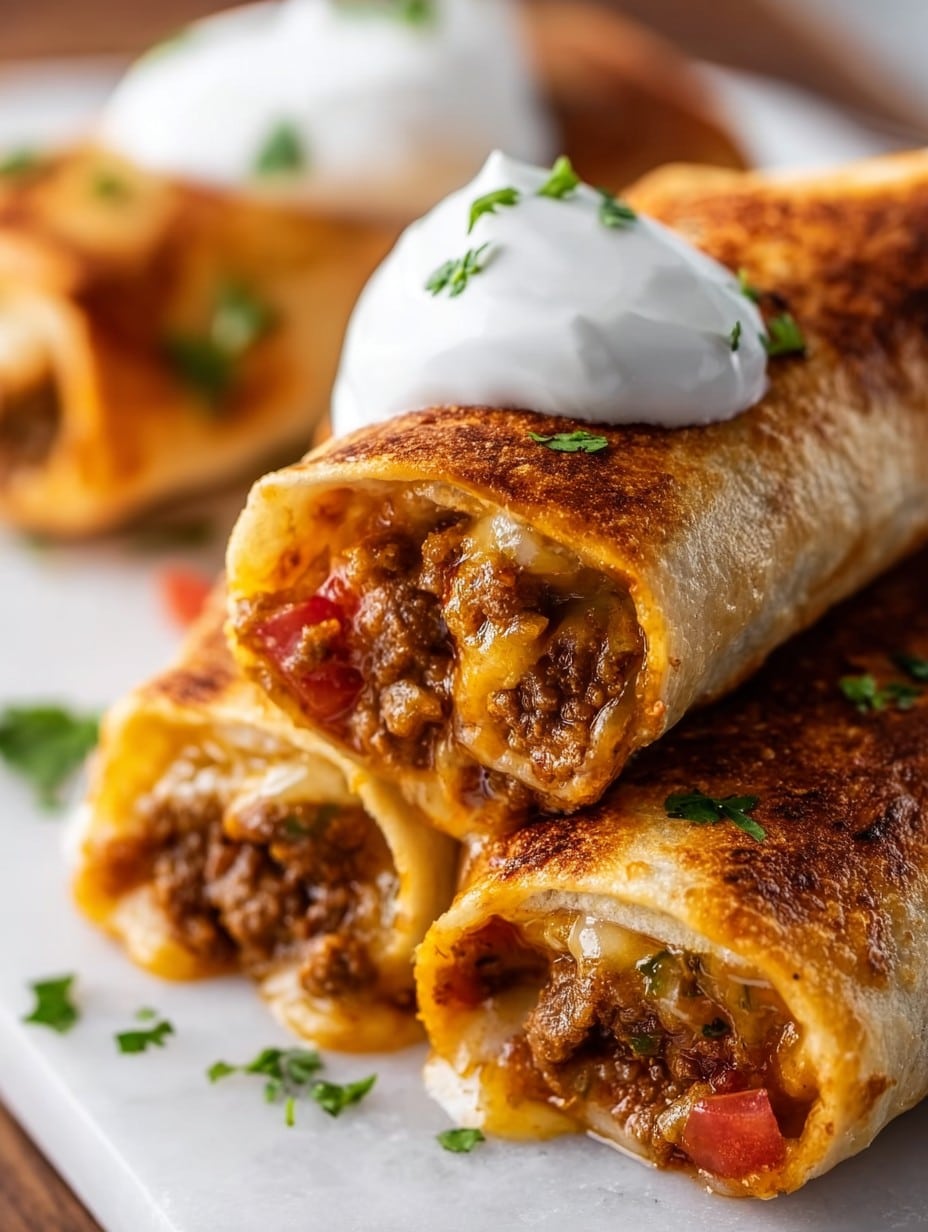
Let Me Tell You About These Chimichangas
I don’t really remember the first time I made beef and cheese chimichangas, but I do remember the first time they disappeared from the table so fast I didn’t even get seconds. Actually, my brother tried to hide one behind the butter dish—like, as if I wouldn’t find it. Anyway, these are my go-to on a rough Tuesday when I just want dinner to be equal parts crunchy and gooey, and preferably not require a bunch of fancy stuff (because let’s be real, who keeps queso fresco on hand?).
Why You’ll Probably Love These (I Sure Do)
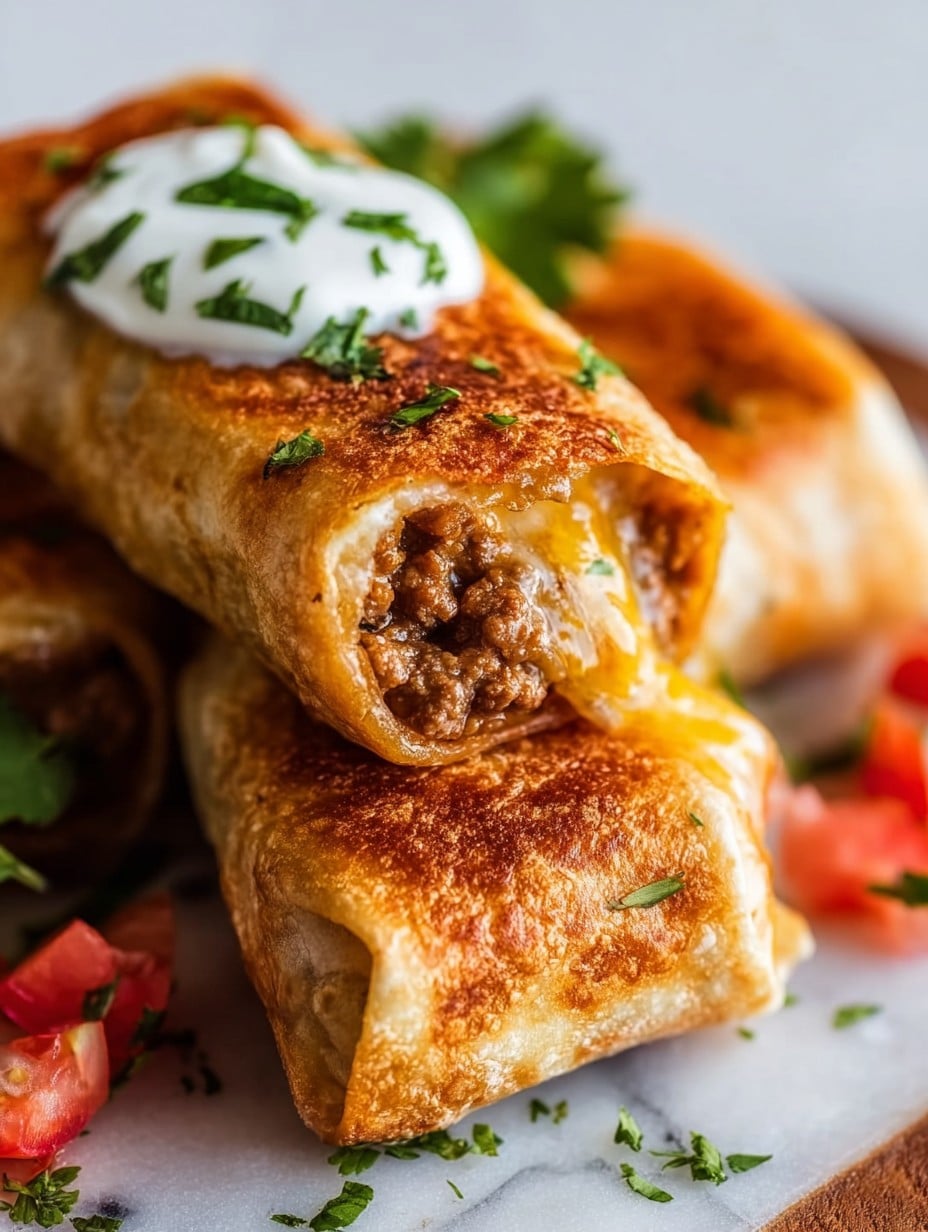
I make this when I want something kind of indulgent but not completely over-the-top. My family goes a little bananas over the crispy shell (especially when I go heavy on the cheese… whoops!), and honestly, assembling these is super easy. At least compared to other hand-held dinners that claim they’re easy (looking at you, homemade empanadas). Maybe you’ll burn your fingers a little on the hot filling, but that’s tradition round here. The only thing I ever found frustrating was keeping the filling from oozing out—but I’ll let you in on my little trick for that, just wait.
What You’ll Need (And What You Can Swap In)
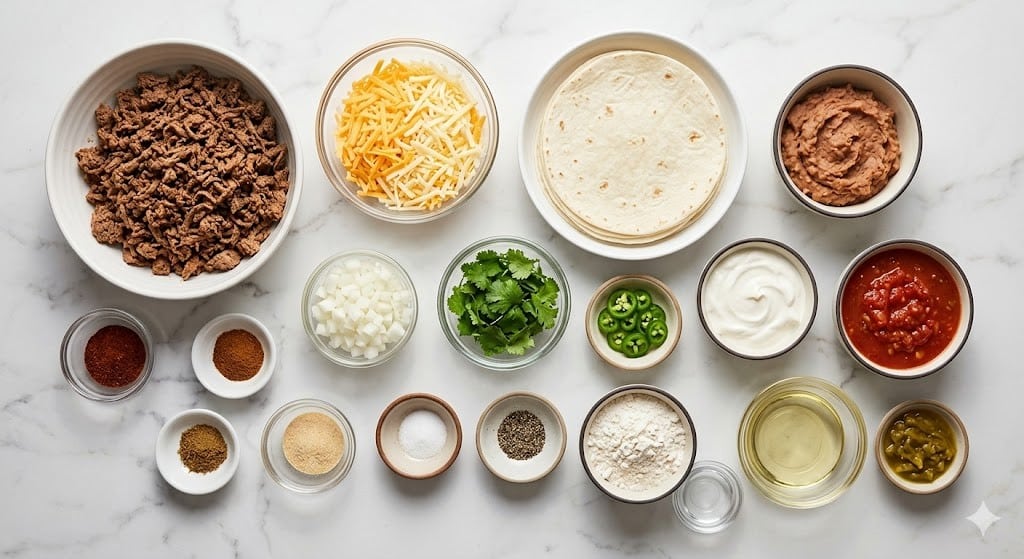
- 1 lb ground beef (80/20, but I’ve used ground turkey when I was out—my grandmother pretends she can tell)
- 1 small onion, diced (yellow or white, whatever’s rolling around in the crisper)
- 2 cloves garlic, minced (sometimes I cheat and use the jarred stuff, shhh)
- 1 teaspoon ground cumin
- 1 teaspoon chili powder
- 1/2 teaspoon smoked paprika (or regular, it’s fine)
- 1/2 teaspoon salt (you might want more—I taste as I go)
- 1/4 teaspoon black pepper
- 1 can (4 oz) diced green chiles, drained (optional but really tasty)
- 1 cup shredded cheddar cheese (sometimes I do half cheddar, half Monterey Jack—use what you like)
- 1/2 cup sour cream (Greek yogurt works in a pinch; no one noticed, seriously)
- 6 large flour tortillas (the extra-large ‘burrito’ ones hold it together way better)
- Vegetable oil for frying (about 1 cup, but really I just eyeball it)
Making Chimichangas: My Kinda Step-by-Step
- Heat a large skillet over medium heat (nonstick is fine). Toss in the ground beef and onion, and cook until the beef’s brown and crumbly and the onion’s soft. About 5-7 minutes. I always drain the excess grease here—it’s mandatory.
- Add the garlic, cumin, chili powder, smoked paprika, salt, and pepper. Stir for another minute or so, until it all smells amazing.
- Mix in the green chiles, let them warm up for a sec. Then turn off the heat. Let things cool for a couple of minutes (I’ve learned the hard way that hot filling can burn through tortillas…oops).
- Once it’s just warm, stir in the cheese and sour cream. Don’t worry if it looks a little thick—it’ll melt beautifully later. This is where I sneak a taste. Or two.
- Time to assemble: Lay out a tortilla, slap about half a cup (give or take) of filling in the center. Fold in the sides, then roll it up burrito-style. If it busts at the seams, I just tuck it tighter or sacrifice a little filling, no biggie.
- Heat the oil in a deep skillet—medium-high, test it with a pinch of tortilla. If it sizzles, you’re good. Working in batches (don’t crowd the pan!), place your rolled-up chimichangas in seam-side down. Fry for 2-3 minutes per side till golden brown and crisp all over. I use tongs, but forks work if that’s all you’ve got. Carefully transfer to a rack or paper towels.
- Let them cool for a few minutes. I know it’s hard, but they’re lava inside right away. Serve with extra sour cream, salsa, or whatever you’ve got hanging out in the fridge.
Notes (Learned the Only Way—By Messing Up)
- If your tortillas crack, microwave them under a damp towel for 30 seconds—problem basically solved.
- I used to overfill them every dang time. Just accept that less is actually better (or you’ll end up with cheesy beef pan-fry, which, hey, isn’t the worst).
- Too much oil? After frying I set them on a wire rack, not just a plate, so they don’t get soggy on the bottom—did NOT realize how much difference that makes until my third batch.
Variations (Some Good, Some Not Great)
- Sometimes I toss in a handful of corn or black beans for extra filling—works great.
- I tried a version with leftover roast chicken instead of ground beef. Pretty tasty but somehow just not the same.
- Cream cheese instead of sour cream? Oddly enough, it was way too heavy for my taste. Your mileage may vary.
Equipment (And What I Do If I’m Missing Stuff)
- Deep-ish frying pan or Dutch oven (one time I used a regular high-sided saucepan—it’s doable, just more crammed).
- Tongs. Or use forks, whatever, just don’t go barehanded unless you’re feeling lucky.
- Slotted spoon helps get them out if you don’t want to spray hot oil everywhere (been there, done that).
Keeping Leftovers (But Who Are We Kidding?)
Technically, you can keep chimichangas in the fridge, wrapped up tight, for up to three days. But honestly, in my house, they never last till morning. (If they do, reheat them in the oven or air fryer so they crisp up again. Microwave makes them kinda sad and floppy in my opinion.)
How I Serve Chimichangas (Your Move)
I love piling up a quick cabbage slaw on the side—brings some crunch. My brother covers his in salsa and more cheese; my dad likes hot sauce and pickled jalapeños. Sometimes we have Spanish rice or even just bagged salad if I need an easy win. If you’re feeling extra, guacamole is a must.
Lessons Learned (The “Pro Tips” Section, Sorta)
- I once tried frying them in butter instead of oil…do not recommend unless you like burnt bits in your dinner.
- Don’t skip letting the filling cool before adding cheese. It melts way better, and the tortillas don’t tear as easy—found this out after about three melty fails.
- If you’re impatient with the oil heat, you’ll get undercooked shells and sad faces all around. Hotter is actually better here.
FAQ (Because People Actually Asked Me These)
- Can I bake these instead of frying?
Yep! Brush with oil, bake at 425°F for about 20 minutes—flip once. Won’t be quite as crisp but still good. - Can I freeze them?
Totally, though I prefer freezing before frying so they don’t get soggy. Thaw in the fridge, then fry or bake when you need them. - Can I use corn tortillas?
Honestly? They break way too easily for me. Flour’s the way to go for a proper chimichanga. But hey, try it if you must! - What about other cheeses?
If it melts, it works. I used mozzarella once—not authentic but tasty in a pizza sort of way. - Why is my filling leaking out?
Probably overfilled or didn’t tuck the sides enough. It happens. Just eat it fast and pretend you planned it.
One last thing—never trust a person who says their first batch of chimichangas came out perfect. They’re probably fibbing, or else they never had to learn from cleaning up cheese off the stove. Enjoy the mess; it’s part of the fun.
Ingredients
- 1 lb ground beef (80/20, but I’ve used ground turkey when I was out—my grandmother pretends she can tell)
- 1 small onion, diced (yellow or white, whatever’s rolling around in the crisper)
- 2 cloves garlic, minced (sometimes I cheat and use the jarred stuff, shhh)
- 1 teaspoon ground cumin
- 1 teaspoon chili powder
- 1/2 teaspoon smoked paprika (or regular, it’s fine)
- 1/2 teaspoon salt (you might want more—I taste as I go)
- 1/4 teaspoon black pepper
- 1 can (4 oz) diced green chiles, drained (optional but really tasty)
- 1 cup shredded cheddar cheese (sometimes I do half cheddar, half Monterey Jack—use what you like)
- 1/2 cup sour cream (Greek yogurt works in a pinch; no one noticed, seriously)
- 6 large flour tortillas (the extra-large ‘burrito’ ones hold it together way better)
- Vegetable oil for frying (about 1 cup, but really I just eyeball it)
Instructions
-
1Heat a large skillet over medium heat (nonstick is fine). Toss in the ground beef and onion, and cook until the beef’s brown and crumbly and the onion’s soft. About 5-7 minutes. I always drain the excess grease here—it’s mandatory.
-
2Add the garlic, cumin, chili powder, smoked paprika, salt, and pepper. Stir for another minute or so, until it all smells amazing.
-
3Mix in the green chiles, let them warm up for a sec. Then turn off the heat. Let things cool for a couple of minutes (I’ve learned the hard way that hot filling can burn through tortillas…oops).
-
4Once it’s just warm, stir in the cheese and sour cream. Don’t worry if it looks a little thick—it’ll melt beautifully later. This is where I sneak a taste. Or two.
-
5Time to assemble: Lay out a tortilla, slap about half a cup (give or take) of filling in the center. Fold in the sides, then roll it up burrito-style. If it busts at the seams, I just tuck it tighter or sacrifice a little filling, no biggie.
-
6Heat the oil in a deep skillet—medium-high, test it with a pinch of tortilla. If it sizzles, you’re good. Working in batches (don’t crowd the pan!), place your rolled-up chimichangas in seam-side down. Fry for 2-3 minutes per side till golden brown and crisp all over. I use tongs, but forks work if that’s all you’ve got. Carefully transfer to a rack or paper towels.
-
7Let them cool for a few minutes. I know it’s hard, but they’re lava inside right away. Serve with extra sour cream, salsa, or whatever you’ve got hanging out in the fridge.
Approximate Information for One Serving
Nutrition Disclaimers
Number of total servings shown is approximate. Actual number of servings will depend on your preferred portion sizes.
Nutritional values shown are general guidelines and reflect information for 1 serving using the ingredients listed, not including any optional ingredients. Actual macros may vary slightly depending on specific brands and types of ingredients used.
To determine the weight of one serving, prepare the recipe as instructed. Weigh the finished recipe, then divide the weight of the finished recipe (not including the weight of the container the food is in) by the desired number of servings. Result will be the weight of one serving.
Did you make this recipe?
Please consider Pinning it!