Let Me Tell You About These Bars (and That One Disaster)
Alright, so here’s the thing: Blueberry Cheesecake Crumble Bars are basically my secret weapon for family gatherings, book club meetups, or just those random Tuesdays when the weather’s gone all gloomy and you want something sweet and homey. I still remember the first time I tried making these—my cousin had just gotten engaged, we’d run out of clean mixing bowls (classic move), and I ended up using a salad bowl. It worked! Actually, I think that’s when I realized this recipe is pretty forgiving—kind of like my favorite pair of jeans, you know? Not that I’d wear those while baking, but you get the drift.
Oh, before I forget—don’t be surprised if your kitchen smells like an old-fashioned bakery when these come out of the oven. My neighbor once poked her head in to check if I was hosting a bake sale. I wasn’t. But hey, she left with a bar (or three).
Why I Keep Making These (Even On a Monday)
I make this when I need an easy win—my family goes a bit bonkers for these bars, especially my dad, who claims he “doesn’t like sweets” but mysteriously manages to polish off half the tray. If I’m honest, these bars are a lifesaver when you want something fancy-ish but don’t want to faff about with water baths or springform pans (been there, regretted that). Also: the crumble top covers any cheesecake cracks! It’s like culinary camouflage.
Sometimes I grumble about the dishes, but honestly, the way my friends hover near the oven makes it worth it.
What You’ll Need (And What I Sometimes Substitute)
- 1 1/2 cups all-purpose flour (but I’ve used half whole wheat when I’m feeling virtuous)
- 1 1/2 cups old-fashioned oats — quick oats work in a pinch, but they get a bit mushier
- 3/4 cup brown sugar (granulated is okay too, but I like the caramel-y vibe of brown)
- 1/2 teaspoon salt
- 1/2 teaspoon baking powder
- 3/4 cup unsalted butter, melted (if you only have salted, just skip the added salt above)
- 1 teaspoon vanilla extract (I’m not above using the cheap stuff—I can’t always taste the difference)
- 8 ounces cream cheese, softened (if you’re in the UK, that’s about 225g, and any store brand will do; my gran swears by Philadelphia, but honestly…)
- 1/4 cup granulated sugar
- 1 large egg
- 2 cups fresh blueberries (frozen totally work! Don’t thaw, just chuck ‘em in frozen)
- 2 teaspoons cornstarch (flour works if you’re out, but it’s a little less smooth)
- 1 tablespoon lemon juice (or a splash more if you like it zippy)
How I Throw It All Together (With Some Shortcuts)
- Preheat your oven to 350°F (that’s 180°C for my metric pals). Line an 8×8 inch pan with parchment paper or just grease it—parchment makes cleanup way easier, though.
- In a big-ish bowl, mix your flour, oats, brown sugar, salt, and baking powder. Pour in the melted butter and vanilla, and stir until you’ve got a crumbly mixture that holds together if you squeeze it. This is usually the bit where I sneak a taste (don’t tell anyone).
- Press about two-thirds of the crumble into the bottom of your pan. No need to be obsessive; just pat it down so it covers the bottom sorta evenly. Set aside the rest for the topping (I always end up munching on a bit—occupational hazard).
- For the cheesecake layer: beat the cream cheese and granulated sugar together until smooth and fluffy. Add the egg and beat again, then stir in the lemon juice. If you forget to soften the cream cheese (been there), just zap it in the microwave for 10 seconds at a time until it’s workable.
- Spread the cheesecake mixture over your crust. Don’t stress if it looks a bit lumpy—it all smooths out in the oven.
- Toss your blueberries with the cornstarch, then scatter them over the cheesecake layer. Press them in a bit. (If some roll off, just eat them—chef’s rights.)
- Crumble the remaining topping all over the blueberries. Be as generous as you like; more is more, in my opinion.
- Bake for about 35-40 minutes, until the top is golden and the edges are just starting to brown. (If your oven runs hot, check at 33 mins; mine’s a bit moody so YMMV.)
- Let cool completely before slicing—actually, I think it tastes better the next day, but let’s be real: warm bars straight from the pan are pretty irresistible too.
What I Wish I Knew Sooner (Notes Form Real Life)
- If you use frozen berries, don’t thaw them. Thawed ones go all watery and make a mess (ask me how I know…)
- The parchment sling is a lifesaver—otherwise, you’ll be scraping bits out with a spatula
- If you want sharper lemon flavor, zest a lemon into the cheesecake layer (I sometimes forget, but when I remember, oof—so good)
- The bars firm up a lot in the fridge, so don’t panic if they seem wobbly right out of the oven
Variations I’ve Tried (And One That’s a Bust)
- Swap the blueberries for raspberries or chopped strawberries—both work, though raspberries make it a bit tangy (in a good way)
- Once, I tried making this with blackberries—turned out way too seedy for my taste, but maybe you’ll love it
- For a gluten free version, I just use a 1:1 GF flour blend and certified GF oats. Turns out fine, nobody notices unless I tell them
- If you want to make it a bit extra, swirl a couple spoons of blueberry jam into the cheesecake layer. Messy, but delicious
Equipment (And What to Do If You’re Missing Something)
- 8×8 inch square baking pan (any dish near this size works—one time I used a round cake tin and just cut wedges, looked wonky but tasted the same)
- Mixing bowls (I’ve made do with salad bowls, as mentioned…)
- Electric mixer or a sturdy whisk—if you don’t have either, just use a fork and a bit of elbow grease. Not fancy, but it gets the job done
- Parchment paper is lovely, but if you’re out, grease the heck out of your pan
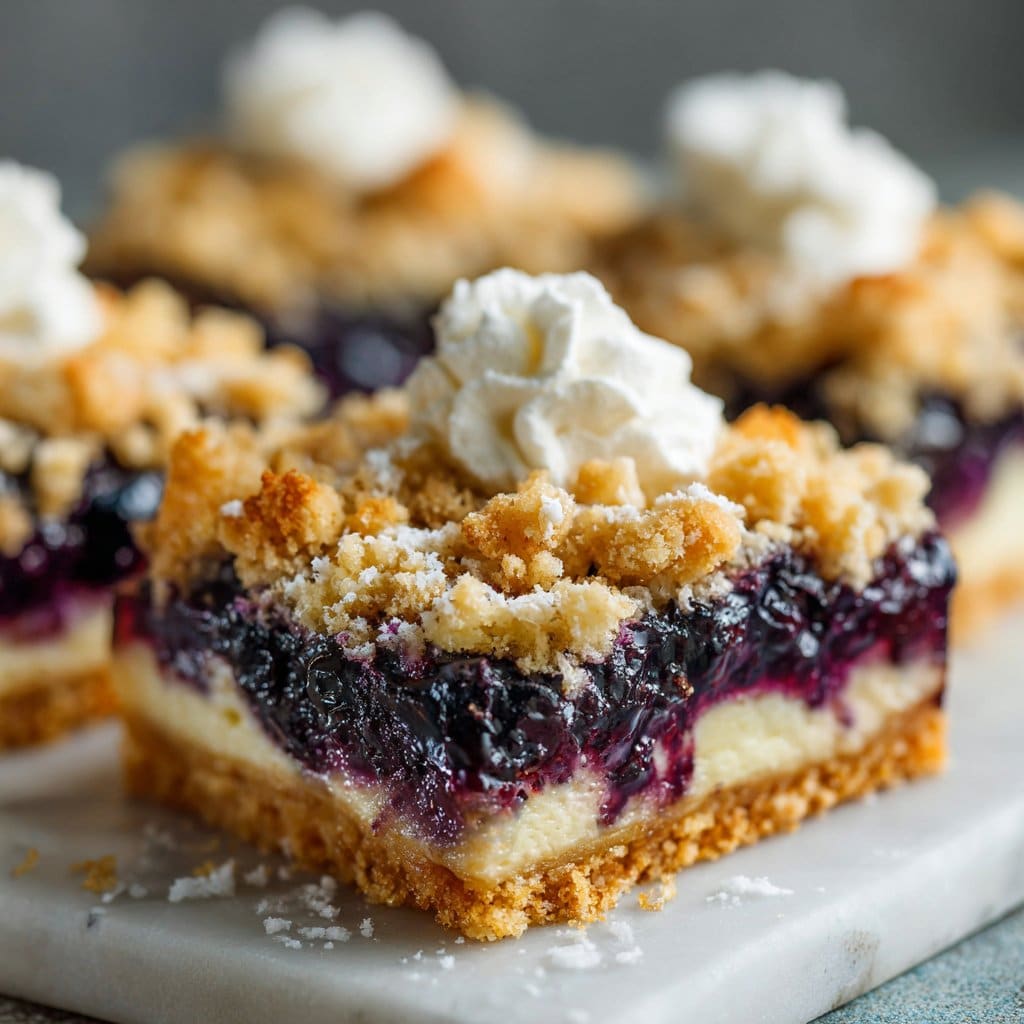
How I Store These (If There’s Any Left)
I keep these bars in an airtight container in the fridge—they’re good for about 3 days, though honestly, in my house they don’t make it past the first night. If you want to keep them longer, freeze them between layers of parchment paper. Just thaw in the fridge overnight. I’ve been known to eat them half-frozen, but maybe that’s just me.
How I Serve These (And a Strange Family Tradition)
We usually cut the bars into generous squares and pile them up on a big platter. My sister likes hers with a dollop of whipped cream (or clotted cream if we’re feeling posh). I personally think they’re best with a mug of strong tea. Sometimes my brother dunks his in coffee—sacrilege? Maybe. But it’s tasty.
Hard-Won Pro Tips (AKA Learn From My Mistakes)
- I once tried to rush the cooling step—big mistake. The bars fell apart and I ended up with a blueberry cheesecake trifle (still tasty, but not the point)
- Another time, I used cold cream cheese and it left lumps. Now I just nuke it for a few seconds if I forget to take it out ahead
- Don’t overbake—if you wait till the middle is totally firm, you’ll have dry bars. Trust me, the carryover heat finishes the job
What People Ask Me (FAQ, Real Talk!)
- Can I use other fruit?
- Pretty much! Raspberries, strawberries, even cherries work, though you might want to cut back on the sugar if your fruit’s extra sweet.
- Do I have to use parchment?
- Nope, but clean-up’s way easier if you do. If you’ve run out, just make sure you grease the pan really well—it’ll stick a bit, but nothing tragic.
- Can I double the recipe?
- Sure thing. Use a 9×13 pan and maybe add 5 minutes to the bake time; just keep an eye on it near the end. Or, y’know, just make two pans. More is more.
- Is it okay to use low-fat cream cheese?
- It’ll work, but the bars are softer and not quite as rich. I’ve done it when I was out of full-fat, but honestly, I like the original better.
- Do these freeze well?
- Yeah! They freeze surprisingly well. Just layer with parchment and pop in an airtight box. Defrost in the fridge or just eat them cold if you’re impatient (no judgment here).
- Any good resources for baking basics?
- Oh, totally. I love Sally’s Baking Addiction’s baking basics—she explains things the way a friend would. Also, King Arthur’s pan guide is handy if you’re not sure what size pan will work.
And if you’ve got a question I haven’t answered, just shout! I love talking food—sometimes a bit too much, probably.
Right, I’m off to put the kettle on. If you end up making these, let me know how it goes (bonus points if you avoid the trifle incident). Happy baking!
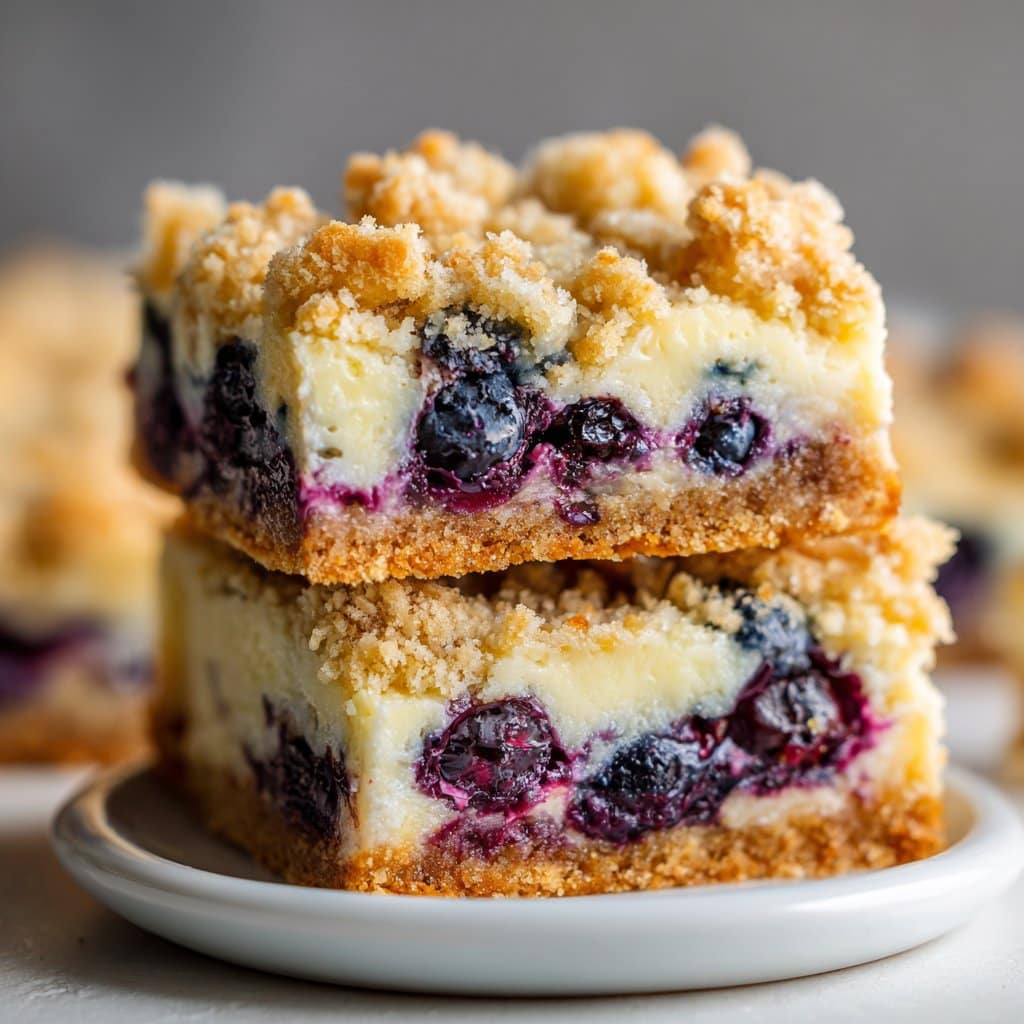
Ingredients
- 1 1/2 cups all-purpose flour
- 1 cup granulated sugar, divided
- 1/2 cup unsalted butter, melted
- 8 oz cream cheese, softened
- 1 large egg
- 1 tsp vanilla extract
- 2 cups fresh blueberries
- 2 tbsp cornstarch
- 1/4 tsp salt
Instructions
-
1Preheat the oven to 350°F (175°C). Line an 8×8-inch baking pan with parchment paper.
-
2In a medium bowl, mix flour, 1/2 cup sugar, melted butter, and salt until crumbly. Press two-thirds of the mixture into the bottom of the prepared pan to form the crust.
-
3In a separate bowl, beat cream cheese, remaining 1/2 cup sugar, egg, and vanilla extract until smooth. Spread the cheesecake mixture evenly over the crust.
-
4Toss blueberries with cornstarch, then sprinkle evenly over the cheesecake layer.
-
5Crumble the remaining flour mixture over the blueberries to form the topping.
-
6Bake for 40 minutes or until the top is golden and the center is set. Cool completely before slicing into bars.
Approximate Information for One Serving
Nutrition Disclaimers
Number of total servings shown is approximate. Actual number of servings will depend on your preferred portion sizes.
Nutritional values shown are general guidelines and reflect information for 1 serving using the ingredients listed, not including any optional ingredients. Actual macros may vary slightly depending on specific brands and types of ingredients used.
To determine the weight of one serving, prepare the recipe as instructed. Weigh the finished recipe, then divide the weight of the finished recipe (not including the weight of the container the food is in) by the desired number of servings. Result will be the weight of one serving.
Did you make this recipe?
Please consider Pinning it!!




