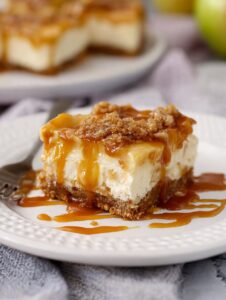
If there’s one thing I can count on when I bring my Chocolate Pb Ooey Gooey Cake to a potluck, it’s that I’ll be leaving with an empty pan (and a bunch of requests for the recipe, sometimes scribbled on napkins — I love that). Actually, once my cousin tried to sneak a chunk of this cake before I’d even finished icing it, which is probably the highest compliment a baker can get, messy kitchen aside. And if I’m being honest, there’ve been more than a few times I’ve made it just because — no occasion, just me craving that gooey, peanut-butter chocolate combo that can make a long day feel a bit sweeter.
Why You’ll Totally Love Making (and Eating) This
I break out this recipe when I want something a little over-the-top but not a huge drama to make. Like, if it’s been raining for three days straight, this is my go-to pick-me-up — it’s like a sugar hug! My family loses their minds over the gooey center; my partner, who pretends to be indifferent around sweets, can’t keep his fork away (maybe he thinks I don’t notice?). Plus, there’s no waiting for perfectly set layers or any of those intimidating steps — if it’s a little rustic, who cares? Actually, that’s kinda the charm. Oh, and there were a few burned edges on my first attempt, but they were still scarfed down, so don’t stress perfection.
So, What Ingredients Do You Need?
- 1 box chocolate cake mix (I usually grab whatever’s on sale, but my grandma swears by Duncan Hines. Any will do, really!)
- 1 stick (about 110g) unsalted butter, melted (I’ve used salted in a pinch, and it’s fine; just a smidge saltier)
- 2 large eggs (room temp is best, but I’ve used cold ones and lived to tell the tale)
- 1 cup peanut butter (I go for creamy — chunky gives a bit more texture, but I find it sometimes gets weirdly clumpy. Natural is ok, but you may want a touch more sugar.)
- 8 oz (225g) cream cheese, softened (Store brand or fancy — doesn’t matter. Once I forgot to soften it and just muscled through.)
- 2 cups powdered sugar (Plus a splash for dusting at the end if you fancy.)
- 1 teaspoon vanilla extract (Imitation is alright. I’ve never been able to taste a huge difference, but maybe that’s just me?)
- Optional: 1 cup mini chocolate chips or chopped peanut butter cups, because why not?
How to Make Your Own Ooey Gooey Magic
- Preheat your oven to 350°F (that’s 175°C for my metric-minded pals). Grease a 9×13 baking dish — I just spritz with whatever nonstick spray I can find. If you forget this step, be prepared to do some cake excavation later, but it’s not the end of the world.
- In a big bowl, mix the cake mix, melted butter, and one egg until it forms a thick dough (honestly, I just use a fork and some muscle). Spread it in the dish — it’s sticky, so sometimes I dampen my fingers to pat it out.
- In another bowl, beat the cream cheese, peanut butter, the other egg, powdered sugar, and vanilla till smooth. (There WILL be lumps if your cream cheese is cold; it’s fine. They melt while baking.)
- Pour that epic peanut butter mixture all over the cake layer. You can swirl it with a butter knife if you’re feeling fancy, or just leave it. Top with chocolate chips if using.
- Bake 35-40 minutes. I usually check at 35 — you want the edges puffed and brown but the middle should still look a bit wobbly. It’ll set as it cools, promise. Don’t panic if it looks like cake soup in the middle, it’s part of the magic.
- Let it cool a little before slicing (I know it’s hard; I fail at this all the time and end up with delicious lava instead of neat squares).
Notes from My (Moderately Messy) Kitchen
- If you want it even gooier, pull it at the 35 minute mark; for more brownie-like, go closer to 45.
- I’ve made this with almond butter once — tasted great, but the texture was a bit odd; probably best to stick to peanut butter unless you’re up for experimenting.
- Baking times might be off if your oven runs hot (mine’s got a mind of its own, so I check early).
Things I’ve Tried (Some Worked, Some…Not So Much!)
- If you’re out of cream cheese, Greek yogurt + a splash of milk actually does ok (don’t tell my mother-in-law).
- Tried swirling raspberry jam in — sounded amazing, came out looking, well, strange. Maybe skip that.
- Once I tossed in chopped pretzels for crunch. Not too shabby, but they got soft by day two, just FYI.
Gear You’ll Need (Or Not!)
You’ll want a 9×13-inch pan, two mixing bowls, and a hand mixer is handy. If you’re living the unplugged life, a whisk/fork and some elbow grease are just as good. Oh, and I once used a casserole dish a bit smaller — just baked it a tad longer (and the edges went a bit crisp, but kinda loved that).

How to Store It (If It Lasts That Long)
Fridge is best — lasts up to 4 days in an airtight container, though honestly, in my house it never lasts more than a day! You can even freeze chunks wrapped in foil, but they rarely make it that far. Tastes pretty good cold, too.
When and How We Serve It
This is best with a scoop of vanilla ice cream — we’re pretty loyal to Tillamook in my family (if you want to check them out: Tillamook ice cream). On birthdays, sometimes I stick a candle in the wobbliest piece and call it fancy. My neighbor insists on whipped cream and a shot of espresso (if you want to have a look at how that’s done, I saw this clever trick at Serious Eats), which actually pairs really well.
Pro Tips from a Serial Cake Eater
- I once tried to cut this cake before it cooled. Rookie error – you’ll just end up with chocolatey mess. Actually, resist the urge. Mostly.
- Don’t skip lining the pan if you’re really into neat pieces — otherwise, a messy scoop with a big spoon works (and saves on washing up, honestly).
- Using natural peanut butter? Give it a good stir; the oil separation can make thin patches in the filling.
Some Burning Questions I Get (And My Real Answers)
- Can I use a gluten-free cake mix?
- Yes! Works just fine, though sometimes I need to bake a little longer. Texture is a bit different but still dangerously good.
- Is it super sweet?
- Well, yes. That’s the point! Actually, you can cut the powdered sugar down a little if you’re not into that, but I wouldn’t do less than 1 1/2 cups or it goes kind of dense.
- Can I double this for a crowd?
- Of course, just use two pans (my oven can’t fit one monster pan anyway) or try one of those huge foil trays for easy cleanup.
- What if I don’t have cream cheese?
- Greek yogurt with a bit more powdered sugar will fudge it; or on second thought, maybe even ricotta, but I haven’t tried that myself yet, so no promises!
- Why is mine always a gooey mess in the center?
- That’s literally the point. But if it’s liquid, bake 5 min more. Or eat messy.
Anyway, that’s about it. Sorry, did I mention how ridiculously good the batter is? Tasting a little while prepping is practically a law in my house.
If you end up making this and want another sticky dessert, I snag ideas from Sally’s Baking Addiction all the time. Oh, and yes — your kitchen will smell insane. Enjoy!

Ingredients
- 1 box chocolate cake mix (16.5 oz)
- 1/2 cup unsalted butter, melted
- 1 large egg
- 1 cup creamy peanut butter
- 1 package (8 oz) cream cheese, softened
- 2 large eggs
- 4 cups powdered sugar
- 1 teaspoon vanilla extract
Instructions
-
1Preheat oven to 350°F (175°C). Grease a 9×13-inch baking pan.
-
2In a large bowl, combine chocolate cake mix, melted butter, and 1 egg. Mix until a soft dough forms. Press the mixture evenly into the bottom of the prepared pan.
-
3Spread creamy peanut butter evenly over the cake base layer.
-
4In another bowl, beat softened cream cheese until smooth. Add 2 eggs and vanilla extract, and continue beating. Gradually add powdered sugar, mixing until smooth and creamy.
-
5Pour the cream cheese mixture over the peanut butter layer and spread evenly.
-
6Bake for 40 minutes or until the edges are set but the center is still slightly gooey. Cool slightly before slicing and serving.
Approximate Information for One Serving
Nutrition Disclaimers
Number of total servings shown is approximate. Actual number of servings will depend on your preferred portion sizes.
Nutritional values shown are general guidelines and reflect information for 1 serving using the ingredients listed, not including any optional ingredients. Actual macros may vary slightly depending on specific brands and types of ingredients used.
To determine the weight of one serving, prepare the recipe as instructed. Weigh the finished recipe, then divide the weight of the finished recipe (not including the weight of the container the food is in) by the desired number of servings. Result will be the weight of one serving.
Did you make this recipe?
Please consider Pinning it!!