Let’s Talk Chocolate Thumbprint Christmas Cookies
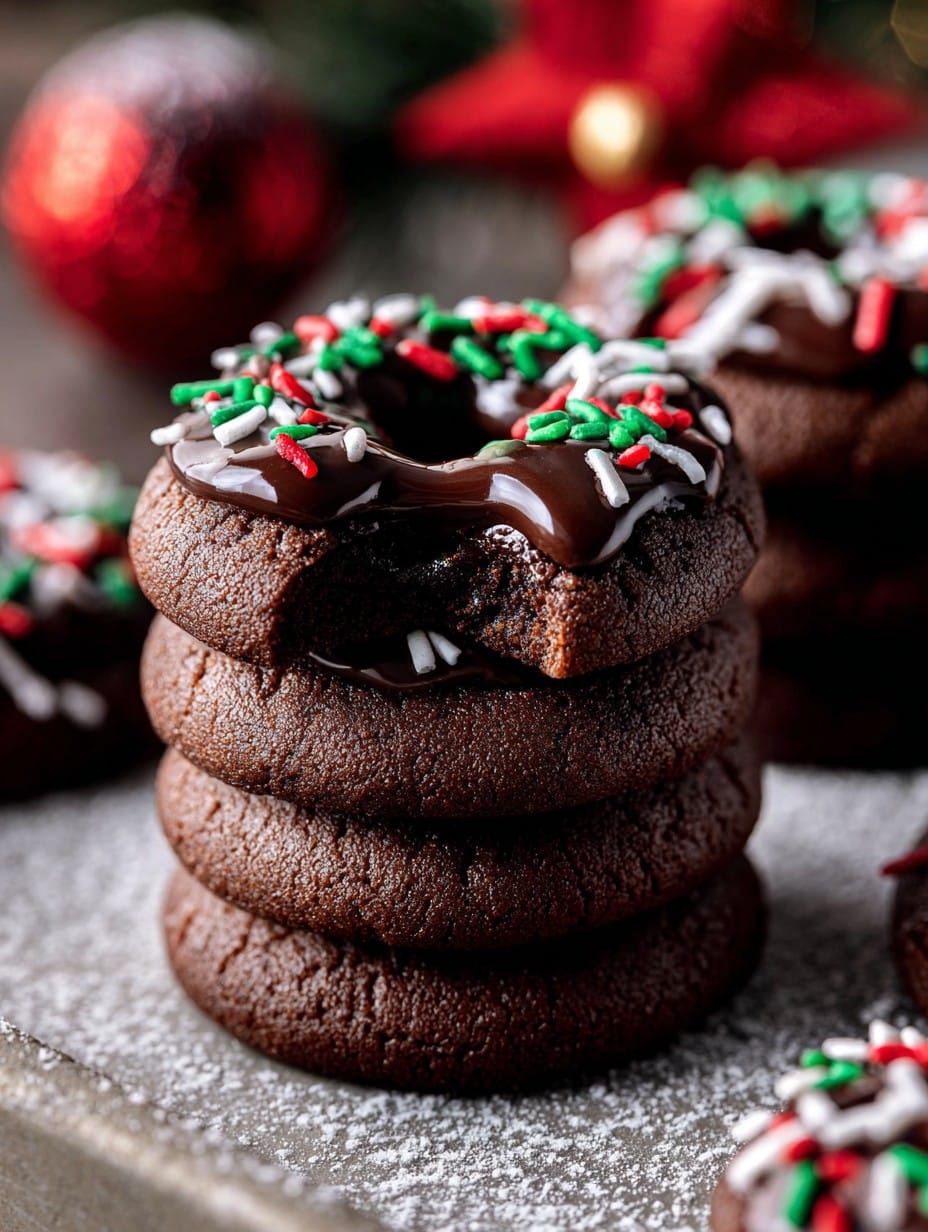
You know that feeling when the holiday playlist is on, you’ve maybe had one cup too many of strong coffee, and you’re knee-deep in flour? That’s basically me every December. Honestly, nothing gets me in the Christmas spirit faster than these Chocolate Thumbprint Christmas Cookies. I started making them one snowy evening because I was out of sprinkles for my usual gingerbread, and now—well, they’re non-negotiable for us. I mean, you get chocolate, a soft but slightly crisp cookie, and a little jammy surprise (or sometimes something else, more on that later!). Plus, my nephew once smooshed his entire thumb into the dough and giggled for ten solid minutes, so now we always make them as a group. It’s chaos and I love it.
Why You’ll Love These (or at least, why we do)
I make these when I want an easy win—like, the kind of cookie that makes folks do that happy little snack-dance, you know? My family goes bonkers for these, especially when I experiment with different fillings. My partner claims to “hate jam”, but somehow these disappear anyway (hmm, curious). Plus, if you’re wrestling with a busy December, these dough balls can be made in advance, frozen, and then baked when you find five minutes between wrapping presents and re-watching Home Alone. I get frustrated sometimes because the thumbprints don’t always look perfect, but hey, that’s part of the charm. Imperfection is festive, right?
Gathering Your Ingredients (Don’t Worry—It’s Flexible)
- 1 cup (220g) unsalted butter, at room temp (I’ve used salted and just skipped extra salt. It’s fine!)
- 3/4 cup (90g) powdered sugar (my friend swears by regular granulated; honestly, both work)
- 1 large egg yolk (sometimes I use the whole egg if I forget—turns out softer!)
- 2 teaspoons pure vanilla extract (I once used almond extract by mistake. Not half bad!)
- 2 cups (250g) all-purpose flour
- 1/4 teaspoon salt (skip if you used salted butter)
- 1/4 cup cocoa powder (I like Dutch-processed, but basic cocoa is just grand)
- About 2/3 cup assorted jam—raspberry or apricot are my go-tos, but use what you like; I’ve even tried Nutella in a pinch
- Optional: Sprinkles, chopped nuts, or shredded coconut for rolling (My gran insisted on toasted pecans, but I never have the patience, truthfully)
How to Pull These Off Without Losing Your Cool
- Get prepped. Oven to 350°F (175°C) and line a couple of baking sheets with parchment paper. No parchment? Grease ’em up. Now, cream together the butter and sugar—either with a mixer, or a sturdy wooden spoon if you’re feeling strong (or impatient).
- Add the yolk and vanilla. Beat those in (I sometimes add the egg white if it sneaks in—shrug, it works).
- Toss in the dry stuff. Mix in flour, cocoa, and salt. Warning: at first it’ll look dry and odd, but keep going! It’ll come together. This is where I taste a tiny pinch, just to be sure. Or, well, because I want to.
- Shape those cookies. Scoop out about a tablespoon and roll into balls—about a walnut in size. I dump them in a big bowl of sprinkles sometimes (kids love this bit), or just plop them on the sheet as-is.
- Thumb time! Now’s the fun part: gently press your thumb (or, if you have a small helper, let them have a go) into the center to make a little well. Sometimes mine crack on the sides; I just squish them back together—no one complains.
- Fill and bake. Spoon in a little dollop of your chosen jam, chocolate spread, or even caramel sauce. Bake for 11–13 minutes. The cookies will look set around the edges and soft in the middle. Don’t panic if they look a little underdone—out of the oven, they’ll firm up. I sometimes re-press the thumbprint mid-bake using the back of a spoon if they’re puffing too much.
- Cool on the tray for a couple minutes, then move to a wire rack (or, a cutting board if that’s all you’ve got—it happens!).
Notes: Stuff I Learned the Hard Way
- Powdered sugar makes these meltier; using granulated gives a bit more chew. It’s a toss up—pick a side.
- If you want super tidy wells, do the thumbpress halfway through baking. But honestly? I couldn’t be fussed.
- Don’t fill the thumbprint all the way or you’ll get an oozy mess (unless you like sticky surprises—no judgment).
Variations & Experiments (Some brilliant, some… not)
I’ve gone wild and filled these with dulce de leche. Chocolate chips? Why not. Once, in a moment of holiday insanity, I tried marmalade. Wouldn’t recommend it; too bitter. Peppermint chips work, but maybe not for everyone. For a nuttier kick, roll in finely chopped hazelnuts before baking, but they do fall off everywhere—your call!
Equipment: What You Need (ish)
- Electric mixer if you’re feeling fancy—otherwise, a big bowl and spoon’s fine. Your arm might complain.
- Baking sheets and parchment paper, or just butter up the sheets if that’s all you’ve got.
- Wire rack helps with cooling. But, seen as how mine disappeared, I use an upside-down muffin tin. Works surprisingly well!
How to Keep These Cookies Fresh (Or Try To)
Store in an airtight tin for up to 5 days. Actually though, in my house they never last more than a day! If you do make a big batch, layer with parchment, and they freeze well—just don’t fill them until after thawing if you’re using wet jams. Oh, and here’s a tip I found from King Arthur Baking: stick a slice of bread in the tin to keep things soft.
How I Like to Serve These (Feel Free to Ignore)
We stack them on a mish-mash of Christmas plates and fight over the ones with raspberry jam. Sometimes I sneak one with my morning tea—don’t tell the kids! They also look cute wrapped up in cellophane if you’re making cookie boxes as gifts (which I used to do before I got lazy about ribbons).
Pro Tips… Learned the Not-So-Easy Way
- I once tried rushing the chill step (by putting the dough straight in the freezer)—regretted it because it made the dough oddly crumbly. Just chill for 15-20 mins in the fridge while you faff about doing something else.
- Don’t overbake. The cookies firm up as they cool, so if they look a little pale in the middle, that’s your cue.
Your Questions, Answered—At Least I’ll Try
- Can I make these gluten-free? I’ve tried with a 1:1 GF flour blend. Worked just fine, though a little softer. Maybe add a sprinkle more cocoa for structure.
- Is there a non-dairy version? Sure thing! Swap butter for a vegan butter (like Earth Balance—my friend from up north swears by it), and it’s still festive. The flavor isn’t quite as rich but still good.
- Can I freeze the dough? Oh yeah. Roll into balls, freeze on a tray, then bag them up. Just thaw before baking, and you’re golden.
- How do I stop the jam from running? Chill the cookies before baking if you want, or choose a thicker jam. But honestly, a little mess is part of the magic!
- Do I need a stand mixer? Nope! Just muscle power. I actually prefer to do it the old-fashioned way (less washing up, honestly).
- Can I use a different flour? Someone once asked me if spelt flour was okay. I’ve never tried it, but hey, why not? Let me know how it goes.
Oh, and quick digression—if you get bored while waiting for your dough to chill, try this list of Christmas films. A bit of background magic never hurt, right? Anyway, happy baking, and let me know if you try filling these with something weird—it might actually be brilliant.
Ingredients
- 1 cup unsalted butter, softened
- 2/3 cup granulated sugar
- 1 large egg yolk
- 1 teaspoon vanilla extract
- 2 cups all-purpose flour
- 1/3 cup unsweetened cocoa powder
- 1/4 teaspoon salt
- 1 cup semisweet chocolate chips
- 2 tablespoons heavy cream
- Holiday sprinkles, for decorating
Instructions
-
1Preheat your oven to 350°F (175°C) and line a baking sheet with parchment paper.
-
2In a large bowl, cream together the butter and sugar until light and fluffy. Add the egg yolk and vanilla extract, mixing well.
-
3Whisk together the flour, cocoa powder, and salt in a separate bowl. Gradually add the dry ingredients to the wet mixture, blending until a soft dough forms.
-
4Shape the dough into 1-inch balls and place them 2 inches apart on the prepared baking sheet. Press your thumb gently into the center of each ball to make an indentation.
-
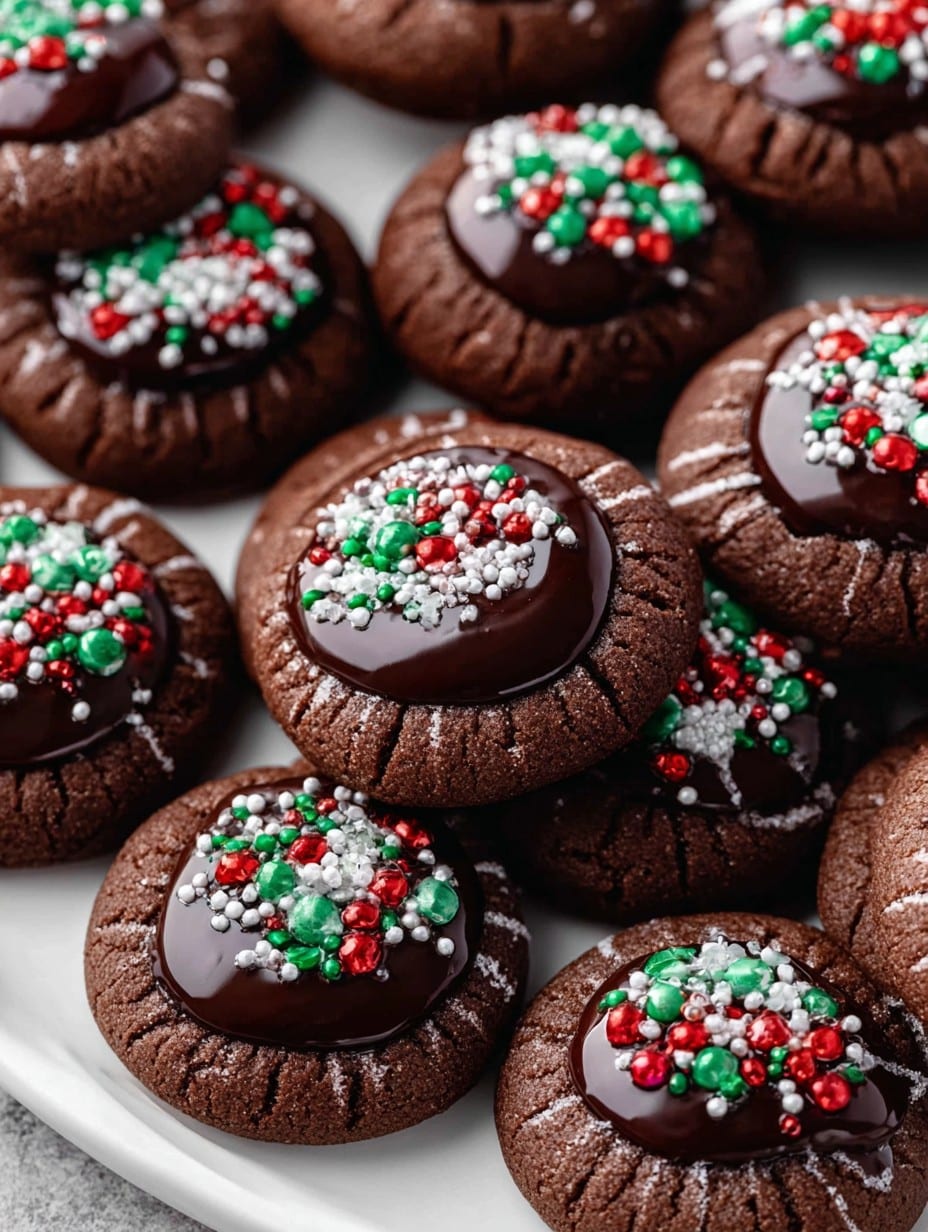
5Bake cookies for 10-12 minutes until set. While the cookies cool, melt chocolate chips with heavy cream in a heatproof bowl until smooth.
-
6Fill each thumbprint with the melted chocolate and top with holiday sprinkles. Let cookies set before serving.
Approximate Information for One Serving
Nutrition Disclaimers
Number of total servings shown is approximate. Actual number of servings will depend on your preferred portion sizes.
Nutritional values shown are general guidelines and reflect information for 1 serving using the ingredients listed, not including any optional ingredients. Actual macros may vary slightly depending on specific brands and types of ingredients used.
To determine the weight of one serving, prepare the recipe as instructed. Weigh the finished recipe, then divide the weight of the finished recipe (not including the weight of the container the food is in) by the desired number of servings. Result will be the weight of one serving.
Did you make this recipe?
Please consider Pinning it!!




