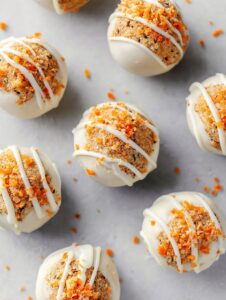
Let’s Get Egg-cited! Why I Make Oreo Balls Every Easter
If you’d told me ten years ago I’d be forming Oreos into pastel eggs instead of simply, well, eating the whole pack on the sofa, I’d have laughed (with crumbs everywhere). But my niece was obsessed one long-ago Easter, so we tried these together. That year, we all ended up with (ahem) colorful chocolate in our hair and big grins. They’ve since become a slightly silly tradition—last year, I caught my brother trying to stash a few on a high shelf so he didn’t have to share with the little ones. Families, right?

Honestly, these are just fun—no fancy skills needed (unless you count not eating them all before they’re dipped). Plus, you can go as bonkers or simple as you feel like with the decorations. Or just let the kids unleash chaos. Happens every time here.
Why You’ll Love Making These (and Eating Them…)
I whip these up when I’m out of time but still want to make something festive. My family goes bananas for them—they vanish way faster than those supermarket marshmallow eggs (which, let’s be real, taste very sweet but not much else). Oreo Balls just have that creamy, crunchy, chocolatey something, possibly thanks to my not-so-secret, extra-generous dose of sprinkles. And if you’ve ever struggled with chocolate coating getting streaky or lumpy: me too, friend. But honestly, these taste so good even when a wee bit messy.
Here’s What You’ll Need (Swaps Are Totally Fine!)
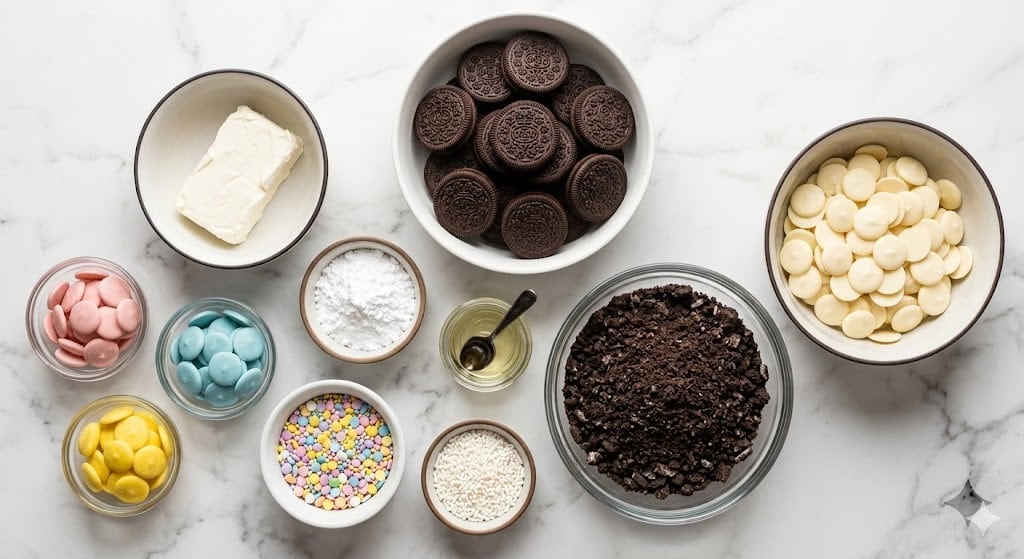
- 36 regular Oreo cookies (I’ve used double-stuf in a pinch—just a bit creamier! Store-brand works okay too)
- 8 oz (225g) cream cheese, softened (I do sometimes use low-fat, but full-fat is more forgiving. My grandmother swore by Philadelphia, but whatever you’ve got…)
- 12 oz (340g) candy melts or white chocolate chips – pastel colors make it festive (One time I used plain white and colored it after; it was messy but worked.)
- Sprinkles, food coloring, or colored sanding sugar (totally optional but kids will revolt if there aren’t sprinkles here)
- 1-2 tsp coconut oil or shortening (optional, helps coating stay smooth)
How To Make Easter Egg Oreo Balls (I Promise, Not Fussy)
- Bash, crush, or blitz your Oreo cookies into fine crumbs—food processor makes it stupid-easy, but a zip bag + rolling pin works if you need to let off steam. Dump into a bowl.
- Stir in the softened cream cheese. I start with a spoon, but get in there with your hands for the last bit—it’s sticky and messy but oddly satisfying. It should look like dark mud at this point (don’t panic!).
- Take small spoonfuls and roll into little egg-ish shapes—think slightly chubby almonds. Place them on a baking sheet lined with parchment. They don’t need to look perfect; knobbly is cute. Pop these in the freezer for about 30 minutes (longer if you get distracted by laundry or a cup of tea—it happens).
- Melt your candy melts or white chocolate, with coconut oil or shortening if you like, either in the microwave in 20-second bursts or slowly over a double boiler. Stir until smooth. If you want to color melted white chocolate, add a drop or two of oil-based food coloring. (Learned the hard way: water-based coloring makes it seize up. Oops.)
- Dip the cold Oreo eggs one by one into the melted candy. I use two forks to do this; shake off the excess and lay them back on the parchment. (This is where I usually sneak a taste, broken eggs are a cook’s tax!)
- Decorate with sprinkles or drizzle extra colored melts on top right away, before the coating sets. If you’re me, at least two end up dropped on the floor; five-second rule?
- Let them set at room temp or in the fridge, whichever is faster and less tempting for sneaky snackers.
Just a Couple Things I’ve Learned (Notes & Real-Talk)
- If your cream cheese is too cold, everything is harder. I sometimes nuke it for 10 seconds, stir, repeat. Don’t let it liquefy, though.
- Chilling the balls really is key—the coating slides off if they’re too soft. I skipped this step once (impatient, always) and ended up with sad blobby puddles.
- And, the messier the decorations, the happier the kids. It’s science, probably.
How I’ve Swapped (and Sometimes Flopped)
- Used Golden Oreos for a blonde version—pretty tasty, more vanilla-y, but less striking once coated.
- One year I tried Nutella instead of cream cheese. It was… not great. Kind of sticky, not holding a shape. Learn form my mistakes!
- Tried rolling some in shredded coconut or crushed nuts before the coating set—actually delicious if you like a bit more texture.

Kitchen Gizmos (But Don’t Sweat It)
- Food processor makes Oreo crushing quick, but the old zip bag + rolling pin method works (mine broke once mid-frenzy—just used a wine bottle instead!)
- A fork does fine for dipping. Those fancy dipping tools are fun but never seem to be on hand when I want them.
How To Store—If There’s Any Left
Bung them in a sealed container in the fridge, they’ll be fine for about a week. That said—they’ve never lasted more than 24 hours in my house, so—shrug. If you want to freeze, wrap individually, thaw in the fridge, and they taste just as good. Actually I think they’re even better slightly cold.
How I Serve ‘Em (Besides Straight Out Of The Tupperware)
If I’m feeling vaguely organized, I’ll set out a plate with pastel napkins for Easter brunch. Sometimes I’ll tuck them into little paper muffin cups, or if there’s an Easter egg hunt, I “hide” a few as a bonus discovery (adults love finding them too—don’t let them tell you otherwise).
Pro Tips, Learned the Messy Way
- Rushing chill time = broken, melty balls. Trust me—I thought 10 minutes would do. It didn’t.
- Do not overheat candy melts or chocolate—seizes up quicker than you can say “oops.” Gentle heat, always.
- If chocolate starts to harden before you’re done, a quick zap in the microwave brings it back.
FAQs From Friends & The Occasionally Curious Relative
- Can these be made ahead of time? Yep! Actually, I think they taste even better after a night in the fridge—the flavors settle, or something.
- I’m allergic to cream cheese—what now? Try plain Greek yogurt cheese or even softened butter as a second-choice. Texture will change—just warning ya.
- Do I have to use candy melts? Nah, white chocolate chips work (I’ve even used milk or dark chocolate in a pinch, turns out fine).
- Help! My chocolate doesn’t stick—what gives? Balls were probably too warm, or coating too cool. Try popping the tray back in the freezer for a few minutes, then dip. Sometimes it’s just a wonky batch—who knows?
- Can kids make these? Oh absolutely—the messier the better! Tiny hands are actually perfectly suited to rolling these, as long as you don’t mind finding a bit of cream cheese in wild places for the next day or two.
Actually, speaking of wild places—I once found a sprinkle in my shoe three days after Easter. The sign of a good holiday, I reckon.
Ingredients
- 36 regular Oreo cookies (I’ve used double-stuf in a pinch—just a bit creamier! Store-brand works okay too)
- 8 oz (225g) cream cheese, softened (I do sometimes use low-fat, but full-fat is more forgiving. My grandmother swore by Philadelphia, but whatever you’ve got…)
- 12 oz (340g) candy melts or white chocolate chips – pastel colors make it festive (One time I used plain white and colored it after; it was messy but worked.)
- Sprinkles, food coloring, or colored sanding sugar (totally optional but kids will revolt if there aren’t sprinkles here)
- 1-2 tsp coconut oil or shortening (optional, helps coating stay smooth)
Instructions
-
1Bash, crush, or blitz your Oreo cookies into fine crumbs—food processor makes it stupid-easy, but a zip bag + rolling pin works if you need to let off steam. Dump into a bowl.
-
2Stir in the softened cream cheese. I start with a spoon, but get in there with your hands for the last bit—it’s sticky and messy but oddly satisfying. It should look like dark mud at this point (don’t panic!).
-
3Take small spoonfuls and roll into little egg-ish shapes—think slightly chubby almonds. Place them on a baking sheet lined with parchment. They don’t need to look perfect; knobbly is cute. Pop these in the freezer for about 30 minutes (longer if you get distracted by laundry or a cup of tea—it happens).
-
4Melt your candy melts or white chocolate, with coconut oil or shortening if you like, either in the microwave in 20-second bursts or slowly over a double boiler. Stir until smooth. If you want to color melted white chocolate, add a drop or two of oil-based food coloring. (Learned the hard way: water-based coloring makes it seize up. Oops.)
-
5Dip the cold Oreo eggs one by one into the melted candy. I use two forks to do this; shake off the excess and lay them back on the parchment. (This is where I usually sneak a taste, broken eggs are a cook’s tax!)
-
6Decorate with sprinkles or drizzle extra colored melts on top right away, before the coating sets. If you’re me, at least two end up dropped on the floor; five-second rule?
-
7Let them set at room temp or in the fridge, whichever is faster and less tempting for sneaky snackers.
Approximate Information for One Serving
Nutrition Disclaimers
Number of total servings shown is approximate. Actual number of servings will depend on your preferred portion sizes.
Nutritional values shown are general guidelines and reflect information for 1 serving using the ingredients listed, not including any optional ingredients. Actual macros may vary slightly depending on specific brands and types of ingredients used.
To determine the weight of one serving, prepare the recipe as instructed. Weigh the finished recipe, then divide the weight of the finished recipe (not including the weight of the container the food is in) by the desired number of servings. Result will be the weight of one serving.
Did you make this recipe?
Please consider Pinning it!