So, You Have Extra Sourdough Discard? Brownies Time!
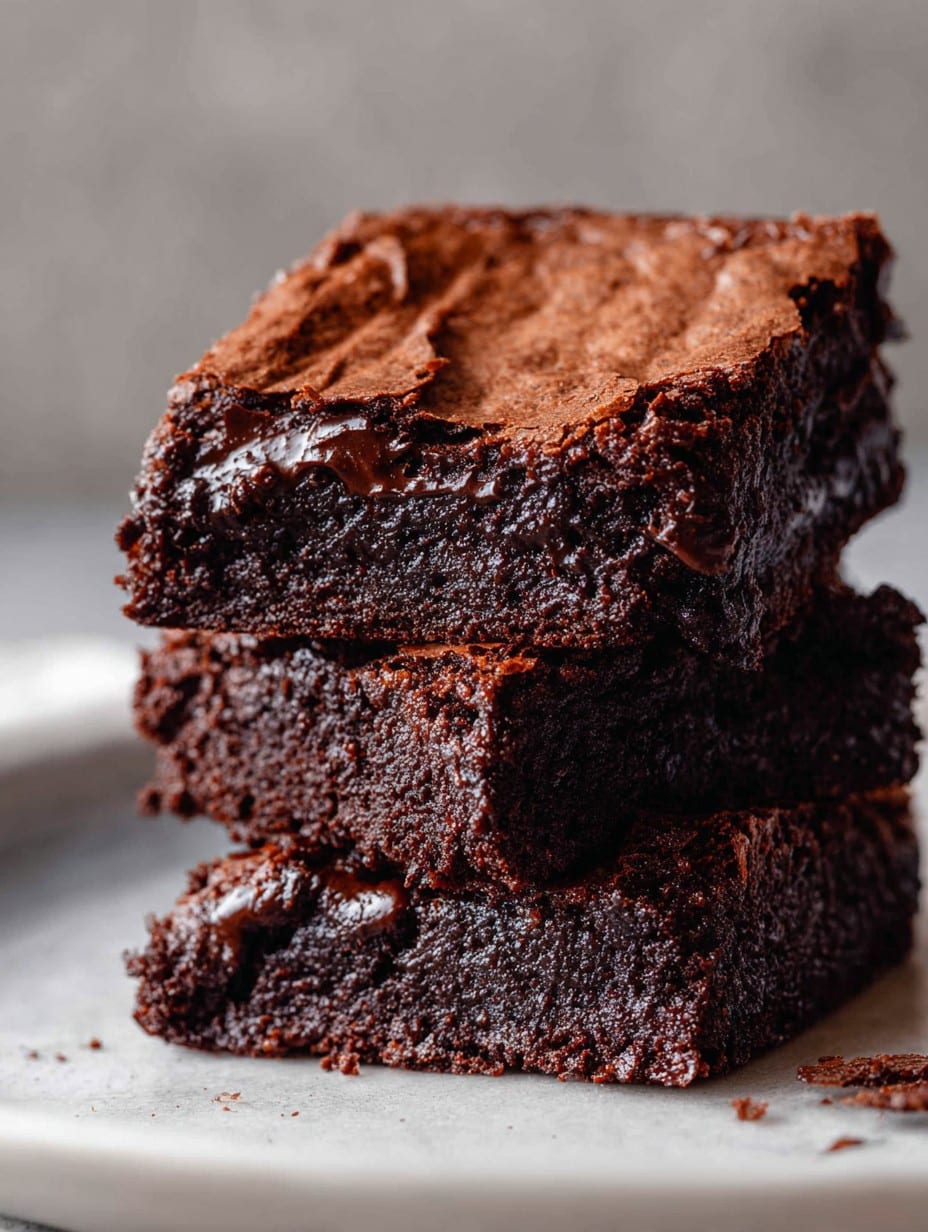
Okay, can I just say—every time I feed my sourdough starter, I wind up with this sad jar of discard sitting in the fridge, looking as forlorn as a rain-soaked cat. And yes, I felt guilty tossing it out, so one day (it was one of those days, you know the sort), I decided, “Let’s just throw it in some brownies and see what happens.” And—drumroll, please—they turned out wild. Chewy at the edges, fudgy in the middle… my sister even called dibs on the corner pieces. That’s how you know it’s legit. I think it was the third or fourth time when my neighbor tried them and immediately asked for the recipe. And if sourdough can make bread and brownies, is there anything it can’t do?
Why I Keep Making These (Despite Myself)
I make these when I’ve had a long day and still want dessert but don’t want to fuss with anything requiring precision that’s more complicated than finding matching socks. (You do occasionally find those, right?) My family goes a bit mad for these because you’d barely believe there’s any sourdough in there—it doesn’t actually taste tangy, and my picky cousin, who side-eyes anything “different,” couldn’t even tell. Oh, and I used to hate the bit where brownies came out too cakey (honestly, isn’t the point to be fudgy?), but ever since leaning into discard brownies, that’s ancient history.
What You’ll Need (With Wiggle Room)
- 1/2 cup (115g) unsalted butter—salted works too, just skip a pinch later. I microwave to melt it. Granny swore by Kerrygold, but I grab whatever’s on sale.
- 1 cup (200g) granulated sugar—sometimes I swap in half brown sugar if I’m low, it makes it chewier (I think?)
- 1/2 cup (60g) unsweetened cocoa powder—I’ve used both fancy Dutch process and regular store-brand; honestly, both work fine.
- 2 large eggs—once used three small ones by accident, didn’t ruin it, just more “cakey”
- 1/2 cup (120g) Sourdough Discard, room temp is best but cold works in a pinch. Mine is sometimes bubbly, sometimes flat—doesn’t matter.
- 1 tsp vanilla extract—I forget this about half the time, still good.
- 1/4 tsp salt—if your butter’s salted, skip it, or don’t; no harm done.
- 1/2 cup (65g) all-purpose flour—on busy days, I just eyeball it… though once I overdid it and they came out like chocolate bricks, so maybe don’t do that (or at least learn from my mistake).
- Optional: a handful of chocolate chips or walnuts; I often do a bit of both if feeling bold.
Making the Brownies: As Unfussy As Possible
- First off—oven to 350°F (175°C). Grease or line an 8×8 inch pan, unless you like chiseling brownies form a dish. (I’ve done this—don’t recommend.)
- Melt the butter in a heatproof bowl, then stir in sugar and cocoa powder. It’ll look a bit grainy, like river mud—don’t worry, that’s how it’s meant to look. If you want to use a hand mixer, great, but a good old fork can also get the job done.
- Crack in the eggs and give ‘em a decent whisk; when it’s glossy and moody-looking, that’s your sign. This is where I usually sneak a taste (don’t @ me about the raw eggs). Add Sourdough Discard and vanilla, mix until combined. It may look split for a second—just muscle on.
- Sprinkle in flour and salt, and fold gently—don’t go wild, or they’ll be tough. Fold in chips/nuts/whatever add-ins you love. It gets kinda thick, so I use a spatula and some elbow grease.
- Scrape into your prepared pan, smooth the top (or not, rustic is pretty), and bake 20-24 minutes, give or take. Toothpick test: you want moist crumbs, not wet batter. It’ll smell absurdly good. Let cool if you can wait—I rarely do.
Stuff I’ve Learned Along The Way…
- The batter will look nothing like classic brownie batter—sometimes it’s more like a paste, but that’s fine.
- If your discard is super tangy-smelling, the tang fades a lot when baked. It’s never been obviously “sourdoughy.” (My neighbor still swears he can taste it, but I think he’s imagining things.)
- If the middle seems wobbly, let it sit in the hot oven (with the door cracked) for five minutes.
Let’s Not Pretend: My Brownie Experiments
I sometimes switch out the cocoa for melted chocolate, but the texture gets heavy—wouldn’t recommend, unless you want a brownie-brick. Adding peanut butter chips was a hit, though, as was a swirl of raspberry jam. Once, I tried a shot of espresso powder but overdid it—edgy and a bit weird. White chocolate chips? Honestly, that’s just not for me, but the kids devoured them.
What If I Don’t Have Fancy Equipment?
No stand mixer required here. I sometimes use a wooden spoon—or a plastic one when my favorite’s in the dishwasher (lazy, sorry). Don’t have an 8×8 pan? Any small oven-safe dish will work; just check it a couple minutes early or late. And parchment paper is nice, but I’ve greased with margarine and everything survived.
How Long Do These Brownies Last? (Anecdotally…)
Supposedly, they’ll keep in a container at room temp for up to four days. But in my house they vanish within 24 hours—my partner sneaks pieces with morning coffee. You can also freeze them (I wrap slices in cling film), then defrost as needed for surprise dessert cravings.
An Easy Way To Serve (But Do It Your Own Way)
Warm, with vanilla ice cream, is how I serve these when friends are over. For solo midnight snacks, straight from the pan—no judgments. On my sister’s birthday, she insists I add caramel drizzle. And sometimes, when I’m feeling fancy, a sprinkle of flaky salt goes on top, right before baking (if I remember, honestly).
Lessons Learned (aka Don’t Be Like Me…)
- I once rushed through whisking the eggs and the brownies came out oddly flat. Take a min—it matters for texture.
- Don’t try replacing all the flour with almond meal—it looked promising, but was sadly more “brownie paste” than anything else.
- Actually, I find putting the pan in the fridge for an hour after baking makes cutting so much easier (and I swear, tastes deeper the next day…if it lasts that long!).
Questions I Actually Get Asked About These Brownies
- Is the sourdough discard safe to eat?—Once baked, totally! It’s just flour and water, nothing funky.
- Can I double this recipe?—Yep, use a 9×13 pan, just add a few mins to the bake. (Or check out King Arthur’s version for mega batches.)
- It’s too gooey in the middle—is that right?—Depends how you like brownies. If you want more cooked through, add 3-5 mins or just let it cool longer; it firms up. I prefer mine gooey, but my mom, not so much.
- Can I use active starter?—You can, but it’s just a little thinner and sometimes disrupts the texture. Still tasty, though.
- Do you use natural or Dutch-process cocoa?—I try both. Dutch is richer, but honestly, any cocoa powder works. More on cocoa options at Serious Eats.
Well. There you go—a rambling, heartfelt recipe for brownies that actually taste like brownies (not secretly bread). If you give these a try, tell me if you sneak your piece while warm—I won’t judge. Next time, remind me to tell you about the time I dropped the whole pan facedown… Still ate it. Not proud, yet not sorry.

Ingredients
- 1/2 cup unsalted butter, melted
- 1 cup granulated sugar
- 2/3 cup sourdough starter discard (unfed)
- 2 large eggs
- 1/3 cup unsweetened cocoa powder
- 1/2 cup all-purpose flour
- 1/2 teaspoon vanilla extract
- 1/4 teaspoon salt
- 1/2 cup chocolate chips
Instructions
-
1Preheat the oven to 350°F (175°C). Line an 8×8-inch baking pan with parchment paper or lightly grease it.
-
2In a large bowl, whisk together the melted butter and sugar until smooth and glossy.
-
3Add the sourdough starter discard, eggs, and vanilla extract. Mix until fully combined.
-
4Sift in the cocoa powder, flour, and salt. Stir until just combined. Do not overmix.
-
5Fold in the chocolate chips, then pour the batter into the prepared baking pan and spread evenly.
-
6Bake for 28-32 minutes, or until a toothpick comes out with a few moist crumbs. Allow to cool completely before slicing and serving.
Approximate Information for One Serving
Nutrition Disclaimers
Number of total servings shown is approximate. Actual number of servings will depend on your preferred portion sizes.
Nutritional values shown are general guidelines and reflect information for 1 serving using the ingredients listed, not including any optional ingredients. Actual macros may vary slightly depending on specific brands and types of ingredients used.
To determine the weight of one serving, prepare the recipe as instructed. Weigh the finished recipe, then divide the weight of the finished recipe (not including the weight of the container the food is in) by the desired number of servings. Result will be the weight of one serving.
Did you make this recipe?
Please consider Pinning it!!




