If you’d ever raided my biscuit tin during the holidays, odds are you’d have fished out at least three of these Fruity Thumbprint Cookies before the tin snapped shut. I can still see my cousin Jill’s little hand, all flour-dusted and sneaky, reaching for the jam-filled centers right as they cooled. Let’s be honest, I mostly make these so I can have something to munch with my afternoon cuppa, but hey—good things are meant to be shared. I’d say my oven has seen more thumbprints than my phone screen (and that’s saying something).

Why I Keep Coming Back to These Cookies
I suddenly get the urge to bake these when I want something that looks a bit fancy with zero fuss. My family absolutely demolishes them (even the ones with the weird jam flavors…) And you know what, the dough is so forgiving—even when I overbeat it once by mistake, it still came out tasty, just a little more crumbly than usual. Plus, making those little wells for the jam? Therapeutic. I put on my favorite tunes and get thumb-deep in cookie dough. There was the one time I tried to fill them with peanut butter and chocolate spread, though, and—let’s just say, some experiments are best left in the lab.
What You’ll Need—My Essentials & Quirky Swaps
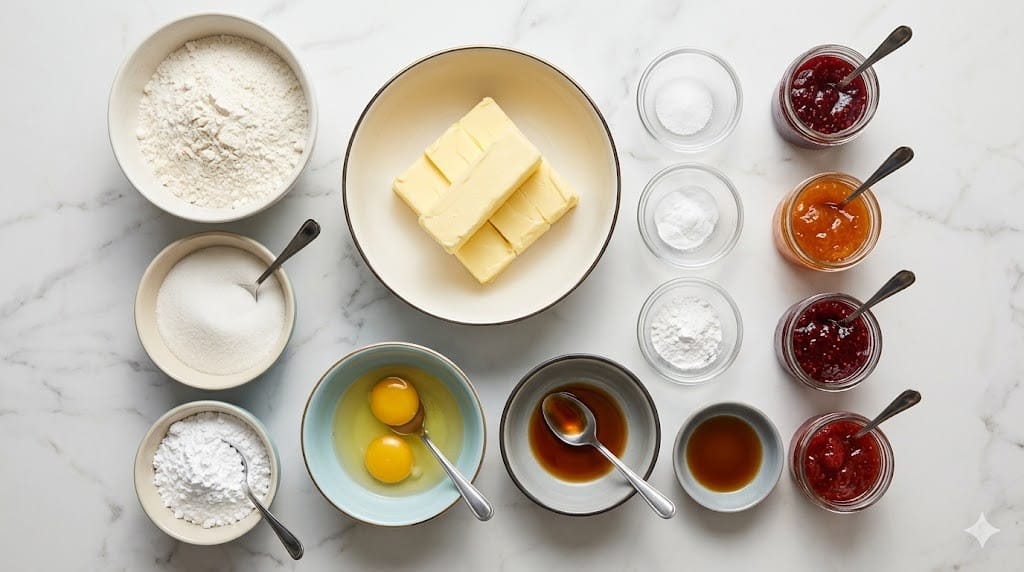
- 1 cup (225g) unsalted butter, softened (but honestly, I sometimes use salted and just skip the pinch of salt)
- 2/3 cup (135g) sugar (granulated works, but I’ve used caster when that’s all I had—no disasters so far!)
- 1 egg yolk (the white can go in your breakfast scramble, if you fancy)
- 1 tsp vanilla extract (my gran swore by the stuff she brought home from holidays, but anything goes)
- 2 1/4 cups (280g) all-purpose flour
- 1/4 tsp salt (omit if you used salted butter—see above!)
- 1/2 cup assorted jams or fruit preserves (raspberry, apricot, blueberry… even marmalade, if you’re feeling cheeky—I sometimes just raid my fridge and see what’s calling my name)
- Powdered sugar for dusting (totally optional, but makes things look proper bakery-esque)
How I Go About Making Them (Imperfectly)
- Cream the softened butter and sugar together in a big bowl until it looks pale and fluffy. You can use a mixer, but sometimes I just go in with a wooden spoon when I’m too lazy to clean gadgets.
- Add the egg yolk and vanilla. Mix until it’s smooth-ish. (Don’t worry if it looks a bit curdled at this point—it sorts itself out with the flour.)
- Tip in the flour and salt. Stir until a soft dough forms. If it’s super sticky, pop it in the fridge for about 20 minutes; if not, carry on.
- Roll the dough into balls—roughly walnut-sized. Space them out on a lined baking sheet. Pro-tip: if your hands are warm, things get sticky quick. Rinse with cold water in-between batches.
- Press your thumb (oh, or the back of a 1/2 tsp spoon if you’re feeling fancy) into the centre of each ball to make a little well. Don’t be shy, but don’t go all the way through either—I’ve crashed through the bottom before and it’s a jammy mess to clean up.
- Spoon about 1/2 teaspoon of jam into each well. This is where I always sneak a tiny taste for quality control…
- Bake in a preheated 350°F (180°C) oven for 12-15 minutes—edges should just start coloring but the centers stay pale. If a few look a little worse for wear, don’t panic; they’ll be covered in powdered sugar soon enough!
- Let them cool on the tray a few minutes, then carefully move to a rack to cool completely.
- Optional, but delightful: dust with powdered sugar once completely cool.
Some Notes (a.k.a. What I Learned the Hard Way)
- If you overfill with jam, it’ll bubble over and stick to the tray—greaseproof paper is your friend!
- Tried making these with whole wheat flour once; they turned out a bit brick-like. Maybe don’t do that?
- They actually taste even better the next day, if you have the willpower not to eat them all warm.
- If the dough cracks a bit when you make the wells, just smush it back together. No one’s judging.
Experiments—What Worked, What Didn’t
- Lemon curd instead of jam: major win! (But it does run a bit if you pile it too high.)
- Chocolate chips in the center: underwhelming. Turns out, I miss the fruity zing.
- Mixing orange zest into the dough tasted fantastic one time but was a flop when I tried zesting a lime (too sharp for my crew!)

What You’ll Need (and What You Can Get Away Without)
- Mixer (stand or handheld), but as said, I’ve gone all old-school with a spoon and arm muscles just fine.
- Baking sheet and parchment. If you’re out of parchment, just grease the tray well—a bit rustic, but it works.
- Cooling rack is nice, but honestly, my kitchen table gets commandeered when I run out of space.
Keeping Them Fresh—At Least in Theory
These cookies should last 3-4 days if you pop them in an airtight tin. Or a zip bag. Theoretically. In reality, mine barely see the sun rise twice. Maybe you’re more disciplined?
How I Like to Serve Them
Perfect with a pot of English breakfast tea (my favorite) or in a cookie gift box for friends. My mum refuses to eat them without a glass of cold milk. I also sneak one for second breakfast, but that’s between you and me.
Lessons I’ve Learned the Hard Way (Pro Tips-ish)
- Tried rushing the chilling step. Would not recommend; warm dough puddles, cold dough holds its shape.
- Once added jam before shaping the wells, total disaster. Shape first, fill second—it’s just easier, trust me.
- Overbaking = dry cookies, underbaking = soggy bottoms. Keep an eye after 12 minutes!
Wait, Is This Normal? (FAQ from Friends & Randoms)
- Do I have to use homemade jam?
Ha! No way. Store-bought is grand. I once used apricot preserves left over form a cheese board and it was brilliant. - Can I freeze these?
Yes, freeze before filling for best results. Fill and bake straight from the freezer, just tack on an extra couple minutes in the oven. - My dough is sticky—what do I do?
Chill it! If it’s still sticky, dust your hands with a bit of flour. Or just embrace being a bit messy; the cookies won’t mind. - Do the cookies keep their jam centers when stored?
Mostly. Sometimes the jam absorbs a bit, but it still tastes fab. Just don’t stack them on top of each other—my cousin did that once. Jam sandwich, anyone? - Can I make these gluten-free?
I haven’t cracked that yet. If you do, tell me how it goes!
So, there you have it: my very favorite Fruity Thumbprint Cookies, complete with messy realness, family mischief, and a few happy kitchen accidents. Give them a go, and if you end up with jam on your pants, that’s just part of the fun, innit?
Ingredients
- 1 cup (225g) unsalted butter, softened (but honestly, I sometimes use salted and just skip the pinch of salt)
- 2/3 cup (135g) sugar (granulated works, but I’ve used caster when that’s all I had—no disasters so far!)
- 1 egg yolk (the white can go in your breakfast scramble, if you fancy)
- 1 tsp vanilla extract (my gran swore by the stuff she brought home from holidays, but anything goes)
- 2 1/4 cups (280g) all-purpose flour
- 1/4 tsp salt (omit if you used salted butter—see above!)
- 1/2 cup assorted jams or fruit preserves (raspberry, apricot, blueberry… even marmalade, if you’re feeling cheeky—I sometimes just raid my fridge and see what’s calling my name)
- Powdered sugar for dusting (totally optional, but makes things look proper bakery-esque)
Instructions
-
1Cream the softened butter and sugar together in a big bowl until it looks pale and fluffy. You can use a mixer, but sometimes I just go in with a wooden spoon when I’m too lazy to clean gadgets.
-
2Add the egg yolk and vanilla. Mix until it’s smooth-ish. (Don’t worry if it looks a bit curdled at this point—it sorts itself out with the flour.)
-
3Tip in the flour and salt. Stir until a soft dough forms. If it’s super sticky, pop it in the fridge for about 20 minutes; if not, carry on.
-
4Roll the dough into balls—roughly walnut-sized. Space them out on a lined baking sheet. Pro-tip: if your hands are warm, things get sticky quick. Rinse with cold water in-between batches.
-
5Press your thumb (oh, or the back of a 1/2 tsp spoon if you’re feeling fancy) into the centre of each ball to make a little well. Don’t be shy, but don’t go all the way through either—I’ve crashed through the bottom before and it’s a jammy mess to clean up.
-
6Spoon about 1/2 teaspoon of jam into each well. This is where I always sneak a tiny taste for quality control…
-
7Bake in a preheated 350°F (180°C) oven for 12-15 minutes—edges should just start coloring but the centers stay pale. If a few look a little worse for wear, don’t panic; they’ll be covered in powdered sugar soon enough!
-
8Let them cool on the tray a few minutes, then carefully move to a rack to cool completely.
-
9Optional, but delightful: dust with powdered sugar once completely cool.
Approximate Information for One Serving
Nutrition Disclaimers
Number of total servings shown is approximate. Actual number of servings will depend on your preferred portion sizes.
Nutritional values shown are general guidelines and reflect information for 1 serving using the ingredients listed, not including any optional ingredients. Actual macros may vary slightly depending on specific brands and types of ingredients used.
To determine the weight of one serving, prepare the recipe as instructed. Weigh the finished recipe, then divide the weight of the finished recipe (not including the weight of the container the food is in) by the desired number of servings. Result will be the weight of one serving.
Did you make this recipe?
Please consider Pinning it!




