So, Why Am I Making Heart Shaped Cookies Again?
You ever find yourself stuck on what to do for Valentine’s Day? Me too. Last year, I realized the fancy dinner route just wasn’t hitting the right note—so I thought, “Oh, just bake!” I grabbed my heart shaped cookie cutter from the drawer (the one I use exactly once a year) and decided to jazz up the classic chocolate chip cookie. Let’s be honest, the shape might be a stretch, but the vibe’s spot-on. My niece loved squishing the dough and somehow got more on her face than on the tray. Worth it for the giggles. And hey, if it makes your kitchen smell like heaven, it’s already a win even if a few cookies look more like potatoes than hearts.

Why I Keep Coming Back to This Recipe
I make these when I’m feeling a bit sappy, or honestly, when I just want cookies with a twist. My family goes a bit wild for these since they sort of expect regular circles, then—bam!—Oh look, hearts. (I tried stars once, but let’s not speak of that day.) Actually, it’s partly because getting the dough into those heart molds is kind of messy but way less fussy than, like, piping royal icing. Also, sometimes I just crave the excuse for extra chocolate. Good enough reason, right?
Stuff You’ll Need (with Substitutes, In Case You’re Missing Something)
- 2 1/4 cups all-purpose flour (sometimes I do half whole wheat, makes me feel posh)
- 1/2 teaspoon baking soda (baking powder works in a pinch, but the cookies are fluffier)
- 1/2 teaspoon salt (confession: I’ve skipped it and nobody rioted)
- 170g unsalted butter, melted & cooled (or, heck, use salted but then nix some added salt)
- 1 cup brown sugar, tightly packed (my grandma insisted on dark, but light works too)
- 1/2 cup white sugar (I’ve sneaked in coconut sugar and felt very modern)
- 1 large egg + 1 egg yolk (sometimes I just do 2 small eggs, sue me)
- 2 tsp vanilla extract (the real deal is nice, but imitation’s totally fine here)
- 1 1/2 cups chocolate chips (milk, dark, whatever’s in the cupboard—chop up a bar if you’ve nothing else)
- Optional: rainbow sprinkles, chopped walnuts, or a pinch of cinnamon (I go wild sometimes)
Okay, Here’s How You Pull This All Together
- First, preheat your oven to 170°C (350°F-ish) and line a big tray with baking paper. Grab your heart shaped cookie cutter—or, if you’re like me and lose stuff, maybe cut a heart template from cardboard (don’t let it catch fire under the broiler, though).
- Mix your flour, baking soda, and salt in a bowl. Give it a quick whisk. Done.
- In a bigger bowl, melt the butter. Let it cool a few mins unless you fancy scrambled eggs in your dough (done that once).
- Add brown sugar and white sugar to the butter. Stir until it gets sort of creamy. Add vanilla, egg, and extra yolk. Whisk away. If it looks lumpy at this point, don’t sweat it. Always smooths out later, I swear.
- Gradually fold in your flour mixture, una fancy wooden spoon works best, but a spatula will do. When pretty much combined but still a bit floury, tip in chocolate chips (and any extras you fancy). This is where I sneak a taste. Honest, you gotta check the chocolate level.
- Scoop some batter, maybe a big tablespoon at a time, and shape soft blobs onto your tray. Press your heart cutter around each blob and sort of nudge the dough to fill the shape. Or trace around with a knife if you’re braver than me. Don’t fuss about perfection. Worn edges look adorable, if I say so myself.
- Bake them for around 10-12 mins. Or, if you like a crispier edge, go to 14—but guard them after 10 or they’ll go from golden to “woops, tastes like bonfire.”
- Let them cool on the tray for a bit. They’ll be soft at first and toughen up as they cool. Avoid ambitious stacking right away. (I speak from experience. Cookie pancake.)
A Few Notes I Learned the Hard Way
- Dough a bit sticky to handle? Chill it for half an hour. Or, skip and accept slightly lumpier hearts—delicious anyway.
- If the cookies look pale underneath, they’re not raw, just soft. They’ll firm up. First time I nearly baked a double batch just waiting for browning.
- The heart shapes sometimes puff into blobs. Actually, they’re still hearts in my books. Just let people eat before they judge.
Experimenting: Some Variations (And a Fail)
- Tried adding dried cherries and white chocolate: amazing combo, a bit posh. My nephew called them “fancy cookies.”
- Peppermint extract instead of vanilla? Tasted weird, probably skip unless you’re really feeling risky.
- Once swapped in peanut butter for all the butter. Ended up with a tray of what can only be described as crusty brown rocks. Family still ate them, but ehhhh.
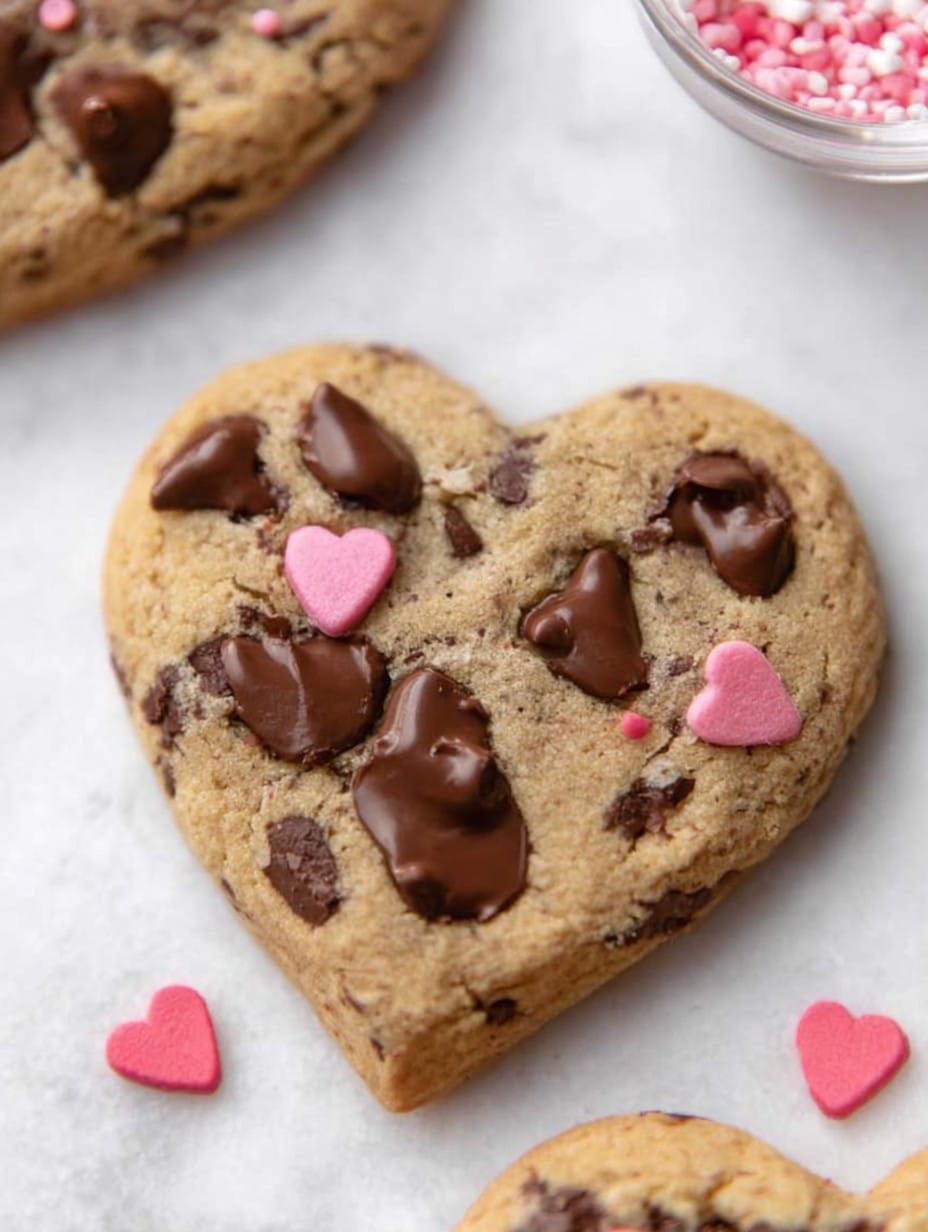
If You Don’t Have a Heart Cookie Cutter, No Stress
I mean, yeah, it helps—but I once used a folded bit of tinfoil shaped into a heart outline. A butter knife works but takes ages; your hands can kind of “pinch” the tops of dough balls into a v-shape. Trust your gut. (Or just make circles and call them love dots, ha!)
How To Store ‘Em (If They Survive That Long)
Airtight tin, counter, 3 days—if you can resist. In my house they vanish on day one, honestly. You can freeze the dough pre-bake too, just scoop shapes and part-bake direct from frozen at a slightly lower temp. Good luck not eating them straight out the oven though.
How I Like To Serve These (But You Do You)
We put a stack on a platter and sometimes splodge a scoop of ice cream on warm cookies (dangerous, but wow). Little glass of milk goes on the side for dipping, though my sister claims it’s sacrilege. You could wrap a few in wax paper and sneak them into someone’s bag as a surprise too (once found a melted one in my coat pocket; oops, but still yum).
A Few ‘Pro Tips’ (From Someone Who’s Messed Up Plenty)
- If you try to shortcut the chilling step and the dough’s unruly, it’ll bake all wibbly—and not in a cute way. I learned that after cleaning up dough puddles. Just chill it, even briefly.
- Don’t expect picture perfect hearts during baking. The dough has a mind of it’s own and that’s just part of the fun.
- Sometimes I over-crowd the tray. BIG regret. They merge into a giant heart monster (which—now I say it—could also be fun for sharing, but yeah, use two trays if you want definition.)
FAQ (Questions I’ve Actually Been Asked, Swear Down)
- Can I half the batch? Yeah, you can, but honestly, why would you want less cookies? Just freeze dough balls if you bake too many. I never do.
- No stand mixer—am I doomed? Nah, wooden spoon and some elbow grease does the trick. Actually, I prefer it (except my wrist doesn’t).
- Can I use margarine? You could, but the flavor’s always a little off in my opinion. Butter’s better, but I won’t judge. Much!
- Why do my cookies go flat? Dough too warm, probably. Chilling helps. Or too much butter. Or, heck, sometimes they’re just in a mood.
- How do I make them chewier? Go easy on the baking, or swap one egg for an extra yolk. (Once I did two yolks by accident and they came out fab.)
There you have it. Slightly chaotic, very chocolatey, and totally heart-felt (pardon the pun). Go forth and bake, and try not to eat them all before you share. Or do. I won’t tell. Cheers!
Ingredients
- 2 1/4 cups all-purpose flour
- 1/2 teaspoon baking soda
- 1/2 teaspoon salt
- 1 cup unsalted butter, softened
- 3/4 cup granulated sugar
- 3/4 cup packed light brown sugar
- 1 teaspoon vanilla extract
- 2 large eggs
- 2 cups semisweet chocolate chips
Instructions
-
1Preheat the oven to 350°F (175°C) and line two baking sheets with parchment paper.
-
2In a medium bowl, whisk together the flour, baking soda, and salt.
-
3In a large bowl, beat the softened butter with granulated sugar, brown sugar, and vanilla extract until light and fluffy.
-
4Add the eggs one at a time, beating well after each addition. Gradually mix in the flour mixture until just combined.
-
5Stir in the chocolate chips. Roll dough to about 1/4 inch thick and use a heart shaped cookie cutter to cut out cookies. Place the cookies on prepared baking sheets.
-
6Bake for 10-12 minutes or until the edges are golden. Allow cookies to cool on the baking sheet for 5 minutes before transferring to a wire rack to cool completely.
Approximate Information for One Serving
Nutrition Disclaimers
Number of total servings shown is approximate. Actual number of servings will depend on your preferred portion sizes.
Nutritional values shown are general guidelines and reflect information for 1 serving using the ingredients listed, not including any optional ingredients. Actual macros may vary slightly depending on specific brands and types of ingredients used.
To determine the weight of one serving, prepare the recipe as instructed. Weigh the finished recipe, then divide the weight of the finished recipe (not including the weight of the container the food is in) by the desired number of servings. Result will be the weight of one serving.
Did you make this recipe?
Please consider Pinning it!!




