Hey, Let’s Talk Bento Cakes (Yes, They’re as Cute as They Look!)
So a little confession — the first time I made a bento cake, I spent more time picking out sprinkles than actually baking. No regrets. These tiny, adorable cakes have basically become my secret weapon for turning a regular Tuesday into something worth remembering (or at least Instagramming). I first spotted them on a trip to Seoul, and honestly, my first attempt looked more like a pancake with frosting, but hey – it’s the spirit that counts, right?
My sister still laughs about the time I tried to fit one in my lunchbox and, er, forgot about the frosting situation. Let’s just say, frosting goes everywhere. But that’s part of the fun; you’ll totally get the hang of these. Swear.
Why I Keep Making These (And Probably You Will Too)
I whip up bento cakes whenever someone needs a little pick-me-up (or when I crave cake but pretending ‘it’s for the kids’). My family goes wild for the mini size — less guilt, more fun. Plus, my partner never argues about eating the last slice because, well, there’s only like 2 slices per cake. If you’re worried about fiddly decorating, I was too! Actually, I find it way less stressful than big cakes. No pressure for perfection here; it’s meant to be cute, not Martha Stewart-level flawless.
And, you know, if you totally mess up the frosting, just stick a big strawberry on top and call it ‘whimsical rustic charm’ (works every time for me).
What You’ll Need (Plus a Few Cheeky Swaps)
- 1 cup (120g) plain flour (my gran swore by self-raising, but honestly all-purpose is fine)
- 3/4 cup sugar (brown sugar if that’s what you’ve got — I’ve done it in a pinch)
- 1/2 cup milk (oat or almond if you need dairy-free — nobody notices, promise)
- 2 eggs (whisked — and if you’re out of eggs, a flax egg sorta works! The texture is a bit…different, but not bad)
- 1/4 cup unsalted butter, melted (I’ve subbed in sunflower oil when out of butter, and it was fine. Probably healthier?)
- 1 tsp baking powder
- Pinch salt (and I mean just a little — I once overdid it and, well…regret)
- 1 tsp vanilla extract (or almond; or orange, which is wild but tasty)
- Buttercream or whipped cream for decorating (store-bought is totally okay; sometimes I just use what’s left in the fridge from Saturday’s cupcakes)
- Sprinkles, berries, edible flowers — whatever tickles your fancy (those tiny sugar pearls? Dangerous. Roll everywhere)
How I Actually Make These (Warts and All)
- Preheat the oven to 350°F (180°C). Grease a baking sheet or line it with parchment. I once skipped this step and spent 20 minutes chiseling cake off the pan — don’t be me.
- In a mixing bowl, whisk flour, sugar, baking powder, and salt. Try not to get flour in your hair, but if you do, just own it. Add the eggs, milk, butter, and vanilla. Mix until just smooth. Don’t overmix or, I dunno, you get weirdly dense cake. (I always sneak a taste of the raw batter — risky, I know, but old habits die hard.)
- Pour the batter into the baking sheet — you’re aiming for about a 1-inch layer. Spread it out gently. If it looks uneven, don’t sweat. Seriously.
- Bake for 10-13 minutes, or until a toothpick comes out clean. Your kitchen will smell like cake heaven.
- Let it cool a bit. (Actually, entirely, if you can wait — once I didn’t, and the frosting just melted right off. Lesson learned.)
- Use a round cutter, glass, or even a tin can (worked for me last week!) to cut out 3- or 4-inch circles. You’ll get 3-4 mini-cakes, depending on how generous you are.
- Stack two cake rounds with a layer of frosting in between. Remember, bento cakes don’t need to be skyscrapers. I tried three layers once; it wobbled like a dodgy pub table.
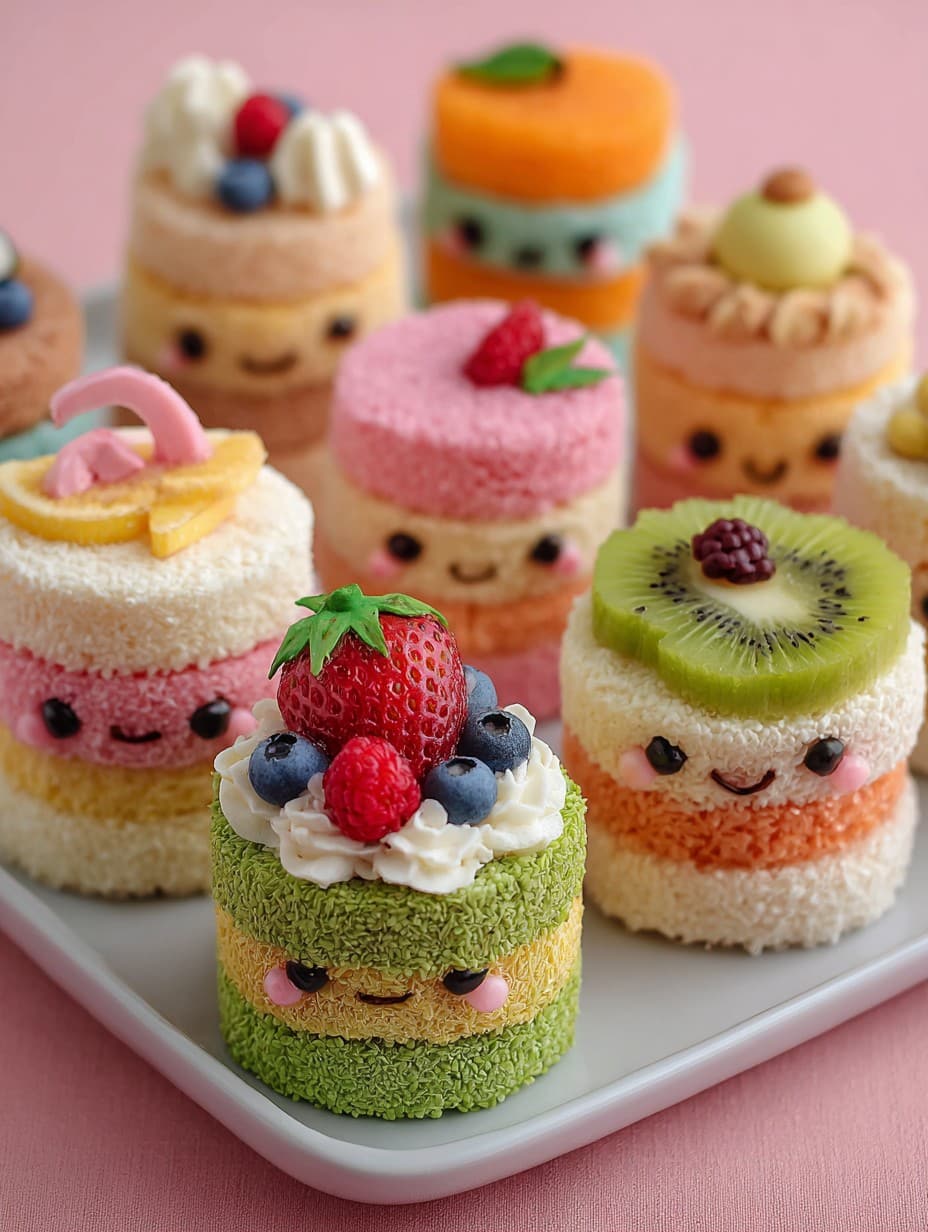
- Frost the outside, do your cutesy decorations, sprinkles, berries, doodles — go to town!
- Chill in the fridge for half an hour if you want everything to set. (If you can wait. Sometimes I just dig in with a fork.)
Stuff I Wish I’d Known (Notes From Experience)
- If your cake comes out a bit crumbly, just add more frosting. Nobody complains about extra frosting.
- Don’t overthink the decorations. One time I tried to pipe tiny roses and they all drooped. Stick to dots and hearts — works wonders.
- Actually, leaving the cakes in the fridge overnight makes slicing easier, but they also disappear faster…
- If the cake is sticking, run a knife around the edges while humming a tune for moral support. It helps. Sort of.
Let’s Get Creative: Variations I’ve Tried (And One Flop)
- Lemon zest in the batter — so bright, highly recommend!
- Matcha powder for a green tea twist (do half plain, half matcha — gets you that cool swirl). I learned this little trick from an article over here.
- Chocolate bento cakes — swap 1/4 cup flour for cocoa and rejoice.
- Tried frozen berries once, but it made the cake a soggy mess. Wouldn’t repeat unless you like damp cake. (Fresh works best!)
The Stuff You Need (Or Don’t, Honestly)
- Mixing bowls, whisk, spatula
- Baking sheet (though last time I used a pie dish, and just cut wonky shapes — nobody cared)
- Round cookie cutter, glass, or clean tin can (Aussies: a Vegemite jar lid works like a charm…weird but true!)
- Offset spatula or butter knife for frosting — but fingers work in a pinch. Just wash them first, trust me.
Keeping Them Fresh (Not That They Last)
Store in an airtight container in the fridge for up to three days — though, honestly, in my place they never make it past the first evening. If you do want to make ahead, you can freeze the plain cake rounds (I wrap mine in baking paper). Thaw, then decorate. Easy peasy.
How I Like to Serve These (Feel Free to Steal My Traditions)
If it’s someone’s birthday, I stick a sparkler in the middle (best garden party hack). Or I’ll pile a few cakes on a platter and let everyone pick their design; it’s like a lucky dip for dessert. My guilty pleasure is eating these straight out of the fridge, with a cup of strong tea, while reading Sally’s baking blog. No regrets.
Pro Tips (Straight From My Kitchen Fails)
- I tried rushing the cooling step and my frosting turned into a slip-n-slide. Don’t do it — patience pays off here.
- If you use store-bought frosting, let it soften a bit before spreading. Or you’ll end up pulling cake crumbs everywhere (which is…fine, but messy).
- On second thought, less is more with the filling. One time I got greedy and the layers kept sliding off like a game of Jenga gone wrong.
FAQs (Because People Really Do Ask)
- Can I use a cake mix?
Absolutely! No shame — I do it when I’m strapped for time. Just jazz it up with some vanilla or zest, and you’re golden. - Do I need special bento boxes?
Nah, just use any little plastic container or Tupperware. (For super authentic vibes, I ordered some cute ones from Daiso — but Dollar Tree ones work fine too!) - My cake broke coming out of the pan, help?
My trick? Frost it together; the frosting is basically culinary glue. Or just eat the scraps. Waste not, want not, eh? - Can I make this gluten-free?
Yes! Swap in your fave GF blend. I tried Bob’s Red Mill and it held up pretty well, just a bit more crumbly. - What if I don’t have a round cutter?
Just improvise with a glass, mug, or anything round. I even grabbed a big biscuit cutter once and it was a riot.
So there it is! If you try these, let me know how they turn out — and if they flop, at least they’ll still taste good. Thanks for reading to the end, and next time maybe I’ll do a digression on my kitchen playlist (it’s mostly early 2000s bangers). Enjoy your bento cake experiment!

Ingredients
- 1 cup all-purpose flour
- 1/2 cup granulated sugar
- 1/2 cup unsalted butter, softened
- 2 large eggs
- 1/2 cup whole milk
- 1 teaspoon vanilla extract
- 1 teaspoon baking powder
- Pinch of salt
- 1 cup buttercream frosting (assorted colors)
- Sprinkles or edible decorations (optional)
Instructions
-
1Preheat the oven to 350°F (175°C). Line a baking sheet with parchment paper and lightly grease it.
-
2In a bowl, cream together the butter and sugar until light and fluffy. Beat in the eggs one at a time, then add the vanilla extract.
-
3Sift together the flour, baking powder, and salt. Gradually add the dry ingredients to the wet mixture, alternating with milk, until combined.
-
4Pour the batter into the prepared baking sheet and spread it evenly. Bake for 18–20 minutes or until a toothpick inserted in the center comes out clean. Let the cake cool completely.
-
5Use a round cutter to cut out small cake circles. Stack two layers for each mini cake, spreading a thin layer of buttercream between them.
-
6Decorate the tops and sides with colored buttercream and sprinkles as desired. Serve in bento boxes or on small plates.
Approximate Information for One Serving
Nutrition Disclaimers
Number of total servings shown is approximate. Actual number of servings will depend on your preferred portion sizes.
Nutritional values shown are general guidelines and reflect information for 1 serving using the ingredients listed, not including any optional ingredients. Actual macros may vary slightly depending on specific brands and types of ingredients used.
To determine the weight of one serving, prepare the recipe as instructed. Weigh the finished recipe, then divide the weight of the finished recipe (not including the weight of the container the food is in) by the desired number of servings. Result will be the weight of one serving.
Did you make this recipe?
Please consider Pinning it!!




