So, You Want to Make Cinnamon Roll Cookies?
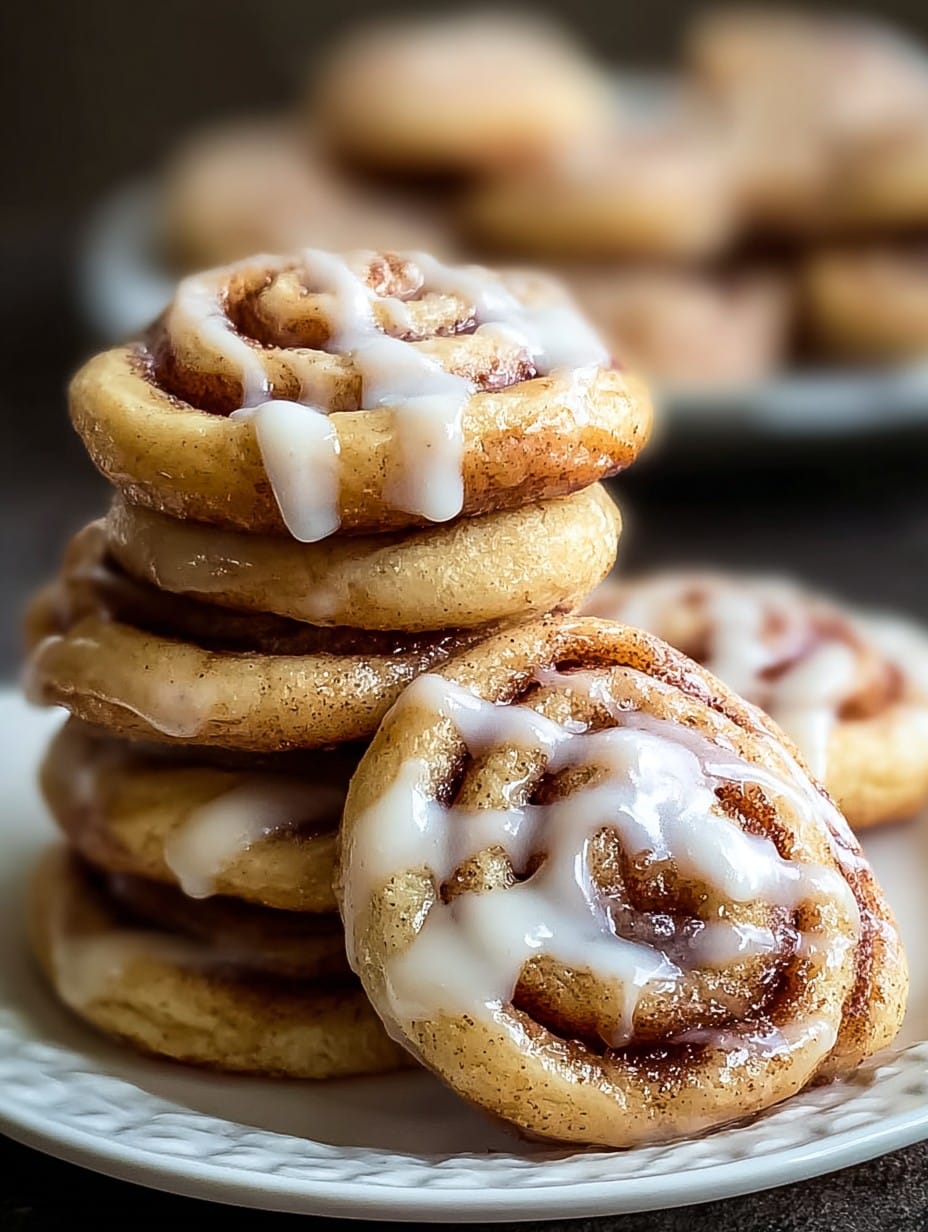
Alright, sit down for this one. The first time I made these cinnamon roll cookies, it was a very frenzied Sunday, the kind where the flour’s somehow on your socks and the cat’s lurking dangerously close to the butter dish. Seriously, if you ever want your home to smell like you’ve been baking for days—even if it’s just one stressed afternoon—make these. They’re like cinnamon rolls that decided, you know what, let’s be a cookie today. It’s a winner at bake sales, too (not that my family ever lets any out the door, but that’s another story).
Why You’ll Love This (Or, Why I Keep Making Them)
I make these when I want something fancy-ish but not too much faff. My kids go bananas for the gooey cinnamon swirl bits (and, weirdly, so does my grumpy neighbor, who suddenly appears whenever these are baking). Plus, you don’t have to deal with yeast or anything rising. That stuff makes me nervous—probably some pastry trauma from years ago. If you’ve ever wanted to eat cinnamon rolls without the commitment, this is your jam (well, cookie, but you get me). Honestly, I keep a stash of dough just for those ‘oh no, we forgot it’s the school bake sale’ moments.
What You’ll Need (But With Wiggle Room)
- 2 and 1/4 cups all-purpose flour (sometimes I use bread flour if that’s all I have, but regular works just fine—I promise)
- 1/2 tsp baking powder (or a slightly heaped 1/4 tsp if you’ve run out—been there)
- 1/4 tsp salt (a pinch will do if you’re using salted butter)
- 3/4 cup unsalted butter, room temp (my gran was team salted, so do what feels right; I’ve even grabbed margarine in a pinch, but it’s not my favorite)
- 3/4 cup sugar (I have swapped in brown sugar for half and it gets a little caramel-ly, which is nice)
- 1 egg (large, but honestly medium is fine—I do not measure eggs)
- 1 tsp vanilla extract (the cheap stuff works, but good vanilla does make it better… or use a splash of maple if you’re feeling fancy)
-
Cinnamon Filling:
- 1/4 cup unsalted butter, softened
- 1/3 cup packed brown sugar
- 1.5 tbsp ground cinnamon (I bump this up to 2 if I’m feeling spicy)
-
Glaze (totally optional but fun):
- 1/2 cup powdered sugar
- 2-3 tsp milk (any kind, I’ve even used oat milk and once, orange juice when I was distracted)
- A teeny splash of vanilla
Let’s Make ‘Em! (Directions, Real Talk Edition)
- First, mix up the flour, baking powder, and salt in a bowl. Set that aside. I always forget this step and end up scooping flour while the mixer’s going, so if you do too, join the club.
- Beat the butter and sugar together until it’s light and fluffy—about 2-3 minutes, I’d say. (This is usually where I sneak a taste. Don’t judge.)
- Crack in the egg and vanilla. Beat again until it’s all a happy creamy mess. If it looks curdled, don’t panic—it comes together after the flour goes in.
- Gently, and with a mess that spreads flour everywhere, add your dry mix into the wet. Just until it forms a dough; don’t overdo it, or they’ll be tough (lesson learned!). If it’s too sticky, toss in a tablespoon more flour until it’s just workable.
- Put the dough onto some parchment or cling wrap, then try to pat or roll it into a rectangle (about 10×8 inches). If it’s sticking to your rolling pin, flour time! This is where I usually get distracted by the dog asking to go out.
- For the filling—mash together the butter, brown sugar, and cinnamon. Slather this over your dough rectangle, right up to the edges (well, leave a 1cm border if you’re a neat freak, but I never do). Don’t worry if it gets a bit messy.
- Now, roll up the dough from the long edge, like a log. Some cracks are normal, and if it’s not perfect? No one will notice. Wrap it up and chill in the fridge for 45 mins or so. I’ve definitely rushed this and regretted it because they just smoosh—so patience, friend.
- Preheat the oven to 180°C (350°F). Grease your baking tray or slap some parchment down.
- Slice the dough into discs, about 1/2 inch thick—sometimes mine are a bit squishy but just nudge them back into circles.
- Space them a bit apart on the tray. Bake for 11–13 mins or so, until they’re lightly golden at the edges. They firm up more as they cool, so don’t panic if they seem too soft at first.
- Once cool-ish, drizzle with glaze, if you want. Or just eat while they’re warm, which is how half my batch usually disappears.
Extra Notes, Straight From Trial and Error
- Room temp butter really does matter—if you forget, microwave it in super short bursts, but don’t melt it completely. Trust me.
- If you use parchment, the cookies come off way easier (learned that the hard way, scraping them off a pan with a spatula…)
- Don’t skip the chilling. I have… then spent 10 mins reshaping blobby cookies.
- I actually like these best the next day, weirdly enough. Something about the flavors settling in?
- Big rectangles = bigger swirls, but don’t sweat the size too much.
Some Variations I’ve Tried (And One That Flopped)
- Add orange zest to the dough: really refreshing, almost breakfast-y?
- Sprinkle in chopped pecans with the filling—my partner loved this, the kids not so much.
- Tried a chocolate swirl instead of cinnamon once. Nope. Maybe someone else can make that work?
- Use a cream cheese glaze for extra richness—just stir in a spoon of cream cheese to the glaze mix.
What You Actually Need (Equipment)
- Mixer (any kind: stand, handheld, or a wooden spoon if you’re looking for an arm workout)
- Rolling pin… Sort of. I’ve used a wine bottle in a pinch (clean it first!)
- Sharp knife for slicing—serrations help
- Some way to line your pan (foil will do if parchment is gone)
If you don’t have a mixer, it’s more effort, but doable—I’ve made these in an AirBnB with literally a fork and my stubborn streak.
How to Store Them (If They Last…)
Airtight tin, up to a week; but honestly, they never make it past dinner at mine! You can freeze the log before slicing if you want to bake fresh cookies on demand (fantastic idea for lazy Sundays—or for surprise guests, it’s like, bam, fresh cookies!).
Serving: How We Eat Them at My House
With hot cocoa on rainy days, but also excellent with cold milk. Some family members (naming no names) dunk them in their tea. Also, if you stack two with a little extra glaze in the middle? Accidental sandwich cookie—highly recommended.
Real-life Pro Tips (Learned the Hard Way)
- Don’t rush the chilling time; tried it once, total disaster. Patience is key—even though I hate waiting.
- If you use super dark brown sugar, the flavor is knockout strong—depends if you like it that way, but I think light brown works best.
- Rolling the dough too thin = explosive cinnamon leaks. Still tastes good, just messy.
- I finally found great cinnamon at King Arthur Baking—not sponsored (although, wouldn’t say no!).
FAQ—The Questions Folks Actually Ask Me
- Can I skip the glaze? Oh, absolutely. Sometimes I do, sometimes I don’t bother, especially if I’m making these at midnight (don’t ask).
- Do they freeze well? Yes, the dough log freezes up great. Just let it thaw a bit before slicing or you’ll have crumbled cookies all over the shop.
- Any tips for rolling the dough? Flour is your mate, and if it sticks just pat it gently—actually, I find it works better if the dough is slightly colder than you’d expect. Less sticky. But you can also roll between parchment sheets; that trick I read over at Sally’s Baking Addiction and it’s saved me more than once!
- Could I make these gluten free? I haven’t tried, but I know friends swap in cup-for-cup GF flour and say they’re grand—let me know if you give it a go.
- How do you make your swirls look perfect? Hah! They never do. Embrace the imperfection—they end up looking rustic (and I tell everyone it’s intentional…most believe me?).
- What if I don’t have brown sugar? White sugar with a dab of maple syrup or molasses works in a pinch. I only learned this trick after once discovering three empty brown sugar bags, sigh.
- Can I double the recipe? Sure thing, but be prepared for twice the mess (and twice the joy). My biggest regret: never having leftovers!
A quick digression: If you’re into weird flavor combos, my friend once dared me to add a pinch of cayenne to the cinnamon mix—spicy, sweet, not for everyone but kinda fun if you’re bored of the usual.
If you give these irresistible cinnamon roll cookies a whirl, drop a comment or—if you’re like my aunt—just text me the photo and tell me they’re already gone. Happy baking! (And don’t forget to clean the cat hair out of the butter—been there twice.)

Ingredients
- 2 1/4 cups all-purpose flour
- 1/2 teaspoon baking soda
- 1/2 teaspoon salt
- 3/4 cup unsalted butter, softened
- 3/4 cup granulated sugar
- 1/4 cup packed light brown sugar
- 1 large egg
- 2 teaspoons vanilla extract
- 1 tablespoon ground cinnamon
- 2 tablespoons unsalted butter, melted (for filling)
- 1/3 cup powdered sugar (for glaze)
- 2 teaspoons milk (for glaze)
Instructions
-
1In a medium bowl, whisk together the flour, baking soda, and salt. Set aside.
-
2In a large bowl, cream the softened butter, granulated sugar, and brown sugar until light and fluffy. Beat in the egg and vanilla extract.
-
3Gradually add the dry ingredients to the wet ingredients and mix until just combined. Divide the dough in half.
-
4Roll each portion of dough into a rectangle between sheets of parchment paper. Brush with melted butter and sprinkle with cinnamon mixed with 1/4 cup sugar.
-
5Roll up each rectangle tightly into a log. Chill in the refrigerator for at least 30 minutes. Preheat oven to 350°F (175°C) and line baking sheets with parchment paper.
-
6Slice logs into 1/2-inch thick rounds and arrange on prepared baking sheets. Bake for 10-12 minutes, until edges are slightly golden. Let cool, then drizzle with a glaze made from powdered sugar and milk.
Approximate Information for One Serving
Nutrition Disclaimers
Number of total servings shown is approximate. Actual number of servings will depend on your preferred portion sizes.
Nutritional values shown are general guidelines and reflect information for 1 serving using the ingredients listed, not including any optional ingredients. Actual macros may vary slightly depending on specific brands and types of ingredients used.
To determine the weight of one serving, prepare the recipe as instructed. Weigh the finished recipe, then divide the weight of the finished recipe (not including the weight of the container the food is in) by the desired number of servings. Result will be the weight of one serving.
Did you make this recipe?
Please consider Pinning it!!




