Let Me Tell You About Mini Sand Pail Pudding Cups…
So here’s the thing: sometimes I just want something goofy, easy, and nostalgic. That’s how these Mini Sand Pail Pudding Cups landed in my rotation. My nephew’s birthday (possibly five years ago?) had a beach theme—long story short, these pudding cups disappeared before I’d even finished setting them out. They’re the kind of no-bake treat that takes you back; suddenly you’re seven again, clinging to a water balloon, probably with dirt on your elbows. But with pudding. Anyway, if you want to serve something that feels both impressive and silly at your next shindig, you honestly can’t go wrong here. And if your friends happen to be the kind who eat the gummy worms first—well, fair game.

Why I Always Make These (Even When I Shouldn’t)
I pull out this recipe when I’m short on time, patience, or clean bowls. My family—especially my sister—goes bonkers for these. Maybe it’s the nostalgia, maybe it’s the sugar. I even make these just for movie night sometimes (though last time I dropped half a cup on the dog—she didn’t mind). The best part? No oven. No standing over the stove. One time, I let the kids make their own and, okay, it got a bit messy, but they actually kept the “sand” mostly in the cups. Mostly. I mean, anything that comes together in 15 minutes and makes people giggle? That’s my idea of a win.
What You’ll Need (and What You Can Get Away With)
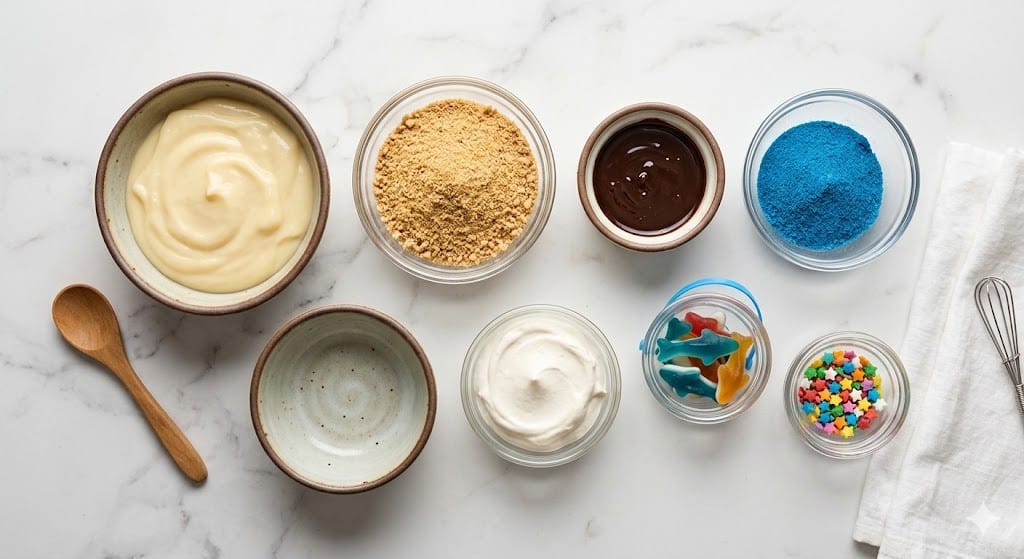
- 1 (3.4-oz) box instant vanilla pudding mix (my grandmother swore by Jell-O, but honestly, any store brand works)
- 2 cups cold milk (I’ve done almond milk too—turned out a bit runny but nobody complained)
- 8 oz whipped topping (I use Cool Whip but I’ve used homemade whipped cream in a pinch, just whip it a little stiffer)
- 8 graham crackers (crushed to smithereens, or a cup of vanilla wafers if that’s what’s lurking in your cupboard)
- Gummy worms (or Swedish fish, or neither if you’re in a mood—totally optional)
- Mini plastic pails or clear cups (the pails are for show, regular old Solo cups work fine)
Here’s How It Happens
- Whisk the pudding mix and cold milk together in a biggish bowl for about 2 minutes. It’ll look suspiciously thin at first; don’t stress.
- Pop the bowl in the fridge for about 5 minutes while you crush your graham crackers. I toss them in a zip-top bag and whack them with a rolling pin (sometimes a wine bottle, in moments of desperation).
- Now fold in the whipped topping. Gently—don’t beat the life out of it. This is where I usually sneak a spoonful, just to check, you know?
- Spoon the pudding mixture into your mini pails or cups, filling them about two-thirds of the way. No need to obsess over perfection here.
- Sprinkle a generous layer of “sand” (the crushed graham crackers) on top, covering the pudding completely. If you’re feeling wild, add an extra pinch.
- Finish off each cup with a few gummy worms poking out of the “sand.” Or skip them. I’ve even used tiny cocktail umbrellas because why not?
- Chill for at least 30 minutes (if you can wait), so everything settles in nicely together. Actually, I think it tastes even better if you let them sit overnight, but rarely does anyone hold out that long.
A Few Notes from My Own Slightly Messy Journey
- I once tried low-fat pudding mix, and it was fine, but just a tad gloopy. Full disclosure.
- If you go heavy on the “sand,” it sometimes gets a bit dry on top—which, honestly, my uncle loves (he calls it the “crunchy beach”).
- Actually, freezing these cups a bit gives you more of an ice-cream effect—my kids discovered this one hot August afternoon.
Wild Idea Variations and My Admitted Flops
- Chocolate pudding base: People love it, but I honestly prefer the vanilla for a real “sand” vibe.
- Used lemon pudding once; the kids hated it, but grownups were polite about it. Take from that what you will.
- I’ve tried crumbled cookies instead of grahams, and it worked, but it looked more like mud pies than sand pails. Eh, could be fun?

Equipment (But Honestly, Just Improvise)
- Big mixing bowl (but I’ve pulled this off with two slightly-too-small bowls and some optimism)
- Whisk or even a big fork will do the trick
- Zip-top bag and rolling pin (or a sturdy mug for smashing up graham crackers)
- Mini pail cups—cute, but clear cups or even jars work in a pinch
- Spoon or scoop for getting pudding into the cups
How I Store (Or Don’t) These
If you do end up with leftovers, slap some plastic wrap over the top and keep them in the fridge. They’re good for a couple days—though honestly, in my house they never last more than a day. If by some miracle one hangs around, I swear the texture gets creamier overnight.
Serving Time—Here’s How We Do It
I put the pails on a tray with those little plastic shovels stuck in. The kids lose their minds for the “authentic” beach experience. And when it’s just us grownups, I’ve been known to just set them out with regular spoons and call it a day. No rules.
Lessons I Learned the Hard Way (Pro-ish Tips)
- Don’t rush chilling the pudding! I once served it too soon—ended up soupy and sad. Just wait, trust me.
- If you overbeat the whipped topping, it kinda turns grainy. Actually, I find it works better if you fold gently and don’t overthink it.
- Oh, and if your “sand” seems too clumpy, just crush it finer. For whatever reason, chunky grahams never look like sand; they look like—you guessed it—graham crackers.
All Those Questions I Get (And, Occasionally, Ignore)
- Can I make these ahead? Yep! Actually, I think this tastes better the next day—if you can manage not to eat them ahead of time.
- Can I use homemade pudding? Sure thing, but honestly—I’m usually too impatient. If you’re feeling fancy, go for it!
- What if I don’t have mini pails? Any small cup works fine. I once used ramekins and called them “miniature beaches”—not sure anyone noticed.
- Do you have to use gummy worms? Nope. I’ve even skipped them entirely and just sprinkled colored sugar for “shells.” If kiddos are picky, leave ‘em off!
- Does nondairy milk work? It does, just turns out a bit thinner. Maybe use less if you like it thicker.
- What’s the best part about these? Oh, definitely licking the bowl before anyone else can claim it. And not having to turn the oven on. Win-win!
Ingredients
- 1 (3.4-oz) box instant vanilla pudding mix (any brand is fine)
- 2 cups cold milk (can sub almond milk for a thinner texture)
- 8 oz whipped topping (like Cool Whip, or homemade whipped cream, whipped stiff)
- 8 graham crackers, crushed (or 1 cup crushed vanilla wafers)
- Gummy worms (or Swedish fish, or optional)
- Mini plastic pails or clear cups (about 8 small servings)
Instructions
-
1Whisk the pudding mix and cold milk together in a biggish bowl for about 2 minutes. It’ll look suspiciously thin at first; don’t stress.
-
2Pop the bowl in the fridge for about 5 minutes while you crush your graham crackers. I toss them in a zip-top bag and whack them with a rolling pin (sometimes a wine bottle, in moments of desperation).
-
3Now fold in the whipped topping. Gently—don’t beat the life out of it. This is where I usually sneak a spoonful, just to check, you know?
-
4Spoon the pudding mixture into your mini pails or cups, filling them about two-thirds of the way. No need to obsess over perfection here.
-
5Sprinkle a generous layer of “sand” (the crushed graham crackers) on top, covering the pudding completely. If you’re feeling wild, add an extra pinch.
-
6Finish off each cup with a few gummy worms poking out of the “sand.” Or skip them. I’ve even used tiny cocktail umbrellas because why not?
-
7Chill for at least 30 minutes (if you can wait), so everything settles in nicely together. Actually, I think it tastes even better if you let them sit overnight, but rarely does anyone hold out that long.
Approximate Information for One Serving
Nutrition Disclaimers
Number of total servings shown is approximate. Actual number of servings will depend on your preferred portion sizes.
Nutritional values shown are general guidelines and reflect information for 1 serving using the ingredients listed, not including any optional ingredients. Actual macros may vary slightly depending on specific brands and types of ingredients used.
To determine the weight of one serving, prepare the recipe as instructed. Weigh the finished recipe, then divide the weight of the finished recipe (not including the weight of the container the food is in) by the desired number of servings. Result will be the weight of one serving.
Did you make this recipe?
Please consider Pinning it!




