Let’s Talk No Bake Cookies (And Why They’re Kinda Magical)
So a little story: the first time I made these no bake Cookies was during a Georgia summer that could fry an egg on the sidewalk. The idea of turning on the oven? Forget it. My kitchen was already hot enough to melt my flip-flops. Anyway—these cookies became an instant classic. There’s just something almost rebellious about mixing up cookies and not even bothering with baking sheets.

To this day, whenever my niece comes over, it’s pretty much the first thing she asks for. I suspect it’s mainly because she gets to lick the spoon, but hey, whatever works. Also, I swear these cookies have the magical power to disappear off the counter faster than you can say “snack attack.”
Why You’ll Love Making These
I make this recipe every time my sweet tooth decides to stage a coup and I have nothing fancy in the fridge. Honestly, my family practically wrestles each other for the last one (and yes, even my husband who claims he doesn’t like dessert—sure, Steve). If you ever get those “I-don’t-want-to-clean-the-oven” blues, or it’s just too darn warm, this one’s a lifesaver. Plus, no stress if the mixture looks a little odd at first. Trust me, it comes together in the end. Oh, and there’s basically no cleanup—except, um, for the sticky pan, but you might as well soak that while you snack, right?
Here’s What You’ll Need
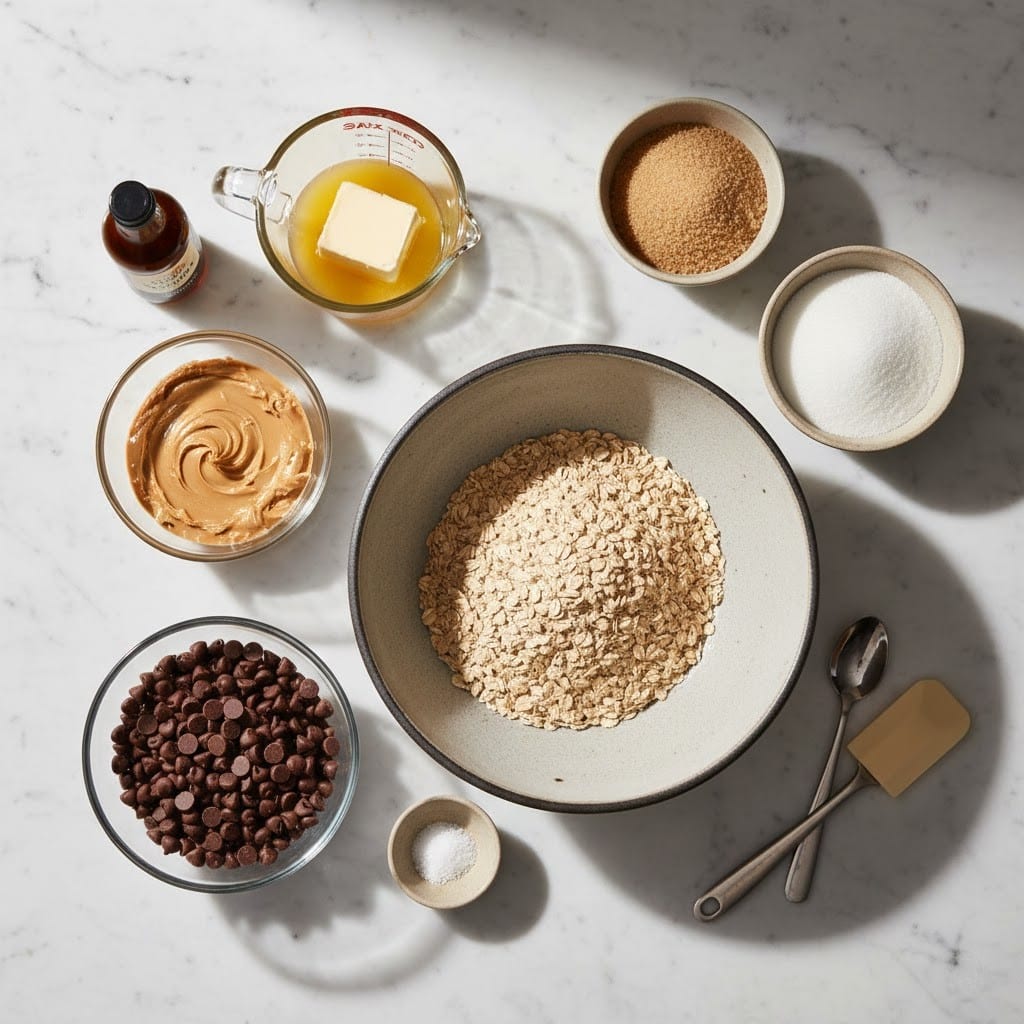
- 2 cups sugar (I’ve subbed coconut sugar in desperate times—different taste, still yum)
- 1/2 cup milk (I usually grab whole, but almond milk sneaks in every so often, especially if that’s all I can find in the fridge)
- 1/2 cup butter (My gran—God love her—always insisted on unsalted. I think salted tastes just fine!)
- 1/4 cup unsweetened cocoa powder
- 3 cups quick oats (rolled oats work but the texture gets chunkier—some folks actually like that)
- 2/3 cup peanut butter (Smooth or crunchy—your call; I switch it up)
- 1 teaspoon vanilla extract (the real thing is a treat, but imitation does the trick too)
- Big pinch of salt (don’t skip this—it makes the chocolate pop, in my opinion)
Bonus: Toss in a small handful of shredded coconut or a few chocolate chips at the end, if you’re wild like that.
How I Actually Make These (With Some Winging-It Moments)
- Grab yourself a good medium saucepan. Pop in the sugar, milk, butter, and cocoa. Medium heat is your friend here. Stir until things melt down together—don’t walk away too long or it’ll scorch. (This is not the time to check your phone, trust me.)
- Once it’s all looking smooth and starting to bubble a little—let it hit a rolling boil, then set a timer for exactly one minute. Not sixty-three seconds. Not fifty-eight. (Alright, maybe being that exact is a bit much, but one minute seems safer from experience.)
- Take it off the heat. Add peanut butter, vanilla, oats, and salt. Stir, but not so aggressively that oats fly across the counter. Mixture should look pretty thick at this point. If it seems gloopy, that’s normal.
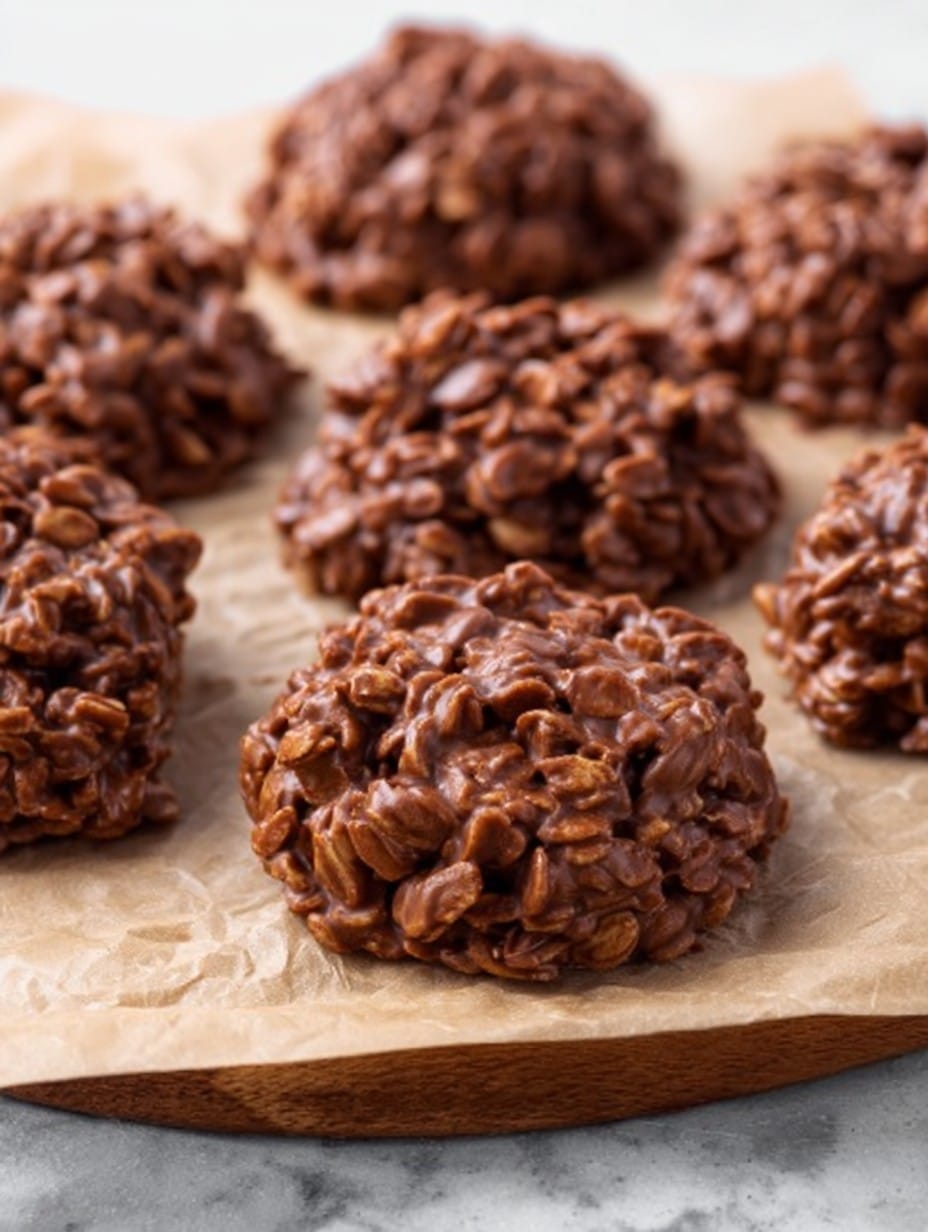
- Spoon generous blobs onto wax paper, parchment, or, in a pinch, just a greased plate if that’s all you’ve got. This is where I usually sneak a taste (okay, two). Let them sit and cool—20–30 minutes, or until they firm up enough to pick up.
Some Notes from the Field
- If your cookies don’t set…uhh, maybe they needed to boil longer, or maybe your peanut butter was extra oily. Actually, I find it works better if you use a refrigerated peanut butter. Weird, right?
- I sometimes forget to add the vanilla until halfway through spooning, in which case I just sort of drizzle it in and mix quickly—hasn’t messed things up yet.
- Try not to make them on an especially humid day, or you might get more of a fudge situation. Not the worst problem!
Variations I’ve Tried—And One I Kind of Regret
- Swapping peanut butter for almond butter is solid, but the flavor is milder. Kids seemed to notice (they’re sharper than you think).
- Adding a pinch of espresso powder makes them fancy-coffee-shop-special, if you’re into that sort of thing.
- Tried adding raisins once… Nobody went back for seconds. Lesson learned (well, almost. I might try cranberries next time).
Equipment (But Don’t Panic If You’re Short a Tool)
- Medium saucepan (honestly, I’ve used a big frying pan before—bit more surface area, but it works in a pinch)
- Spoon (just about anything bigger than a teaspoon will do)
- Wax or parchment paper (or hey, just use an old baking sheet—I’ve scraped many a cooled cookie off that with zero shame)
What About Storage? (Theoretically Speaking)
Store these in an airtight container at room temp. They’ll keep for about 4–5 days, but honestly—in my house, they never last more than a day. If, by some miracle, you have leftovers, popping them in the fridge is nice; they get a bit fudgier, which I like. But, you do you.
Serving Suggestions (And a Little Family Tradition)
Okay, this might sound odd, but my brother swears by eating them straight out of the freezer. He claims it’s the only way. Personally, I like them with a cup of strong coffee in the afternoon when I’m pretending to get work done. At family parties, we kind of hover around the tray and pretend we’re being polite about “just one more.” Nobody’s fooled.
Stuff I’ve Learned the Hard Way (Pro Tips, Sort Of)
- Once, I tried to scoop out the cookies before they cooled a bit—ended up with chocolate puddles. Be patient. It’s worth it (she says, as if she’s ever patient).
- If you overdo the oats, you’ll end up with crumbly bits that don’t hold together. Better to err on the sticky side.
- I once used super cheap cocoa. It was fine, but, honestly, a better cocoa does make a difference. Not to be a snob about it.
FAQ—Questions I Actually Get Asked
Can I use old-fashioned oats instead of quick oats?
Yes, but the cookies end up chewier. My kids didn’t mind, but my mother-in-law gave me “the look.”
Is there a nut-free version?
Sunflower butter works pretty well! It’s not quite the same, but pretty close. Just watch for allergies.
Can I double the recipe?
I have, and it’s chaos (in a good way). Just make sure your saucepan can handle it, or you’ll be frantically ladling hot goop into a second pan. Ask me how I know this.
Do they freeze well?
Honestly? I prefer them super fresh, but freezing’s fine if you wrap them up tight—they do get a bit more brittle though.
Why aren’t my cookies setting?
Could be the boiling time. Or maybe it’s one of those weird rainy afternoons where nothing goes right. Sometimes, even I don’t know, but they’re still tasty, so just eat ’em with a spoon if you must.
And if you’ve hung in this long, well, you deserve a cookie. Or three. (And if you get distracted and end up accidentally making fudge—call it a happy accident. Happens to the best of us!)
Ingredients
- 2 cups granulated sugar
- 1/2 cup unsalted butter
- 1/2 cup milk
- 1/4 cup unsweetened cocoa powder
- 1/2 cup creamy peanut butter
- 3 cups quick-cooking oats
- 1 teaspoon vanilla extract
- 1/4 teaspoon salt
Instructions
-
1In a medium saucepan, combine sugar, unsalted butter, milk, and cocoa powder. Stir to mix.
-
2Heat the mixture over medium heat, stirring occasionally, until it comes to a rolling boil. Let it boil for 1 minute.
-
3Remove the saucepan from the heat. Immediately stir in peanut butter, vanilla extract, and salt until smooth.
-
4Add the quick-cooking oats and mix until fully combined.
-
5Drop spoonfuls of the mixture onto parchment-lined baking sheets. Allow the cookies to cool and set at room temperature for about 30 minutes.
Approximate Information for One Serving
Nutrition Disclaimers
Number of total servings shown is approximate. Actual number of servings will depend on your preferred portion sizes.
Nutritional values shown are general guidelines and reflect information for 1 serving using the ingredients listed, not including any optional ingredients. Actual macros may vary slightly depending on specific brands and types of ingredients used.
To determine the weight of one serving, prepare the recipe as instructed. Weigh the finished recipe, then divide the weight of the finished recipe (not including the weight of the container the food is in) by the desired number of servings. Result will be the weight of one serving.
Did you make this recipe?
Please consider Pinning it!!




