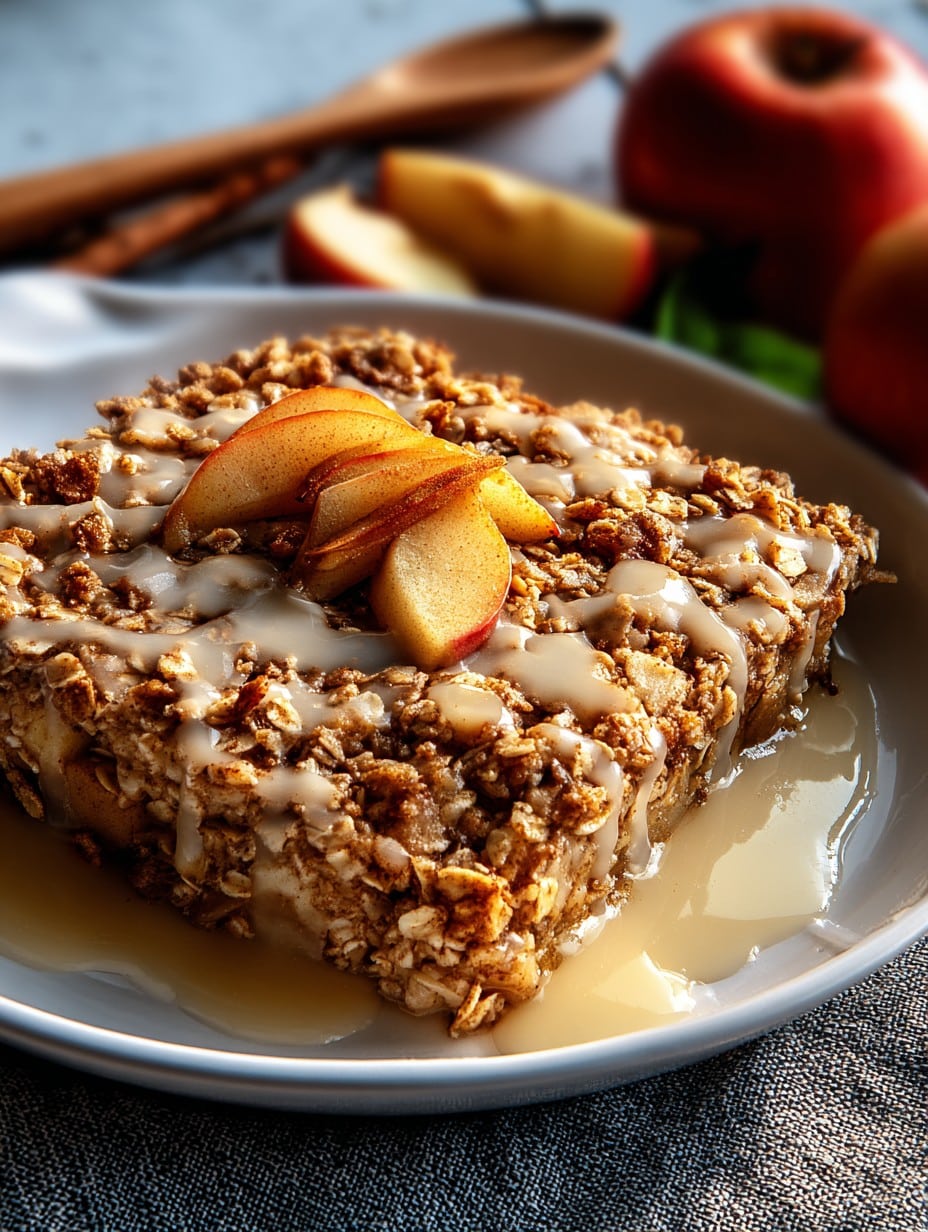
So About This Oatmeal Apple Breakfast Bake…
If you’ve ever woken up to a kitchen that looks like it survived a tornado (a scene I know very well after school mornings), you’ll understand why I adore this Oatmeal Apple Breakfast Bake. It’s kind of like a warm hug in a baking dish—and honestly, the scent alone is worth crawling out of bed for. I first started making this on weekends, thinking it was a “special treat,” but it turns out my family keeps asking for it any old Tuesday too. Oh, and fair warning: you might find yourself nibbling the topping before it goes in the oven. Zero judgment—I always do.

Why I Keep Coming Back to This Recipe
I make this when my mornings are desperate for something besides cold cereal (which is, let’s be real, most mornings—especially in winter). My kids think it’s like having dessert for breakfast, which means it vanishes fast. I love it because it’s basically foolproof, and it saves me from breakfast arguments (if only it worked for laundry sorting, too). Sometimes my apples end up a bit mushy or the edges crispier than the center, but nobody’s ever complained. Actually, I kind of like those crispy brown corners. It’s also great if you’ve got extra apples rolling around, looking a bit past their prime.
What You’ll Need (Plus a Few Swaps)
- 2 large apples, chopped (Granny Smith works best, but once I used Pink Lady and it was fun. Use what you have—the universe won’t mind.)
- 2 cups rolled oats (Quick oats in a pinch, though it’s a bit mushier. Steel-cut? Eh, not my fave for this)
- 2 cups milk (Dairy, oat, almond—honestly, I’ve done all three. My gran swore by whole milk, but I rarely have it)
- 2 eggs
- 1/3 cup maple syrup or honey (Brown sugar works too, though it’s a bit stickier. I forget the syrup now and then and just toss in some sugar, not ideal, but breakfast waits for no one)
- 1 tsp cinnamon (I sometimes double it when I need extra spice comfort)
- 1/4 tsp nutmeg (optional, I forget this a lot—it’s still great)
- 1/2 tsp salt
- 1 tsp vanilla extract
- 1/3 cup chopped nuts (pecans, walnuts, or skip if nut-averse—my mate Phil hates nuts, so sometimes I leave them on just one half!)
- 2 tbsp butter, melted (Coconut oil works when I’m out. Don’t stress)
Let’s Throw It Together (Directions-ish)
- Alright, preheat your oven to 350°F (about 180°C, give or take—I usually just set it to “somewhere in the middle” if I’m not quite awake).
- Grab an 8×8 baking dish. If you haven’t got one, a pie plate or loaf tin sort of works too. Grease it—nobody likes cemented oats.
- Mix oats, cinnamon, nutmeg (if you remember), and salt in a big-ish bowl. Give it a quick stir. I always sneak a whiff here because…yum.
- In another bowl, beat your eggs, add milk, maple syrup, and vanilla. Mix it up till it’s all friends in there.
- Tumble the apples (chunks, skins on or off, up to you) and most of the nuts into the dry mixture.
- Pour the wet mixture over the dry and stir—don’t panic if it looks a bit runny or odd. It’ll bake up fine. This is where I usually sneak a taste. (Eggs are supposed to be off-limits raw, but I’ve lived to tell the tale.)
- Tip it all into your dish. Drizzle melted butter on top, then sprinkle on the rest of the nuts and maybe an extra shake of cinnamon if you like living dangerously.
- Bake for about 35-40 minutes. Sometimes, if I lose track of time, it goes to 45—it comes out just a bit crispier. If it’s jiggly in the middle, give it five more minutes. The edges get bubbly and golden, like some magic porridge fairy visited while you waited.
Notes—What I Learned the Hard Way
- Leaving it to sit for 10 minutes after baking makes it scoop better. I rarely wait, but just saying—you’ll thank yourself later.
- Once I tried it with way too much cinnamon (“Measuring by heart-syndrome,” as my mum says). It can get a little spicy if you go overboard. Your call.
- Don’t panic if the apples look a bit grey before baking. They’ll perk up in the oven, promise.
What Else I’ve Tried (And What Was an Oops)
- Added some raisins once—delicious, but the kids staged a small revolt. Apparently, raisins are “suspicious.” Sultanas work too, if you’re into that sort of thing.
- Tried “overnight” soaking, but honestly, it turned out a bit too gloopy for my taste. Maybe I did it wrong. Eh.
- Swap in pears for apples if you’re feeling fancy. Or lazy, if that’s what’s in the fridge.
Here’s What You’ll Want to Grab (Equipment)
- 8×8 baking dish (But as I said above, a pie plate or a deeper cake tin will do. I’ve used a roasting pan once—bit thin, but it works!)
- Mixing bowls (or a very clean soup pot—don’t ask why I know this)
- Wooden spoon or spatula (or, honestly, your clean hands, but it gets messy)
What About Storing Leftovers?
Technically, you can store leftovers in an airtight container in the fridge for 3ish days. But in my house it never lasts more than a day! Just zap a slice in the microwave for 30 seconds. If you make this just for you (living the dream), it actually tastes even better the next day—like all those flavors meld or something. Freezer-friendly? Kind of. But mine always picks up freezer flavor after a while, so I don’t usually bother. Up to you.
How I Serve It (And Why)
Sometimes I eat it just as it is, with coffee (or tea, for my fellow British expats!). My youngest loves a big dollop of vanilla yoghurt on top—I have to admit, it’s pretty ace. My partner insists it’s breakfast so “should be healthy,” but then dumps brown sugar all over his bit, so I call that balance.
Oh, and if it’s chilly out, a splash of warm milk over the top melts everything together and feels a bit decadent. It’s also epic with a few berries, if you want extra color (and a pat on the back for eating fruit).
Lessons I’ve Picked Up the Hard Way (Pro-ish Tips)
- Don’t skip greasing the dish—cleaning welded-on oats is a special kind of purgatory. I once tried lining it with baking paper; it worked, but then the edges didn’t crisp up. Your call.
- Stir gently—too much enthusiasm and the apples turn to mush. Unless you like mush, then by all means, go for it.
- I once tried to rush the cooling bit and ended up burning my tongue, which wasn’t fun. So, maybe wait five minutes before attacking it (or blow on it with wild abandon, your choice).
Questions Friends Have Actually Asked Me (FAQ)
- Can I make this vegan? Yep, just skip the eggs (add a bit more milk—maybe 1/4 cup), use plant milk, swap honey for maple syrup, and coconut oil for butter—or whatever works for you. It turns out a little softer, but still delicious.
- What apples are best? Whatever you’ve got. Green ones (Granny Smith) get more tart; Gala and Fuji are sweeter. I wouldn’t use Red Delicious—they go all weird and mushy, in my experience.
- Do I have to add nuts? Not at all! Leave them out, or toss in sunflower seeds if you want crunch but no nuts.
- Can I halve the recipe? Yup, but use a smaller dish or it’ll be too thin. Or just make the whole thing and eat it for snacks all week. Win-win.
- Can I prep this the night before? Mix up the wet and dry stuff separately, chuck it all together in the morning. If you mix it all ahead and let it sit, it does get a bit more porridgy (is that a word?), but not bad, just different.
- Can I use instant oats? Yeah, if you’re in a rush. It comes out a bit creamier, less chewy—but it’s still breakfast.
Also, not that it relates to oats, but has anyone else noticed how apples from the farmer’s market disappear about 500 times faster than ones from the shop? Maybe that’s just in our house, but I end up hoarding the good apples for bakes like this. Anyway—if you give this a go, let me know how you tweak it; half the fun of cooking this stuff is making it your own. Cheers!
Ingredients
- 2 cups rolled oats
- 2 medium apples, diced
- 1/2 cup milk
- 1/4 cup maple syrup
- 2 large eggs
- 1/2 teaspoon ground cinnamon
- 1 teaspoon vanilla extract
- 1 1/2 teaspoons baking powder
- 1/4 teaspoon salt
- 2 tablespoons unsalted butter, melted
Instructions
-
1Preheat the oven to 350°F (175°C). Grease an 8×8-inch baking dish with a little butter or non-stick spray.
-
2In a large bowl, combine the rolled oats, baking powder, cinnamon, and salt.
-
3In a separate bowl, whisk together the eggs, milk, maple syrup, vanilla extract, and melted butter until smooth.
-
4Add the wet ingredients to the dry ingredients and mix until well combined. Fold in the diced apples.
-
5Pour the mixture into the prepared baking dish and spread evenly. Bake for 35 minutes or until the top is golden and the center is set.
-
6Let cool slightly before slicing. Serve warm and enjoy!
Approximate Information for One Serving
Nutrition Disclaimers
Number of total servings shown is approximate. Actual number of servings will depend on your preferred portion sizes.
Nutritional values shown are general guidelines and reflect information for 1 serving using the ingredients listed, not including any optional ingredients. Actual macros may vary slightly depending on specific brands and types of ingredients used.
To determine the weight of one serving, prepare the recipe as instructed. Weigh the finished recipe, then divide the weight of the finished recipe (not including the weight of the container the food is in) by the desired number of servings. Result will be the weight of one serving.
Did you make this recipe?
Please consider Pinning it!!




