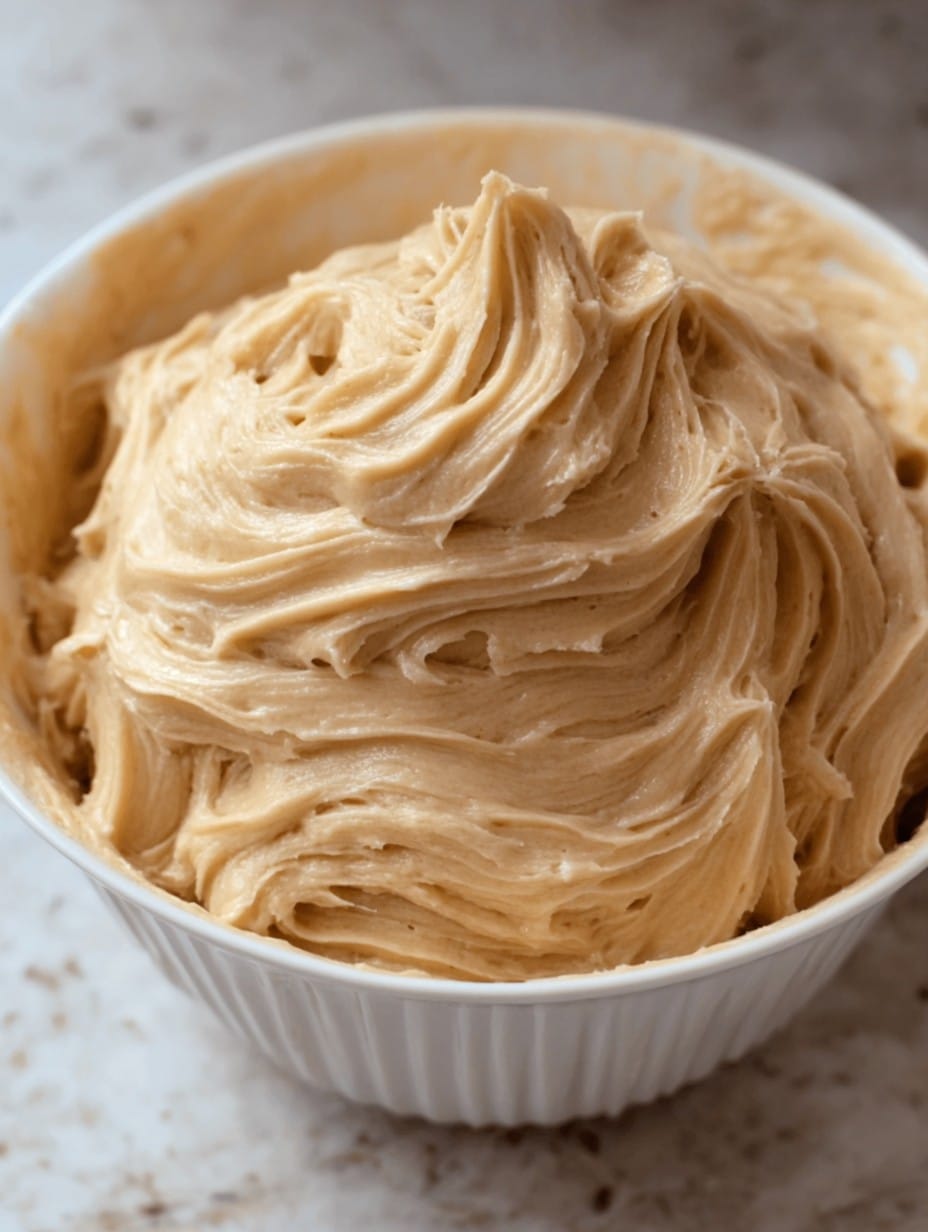
If you’ve never sat at the kitchen table with a bowl of peanut butter frosting and a spoon… well, first, I sort of envy your restraint, and second, let me tell you, you’re missing out. This was the first frosting I ever made without a grown-up looming over my shoulder—age 14, new hand mixer in hand, and an absolutely enormous bowl (technically for mashed potatoes, but who’s counting?). Anyway, my little brothers showed up, lured by the sweet smell, and I think the cake ended up with more fingerprints in the frosting than candles. Ah, family.

Why You’ll Love This One (or at least, why I keep making it)
I mean, I make this peanut butter frosting every birthday, because at this point my family expects—no, demands—it on chocolate cupcakes. It’s just the right combo of creamy, salty, and sweet (if I’m honest, more people lick it off the knife than I care to admit). Plus, there’s no fussing with egg whites or sugar thermometers. And, listen, the first couple times I tried to frost a layer cake with this, it slid all over the place, but once I started chilling it, problem solved. Sort of—still a mess, but now a delicious one. Who am I to get mad about frosting everywhere?
What You’ll Need (and what you can swap)
- 1/2 cup unsalted butter, softened (sometimes I just use salted and skip adjusting, can’t really taste the diff on a bad day)
- 1 cup creamy peanut butter (my grandma—rest her soul—would’ve thrown a shoe if I used any brand except Skippy, but truly, whatever’s on hand is fine… once I even used crunchy and it was kinda fun but a little weird)
- 2–2 1/4 cups powdered sugar, sifted if you’re feeling fancy
- 2–3 tablespoons milk (whole milk is creamier, but I’ve made it with oat milk when the fridge was empty and no one complained)
- Pinch of salt, especially if you use unsalted butter (or skip if your peanut butter is already salty as the ocean)
- Optional: 1/2 teaspoon vanilla extract (or honestly, sometimes a little maple syrup for fun, but that’s between us)
How I Throw It Together
- Toss the butter into a medium mixing bowl, and beat it until it starts looking fluffy. Don’t worry if the cat interrupts and it sits for a minute—it’s forgiving.
- Add in the peanut butter, and mix until smooth (or until your patience runs out, honestly). This is usually where I sneak a taste because why not?
- Gradually blend in the powdered sugar, about a cup at first—don’t just dump it all in, unless you like accidental kitchen snowstorms. Mix on low so you don’t inhale it (trust me—been there, coughed that).
- Pour in the milk, a spoonful at a time, until it’s spreadable, light, and whippy; if it looks too stiff, just add a splash more, but not too much or you’ll be making peanut butter soup. Also, don’t panic if it looks lumpy for a bit—it sorts itself out.
- Stir in the salt and vanilla. Taste. Then taste again because, frankly, who’s stopping you?
- I usually refrigerate it for 20 minutes before using, especially if I’m frosting a cake. But when the kids are circling, sometimes that part… just falls by the wayside.
Notes form My ‘Perfectly Imperfect’ Kitchen
- Once I tried skipping the sifting—big mistake; tasted fine, but the lumps made my cupcakes look like a topographical map. Not the vibe.
- Honestly, the flavor deepens after a night in the fridge. If you can wait, do it. But I rarely can.
- Heavy cream instead of milk makes it really rich… but then again, I once used water and no one complained. Peanut butter hides a multitude of sins.
What Else You Can Try (Or, Frosting Misadventures)
- Love chocolate? Add a couple tablespoons cocoa powder with the sugar. It tastes like a peanut butter cup met a cloud.
- I tried honey instead of most of the sugar once, and it tasted fantastic but the texture went a bit gooey. Not in a good way. Wouldn’t repeat.
- Crunchy peanut butter for texture—some people go wild for it, but it doesn’t spread quite as pretty.
- I once tossed in cinnamon, and wow, that was a happy accident.
Do You Actually Need Fancy Equipment?
I use a trusty old hand mixer (the kind that smells slightly of burning when you crank it high). But hey, a sturdy wooden spoon and elbow grease can make this come together; yes, you might get a bit of an arm workout—call it exercise to justify the frosting? If you’ve only got a fork… well, you’ll survive, but invite someone with strong arms.
Keeping It Fresh (Though It’s Gone Instantly Here)
Store extra (ha!) in an airtight container in the fridge, up to a week or so. Honestly? It’s never lasted more than a day in my house, but allegedly, it keeps well. If it firms up too much, just let it warm on the counter and give it a stir.
How We Serve It Around Here
Slathered on chocolate cupcakes, sandwiched between graham crackers (midnight snack alert!), or straight-up swirled on pancakes when we’re feeling reckless. My cousin once used it as a dip for apple slices—bit odd, but it works. Our tradition is letting the birthday person lick the bowl. Seems only fair, right?
Pro Tips (a.k.a “Oops, I Did That So You Don’t Have To”)
- I once tried to make this with cold butter to rush things—bad idea, it just sat in lumps. Actually, it’s better if you go slow and let things come to room temp.
- Add the milk in little bits. Too much and you’ll spend forever dumping in extra sugar to try to fix soggy frosting.
- Sometimes I get impatient and skip sifting the sugar. Sometimes it’s okay. But once, it really wasn’t. Play it by ear!
Real Questions I’ve Actually Been Asked
- Can I make this vegan?
- Yeah! I’ve swapped in vegan butter and oat milk; works just fine, maybe a bit less rich but still yum.
- Can I freeze peanut butter frosting?
- Sure, in a pinch—though it does thaw a bit grainy for me. Not terrible, just extra mixing when you’re ready to use it.
- How do I make it less sweet?
- Start with less sugar, and add bit by bit. Or sometimes a splash of extra salt balances things out. Salt’s your friend.
- Does this work for piping pretty decorations?
- It’s not as sturdy as some buttercreams, but for swirls and swoops, yes—I once piped stars on brownies and they toppled a bit, but no one noticed. Probably wouldn’t trust it for anything requiring 90 degree angles, though!
So, that’s my peanut butter frosting—you’ll probably eat half before it even gets near a cake. (No judgment.) If you give it a whirl, let me know if your kitchen ends up as sticky as mine usually does!
Ingredients
- 1 cup creamy peanut butter
- 1/2 cup unsalted butter, softened
- 2 cups powdered sugar, sifted
- 1/4 cup whole milk (more if needed)
- 1 teaspoon vanilla extract
- 1/4 teaspoon salt
- 1 tablespoon heavy cream (optional for creamier texture)
Instructions
-
1In a large bowl, beat together the peanut butter and softened butter with an electric mixer until smooth and creamy.
-
2Gradually add the powdered sugar, mixing on low speed, until fully incorporated.
-
3Add the milk, vanilla extract, and salt. Beat on medium speed until the frosting is light and fluffy.
-
4If the frosting is too thick, add extra milk or heavy cream 1 tablespoon at a time until the desired consistency is reached.
-
5Spread or pipe the frosting onto cooled cakes, cupcakes, or cookies as desired.
Approximate Information for One Serving
Nutrition Disclaimers
Number of total servings shown is approximate. Actual number of servings will depend on your preferred portion sizes.
Nutritional values shown are general guidelines and reflect information for 1 serving using the ingredients listed, not including any optional ingredients. Actual macros may vary slightly depending on specific brands and types of ingredients used.
To determine the weight of one serving, prepare the recipe as instructed. Weigh the finished recipe, then divide the weight of the finished recipe (not including the weight of the container the food is in) by the desired number of servings. Result will be the weight of one serving.
Did you make this recipe?
Please consider Pinning it!!




