First Things First: Why I’m Writing About These Cookies
So, have you ever had a dessert that just sort of sneaks up on you? Like, you didn’t plan on making something magical, but you did? That’s these Ritz Smores Cookies for me. The first time I slapped them together was on a rainy Tuesday when my oven was acting up (because, why not?) and the kids were bouncing off the walls. I remember my youngest licking melted marshmallow off her elbow with a look that said, “best day ever.” Honestly, these remind me of summer bonfires but… you know, without all the wet socks and mosquito bites. Also, just between us, I tend to eat the first finished one before anyone else even knows they’re ready. Perks of being the chef, right?
Why You’ll Love This (Like, Really)
I make these Ritz Smores Cookies when I need a pick-me-up or when I’m fighting the urge to buy a complicated dessert (because who has the energy for that after 6pm?). My family goes wild for them because they’re salty, sweet, gooey, and crunchy all at once — basically, the holy grail of snacks. And can I just say, there’s something about not having to use the oven that feels like a win. (Except that one time I microwaved them too long and the marshmallows tried to escape. Oops!)
What You’ll Need (Honestly, Pretty Simple)
- Ritz crackers (or the store brand — I’ve used both, and nobody noticed. My grandmother always insisted on the name brand, but honestly, any round, buttery cracker works.)
- Regular marshmallows (I’ve even used mini ones in a pinch, more fiddly but totally doable.)
- Milk chocolate bars (Sometimes I use semisweet chips, or whatever’s left over from Halloween. Dark chocolate is fab if you’re feeling fancy.)
- Optional: A dab of peanut butter or Nutella for a twist — my neighbor swears by it, though I think it can be a bit much. But, your call!
How to Do It (I Swear It’s Not Fussy)
- Start by laying out half your Ritz crackers, flat side up, on a big plate or a lined baking sheet. (Pro tip: this is where I usually sneak a taste. Quality control…)
- Plop a marshmallow on each cracker. You don’t need to be precise, unless you’re one of those people. And if you’re using mini marshmallows, just pile a few on, no sweat.
- Pop them in the microwave for about 10-15 seconds. Watch them like a hawk — marshmallows puff up FAST. If they look like they’re about to run away, pull them out. If you’re old school, you can totally do this under the broiler for a few seconds (just don’t wander off, trust me.)
- Immediately lay a square of chocolate (or a small handful of chips) over the melted marshmallow. It gets glossy and messy, but that’s half the fun.
- Top each one with another Ritz cracker to make a little sandwich. Gently smoosh it down — not too hard or you’ll have marshmallow all over the place. Okay, so you probably will anyway. It’s part of the charm.
- Let them sit for a couple minutes so the chocolate softens up. Or just eat them straight away if you can’t wait. I usually can’t.
Stuff I Figured Out the Hard Way
- Don’t try to make a giant batch unless you’ve got extra hands. The marshmallow sets fast, so I do a dozen at a time.
- If the chocolate doesn’t melt enough, zap the whole tray for 3 more seconds (I once did it for 30 and everything turned into a puddle—it was…interesting.)
- Honestly, I think these taste better the next day (if you hide a couple for yourself).
Variations I’ve Toyed With (Some Winners, Some…Not So Much)
- Swap the milk chocolate for peanut butter cups. Outrageous.
- Use white chocolate. Actually, I find it works better if you chill them before eating.
- Tried stuffing mini marshmallows and bits of caramel inside — way too sticky. Wouldn’t really recommend unless you love a challenge.
- Threw in a sprinkle of flaky sea salt once: chef’s kiss.
Do You Need Any Fancy Tools?
Not really. I just use a plate and the microwave. If you don’t have a microwave (or it’s on the fritz like mine was last summer), just use the oven’s broiler for a minute or two — but keep a close eye, or you might end up with carbonized marshmallows. Also, tongs are nice for handling the gooey bits, but your fingers work fine (as long as you don’t mind getting messy).
How to Store ‘Em (If You Actually Have Leftovers)
You can pop them in an airtight container for 2-3 days, but honestly, in my house, they never last more than a day! If you want them less sticky, layer with parchment paper. Fridge works, but then the chocolate hardens up. Some folks say it’s even better that way, though…
How I Like to Serve These (And the Family’s Traditions)
We pile them up on a big platter and plunk it in the middle of the table after movie night. Sometimes I’ll stick little flag toothpicks in them for the kids — they think it’s hilarious (and it saves me from sticky fingers all over the sofa). Also, I always save a couple to go with my morning coffee the next day. Don’t judge!
Lessons Learned (The Hard, Messy Way)
- I once tried rushing the marshmallow melting step and regretted it because half of them ballooned up and popped — sticky mess on the microwave roof. Just be patient here.
- Don’t over-squash the sandwich — unless you want marshmallow in your hair. (Happened. Still not sure how.)
- If you let them sit for a few minutes, the chocolate and marshmallow mellow out and the crackers don’t get soggy as fast. Good things to those who wait, right?
FAQ: Questions Folks Actually Asked Me
- Can I make these ahead of time? Sure, but honestly, they’re best fresh. I mean, I’ve made them in the morning for an afternoon party, and they were still good — just maybe a bit softer. If you want them crispy, don’t make too far in advance.
- Do they work with gluten free crackers? Yup! I’ve used Glutino brand and they held up fine. If the cracker is too delicate, it might fall apart, but most store-bought brands work. Or you could check here for more GF snack ideas — they’ve got loads.
- Can I use a campfire to make these? You absolutely can — just toast the marshmallow the classic way, then sandwich everything together. It’s a little messier (and more fun if you ask me). For more outdoor s’mores ideas, Food Network has some wild versions.
- Why do my cookies get soggy? Well, humidity is the enemy; if it’s really damp, eat them quick. Or store in a sealed box with a paper towel.
- Can I freeze these? I have, once, when I got a little overzealous. They taste fine from the freezer but the texture’s a bit odd. Maybe not my first choice, but hey — waste not, want not.
Side note: I once tried to make a ‘giant’ version of this with a whole sleeve of crackers and a giant bar of chocolate, thinking I’d made the dessert equivalent of a unicorn — let’s just say, it was more of a mess than a masterpiece. Lesson learned. But if you ever figure out how to pull it off, let me know!
That’s it from me — hope your kitchen smells like melted chocolate and toasted marshmallow sometime soon. If you want more simple dessert ideas, Sally’s Baking Addiction has some absolute gems (her no bake bars — wow). Enjoy, and don’t forget to lick your fingers!

Ingredients
- 24 Ritz crackers
- 12 large marshmallows
- 12 pieces milk chocolate (about 1.5 oz)
- 1/2 cup semi-sweet chocolate chips, melted
- 1 tablespoon unsalted butter, melted
- 1/4 cup graham cracker crumbs
- 1/4 teaspoon sea salt (optional)
- Nonstick cooking spray
Instructions
-
1Preheat your oven to 350°F (175°C) and line a baking sheet with parchment paper. Lightly spray with nonstick cooking spray.
-
2Arrange 12 Ritz crackers, salted side down, on the prepared baking sheet. Place a piece of milk chocolate and a large marshmallow on each cracker.
-
3Top each with another Ritz cracker, salted side up, to form a sandwich. Gently press down.
-
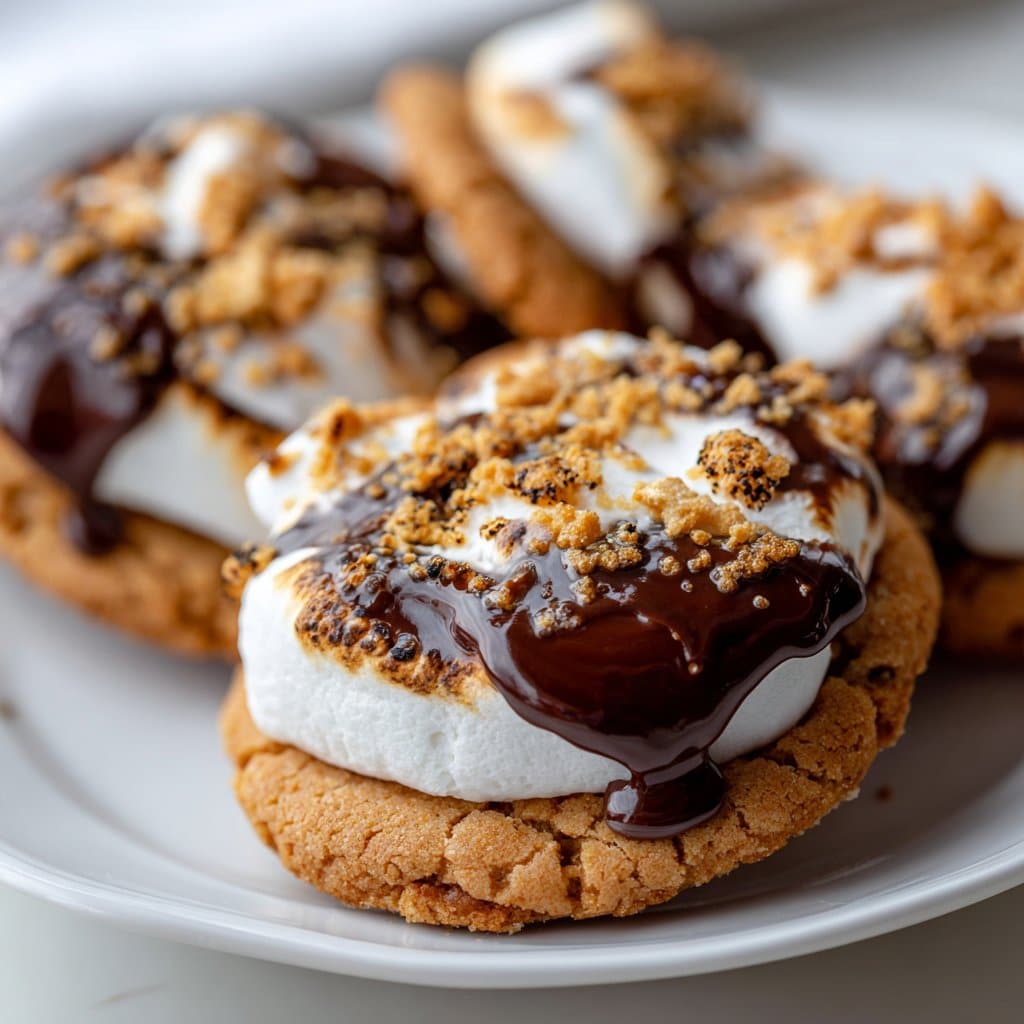
4Brush the tops with melted butter and sprinkle with graham cracker crumbs and sea salt if desired.
-
5Bake for 6-7 minutes, or until the marshmallows are soft and the chocolate is melted. Remove from oven.
-
6Drizzle with melted semi-sweet chocolate chips. Allow to cool slightly before serving.
Approximate Information for One Serving
Nutrition Disclaimers
Number of total servings shown is approximate. Actual number of servings will depend on your preferred portion sizes.
Nutritional values shown are general guidelines and reflect information for 1 serving using the ingredients listed, not including any optional ingredients. Actual macros may vary slightly depending on specific brands and types of ingredients used.
To determine the weight of one serving, prepare the recipe as instructed. Weigh the finished recipe, then divide the weight of the finished recipe (not including the weight of the container the food is in) by the desired number of servings. Result will be the weight of one serving.
Did you make this recipe?
Please consider Pinning it!!




