So, Let’s Talk Slumgullion—Why This Goulash Makes Me Grin
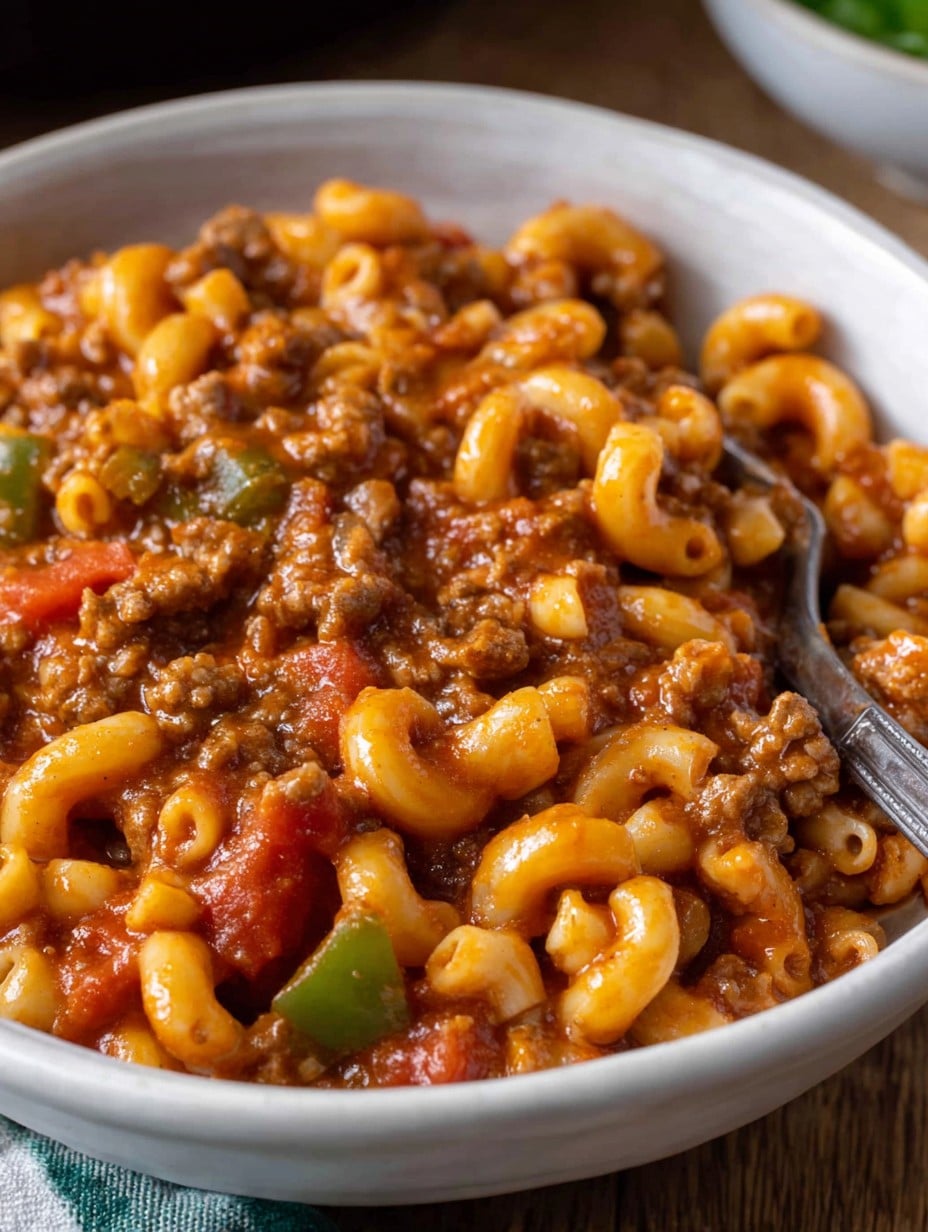
Alright, let me paint you a picture: it’s raining cats and dogs outside (classic Midwestern Tuesday), and the only thing that’s going to cure the grumbles in my house is a giant pot of Slumgullion—also known as good old American goulash. I swear, this stuff is pure nostalgia in a bowl. My dad called it “kitchen sink stew” because, well, it has about everything except the sink thrown in. And, you know, every time I make it, I remember that one time I accidentally doubled the paprika—let’s just say nobody slept that night.

But anyway, if you like comfort food that doesn’t ask you to be fancy, pull up a chair. I’m about to spill my loosely guarded secrets to making Slumgullion the way my family likes it (with the burnt cheese bits and all).
Why You’ll Probably Love This (Because I Do)
I usually make this goulash when time’s short and everyone’s patience is even shorter—it just works. My family goes nuts for this because it’s warm, filling, and, honestly, even better scooped up with a big chunk of bread (sometimes a tortilla if I’m out of bread, shh). Plus, Slumgullion forgives you if you muck up the order or if you, I don’t know, get distracted by the dog barking at the mailman and overcook the pasta a little. Oh, and it’s my go-to when I need to disguise a handful of veggies—nobody even notices the sneaky carrots unless I forget to chop them small enough. Which…look, nobody’s perfect.
What You’ll Need (And What You Can Get Away With)
- 1 lb ground beef (sometimes I use ground turkey if I’ve got it but my dad would protest loudly)
- 1 large onion, chopped (red, yellow – whatever’s rolling around in the pantry)
- 3 cloves garlic, minced (or a lazy squeeze from the garlic tube; I won’t judge)
- 1 bell pepper, diced (green is classic, but any color works—my neighbor swears by orange)
- 1 can (15 oz) diced tomatoes (sometimes two if I’m feeling saucy)
- 1 can (8 oz) tomato sauce (honestly, the ‘no salt added’ version tastes the same to me)
- 2 cups beef broth (I’ve made it with chicken broth before and nobody noticed… until now I guess)
- 2 tsp paprika (smoked, sweet, or the accidental double mentioned earlier…be careful)
- 1 tsp dried oregano (or Italian seasoning if you can’t be bothered)
- 1 tsp salt (I go easy and adjust later—it can be salty fast!)
- 1/2 tsp black pepper (probably more if you like a kick)
- 2 cups elbow macaroni (yep, I’ve used shells in a pinch. Cavatappi looks fancy but doesn’t change things that much)
- 1 cup shredded cheddar cheese (I like the sharp stuff, but honestly, any cheese that melts will do. My grandma was insistent on Kraft; I can’t taste the difference.)
- Optional: handful of chopped parsley, red pepper flakes, Worcestershire sauce (Not essential, but fun if you’re feeling experimental or just need to clean out the fridge.)
How I Actually Make It (Emphasis on “Actually”)
- Grab your biggest pot—trust me, it saves you from weird boil-overs. Heat it up over medium and toss in the ground beef. Break it up, stir it around, maybe hum a little. If you’re using super lean meat, a splash of oil won’t hurt.
- Once the meat is mostly browned, throw in the onion, garlic, and bell pepper. Stir for about five minutes, until it all smells amazing—this is always when my dog trots in, nose in overdrive.
- Drain off excess fat if you feel like it. (Actually, sometimes I skip this step if I’m in a hurry. Doesn’t seem to ruin things.)
- Next, dump in those tomatoes, tomato sauce, and beef broth; give it all a good stir and add in paprika, oregano, salt, and pepper. If it looks a bit soupy at first, that’s totally normal – it thickens up once the pasta goes in. I usually sneak a taste here.
- Bring to a low boil, then drop the heat and let it simmer for 10 minutes, uncovered. Sometimes I forget to cover it, sometimes I forget to uncover it. Either way, just keep an eye out so it doesn’t dry out.
- Add the macaroni right in—no need to pre-cook. Give it all a stir so nothing clumps up. Cook for about 10-12 minutes until the pasta’s tender, but not mush (unless you’re into that, no judgement). Stir occasionally, especially near the end—stuff can stick like the dickens.
- When the pasta’s almost done, toss in your cheese and stir until things go nice and gooey. If it’s too thick—splash a little water or broth. If it’s too thin, just simmer a bit longer, uncovered. Honestly, this bit is all by feel for me.
- Taste and adjust seasoning. Now’s where I might drop in parsley or, if I’m brave, a scant shake of red pepper flakes. Serve hot, with more cheese—because why not?
Random Discoveries and Other Notes
- I’ve learned Slumgullion actually tastes better the next day, which is a miracle, since most leftovers in my house never make it to day two (or, frankly, even past midnight).
- If the pasta sits too long, it does soak up the sauce and go a bit stodgy. Actually, I like it that way sometimes—it’s almost like a casserole then.
- Adding Worcestershire sauce gives a slight tang, but don’t overdo it—speaking from, um, experience.
- Really, don’t stress if it looks a bit messy. That’s half the charm.
Variations I’ve Taken for a Spin (And One Flop)
- Ground turkey or chicken—great if you’re trying to lighten things up a smidge. Just add a little olive oil so it doesn’t dry out.
- Swap in whole-wheat pasta—my kids claim they knew, but I’m not so sure…
- I tried making a vegetarian version once with lentils, and, well, it tasted fine but the texture was off. Might try chickpeas next time? Or maybe not, we’ll see.
- I’ve tossed in random veggies hiding in the fridge: corn, zucchini, peas, even spinach if you chop it up small. Not all of those were big hits, but hey, waste not.
Tools—and My Occasional Workarounds
You’ll want a good, heavy-bottomed pot or Dutch oven. If yours is stuck under the holiday decorations from last year, a big soup pot totally works (I’ve used a high-sided frying pan before in a pinch; it was… tense, but it worked). Oh, and a sturdy spoon—don’t use that wimpy plastic one that melts if you look at it sideways.
Storage Stuff (Not That It Ever Lasts Long)
Technically this keeps in an airtight container in the fridge for three, maybe four days. Mine never makes it past the next day—people just keep sneaking spoonfuls. But if you’re saving it, add a splash of broth or water when you reheat, since the noodles do that thing where they soak up all the goodness. Freezing: you can, but the pasta gets kinda soft. (Still edible on a lazy night, though!)
How We Serve It (Feeding a Crowd or Just Myself)
Big steaming bowls, usually with a side of crusty bread. Sometimes I top it with more cheddar—my brother drowns his plate in hot sauce for some reason. If it’s a “fancy” dinner (haha), a simple green salad goes alongside, but honestly nobody touches that till they’ve had second helpings of the goulash. And on a whim I once tried serving with a fried egg on top; honestly, amazing.
If I Could Go Back—My “Pro” Tips
- Don’t rush browning the meat. I once did, and ended up with weird, gray lumps (edible but a bit sad).
- Taste before adding extra salt. The broth and cheese can make it saltier than you think—been there, drank all the water after.
- If you forget to stir when the pasta’s cooking, it really does stick and burns a patch on the bottom. So now I tell myself: “stir, then wander off.” Not the other way round.
- Don’t stress about perfect measurements. This is home cooking, not rocket science.
Questions Friends (and Slightly Distracted Cooks) Have Asked Me
- Can I use another type of pasta? Absolutely, mate. Shells, penne, even broken-up spaghetti if that’s all you’ve got. Just watch the cooking time—some types go soft quickly.
- What if I hate bell peppers? Leave ’em out, or swap for whatever’s on sale. Celery isn’t the same, but it’ll do in a pinch.
- How spicy is it? Not very. But you like heat, so add more pepper, or even a cheeky spoon of hot sauce. Kids seem to prefer it mild, though.
- My goulash ended up really thick. Fix? Pour in a bit more broth or even water. No need for panic. Actually, thicker can be nice the next day.
- Can I make this ahead? You bet! In fact, I think it tastes better on day two, flavors get all cozy. Just keep in mind the pasta keeps soaking up liquid, so loosen it up with broth when reheating.
- Do I really need cheese on top? In my house? Yes. But you do you. It’s still great if you skip it, or swap for whatever cheese you fancy (or that mystery bag in the fridge).
- I ran out of tomato sauce—help? Tomato soup, a bit of ketchup, or more diced tomatoes will work. Just wing it, honestly—we’re all friends here.
Okay, I think that’s all my Slumgullion ramblings for today. If you make it, let me know how you tweak it, or if you accidentally invent something weird. Keeps things interesting, don’t you think?
Ingredients
- 1 pound ground beef
- 1 large onion, diced
- 2 cloves garlic, minced
- 1 green bell pepper, diced
- 2 cups elbow macaroni, uncooked
- 1 can (28 ounces) crushed tomatoes
- 2 cups beef broth
- 2 teaspoons Italian seasoning
- 1 teaspoon salt
- 1/2 teaspoon black pepper
- 1 cup shredded cheddar cheese (optional)
Instructions
-
1In a large pot over medium heat, cook the ground beef until no longer pink, breaking it up with a spoon.
-
2Add the diced onion, garlic, and bell pepper to the pot. Sauté for 4–5 minutes until the vegetables are softened.
-
3Stir in the crushed tomatoes, beef broth, Italian seasoning, salt, and black pepper. Bring the mixture to a gentle boil.
-
4Add the uncooked elbow macaroni. Reduce the heat to a simmer, cover, and cook for about 15 minutes until the pasta is tender, stirring occasionally.
-
5Uncover and simmer for a few extra minutes if needed to reach desired consistency. If using, stir in shredded cheddar cheese just before serving.
-
6Serve hot, garnished with additional cheese or chopped parsley if desired.
Approximate Information for One Serving
Nutrition Disclaimers
Number of total servings shown is approximate. Actual number of servings will depend on your preferred portion sizes.
Nutritional values shown are general guidelines and reflect information for 1 serving using the ingredients listed, not including any optional ingredients. Actual macros may vary slightly depending on specific brands and types of ingredients used.
To determine the weight of one serving, prepare the recipe as instructed. Weigh the finished recipe, then divide the weight of the finished recipe (not including the weight of the container the food is in) by the desired number of servings. Result will be the weight of one serving.
Did you make this recipe?
Please consider Pinning it!!




