If You Like Dessert with a Bit of Drama (and Mess): My Strawberry Cheesecake Poke Cake Story
Okay, so the first time I tried making this Strawberry Cheesecake Poke Cake, I actually splattered strawberry sauce onto my favourite t-shirt. (Classic me.) But honestly? It was worth it. This cake is a real showstopper, the kind of thing you bring to a backyard BBQ and everyone’s suddenly your best mate. Plus, the kids think the ‘poke’ part is hilarious, so I get company when I’m stabbing holes in the cake. I’ll admit, I once tried to skip a step because I was running late for the school pickup—don’t do it! Patience is a virtue, at least when there’s cheesecake involved.
Why I Keep Coming Back to This Cake
I make this whenever my in-laws threaten to visit (kidding! Mostly). My family goes wild for this because it’s basically two desserts in one, and honestly, I think it tastes even better the next day—if it lasts that long in the fridge. There’s something about the creamy filling seeping into those cake holes that’s just magic. Sometimes I use boxed cake mix when I’m feeling lazy (just being honest), but you can go all out and bake from scratch if you’re feeling fancy. Oh! And you don’t have to fuss over perfect layers; it’s supposed to look a bit messy. That’s half the fun.
What You’ll Need (and My Not-So-Secret Substitutions)
- 1 box white or yellow cake mix (I’ve also used vanilla, and once…a lemon one by mistake. Not bad!)
- Eggs, oil, water (as per your cake mix, or go homemade if you’ve got the time)
- 1 packet strawberry gelatin (3 oz) (Honestly, any store brand is fine—my gran swore by Jell-O, but I can’t tell the difference)
- 1 cup boiling water
- 1/2 cup cold water
- 8 oz cream cheese, softened (Full-fat or light—I don’t judge. I even used mascarpone once, which was a treat.)
- 1 cup powdered sugar (Sometimes I just eyeball this. Don’t tell anyone.)
- 1 tsp vanilla extract
- 2 cups whipped topping (Cool Whip or homemade whipped cream. I’m not above Cool Whip on a hot day.)
- 1 pound fresh strawberries, sliced (Or frozen if you’re desperate—it happens.)
- Optional: Graham cracker crumbs for topping (I’ve also sprinkled on digestive biscuits, and nobody complained)
Here’s How I (Usually) Make It—With a Few Mishaps
- First things first: bake the cake. Preheat your oven to whatever your cake mix says (usually 350°F). Mix up the batter, pour it into a 9×13 pan, and bake. (I once used a round pan and—well, it was interesting. Stick with rectangular.)
- Let the cake cool for a bit. I mean, you want it mostly cool but not fridge-cold. Maybe 20 minutes? Meanwhile, put the kettle on for the gelatin.
- Now comes the fun part: poke holes all over the cake with a wooden spoon handle. Or, honestly, anything round and pokey. Don’t be shy—really get in there. This is where the kids like to help (and make a mess).
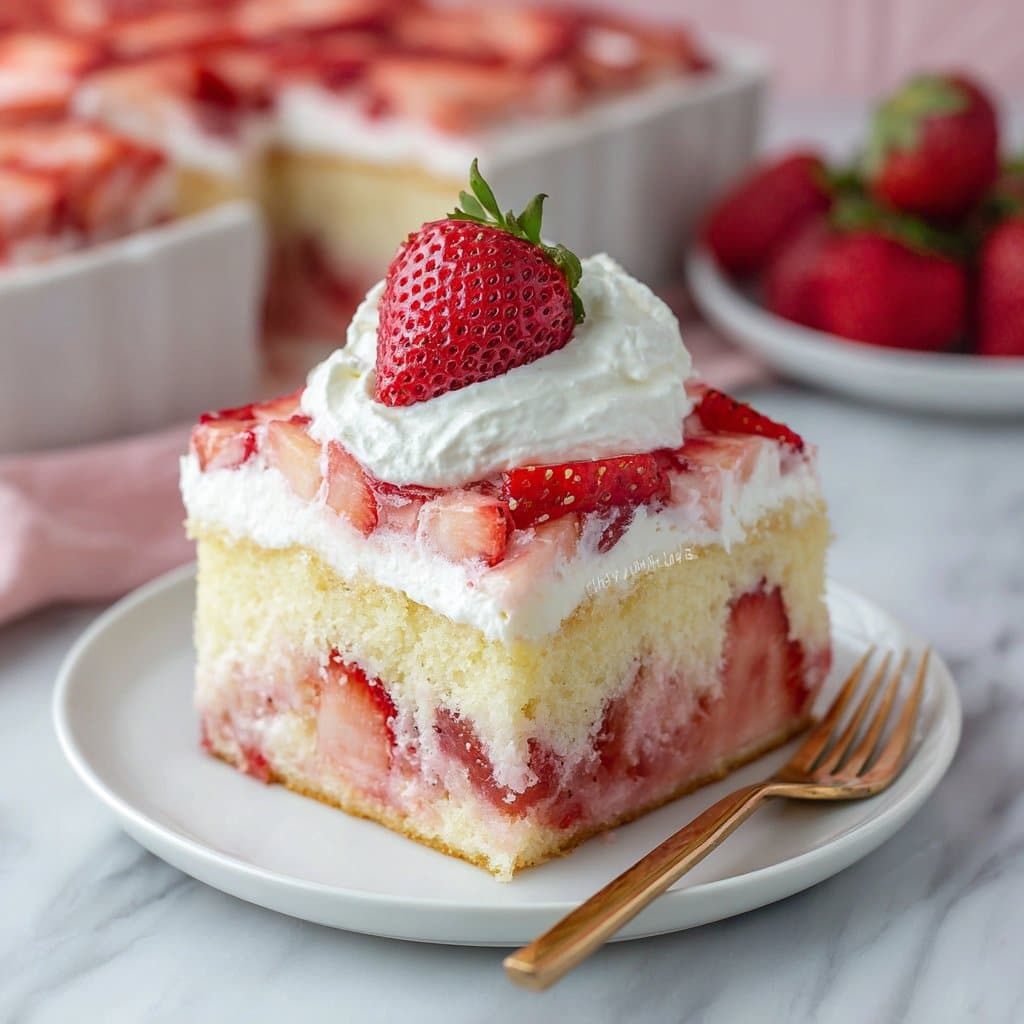
- Mix the strawberry gelatin with 1 cup boiling water, stir until dissolved, then add the 1/2 cup cold water. Pour this strawberry goodness slowly over the cake, letting it fill the holes. It looks a bit weird; don’t panic. It’s supposed to.
- Pop the cake in the fridge to chill for at least an hour (I usually forget and leave it longer).
- In a bowl, beat the cream cheese until smooth—no lumps! Add powdered sugar and vanilla, beat again. Fold in the whipped topping gently. This is where I sneak a taste. Quality control, right?
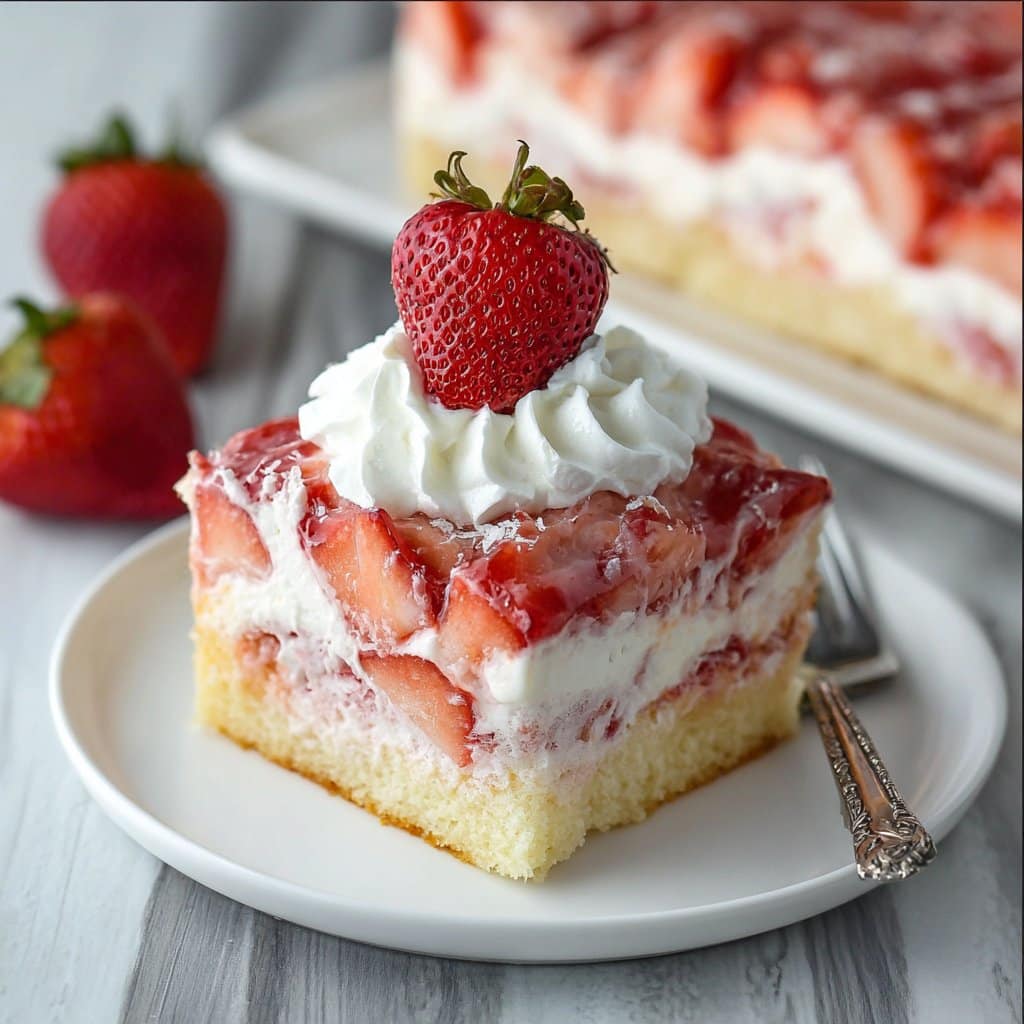
- Spread your cheesecake mixture over the chilled cake. Top with sliced strawberries, and whatever crunchy bits you like (graham crackers, biscuits, or skip it if you’re out).
- Back in the fridge it goes for another hour, or until you just can’t wait any longer.
Things I’ve Learned (the Hard Way, Sometimes)
- If you rush adding the gelatin, it’ll pool on top, and trust me, that’s not what you want. Let the cake cool first.
- I’ve tried using low-fat everything—it’s okay, but you do lose some creaminess. On second thought, just enjoy the treat!
- Don’t overfold the cheesecake layer or it’ll deflate. I did that once and it looked like sad frosting.
Some Variations I’ve (Bravely) Attempted
- Lemon gelatin and blueberries instead of strawberry—surprisingly good, actually!
- Chocolate cake mix with raspberry gelatin—bit much for me, but hey, give it a go if you love chocolate!
- Once I tried folding fresh chopped mint into the cream cheese. It was…odd. Wouldn’t do it again, but maybe you’d love it?
What If You Don’t Have All the Fancy Tools?
I always say a wooden spoon handle is perfect for poking the holes, but I’ve used chopsticks, a butter knife (not my finest work), even my finger in a pinch. No mixer? A whisk and some elbow grease will do for the cream cheese layer—count it as your workout.
Keeping Leftovers (If You’re Lucky Enough to Have Them)
Store in the fridge, covered, for up to three days. Though honestly, in my house it never lasts more than a day! The cake does get a bit softer as it sits, which I actually prefer—so moist.
How We Serve It at My Place
Big squares, usually with a dollop of extra whipped cream (sometimes out of a can—don’t judge me). My cousin pours a splash of strawberry liqueur over hers, which is a whole vibe. In summer, we eat it outdoors with extra strawberries scattered around. Feels a bit posh, even if we’re just in lawn chairs.
Little Tips I Learned by Messing Up
- I once tried to chill the cake in the freezer to speed things up. Regretted it—ice crystals in the cheesecake layer aren’t fun.
- Don’t skip lining the pan if you want easy removal. I’ve wrestled with many a stuck poke cake. Foil works in a pinch.
- Actually, I find it works better if you let the cake come up to room temp for a few minutes before serving. The layers taste richer.
Questions People Actually Ask Me (And My Honest Answers)
- Can I make this ahead? Yep! It’s best after a night in the fridge. Just add the fresh strawberries on top before serving so they don’t go mushy.
- Could I use a different fruit? For sure. Blueberries worked great, and once I tried peaches (tinned ones, in syrup). Results? Decent, but not my favourite.
- What if I don’t have whipped topping? Real whipped cream works. Or you can check out this simple homemade whipped cream recipe I love from Sally’s Baking Addiction.
- How do I keep the strawberries fresh-looking? Brush them with a little warmed apricot jam if you want them shiny—saw that on King Arthur Baking once, and it’s genius.
- Can I freeze leftovers? I wouldn’t. Cream cheese filling gets a bit grainy after freezing. But if you’re like my uncle and don’t mind textures, go for it?
And, by the way, if you’re looking for another summery dessert, have a peek at my favourite No-Bake Cheesecake—it’s saved my bacon on many a hot day when I can’t face the oven. Anyway, happy poking! Let me know how yours turns out, or if you have a wild variation I should try (except mint, once was enough).
Ingredients
- 1 box white cake mix (plus ingredients listed on box: eggs, oil, water)
- 1 package (3 oz) strawberry gelatin
- 1 cup boiling water
- 1 package (8 oz) cream cheese, softened
- 1 cup powdered sugar
- 1 container (8 oz) whipped topping, thawed
- 1 cup fresh strawberries, diced
- 1 teaspoon vanilla extract
Instructions
-
1Preheat oven to 350°F (175°C). Prepare the white cake mix according to package instructions and bake in a 9×13-inch pan.
-
2Allow the cake to cool for 10 minutes. Using the handle of a wooden spoon, poke holes all over the cake.
-
3In a bowl, dissolve strawberry gelatin in 1 cup boiling water. Pour the gelatin mixture evenly over the cake, allowing it to soak into the holes. Refrigerate for 1 hour.
-
4In a mixing bowl, beat softened cream cheese until smooth. Add powdered sugar and vanilla extract, mixing until combined. Fold in the whipped topping.
-
5Spread the cheesecake mixture evenly over the chilled cake. Top with diced fresh strawberries.
-
6Refrigerate for at least 30 minutes before serving. Slice and enjoy!
Approximate Information for One Serving
Nutrition Disclaimers
Number of total servings shown is approximate. Actual number of servings will depend on your preferred portion sizes.
Nutritional values shown are general guidelines and reflect information for 1 serving using the ingredients listed, not including any optional ingredients. Actual macros may vary slightly depending on specific brands and types of ingredients used.
To determine the weight of one serving, prepare the recipe as instructed. Weigh the finished recipe, then divide the weight of the finished recipe (not including the weight of the container the food is in) by the desired number of servings. Result will be the weight of one serving.
Did you make this recipe?
Please consider Pinning it!!




