I’ll never forget the first time my cousin brought out a bowl of gloriously fluffy, whipped butter at Thanksgiving. I know it sounds dramatic, but my jaw actually dropped. I’d grown up just slapping fridge-cold pats on toast (like a peasant, basically), but that day? That day I understood what all the fuss was about. Ever since then, I make whipped butter whenever I want to feel a little fancy. Or just when I’m bored and want an excuse to eat more bread. Don’t judge.

So Why Do I Make This?
I make whipped butter when crusty bread demands a soft, cloud-like spread. Or when I’ve got company and I want things to look fancier than they feel (it’s just butter, but with pizzazz). My family goes bonkers for this stuff – even my kid who refuses anything yellow. Honestly, part of me likes it ’cause it means I don’t have to deal with that awkward plop of cold butter that won’t spread on toast (cue the deep sighs, you know what I mean).
What You’ll Need (But Feel Free to Improvise)
- 1 cup (225g-ish) unsalted butter, softened – but look, I’ve used salted before, and it’s totally fine (just watch the salt you add!)
- 2-3 tablespoons heavy cream – or, on lazy days, milk. My grandmother swore by using full-fat sour cream, believe it or not, and it’s not half-bad.
- 1/2 teaspoon sea salt (optional, or to taste). Sometimes I go wild with flaky salt on top at the end instead of mixing it in.
- Optional extras: cracked black pepper, fresh or dried herbs (thyme is lovely!), a drizzle of honey for sweet tooths, or even a little roasted garlic – though be prepared for a little kitchen garlic fog.
Alright, Here’s How I Do It
- Let the butter actually get soft. And I mean, really soft. Not just “poke it with your finger and it leaves a dent” soft – let it lounge out for at least an hour, especially if your kitchen’s chilly like mine. I’ve used the microwave trick (5 secs at a time); it works, just don’t melt it. Been there, rescued that.
- Plop that butter in your mixer bowl. Stand mixers are fab but a hand mixer is just as good, honestly. If you’ve nothing but a wooden spoon and sturdy arms, do you – you’ll get a mini-workout.
- Beat on medium for about 2 minutes. At first, it always looks a bit ugly and lumpy. Don’t panic, it comes together. I usually scrape down the bowl once or twice here. Actually, I sneak a taste at this point, too (who wouldn’t?).
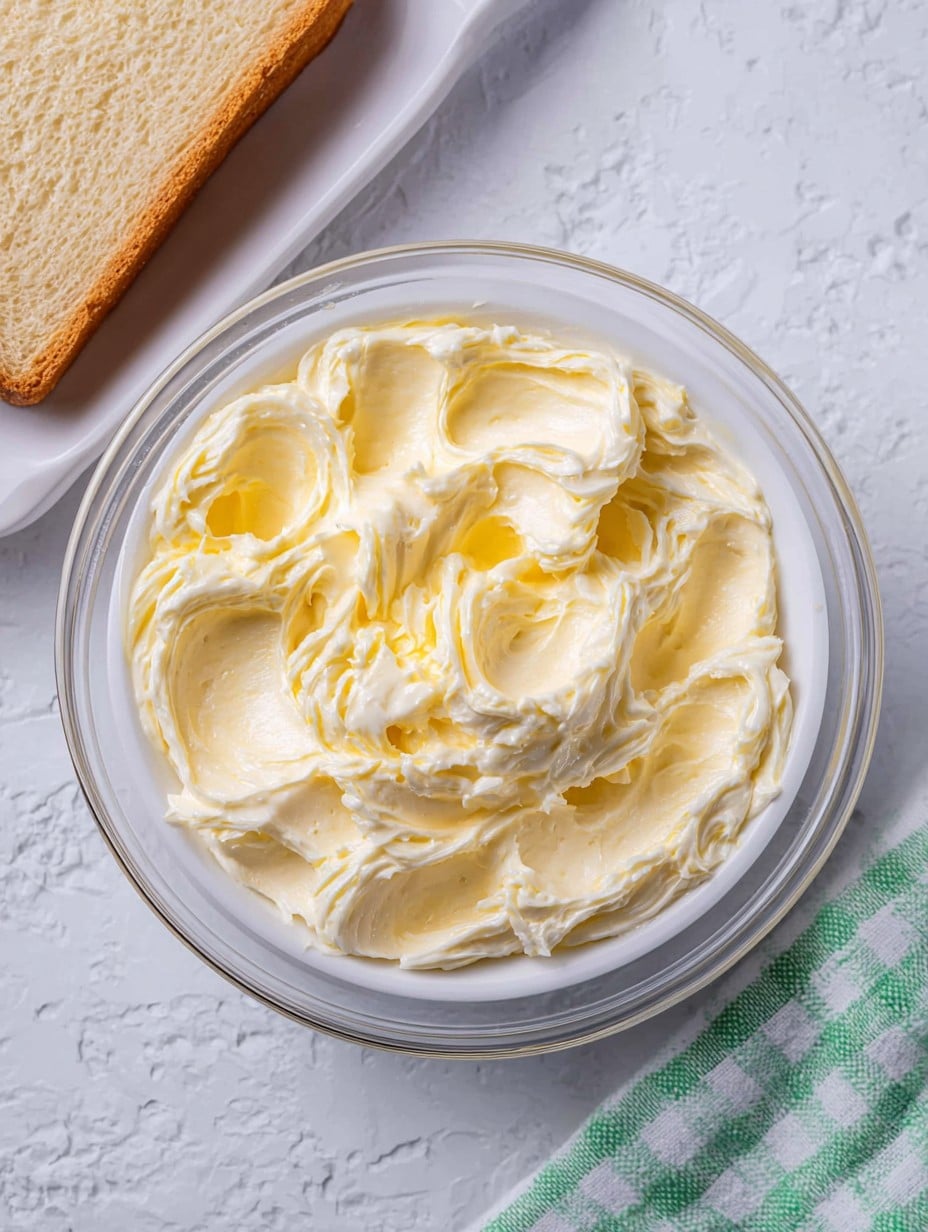
- Now drizzle in your cream/milk/sour cream, little by little, while the mixer’s going. You want the butter to get all creamy and pale, with a texture almost like frosting. Sometimes I add a smidge more cream than planned – if it looks fluffy, you’re golden.
- Mix in salt (and any other flavor bits you fancy). Give it another short whirl, and you’re done. Admire those soft peaks for a hot second. You did it.
Notes (A Few From My Own Mess-Ups)
- If you over-whip, it sometimes starts to separate – just stick it in the fridge for twenty minutes and whip again. Or, honestly, spread it anyway; no one’ll notice.
- Forgot to soften the butter? Slash it into thin slivers and leave near a sunny window. Weird tip, but it works when I remember.
- I used margarine that one time when I was desperate. Tasted…okay, but never again. Butter’s better (predictably, ha).
Whipped Butter Experiments I’ve Tried
- Chopped chives – possibly my favorite addition (tastes like fancy steakhouse butter—even more fun if you say “steakhouse” in a dramatic voice… or is that just me?).
- Lemon zest and a smidge of honey – good with scones, but too weird on rye bread. You’ve been warned.
- Once I tried olive oil instead of cream. It was a runny mess. Not my finest moment!
Stuff You Might Use (And When You Don’t Have It…)
- Stand Mixer or Hand Mixer – does most of the heavy lifting. But if you’re in a bind, grab a regular whisk and go to town. I did this at a campsite once—felt very rustic and old-world (and my arm almost fell off).
- Bowl – not picky. Glass, metal, plastic, whatever’s clean.
- Rubber spatula – not totally essential, but it makes scooping easier. Back of a spoon works in a pinch; I’ve even used my kid’s sandwich knife (don’t tell her).
How Long Does This Stuff Last (If It Lasts)?
Supposedly, you can keep it tightly covered in the fridge for up to a week. In my house? I blink and it’s gone. But, for science, yes, up to a week – bring it out 10 minutes before you want to use it for max spreadability. Freezes fine, but gets a bit crumbly when thawed – your call.
How I Love to Serve It
If you ask my family, whipped butter’s for everything – bagels, pancakes, baked sweet potatoes, you name it. My personal favorite is on fresh, still-warm sourdough (sometimes with jam). At holidays we serve it in a cute little dish, but honestly, a mug works when I can’t find the nice stuff (which is always…I really need to organize that drawer).
Things I’ve Learned the Hard Way (AKA, My Pro Tips)
- Don’t try to rush the softening. I once nuked my butter five seconds too long and ended up with a puddle. Not exactly the creamy dream.
- Clean up as you go. Whipped butter somehow gets everywhere (why? I have no idea!). It’s slippery as an eel on a wet dock, so watch for flying spatulas.
- If you use salted butter, taste before adding more salt. Your taste buds will thank you later.
- Start with less cream, add more if you want it airier. There’s no going back if you overdo it, unless you like drinking your butter (I don’t judge…much).
Your Questions – Answered (From Real Life Texts!)
- Can I use plant-based butter? Been there! Yes, but some get weirdly oily. Try it with a half recipe first in case you don’t vibe with the texture.
- Why did my whipped butter go grainy? Usually, too-cold butter meets too much liquid. Just let it all come to room temp next time and whip longer.
- Can I make this ahead of time? For sure! It’s actually (I think) better the next day since the flavors kind of hang out together.
- My whipped butter’s yellow—shouldn’t it be pale? Some butters are more golden (farmers market stuff especially!). It’s totally fine, and, arguably, even prettier.
- Do I have to whip by hand? Nope, get out that mixer if you’ve got one. Or make someone else do the whisking for you while you supervise (this works on kids under 10 and unsuspecting partners).
By the way—one time I accidentally grabbed powdered sugar instead of salt when making the honey version. Strangely…not horrible. So, there you go: the kitchen’s full of surprises. That’s part of the fun, right? Go make yourself a batch and spread a little joy (literally) around your table.
Ingredients
- 1 cup unsalted butter, softened
- 2 tablespoons heavy cream
- 1 tablespoon honey
- 1/4 teaspoon sea salt
- 1/2 teaspoon vanilla extract
- 1/4 teaspoon lemon juice (optional)
- 1/2 teaspoon powdered sugar (optional)
- 1/8 teaspoon ground cinnamon (optional)
Instructions
-
1Place softened unsalted butter in a large mixing bowl.
-
2Add heavy cream, honey, sea salt, and vanilla extract to the butter.
-
3Using an electric mixer, beat the ingredients on medium-high speed for about 3-5 minutes until light and fluffy.
-
4For a sweeter or flavored butter, mix in powdered sugar, lemon juice, or ground cinnamon to taste.
-
5Transfer whipped butter to a serving bowl or airtight container and chill until ready to serve.
Approximate Information for One Serving
Nutrition Disclaimers
Number of total servings shown is approximate. Actual number of servings will depend on your preferred portion sizes.
Nutritional values shown are general guidelines and reflect information for 1 serving using the ingredients listed, not including any optional ingredients. Actual macros may vary slightly depending on specific brands and types of ingredients used.
To determine the weight of one serving, prepare the recipe as instructed. Weigh the finished recipe, then divide the weight of the finished recipe (not including the weight of the container the food is in) by the desired number of servings. Result will be the weight of one serving.
Did you make this recipe?
Please consider Pinning it!!




