Let’s Chat About White Chocolate Brownies (Yes – They’re a Thing!)
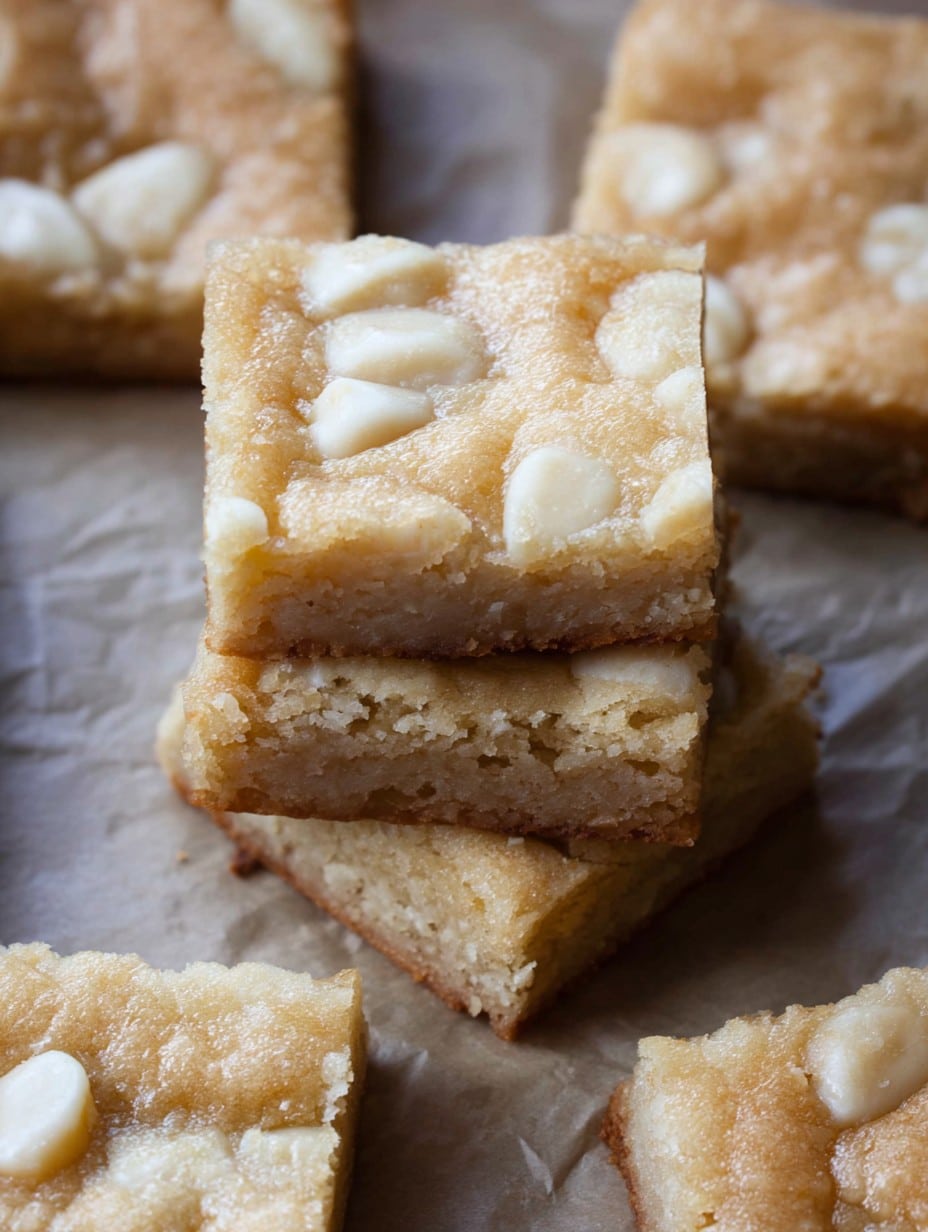
So last winter, I tried to impress my niece by making regular old brownies, but I grabbed the wrong bar and—well, surprise! We ended up with white chocolate brownies, which are actually more blondie than brownie but, shh, don’t tell anyone. Ever since then, the little one asks for “the pale brownies” every time she comes over. Honestly, they’re kind of addictive and somehow vanish from the tin before they’ve properly cooled. I’m starting to suspect my husband of midnight snacking. Anyway, if you’ve never tried baking with white chocolate instead of the usual, this is your permission slip. And don’t worry, if I can manage this recipe without burning down the place, anyone can.

Why You’ll Love Making (and Eating) These
I pull out this recipe when I want something sweet but I can’t face another chocolate overload, or when I want to trick people into thinking I spent hours in the kitchen – when actually, all it took was a single bowl and a half-hearted whisk. My family goes absolutely spare for the slightly fudgy center (and okay, sometimes they’re underbaked because I get impatient, but it just makes them gooey). If you hate washing up, rejoice: barely any bowls required. Plus, if you’re like me and you sometimes forget the eggs are almost out, it’s forgiving enough to get by with just one. Oh, and—if you’re having a rough day, eating the corner piece straight from the pan is almost therapeutic, I swear.
What You’ll Need (Plus My Usual Swaps)
- 200g (about 7oz) white chocolate – I sometimes swap half for a white baking bar if that’s what’s left in the cupboard; grandma was partial to Green & Black’s but honestly, supermarket stuff works fine!
- 100g (1 small stick, plus a tad) unsalted butter – salted actually adds character if that’s all you’ve got, though maybe tone back the pinch of salt
- 2/3 cup granulated sugar – caster or plain, I’ve even used half brown sugar in a pinch for a toffee-ish vibe
- 2 large eggs – you can use 1 egg and 2 yolks for extra goo if you’ve accidentally dropped a white somewhere, which has happened to me more than once
- 1 tsp vanilla extract – or a dash more, who’s counting?
- 1 cup plain flour – I measured once, now I just kind of scoop (don’t quote me!)
- 1/2 tsp baking powder – vital for a bit of lift but if you leave it out, no lawsuits please
- Pinch of salt – unless you went for salted butter, in which case, skip
- Handful of nuts or dried cranberries (optional) – my lot rebel if I use walnuts but go wild
The Way I Do It (With a Few Shortcuts)
- Preheat the oven to 350°F (that’s about 175°C) – just do it first so you don’t forget, speaking from experience.
- Line an 8-inch square tin with parchment. Or, if you ran out (like I do every third time), just grease the tin and hope for the best – sometimes sticking just means first dibs for the baker.
- Break up your white chocolate, chuck it in a microwave-safe bowl with the butter, and melt gently. 30 seconds, stir, repeat. Or the old-fashioned way over a pan of barely simmering water.
But hey, I’m impatient usually. If it looks lumpy at this point—it always does, don’t fret. - Stir in the sugar – which always seems too much at first but trust the process.
- Let cool for a minute (learned the hard way: don’t add eggs to a hot mix unless you want sweet scrambled eggs), then whisk in the eggs and vanilla.
- Fold in the flour, baking powder, and salt. I use a spatula, but a wooden spoon works if you like arm workouts.
- Add in your extras if you’re feeling fancy. About a handful. (I usually sneak a stray cranberry at this point.)
- Scrape the mixture into your prepared pan. It’s thick, so call this your warm-up.
- Bake for 22 – 28 minutes. My oven runs hot, so I check at 22; they’re done when golden at the edges but still a bit soft. If the middle jiggles slightly, that’s perfect for me! But for firmer brownies, go for 30.
- Cool in the tin for 10 minutes, then lift onto a rack. Or, if you can’t wait, just slice straight in there. No judgment.
Little Things I Figured Out
- White chocolate burns crazy fast, so keep an eye when melting – the rescue mission isn’t fun.
- If you forget to let the mix cool before adding eggs, you might get a few flecks of cooked egg—no biggie, just strain them out (and pretend you meant to!).
- Also, these taste better on day two, though in my house, that’s just a theory I’ve rarely proved.
Stuff I’ve Tried (Some Good, Some… Not So Much)
- Swapping the flour for almond meal? Actually works—and makes them a bit chewy.
- Tossing in orange zest: surprisingly yum. Lemon zest—not so much, gave it a weird tang.
- I tried swirling raspberry jam on top once and it just sank right in. OK if you like surprise jam puddles, I suppose.
What You Need (and How I Improvise)
- 8×8″ square tin – round pans also work, just cut funny slices, makes no difference
- Mixing bowl – I’ve used a soup pot before (don’t judge)
- Whisk or sturdy fork
- Parchment paper (optional, as discussed above!)
Storing Your Brownies
These keep wrapped or in an airtight box for three, even four days—though honestly, in my house it never lasts more than a day! If you do want to hide a few pieces for yourself (I’ve done this behind the cereal), they freeze well for up to a month.
How We Eat Them (And How You Might)
I always nudge folks to try a square with tea, but my sister likes hers with a scoop of vanilla ice cream—especially if they’re still warm and a bit wobbly in the middle. Sometimes, we even toast the leftovers lightly (on the odd occasion there are leftovers) and dunk them in hot chocolate. Trust me, it’s a treat.
Things I Learned the Hard Way
- Patience, friends: I once tried to shortcut the cooling and made a massive crumbly avalanche. Let them rest a smidge.
- Don’t overbeat the batter—just fold until you can’t see dry flour. I got enthusiastic with an electric mixer once and they came out more like cake than brownie.
- Actually, I find it works better if you check them early rather than late. Dry brownies are a sin in my book.
Stuff People Ask (I Swear I Don’t Make These Up)
- Is white chocolate really chocolate? Depends who you ask—my nephew says no, but, eh, it’s delicious so who cares?
- Can I use a glass dish instead? Sure, but they probably take a few minutes longer. Every oven’s a law unto itself, isn’t it?
- Can I make these gluten-free? Yep! Like I said, almond meal or a good GF blend works. Won’t be identical, but still good.
- My brownies look raw in the middle. Is that okay? If they’ve set at the edges and don’t pour out, you’re golden. They firm up as they cool! If you prefer extra goo (like me), just grab a spoon.
- What if I don’t have real vanilla? Oh, I’ve used vanilla sugar, or—once—maple syrup. Not the same, but nobody noticed.
- Why are mine so thin? Maybe the pan’s too big, or your baking powder snoozed past its expiry date (I’ve done this, too many times).
- Can I double this? Yeah, just use a bigger pan and watch the bake time! Don’t try shoving it all in an 8-inch—overflow city.
Before I ramble off—don’t be shy if a part goes off-piste, just laugh it off (and maybe claim you meant to do it). That’s how the best kitchen stories start, anyway. Enjoy your pale brownies and let me know if your family polishes them off faster than mine does!
Ingredients
- 200 g white chocolate, chopped
- 110 g unsalted butter
- 100 g granulated sugar
- 2 large eggs
- 1 tsp vanilla extract
- 130 g all-purpose flour
- 1/4 tsp salt
- 50 g white chocolate chips (optional)
Instructions
-
1Preheat your oven to 350°F (175°C). Line an 8-inch square baking pan with parchment paper.
-
2In a heatproof bowl, melt the white chocolate and butter together over a pot of simmering water or in the microwave. Stir until smooth and let cool slightly.
-
3In a large bowl, whisk together the sugar and eggs until pale and combined. Add the vanilla extract and mix well.
-
4Pour the melted white chocolate mixture into the egg mixture and stir until incorporated.
-
5Fold in the flour and salt until just combined. Gently stir in white chocolate chips if using.
-
6Spread the batter evenly in the prepared pan. Bake for 28-32 minutes, or until the edges are set and the center is just firm. Cool completely before slicing into squares.
Approximate Information for One Serving
Nutrition Disclaimers
Number of total servings shown is approximate. Actual number of servings will depend on your preferred portion sizes.
Nutritional values shown are general guidelines and reflect information for 1 serving using the ingredients listed, not including any optional ingredients. Actual macros may vary slightly depending on specific brands and types of ingredients used.
To determine the weight of one serving, prepare the recipe as instructed. Weigh the finished recipe, then divide the weight of the finished recipe (not including the weight of the container the food is in) by the desired number of servings. Result will be the weight of one serving.
Did you make this recipe?
Please consider Pinning it!!




