Oh, this Coconut Thai Salmon Curry is the kind of thing I make when the clock is playing tricks on me and everyone’s hungry (or, well, hangry) and I just want to sit down already. The first time I tried it, the curry was so spicy it nearly cleared my sinuses — I can laugh about it now, but at the time, even the cat left the kitchen. Anyway, through a bit of trial, error, and a possibly embarrassing amount of coconut milk, I landed on this quick curry that tastes like you put in more effort than you really did. Sometimes, I even pretend it took longer, just for the compliments.

Why You’ll Love This (Or at least why I do!)
I pull this recipe out of my hat when: 1) I want something that tastes fancy but don’t want to juggle a billion pots, 2) I’ve totally forgotten to defrost chicken, and 3) someone asks for “that Thai fish thing” again. My family kinda loses their minds over this; maybe it’s all that coconut richness or the fact that cleanup is just one pan (I mean, hallelujah). Once I forgot to add the lime at the end, and wow, that was NOT the same—never skipping it again.
What You’ll Need (Plus my oddball swaps)
- 2 salmon fillets (about 300-350g total) – I use whatever looks freshest, but I’ve subbed trout and it’s still great.
- 1 can coconut milk (400ml) – Full-fat is best, but I’ve snuck in the light one when I’m feeling virtuous.
- 1 heaped tablespoon Thai red curry paste – My gran swears by Maesri, but seriously, the supermarket jar is fine.
- 1 small onion, thinly sliced – Sometimes I just grab shallots or even that half-forgotten leek.
- 2 cloves garlic, minced – Pre-minced is fine if you need speed (I do, all the time honestly).
- 1 thumb-sized piece of ginger, grated – Dried ginger isn’t as zingy, but in a pinch, I’ve used it. No shade.
- 1 red bell pepper, sliced – Or a yellow one. Or snap peas if that’s all I have.
- Juice of 1 lime – Don’t skip it! I tried lemon once; it’s…not the same.
- A handful of fresh cilantro (optional, but lovely) – I know some people think it tastes like soap. You do you.
- Salt and pepper, to taste
- Oil for cooking (coconut, vegetable, whatever’s handy)
How to Make This Curry (Without Losing Your Mind)
- Heat about a tablespoon of oil in a big pan or wok over medium heat. Chuck in the onions, a good pinch of salt, and cook till they’re see-through. This is usually when I spill half the onions, but whatever.
- Add garlic and ginger. Stir for about a minute; don’t let them burn! If you do, just scrape it out and start again. (I’ve done it. Twice, actually.)
- Spoon in the red curry paste. Stir it around till the kitchen smells like your favorite take-away, or about 1-2 minutes. It might look like it’s sticking, and that’s normal. I usually get nervous here, but trust me.
- Pour in all the coconut milk. Use a spatula to scoop out every last bit (don’t waste any!). Give it a good stir, scraping the curry paste off the sides.
- Throw in the bell pepper, then nestle in the salmon fillets, skin side down if there’s skin. The sauce won’t totally cover them; that’s fine.
- Bring to just barely a simmer, cover loosely with a lid or an awkwardly-placed baking sheet if your pans don’t match (I improvise). Let bubble for about 8–10 minutes, depending how thick your salmon is. Flip halfway if you want it even, but honestly, sometimes I forget and it still works.
- This is where I sneak a taste for salt (and, let’s be honest, because I’m hungry). Add pepper and more salt if needed.
- When the salmon flakes with a fork, squeeze over the lime juice and toss in a handful of cilantro if you like. Tastes punchier that way.
Notes (Honestly, learn form my mistakes)
- For thicker coconut curries, simmer uncovered 3ish minutes before adding salmon. Watery curry is a sad thing!
- If your curry splits (oily patches on top), it’s still fine, just stir it like you mean it.
- I once used frozen salmon fillets straight from the freezer. Surprisingly, not a disaster—just needed 5 more mins.
- The amount of curry paste is kind of up to you. I like it spicy; my kids don’t.
Variations I’ve Tried (Some Winners, Some… Meh)
- Shrimp instead of salmon – actually delicious, just needs less cooking time so don’t wander off.
- Added spinach during the last couple of minutes for the “I need more veg” days.
- Used green curry paste once. Not really my jam, but if you love it, go wild.
- I tried making it with tofu instead of salmon for a veggie friend. The tofu sort of dissolved; next time I’ll go with pan-fried firm tofu chunks instead. Or maybe just…not do it that way.
Equipment – But Don’t Sweat It
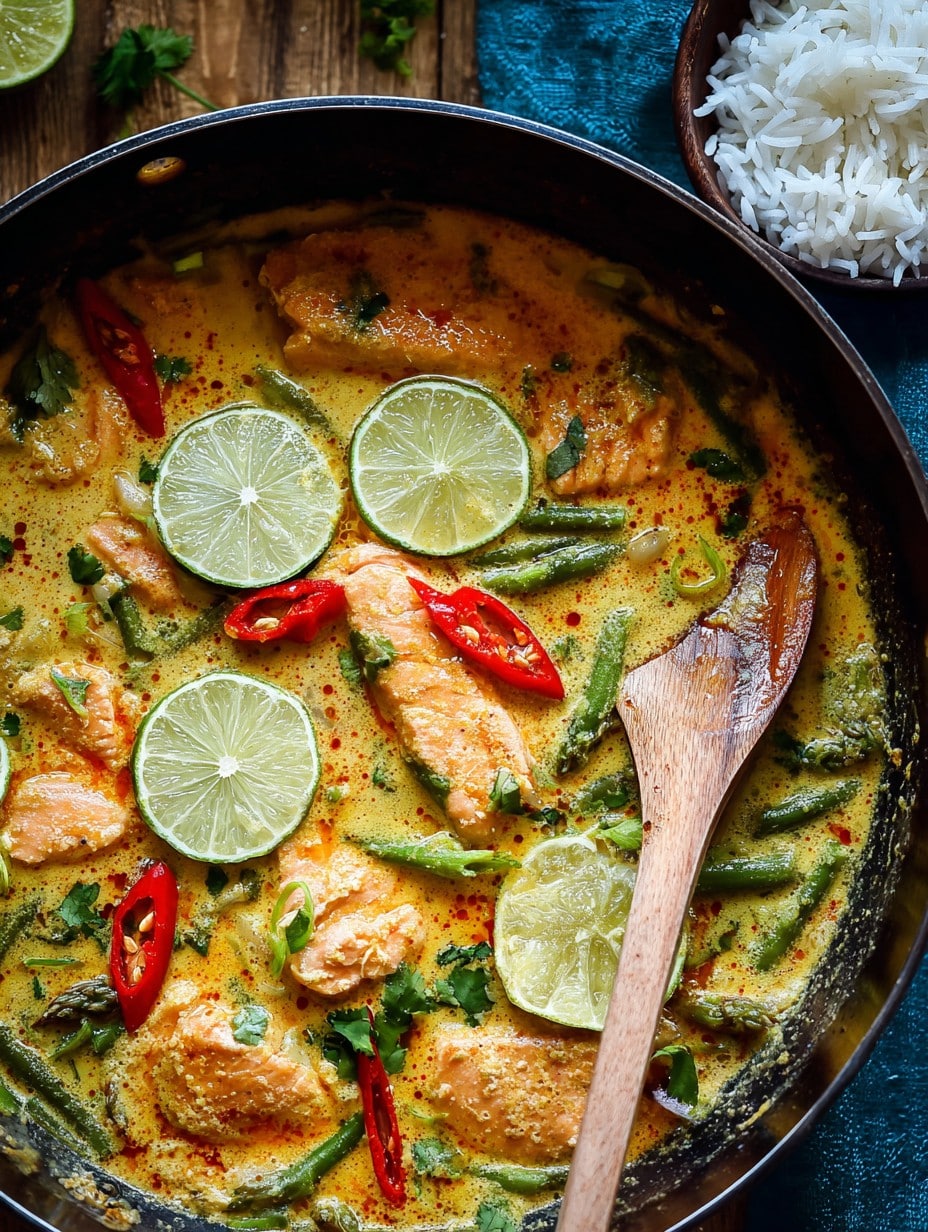
I use a big frying pan or a wok if I’m showing off. No lid? Just cover with foil or the nearest oversized plate (done it many times). Garlic press is nice, but smashing with the blade of a knife does the trick. If you have none of that, don’t overthink it—chop it tiny, call it rustic.
How To Store (Not That It’ll Last, Let’s Be Real)
Pop leftovers in a sealed container and fridge for up to 2 days. I think salmon flavor’s actually better on the second day, though honestly it never makes it past lunch in my house. If you must, reheat gently on the hob or in the microwave; don’t boil it to oblivion or it’ll dry up fast.
Serving Ideas and Little Traditions
We eat ours with lots of fluffy jasmine rice and (because my sister started this) a big wedge of lime on the side for squeezing. Makes you feel like you’re far away from your leaky kitchen tap, if only for dinnertime. Sometimes a chill cucumber salad or naan on the side, if I’m feeling extra.
Pro Tips (Yeah, I’ve Messed Up…)
- Let the curry paste cook for real before adding coconut milk. I once rushed this—tasted a bit raw.
- Use room temp salmon if possible; straight from the fridge can make the curry a tad watery for some reason.
- Actually, don’t skimp on the lime. I tried, and it’s just not the same.
Your Questions Answered (Well, Some Anyway)
- Can I use chicken? Sure, just cut it into thin strips and cook till firm. But, it’s a different vibe—I’d stick with salmon if you can.
- Is this really spicy? It can be! Just use less curry paste (or more, if you’re brave—no judgment).
- What if I don’t like cilantro? Leave it out! Sometimes I use Thai basil when I can find it, which isn’t often, but it’s fun when I do.
- Do I need a wok? Nope! Any biggish frying pan or even a stove-safe casserole works.
- Can I freeze it? I probably wouldn’t. Cooked salmon just goes all grainy and sad after freezing, in my opinion.
Totally unrelated: last time I made this, my dog tried to steal the raw fish. Spoiler—she didn’t get it. Anyway, curry’s ready when you are!
Ingredients
- 4 salmon fillets (about 5 oz each), skinless
- 2 tablespoons red Thai curry paste
- 1 tablespoon vegetable oil
- 1 can (14 oz) coconut milk
- 1 red bell pepper, sliced
- 1 small onion, thinly sliced
- 2 cloves garlic, minced
- 1 tablespoon fish sauce
- 1 tablespoon brown sugar
- 1 teaspoon fresh ginger, grated
- Juice of 1 lime
- Fresh cilantro leaves, for garnish
- Cooked jasmine rice, for serving
Instructions
-
1Pat the salmon fillets dry and season with a pinch of salt and pepper. Set aside.
-
2Heat vegetable oil in a large skillet over medium heat. Add onion and bell pepper, sauté for 3 minutes until softened. Add garlic and ginger, cook for 1 minute more.
-
3Stir in the red Thai curry paste and cook for 1 minute to release its aroma. Pour in the coconut milk, fish sauce, and brown sugar. Stir well to combine and bring to a gentle simmer.
-
4Nestle the salmon fillets into the sauce. Cover and simmer for 8-10 minutes, or until the salmon is opaque and flakes easily with a fork.
-
5Remove from heat, squeeze in the lime juice, and garnish with fresh cilantro leaves. Serve hot over cooked jasmine rice.
Approximate Information for One Serving
Nutrition Disclaimers
Number of total servings shown is approximate. Actual number of servings will depend on your preferred portion sizes.
Nutritional values shown are general guidelines and reflect information for 1 serving using the ingredients listed, not including any optional ingredients. Actual macros may vary slightly depending on specific brands and types of ingredients used.
To determine the weight of one serving, prepare the recipe as instructed. Weigh the finished recipe, then divide the weight of the finished recipe (not including the weight of the container the food is in) by the desired number of servings. Result will be the weight of one serving.
Did you make this recipe?
Please consider Pinning it!!




