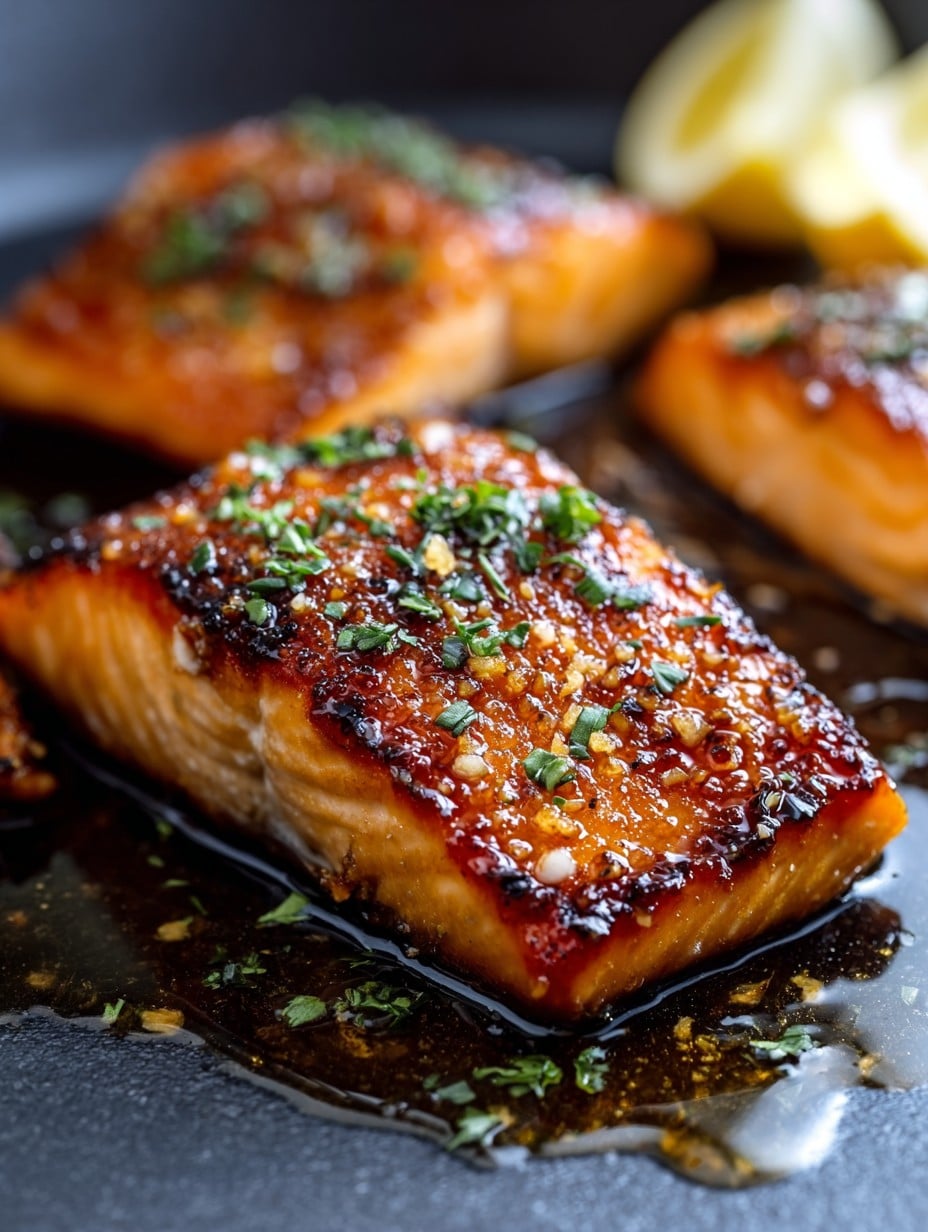
Let’s Talk About This Crispy Honey Garlic Glazed Salmon
Oh, salmon. My weeknight hero and the one fish my kids will eat without pulling faces (usually). The first time I threw honey and garlic together on a piece of salmon, I honestly wasn’t sure what would happen—was this genius or just dinner gone a bit sideways? I was hungry, so risks were taken. And you know what? No regrets, except maybe I should’ve doubled the batch because someone (not naming names, but it was me) ate most of the crispy bits right from the pan. If you’ve ever been halfway through a recipe and realized the only thing left to glaze is your own dignity, welcome—you’re among friends here.

Why You’ll Actually Crave This Salmon
I make this when I want dinner that feels fancy but really isn’t all that fussy. My family goes a bit mad for the sticky-sweet glaze (sometimes there’s a small fork battle for the last bite, which is… not my proudest moment). When I want to feel like a competent adult even if the rest of the kitchen looks like a tornado hit it, this recipe delivers. Oh! And that crispy edge you get on the salmon skin? That’s pure gold. I used to struggle getting salmon crispy enough—ended up with more of a limp, sad pink flap before I started cranking up the pan. So don’t be afraid of a bit of sizzle.
Here’s What You’ll Need (And a Few Swaps)
- 4 salmon fillets (skin-on is great for crispiness, but if you’ve only got skinless, no drama)
- Salt and black pepper (I’m not precious about pepper—sometimes I use lemon pepper because, well, it’s there)
- 2 tablespoons all-purpose flour (or cornstarch, if I’m feeling gluten-free-ish; my aunt swore by rice flour, by the way)
- Olive oil or any neutral oil (grandma used canola, and honestly, any works except coconut—tried it, was weird)
- 2-3 cloves garlic, minced (I cheat with the jarred stuff when the real thing’s MIA; it’s fine, I promise)
- 3 tablespoons honey (sometimes I scrape the last bit out of the bear bottle and…well, that’s enough)
- 2 tablespoons soy sauce (I use low-sodium, but regular will do; in a pinch, I once used tamari—it was fine, slightly different vibe)
- 1 tablespoon apple cider vinegar (white vinegar is also totally ok—rice vinegar brings a mellow tang, if you have it)
- Sesame seeds and sliced scallions, for garnish (but you know what, I forget these half the time—it’s still tasty)
How I Actually Cook This (And What I Tell Myself to Remember)
- Pat your salmon fillets dry with a bit of kitchen roll. Trust me, this makes everything crispier (like, surprisingly so). Sprinkle both sides with salt and pepper, then dust lightly with flour. Don’t get fussy, just a quick coat—most days, I’m more like ‘it looks good enough.’
- Get a large skillet (I love my cast iron, but honestly, any frying pan will do; just don’t go with nonstick if you’re chasing Max Crisp™). Add a swirl of oil and crank the heat up medium-high. Wait till it’s hot—like, nearly shimmering. Otherwise, forget the crispy part. Place the salmon skin-side down (you’ll hear a sizzle—if not, the pan’s not hot enough). Cook without poking for 3 to 4 minutes. You want that color. If the skin sticks a bit, that’s ok, just gently nudge until it lets go—it’s a bit stubborn sometimes, like my old cat.
- Flip the salmon over, reduce heat to medium, and keep going another 2 minutes. (This is the step where I usually sneak a forkful if a bit breaks off. Quality control.)
- Meanwhile, mix together garlic, honey, soy sauce, and vinegar in a small bowl. Pour this sticky concoction right into the pan—yes, over the salmon, it’ll sizzle and bubble up (don’t be startled!). Spoon the sauce over the fillets as it thickens, about 2 minutes. If the sauce gets too thick, I just splash in a little water or chicken stock. No biggie.
- Once the salmon looks glossy and the sauce is clinging like a warm hug, take the pan off the heat. Sprinkle with sesame seeds and scallions—if you remember.
A Few Notes You Won’t Find in Cookbooks
- If you overdo the sauce, it’s honestly not a tragedy; just put it in a bowl and dip some rice or bread in it later.
- You can broil the salmon for literally 1 minute after glazing for next-level crisp, but it’s not required (and I sometimes forget).
- Leftovers? I think the salmon gets deeper flavor overnight—but that’s only when I hide a filet at the back of the fridge (shhh).
- I once dropped a fillet trying to flip it with chopsticks. Use a proper spatula unless you’re feeling acrobatic.
Variations I’ve Tried (Including a Flop)
- Maple syrup instead of honey: Yummy, with a deeper warmth. My Canadian cousin swears by it.
- Swapping salmon for trout or even thick cod: Actually works, but cod’s a bit too flaky and has fallen apart on me, so maybe only with salmon if you want full crispy vibes.
- Extra chili flakes: Nice kick, but once I added way too many and, er, nobody touched the sauce. Proceed with caution!
- One time, I threw orange zest into the glaze. It was…interesting. Wouldn’t repeat, but who knows, maybe you’ll love it.
What You Need to Make It (And What to Do If You Don’t Have It)
A big pan is grand, but if all you’ve got is a smaller one, just work in batches. No fish spatula? Use a regular one, or even two forks together (seriously, I’ve done it in a pinch—it’s not elegant but gets the job done). No whisk? A fork mixes glaze ingredients just fine. Actually, you can probably get away with almost any kitchen gear… except an open fire grill. Had a salmon graveyard incident once trying that.
How to Store It—But, Honestly, Mine Disappears
If you do have leftovers, pop them in an airtight container in the fridge. They’ll keep for a couple days—though, speaking honestly, they’re never in there for long. Something about cold honey garlic salmon at midnight is just too tempting.
How I Like to Serve It (Family Traditions and Odd Ideas)
This goes brilliantly with jasmine rice or garlicky mashed potatoes—I’ve even served it on a crusty baguette (like a posh salmon sandwich, which my neighbor still talks about). My aunt always insists on pickled radish on the side, but honestly, a green salad does me just fine. Oh! Sometimes, if it’s a Friday, I’ll pour a cheeky little glass of wine too. Makes the whole thing feel like a proper occasion.
Random Pro Tips (Learned the Hard Way)
- Don’t rush the pan heating step. I once put the salmon in too early and got flop instead of crisp—a culinary tragedy. Be patient, just this once.
- If the sauce looks weird partway through, keep stirring. It usually comes together just when you think it won’t.
- Trying this with frozen salmon? Defrost it first, otherwise you end up with a soggy mess—which I’ve definitely done before.
FAQ—Answers I Give Friends, Family, and the Occasional Stranger
- Can I make this without flour? Oh, sure—you’ll skip a bit of crisp, but it still works. Sometimes I just forget to dredge the fillets and no one notices, except me maybe.
- Do I have to use fresh garlic? Nope! The jarred stuff works in a pinch. I’ve even used garlic powder once (don’t judge) when I was out. Did the trick.
- Can I bake the salmon instead? Technically yes, but you won’t get that glorious crunch (I tried, and it was… fine, but not worth bragging about).
- What if I don’t have soy sauce? Tamari, coconut aminos, or honestly, a splash of Worcestershire in a pinch. Might taste a bit different, but that’s half the fun, right?
- Is this spicy? Not as written, but you can throw in some crushed chili flakes if you’re chasing a kick.
- How do I know when the salmon is cooked? I just peek in the thickest bit with a fork; if it flakes easily, it’s done. Don’t sweat hitting the perfect temp—unless you’re running a restaurant, in which case, ignore me.
- Can I double this recipe? Absolutely! Just be prepared for saucy salmon bits everywhere—it likes to spatter when you crowd the pan. Maybe wear an apron for once, as I learned too late.
And if you try this out, let me know—unless it flops, then, uh, maybe just blame the fish.
Ingredients
- 4 salmon fillets (about 6 oz each), skin-on
- 1/3 cup honey
- 4 cloves garlic, minced
- 2 tablespoons soy sauce
- 1 tablespoon lemon juice
- 2 tablespoons olive oil
- 1/4 teaspoon black pepper
- Salt to taste
- 2 tablespoons chopped fresh parsley (optional, for garnish)
Instructions
-
1Pat the salmon fillets dry with paper towels and season both sides with salt and black pepper.
-
2Heat olive oil in a large nonstick skillet over medium-high heat. Add salmon fillets, skin-side down, and cook for 4-5 minutes until the skin is crispy.
-
3Flip the salmon and cook for 2-3 more minutes until just cooked through. Remove salmon from pan and set aside.
-
4Reduce heat to medium. Add minced garlic to the same skillet and sauté for 30 seconds until fragrant.
-
5Add honey, soy sauce, and lemon juice to the skillet. Stir well and simmer for 2-3 minutes, until slightly thickened.
-
6Return salmon to the skillet and spoon the honey garlic glaze over each fillet for 1-2 minutes. Serve immediately, garnished with parsley if desired.
Approximate Information for One Serving
Nutrition Disclaimers
Number of total servings shown is approximate. Actual number of servings will depend on your preferred portion sizes.
Nutritional values shown are general guidelines and reflect information for 1 serving using the ingredients listed, not including any optional ingredients. Actual macros may vary slightly depending on specific brands and types of ingredients used.
To determine the weight of one serving, prepare the recipe as instructed. Weigh the finished recipe, then divide the weight of the finished recipe (not including the weight of the container the food is in) by the desired number of servings. Result will be the weight of one serving.
Did you make this recipe?
Please consider Pinning it!!




