If You’d Like a Kitchen That Smells Like Autumn, This Is It
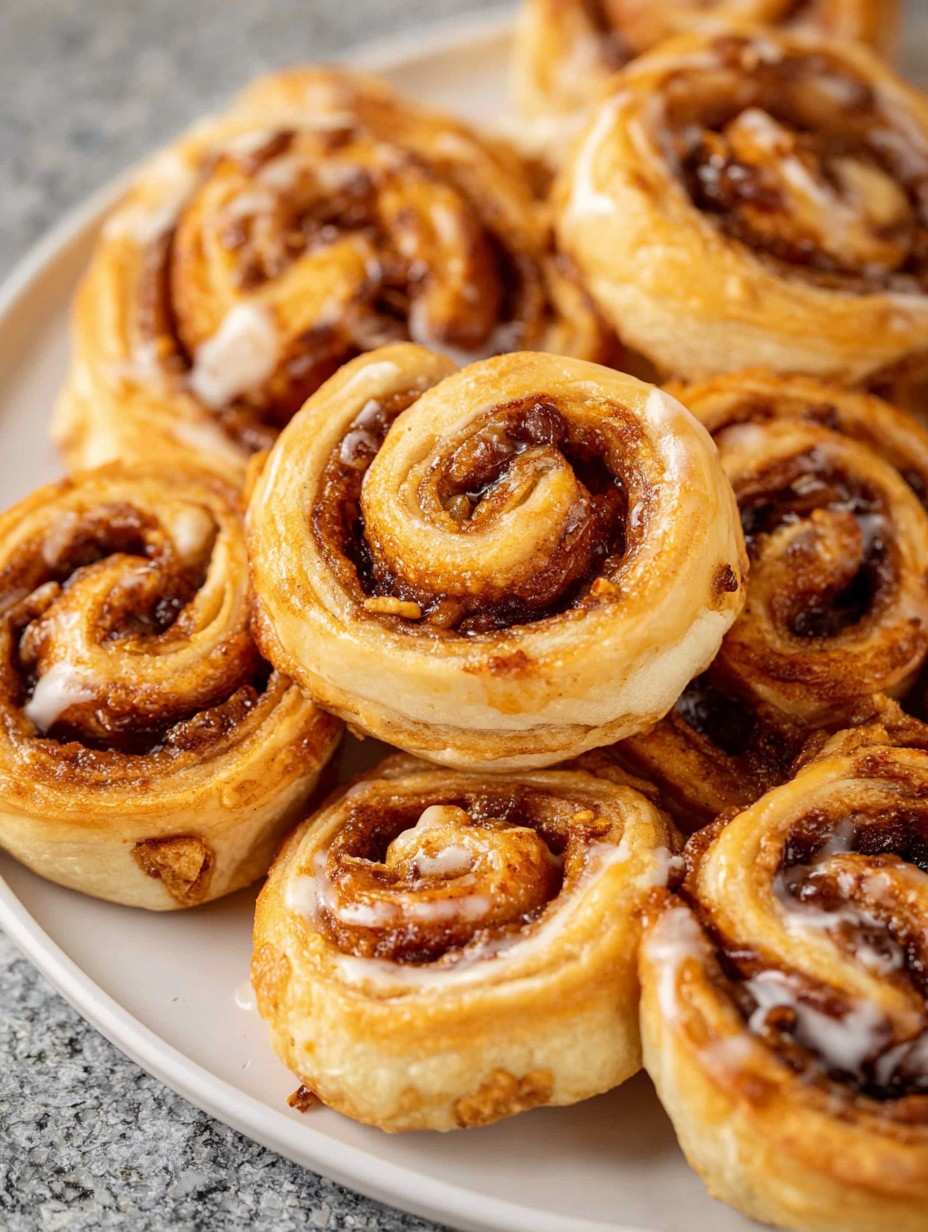
I can’t even count how many times I’ve made these apple butter pinwheels—usually because someone’s asking for just one more and then the pan mysteriously empties. The first time, I tried the recipe out of boredom (and a half jar of apple butter starting to look a bit lonely in the fridge), but now it’s a family tradition for chilly weekends. Oh, and the smell—honestly, it’s better than any candle. My cousin once said it’s like a warm hug from inside your nose, which is a weird thing to say, but, you know, it kinda fits!
Why I Keep Coming Back to These
I make these when the weather turns all gray and everyone’s a tiny bit grumpy (usually around October here, but who’s counting). They’re just easy enough that you won’t have a meltdown if you’ve got kids around, but fancy enough to make you feel like you’re on one of those British baking shows. My family absolutely loses its head over these—especially when there’s extra glaze. And listen, I once tried to cheat and use puff pastry instead of the homemade dough, and yep, it worked in a pinch—though, don’t tell my aunt. Oh, and if you’ve ever wrestled with cinnamon roll dough that sticks everywhere? This recipe is a breezy walk by comparison.
The Low-Key Ingredient List
- 2 cups all-purpose flour (If you’re feeling fancy, swap in half whole wheat, but I usually don’t bother)
- 2 teaspoons baking powder
- 1/2 teaspoon salt
- 4 tablespoons cold unsalted butter (I’m lazy and use salted if that’s all I’ve got—just skip the salt above, works fine)
- 3/4 cup milk (Whole, 2%, or even almond—honestly, whatever’s left in the fridge. Just don’t use buttermilk; tried that, bit tangy for my taste)
- 3/4 cup apple butter (My grandma swears by the kind from the farmer’s market, but hey, store-bought is perfect. Use pumpkin butter if you like—I’ve done that when apple’s MIA)
- 1/4 cup brown sugar (Light or dark, or raw if you’re feeling wild)
- 1 teaspoon ground cinnamon
- 1/2 teaspoon ground nutmeg (Totally optional, but it makes the house smell like Christmas. Tried allspice one time; not my favorite)
- Optional: a handful of chopped pecans or walnuts (Only if nobody’s allergic, which… well, you know your crowd)
How I Actually Make These (Warts and All)
- Preheat your oven to 400°F (about 200°C). No parchment? No problem. Just butter the heck out of your baking pan—an 8″ square or round is fine.
- Mix flour, baking powder, and salt in a bowl. Big fork or small whisk, whatever you grab first. Cut in the cold butter with a pastry cutter—or two butter knives, or heck, even your fingers if you must (just work quick so it doesn’t get melty and weird).
- Pour in the milk and gently stir it together. Don’t overmix! It’ll look a bit shaggy; that’s exactly right. If it looks oddly dry, add a splash more milk. (This is where I always second-guess myself and then it turns out fine anyway.)
- Turn the dough out onto a floured surface and pat or roll it into a rectangle—roughly a foot by six inches, but who’s measuring? If it starts sticking, just dump a little flour under it. No rolling pin? Use a wine bottle. Been there.
- Spread the apple butter all over the dough, right to the edges. Sprinkle brown sugar, cinnamon, and nutmeg (if using) over the apple butter. Add chopped nuts if you’re feeling it. This is the part where I sneak a taste with my finger, just to check. Quality control, you know?
- Roll it up (long side to long side) as evenly as you can. It’s never perfect, but neither are we. Pinch the seam closed; don’t fuss over it.
- Cut into roughly 8-10 slices. If they smoosh, just press them back into shape—no judgment here.
- Pop the slices in the pan, cut side up. If there’s a little space between them, that’s good—they’ll puff up. Bake about 20-22 minutes. You’re looking for golden, maybe bubbling at the edges. And that smell? Unreal.
A Bunch of Notes (Aka, Things I Figured Out the Hard Way)
- If your dough comes out dry, it’s usually because I was stingy with the milk. Just add a tiny splash until it sticks together.
- The first few times, I rolled way too tight—ended up with tiny pinwheels that looked like snail shells. Now I roll looser, and they look way better (and, oddly, taste better?).
- Brushing the tops with a little milk or cream before baking gives you a shiny finish. I usually forget; nobody notices.
- If you bake these and the filling oozes out, congratulations—you’ve made the best bits, the caramelized, sticky bottoms. Scrape those up with a spoon, trust me.
Variations I’ve Actually Tried (And One I’ll Never Do Again)
- Substitute pumpkin butter for apple butter—nice for a Halloween twist.
- Added a handful of diced apples inside once. Was messy, but really tasty—kind of like apple pie pinwheels.
- Tried adding raisins. Regretted it immediately, because my kids staged a one-bite protest. If you love raisins, go for it, but don’t say I didn’t warn you.
- Saw this recipe for sweet potato butter online (probably here: Food52); thought about it, but chickened out. Maybe next time?
What You Need (And What I Use When I Can’t Find It)
- Mixing bowl (No bowl big enough? Clean pasta pot works just as well.)
- Pastry cutter (or two forks, or your actual hands—in a pinch, a food processor, but that’s too many dishes for me)
- Rolling pin (wine bottle, again—honestly, it works)
- Baking pan (I’ve used a cake tin when I can’t find my usual one, comes out fine)
- Knife for slicing (I’ve used dental floss for a cleaner cut, which sounds odd, but works—just don’t use the minty kind. Learned that the weird way.)

How to Store Them (But They Don’t Last Long)
Officially, you cover cooled pinwheels and keep them at room temp for 1-2 days—fridge for longer. Real talk? In my house, they’re usually gone before breakfast is over. If you do stash some, try a lidded tin, so they don’t get soggy (learned that after sticking them in a baggie—mistake). They reheat ok in the toaster oven or microwave, but go gently.
How We Serve ‘Em (Maybe Your Family’s the Same?)
I love to set these out for breakfast next to a big pot of coffee (my daughter insists on a hot chocolate). Sometimes, for brunch, I serve them alongside sharp cheddar slices—sweet and savory, so good. On rainy afternoons, we just grab them straight from the pan. I have a friend who puts a scoop of vanilla ice cream on warm pinwheels—sounds odd, but it works a treat. Saw someone on Smitten Kitchen do something similar, so it must be official.
Pro Tips: Lessons Learned (Usually the Hard Way)
- I once tried rushing the dough by using melted butter instead of cold—came out weird. Stick with cold, even if it means waiting a minute.
- If you overfill the dough with apple butter, it’ll ooze everywhere and make a bit of a mess. Tasty, but less pretty. Actually, I kind of like the mess, but if you’re gifting them, maybe use a light hand.
- Don’t try slicing the rolled dough too thin—if you go under an inch per pinwheel, you end up with floppy little pancakes (ask me how I know).
FAQs—These Have All Actually Been Asked
- Do I have to make my own apple butter?
- Not at all! Store-bought works great—I’ve tried a few brands, and they’re all fine. Just pick one with real apples if you can.
- Can I freeze these pinwheels for later?
- Honestly? You can, but they’re not quite the same after thawing. The dough dries out a tad, but if you zap ’em in the microwave and add a little slab of butter, who’s complaining?
- What if I don’t own a rolling pin?
- Use a wine bottle or even a sturdy drinking glass. I’ve done both—function over form, right?
- Are these super sweet?
- Eh, not too sweet. If you like things super sugary, sprinkle more sugar on before rolling.
- Could I make these gluten-free?
- I’ve not tried it, but I hear good things about Bob’s Red Mill 1-to-1 Baking Flour (I haven’t found it in my local shop, so if you do, let me know!).
So there you have it—my slightly messy, always comforting apple butter pinwheels! Honestly, if you spill a little flour or eat the gooey bits straight from the pan, I promise you’re doing it right.
Ingredients
- 1 sheet puff pastry, thawed
- 1/2 cup apple butter
- 2 tablespoons light brown sugar
- 1 teaspoon ground cinnamon
- 1/4 teaspoon ground nutmeg
- 1 egg, beaten (for egg wash)
- 1 tablespoon granulated sugar (for topping)
- 1 tablespoon flour (for dusting surface)
Instructions
-
1Preheat the oven to 400°F (200°C) and line a baking sheet with parchment paper. Lightly dust a clean surface with flour.
-
2Unfold the thawed puff pastry sheet and gently roll it out into a rectangle approximately 10×12 inches.
-
3Spread the apple butter evenly over the pastry, leaving a 1/2-inch border. Sprinkle evenly with brown sugar, cinnamon, and nutmeg.
-
4Carefully roll the pastry tightly from the longer side into a log. Slice the log into 8 equal pinwheels.
-
5Arrange the pinwheels, cut side up, on the prepared baking sheet. Brush the tops with the beaten egg and sprinkle with granulated sugar.
-
6Bake for 16–18 minutes, or until golden brown and puffed. Let cool slightly before serving.
Approximate Information for One Serving
Nutrition Disclaimers
Number of total servings shown is approximate. Actual number of servings will depend on your preferred portion sizes.
Nutritional values shown are general guidelines and reflect information for 1 serving using the ingredients listed, not including any optional ingredients. Actual macros may vary slightly depending on specific brands and types of ingredients used.
To determine the weight of one serving, prepare the recipe as instructed. Weigh the finished recipe, then divide the weight of the finished recipe (not including the weight of the container the food is in) by the desired number of servings. Result will be the weight of one serving.
Did you make this recipe?
Please consider Pinning it!!




