Let Me Tell You About My Baked Chicken with Green Olives
You know how some recipes just stick with you? Like, you make them so much that you could probably do it with your eyes closed, except you’d probably spill olive brine all over the place (ask me how I know). Anyway, this baked chicken with green olives is one of those dishes for me. Actually, I first cooked it after coming back from a trip to Spain—where the olives basically taste like sunshine and salt. I was a bit obsessed for a while (still am, if I’m being honest). I remember burning the chicken that first time because I got distracted by my neighbor’s cat in the window. Classic.
Why I Think You’ll Love Making This
I make this for weeknight dinners when I want something that feels a bit fancy but isn’t a huge faff. My family goes crazy for this—especially my youngest, who insists on picking out extra olives before anyone else can. (Sibling squabbles over olives are real in my house.) And if I’m honest, it’s a great way to use up those odds and ends in the fridge—lemon getting a bit wrinkly? In it goes. Forgot to buy fresh herbs? No biggie, dried works fine. Oh, and I used to always dread the mess from browning chicken on the stove, but this one goes straight in the oven. Less splatter, less drama.
Here’s What You’ll Need (and Some Cheats)
- 6 skin-on, bone-in chicken thighs (or drumsticks, or honestly, even chicken breasts if you must—just adjust the cooking time)
- 1 big handful of green olives, pitted (I love castelvetrano, but plain old jarred ones from the supermarket are just fine, too)
- 2 cloves garlic, smashed (I sometimes just use the pre-minced stuff if I’m feeling lazy)
- 1 lemon, sliced into rounds (or a splash of white wine if you forgot to buy lemons—I’ve done this more times than I care to admit)
- 2 tablespoons olive oil (my grandma swears by the fancy stuff, but any will do—I’ve even used vegetable oil in a pinch)
- 1 teaspoon smoked paprika (or regular paprika, or skip it if you don’t have any—it’s flexible)
- Salt and pepper, to taste
- A few sprigs of fresh thyme (dried oregano or rosemary work a treat too, or just skip herbs altogether—it’s still good)
How I Actually Make It (Plus Some Rambling)
- Preheat your oven to 400°F (about 200°C). I always forget to do this until I’m halfway through prepping—don’t be like me.
- Pat your chicken dry with paper towels (so the skin goes nice and crispy). Put it in a baking dish—something with a bit of depth so the juices don’t spill everywhere. If you only have a sheet pan, use that, just don’t fill it to the brim.
- Drizzle the chicken with olive oil, then sprinkle over the smoked paprika, salt, and pepper. Rub it in with your hands (this is where I usually sneak a taste of the olive oil—don’t judge).
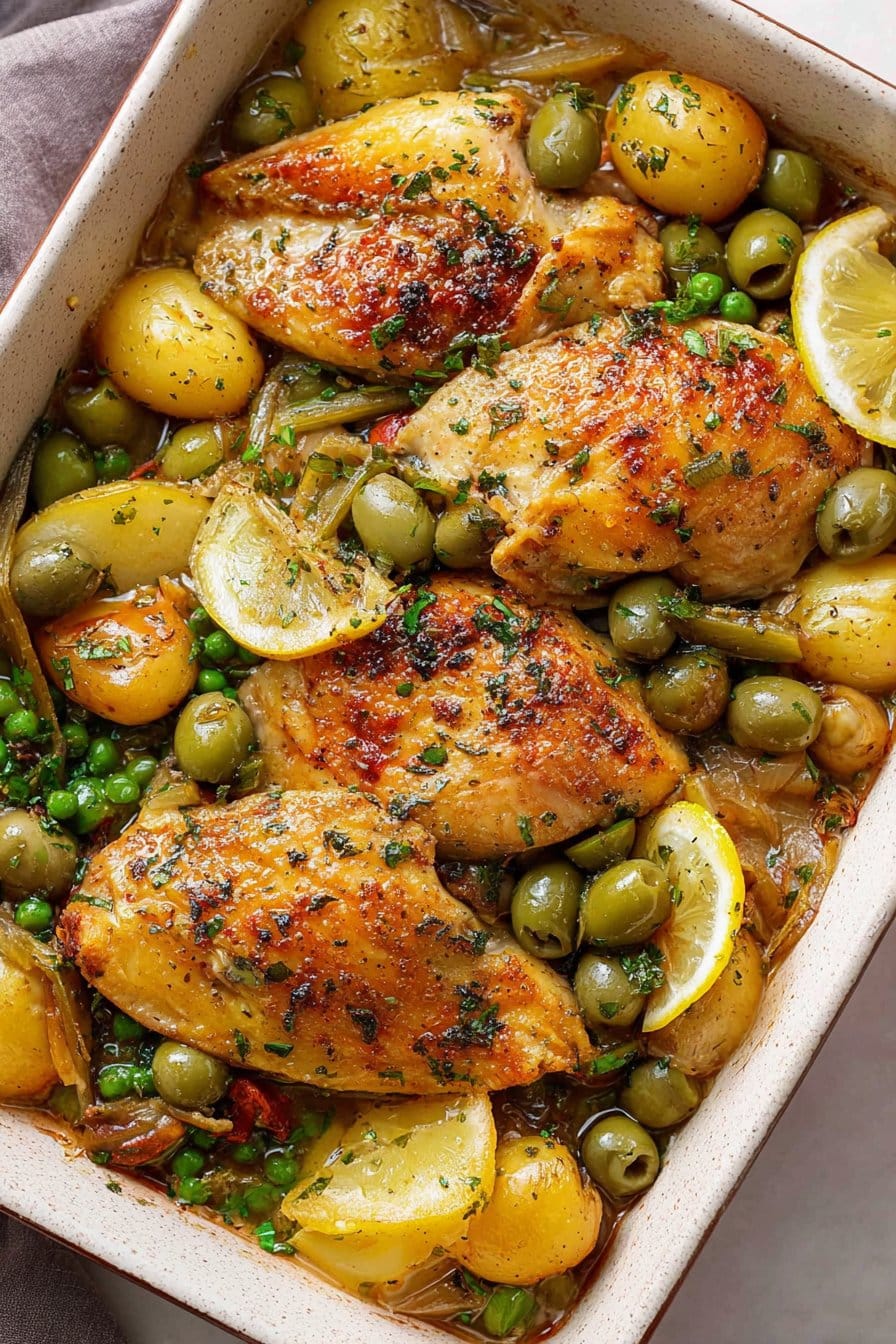
- Scatter the smashed garlic, olives, lemon slices, and herbs all around and on top of the chicken. It always looks a bit of a mess at this stage, but trust me, it sorts itself out in the oven.
- Pop it in the oven, middle rack, for about 40-45 minutes. If your chicken pieces are huge, give them another 5-10 minutes. I check for doneness by poking the thickest bit with a knife—if the juices run clear, you’re golden. Or use a thermometer if you’re fancy (165°F is the magic number).
- If you want the skin extra crispy, whack it under the broiler/grill for 2-3 minutes at the end. Just don’t walk away—I’ve accidentally scorched a few dinners by getting distracted scrolling Serious Eats.
- Let it rest for 5 minutes—if you can wait.
Notes From My Kitchen (Not a Pro, But…)
- I’ve found that leaving the olives whole gives a burst of flavor, but my mum likes to chop them up—either way’s good.
- If your garlic burns a bit, it actually tastes kind of nice (in moderation), but don’t let it go too far like I did that one time. Yikes.
- Some days I make this with boneless, skinless chicken, but honestly, it’s just not as juicy. Bone-in really is better here.
Variations I’ve Tried (and One I Don’t Recommend)
- I once swapped the green olives for kalamata. Tasted nice, just a bit sharper. Good if you want a punchier flavor.
- Sometimes I throw in a handful of cherry tomatoes—they start to burst and make a lovely sauce.
- I tried adding potatoes to the pan once, but they kinda soaked up all the chicken fat. Not my best idea. Would probably work better if you parboil them first, but I haven’t bothered since.
What You’ll Need (Or Not, Actually)
- Baking dish or roasting pan (if you don’t have one, a big cast iron skillet or even a deep pie dish works in a pinch)
- Tongs (I usually just use a fork, but tongs are less likely to send your chicken flying across the kitchen)
- Paper towels, for patting dry (or a clean tea towel, but beware: it does smell a bit chickeny after!)
How To Store It (If There’s Any Left…)
Pop leftovers in an airtight container in the fridge; they’ll keep for a couple of days. Actually, I think this tastes better the next day—the flavors settle in. But honestly, in my house it never lasts more than a day! You can reheat in the oven or just zap in the microwave if you’re in a hurry (the skin gets less crispy, but it’s still really good).
How I Like To Serve It
I usually dish this up with some crusty bread, so you can mop up all those tasty juices (sometimes I just eat it straight from the pan—it’s not fancy, but who cares?). My kids love it with a pile of fluffy rice, and when I’m feeling a bit extra, I’ll make a quick green salad on the side, too. Sunday lunch tradition: my partner insists on a splash of hot sauce. Not my thing, but you do you.
Pro Tips (Learned the Hard Way)
- I tried rushing the browning step once by broiling on high from the start. Don’t. The skin goes leathery and sad. Just let it roast in the oven.
- Actually, I find it works better if you don’t overcrowd the pan, otherwise the chicken stews instead of roasts.
- If you forget the herbs, don’t panic—it’s still tasty, honest!
Questions Folks Have Asked (And My Honest Answers)
- Can I use boneless chicken? Sure, but it cooks a bit faster so keep an eye on it—maybe check at 30 minutes. It won’t be as juicy, though.
- What about other olives? Go for it! Black olives or even stuffed ones work. My aunt once tried it with those weird pimiento-stuffed olives—surprisingly tasty.
- Is this freezer-friendly? Technically yes, but the texture gets a bit odd. I mean, it’s fine if you’re not fussy, but I’d just eat it within a couple days.
- Can I add veggies? Absolutely. Bell peppers, onions, or tomatoes all play nicely. Just don’t add too much or it gets soupy.
- Do I have to use chicken thighs? Nope! Drumsticks work, or even a whole chicken cut into pieces if you’re feeding a crowd. Just adjust your cooking time.
Oh, and if you want to geek out on olive varieties (as I did for way too many hours once), check out The Olive Oil Source—they’ve got a rabbit hole you can fall into if you’re not careful. Anyway, happy cooking and let me know how yours turns out (or if your cat distracts you, too).
Ingredients
- 4 bone-in, skin-on chicken thighs
- 1 cup green olives, pitted and halved
- 2 tablespoons olive oil
- 1 lemon, sliced
- 4 garlic cloves, minced
- 1 teaspoon dried oregano
- 1 teaspoon paprika
- Salt and black pepper to taste
- 1/2 cup chicken broth
- Fresh parsley, chopped (for garnish)
Instructions
-
1Preheat the oven to 400°F (200°C).
-
2Pat the chicken thighs dry and season both sides with salt, black pepper, paprika, and dried oregano.
-
3Heat olive oil in a large oven-safe skillet over medium-high heat. Add the chicken thighs, skin side down, and sear for 3-4 minutes until golden brown. Flip and cook for another 2 minutes.
-
4Add the minced garlic, green olives, and lemon slices to the skillet. Pour in the chicken broth.
-
5Transfer the skillet to the preheated oven and bake for 35-40 minutes, or until the chicken is cooked through and the skin is crispy.
-
6Remove from the oven, garnish with fresh parsley, and serve hot.
Approximate Information for One Serving
Nutrition Disclaimers
Number of total servings shown is approximate. Actual number of servings will depend on your preferred portion sizes.
Nutritional values shown are general guidelines and reflect information for 1 serving using the ingredients listed, not including any optional ingredients. Actual macros may vary slightly depending on specific brands and types of ingredients used.
To determine the weight of one serving, prepare the recipe as instructed. Weigh the finished recipe, then divide the weight of the finished recipe (not including the weight of the container the food is in) by the desired number of servings. Result will be the weight of one serving.
Did you make this recipe?
Please consider Pinning it!!




