Let Me Tell You About These Cheesy Potato Slices
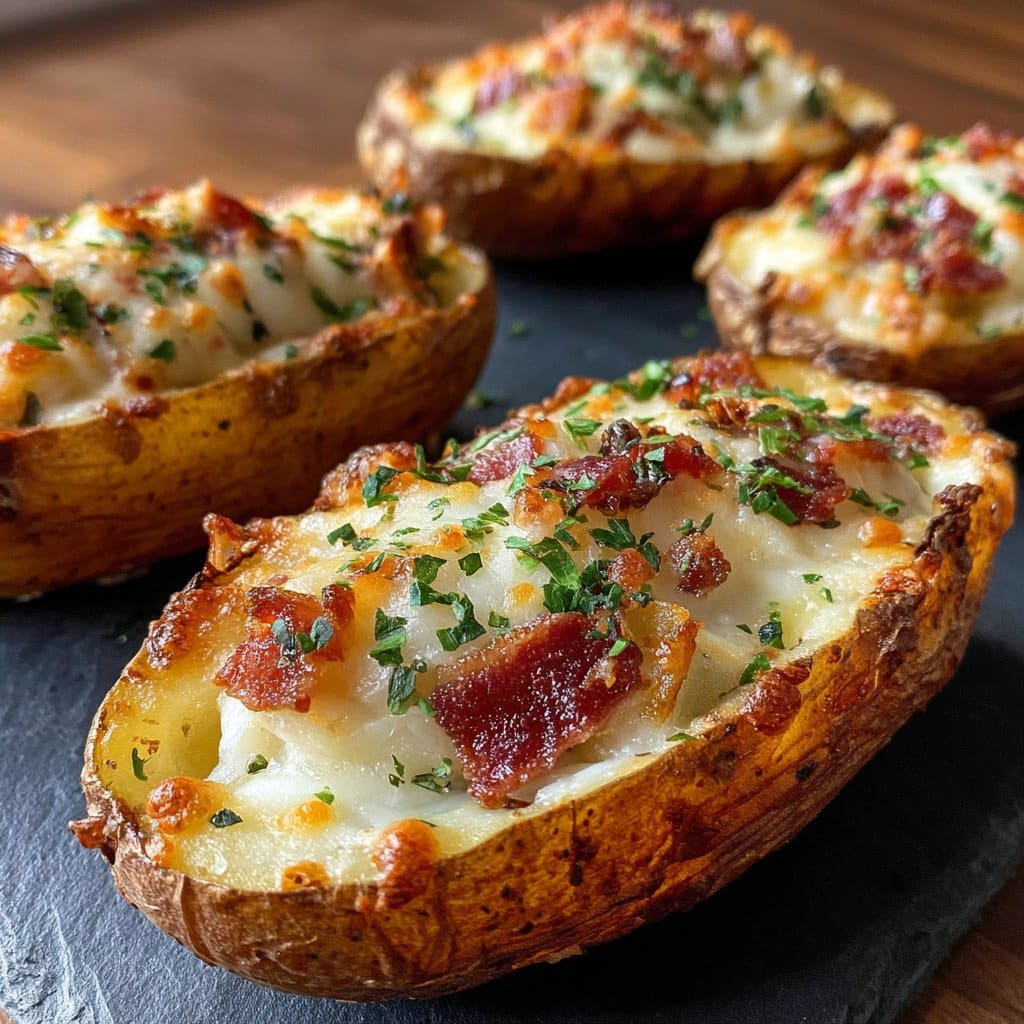
Alright, so you know those days when you just want something warm and cheesy, but your brain can’t handle another complicated recipe? That’s me, most Wednesdays. Actually, this recipe for Baked Potato Slices with Cheese Topping was a happy accident—I was trying to make something fancier, but then I sliced the potatoes too thin (classic), and, well, this was the delicious result. Now my kids beg for it whenever I pull out the spuds. Warning: it’s dangerously easy to eat a whole tray by yourself. Not that I would know, ahem.
Why You’ll Love This (Or Why I Keep Making It)
I make this when I want something cozy but not a full-on casserole situation. My family goes wild for these because they’re crispy on the edges, soft in the middle, and all that gooey cheese—come on. (Plus, there’s minimal washing up. Can I get an amen?) Sometimes I add a bit of smoked paprika if I’m feeling fancy, but honestly, this is the recipe I turn to when I need to use up those potatoes lurking at the back of the cupboard. Oh, and if you’ve ever burnt the cheese—same. I finally figured out how to avoid that; more on that later.
What You’ll Need (And a Few Substitutes I’ve Tried)
- 4 medium potatoes (I usually use Yukon Gold, but russets are grand, too. My gran swore by Maris Piper, but good luck finding those here.)
- 2 tablespoons olive oil (sometimes I’ll grab sunflower oil if that’s what’s on hand)
- 1 teaspoon sea salt (or regular table salt works, I won’t tell)
- 1/2 teaspoon black pepper (or go rogue with chili flakes if you like a kick)
- 1 1/2 cups shredded cheese (cheddar is the classic, but mozzarella, Colby Jack, or even a mystery cheese from the fridge all work—just don’t use blue cheese unless you’re into that sort of thing)
- Optional: chopped chives, sliced spring onion, or a dab of sour cream to serve
How I Make These Cheesy Potato Slices
- Preheat your oven to about 425°F (220°C). If your oven’s a bit dodgy like mine, maybe check it with a thermometer, but honestly, just crank it up.
- Slice the potatoes about 1/4 inch thick. I sometimes go thinner if I’m in a hurry, but then you risk potato chips instead of slices. Use a mandoline if you want them even, but I just grab a knife and hope for the best.
- Toss the potato slices in a large bowl with the oil, salt, and pepper. Use your hands (or a spatula if you’re feeling posh). Make sure every bit gets a little love.
- Spread them in a single layer on a baking sheet lined with parchment. If they overlap, it’s not the end of the world, but they’ll stick together a bit (which honestly, is sometimes great).
- Bake for 20 minutes, then flip them over. This is where I usually sneak a taste. Return to the oven for another 10 minutes or so—keep an eye on them, because some ovens are tricksters.
- Take the tray out and sprinkle generously with cheese. Back in the oven it goes, but watch closely. The cheese can go from golden to incinerated faster than you’d think (trust me). About 5 minutes is usually perfect.
- Let them cool for a couple of minutes so you don’t burn your mouth (speaking from experience) and then top with chives or whatever floats your boat.
Notes from My Many Potato Experiments
- I used to put the cheese on at the very beginning. Big mistake; it just goes leathery. Actually, it’s much better to add at the end for meltiness (is that a word?).
- I sometimes forget to line the tray. Cleanup is, um, not fun. Parchment is your friend.
- If you slice them too thick, you’ll get more like mini roasties than slices, which is nice, but not what we’re after today.
Variations (Some Winners, Some Not So Much)
- I tried bacon bits once—fantastic, but my veggie friends weren’t thrilled. Veggie bacon works, kind of.
- Herbs like rosemary or thyme? Lovely, but don’t overdo it or it tastes like a hedge.
- One time I added blue cheese and walnuts. Hmm. Not my finest hour. The dog loved it, though.
Do You Really Need Fancy Equipment?
I use a baking sheet and sometimes a mandoline if I’m feeling brave (those things are sharp as anything). But honestly, just use a sharp knife and your regular oven. No air fryer? No worries, they still turn out grand. You could even do these in a toaster oven in a pinch, though they might crowd a bit.
Storing Leftovers (If You Even Have Any)
Pop them in an airtight container in the fridge. They’ll keep for up to 2 days, but honestly, in my house, these never make it past breakfast the next day. I reckon they taste even better reheated in a skillet—but that might just be me.
How I Like to Serve These (And a Family Quirk)
We serve these as a side with soup (see my favorite lentil soup), or just pile them up with a dollop of sour cream and some hot sauce—my husband swears by Sriracha, but I’m more of a sweet chili fan. Occasionally, we just eat them off the tray while standing in the kitchen. No shame.
Pro Tips I Learned the Hard Way
- Don’t rush the flipping step. I skipped it once and half the slices welded themselves to the tray. Regret.
- Keep an eye on the cheese. It can go from gooey to crispy way faster than you’d think—set a timer, or you’ll be picking off burnt bits (or eating them, no judgement).
- If you’re doubling the recipe, use two trays. Cramming them all on one just leads to sad, steamed slices.
Okay, Some FAQs (Because My Friends Actually Ask These)
- Do I have to peel the potatoes? Nope! In fact, I never do. The skins crisp up nicely and there’s less faff. Just scrub them first.
- Can I use sweet potatoes? Yes, but they go softer, so watch your timing. I tried once and they kinda mushed together, but still tasty.
- Can I freeze them? Erm, you can, but they come out a bit sad and soggy. I say fresh is best.
- What cheese is best? Whatever melts! I love sharp cheddar. For inspiration, I sometimes check out the cheese guides on Serious Eats.
- Can I make these ahead? Sure, bake the slices, then add cheese and reheat under the grill when you’re ready to serve. Just don’t tell anyone you made them yesterday.
- Why are my slices sticking to the tray? Usually it’s lack of parchment or not enough oil. Or maybe my oven is just a pain, who knows?
Oh, before I forget, if you’re into more potato things, check out this potato gratin recipe from BBC Good Food—it’s a good one when you want to get a bit fancy.
If you actually make these baked potato slices with cheese topping, let me know how you get on, or what weird cheese combos you’ve tried. Happy cooking (and snacking)!

Ingredients
- 4 medium russet potatoes
- 2 tablespoons olive oil
- 1 teaspoon garlic powder
- 1 teaspoon paprika
- 1/2 teaspoon salt
- 1/4 teaspoon black pepper
- 1 1/2 cups shredded cheddar cheese
- 2 tablespoons chopped fresh chives (optional)
Instructions
-
1Preheat the oven to 400°F (200°C). Line a baking sheet with parchment paper.
-
2Wash and scrub the potatoes. Slice them into 1/4-inch thick rounds.
-
3In a large bowl, toss the potato slices with olive oil, garlic powder, paprika, salt, and black pepper until evenly coated.
-
4Arrange the potato slices in a single layer on the prepared baking sheet.
-
5Bake for 25 minutes, flipping halfway through, until the potatoes are golden and tender.
-
6Sprinkle shredded cheddar cheese evenly over the potato slices and bake for an additional 5 minutes, or until the cheese is melted and bubbly. Garnish with chopped chives before serving, if desired.
Approximate Information for One Serving
Nutrition Disclaimers
Number of total servings shown is approximate. Actual number of servings will depend on your preferred portion sizes.
Nutritional values shown are general guidelines and reflect information for 1 serving using the ingredients listed, not including any optional ingredients. Actual macros may vary slightly depending on specific brands and types of ingredients used.
To determine the weight of one serving, prepare the recipe as instructed. Weigh the finished recipe, then divide the weight of the finished recipe (not including the weight of the container the food is in) by the desired number of servings. Result will be the weight of one serving.
Did you make this recipe?
Please consider Pinning it!!




