Let Me Tell You How This Pie Saved My Sunday
So, last fall, in the middle of a chilly Sunday (the kind where you can see your breath in the kitchen, even though someone swears they turned the heat up), I somehow ended up with a bag of apples, a craving for something sweet, and not much else going on. That’s how this caramel apple pie happened. Honestly, I’d never made my own caramel before—thought it was mysterious wizardry. Turns out, it’s not rocket science (unless you walk away for a minute and the sugar burns, which I only did once, I promise). Now, this pie is my secret weapon for family dinners, potlucks, or just when I want to feel like a domestic genius.
And okay, I’ll admit: the first time, my caramel filling was more like a sticky toffee glue. But you know what? We ate every crumb anyway. That’s the power of apples and caramel together—maybe they should be their own food group.
Why You’ll Love This (Or At Least Why I Do)
I make this pie when I want to impress people with minimal effort but maximum flavor—plus, my kids are convinced it’s magic. My cousin Mark always asks me to bring it to Thanksgiving (he claims he’s allergic to regular apple pie, which is… suspicious). Also, the homemade caramel really does taste richer (and you get to lick the spoon, which I might love more than the pie). If you’re ever frustrated by pies where the filling leaks everywhere or the apples end up weirdly mushy, I’ve totally been there. Actually, my first few tries ended up as something I call “apple pie soup”—learned the hard way to let it cool before slicing. Oh, and if you’re on the fence about making your own caramel, I get it, but trust me, it’s worth it.
What You’ll Need (And Some Swaps That Work)
- 6–7 medium apples (Granny Smith is classic, but I sometimes use Honeycrisp or whatever looks good at the market. My grandma always said to mix tart with sweet apples, and honestly, she was right.)
- 2 homemade or store-bought pie crusts (I usually cheat and use store-bought if I’m rushed; homemade tastes just a bit better, but honestly, it’s not a dealbreaker.)
- 2/3 cup white sugar
- 1/4 cup water
- 6 tablespoons unsalted butter (Salted will work in a pinch; just skip the extra salt.)
- 1/2 cup heavy cream (I’ve subbed in half-and-half before. It’s OK but a little thinner.)
- 1 teaspoon vanilla extract (Real or the cheaper stuff—no one’s judging.)
- 1/2 teaspoon salt
- 1/2 cup light brown sugar
- 1 tablespoon flour or cornstarch (Flour’s what I reach for, but cornstarch makes it a bit glossier.)
- 1 teaspoon cinnamon
- 1 egg (for egg wash) (Or just milk if you’re out of eggs. I’ve done it—who hasn’t?)
How To Actually Make This Pie (With My Pitfalls Included)
- Get the crust sorted. Lay one pie crust in your pie dish. Sometimes mine tears a bit and I just patch it up—no one notices once it’s baked.
- Slice your apples. Peel and cut your apples (I like thick slices, about half an inch, but my aunt swears by thinner. Up to you). Toss them with brown sugar, flour, cinnamon, and salt. This is where I usually sneak one or two slices. Quality control, right?
- Make the caramel. In a saucepan, melt white sugar with water over medium heat. Don’t stir! Swirl the pan gently—this is the trickiest part. Once it turns a deep amber (not too dark or it’ll taste burnt—voice of experience!), whisk in the butter. It’ll bubble like mad. Once melted, add the cream slowly. Don’t panic if it seizes, just keep stirring and it’ll come back together. Finish with vanilla.
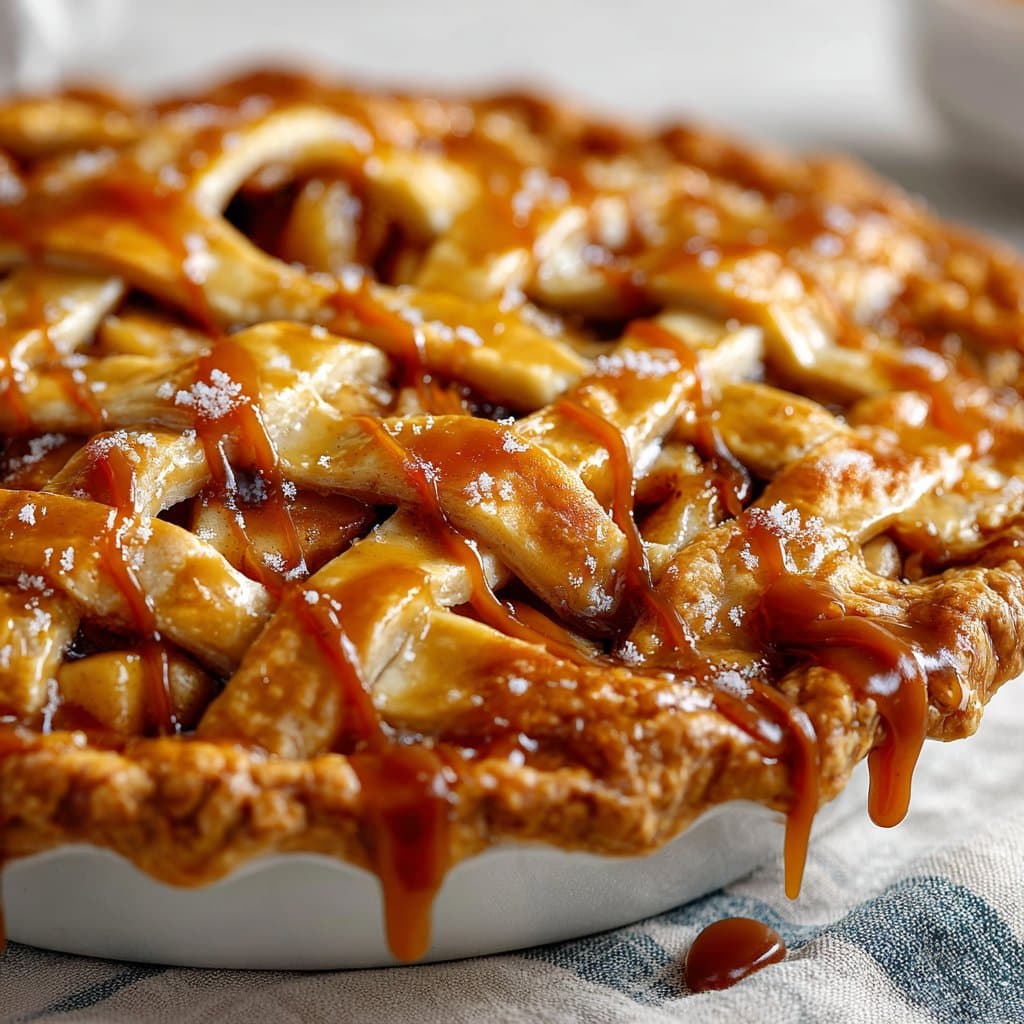
- Mix caramel with apples. Pour about two-thirds of your caramel over the apples. Toss to coat. Save the rest for drizzling after baking (or for ice cream later; I won’t tell).
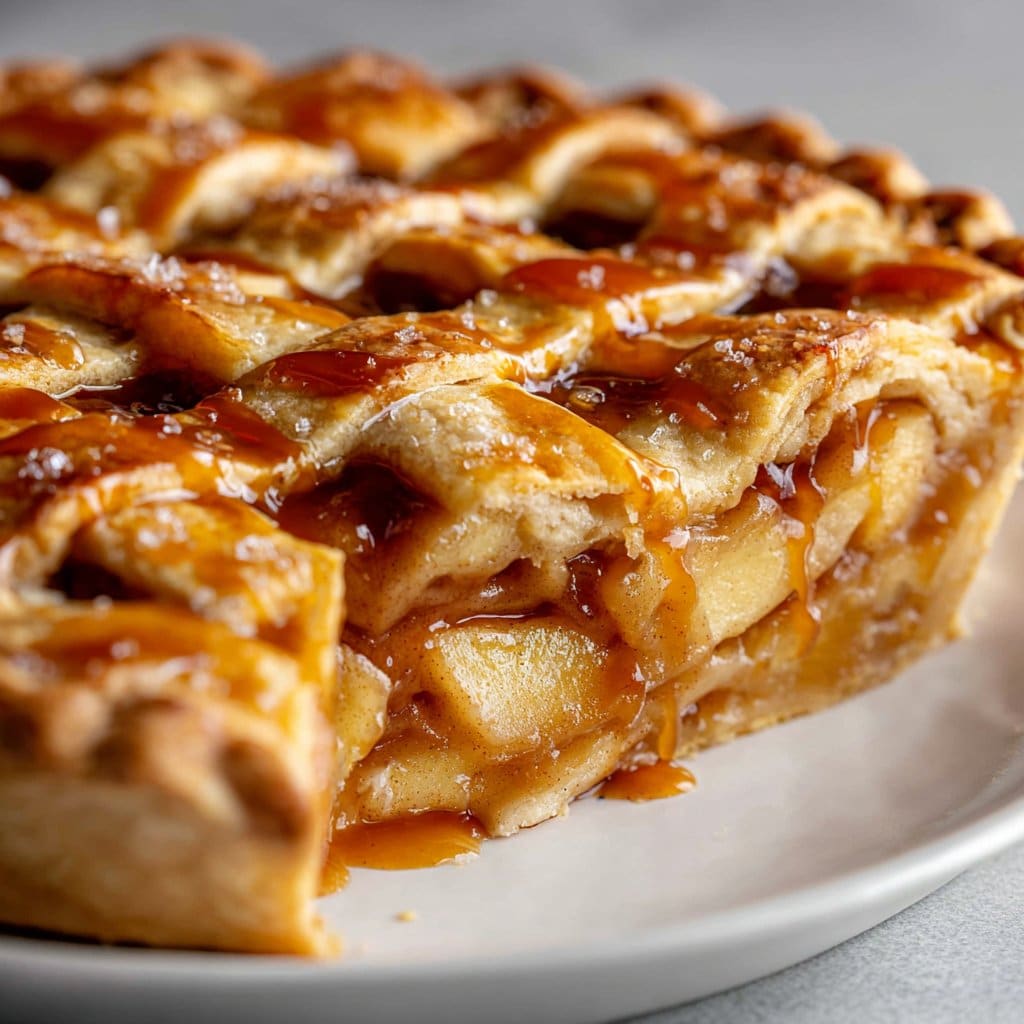
- Fill and top. Tip the apples into the crust. Dot a few more bits of butter on top if you’re feeling wild. Lay the second crust on top, crimp edges (messy is fine), and cut a few slits for steam. (Lattice looks fancy, but I only do it if I’m feeling patient, which is rare.)
- Egg wash it. Beat the egg and brush over the top. Sprinkle with a bit of sugar if you like a crunchy crust.
- Bake. Into a 400°F (205°C) oven for 20 minutes, then lower to 350°F (175°C) for another 35 to 40 minutes. If the top gets too brown, lay a bit of foil over it. The filling should bubble, and the crust should be golden—don’t worry if some caramel leaks out; it’s part of the charm.
- Cool, then eat. Seriously, let it cool at least 2 hours. Otherwise it’s just a gooey mess. Learned that one the sticky way.
Little Notes From My Own Kitchen Experiments
- If your caramel goes lumpy, just keep stirring. Or, worst-case scenario, strain it through a mesh sieve and pretend you meant to do that.
- I sometimes add a pinch of nutmeg for a more autumn-y vibe. Not everyone likes it, so maybe skip if you’ve got picky eaters.
- Cutting the pie while it’s still warm is tempting—but I’ve done it, and it slides everywhere. Honestly, patience is not my strong suit, but here it pays off.
Things I’ve Tried (And Sometimes Failed At) For Variations
- Adding a handful of chopped pecans to the apple filling—SO good, unless your cousin is allergic (sorry, Mark!).
- Mixing pears in with the apples. Actually, I thought it’d be brilliant, but it just made it kinda watery. Wouldn’t do that again unless I pre-cooked them.
- A splash of bourbon in the caramel. For grown-up pie nights. Might’ve added a bit too much once, but hey, it was a hit.
What If You Don’t Have All The Gear?
If you don’t have a proper pie dish, I’ve once baked this in a cast iron skillet. Worked a treat, if a bit rustic. No pastry brush for the egg wash? Just dab it on with a bit of kitchen paper, or even your fingers (it’s your pie!).
How To Store This Pie (But It Probably Won’t Last Long)
Technically, you can cover leftovers with foil and keep them in the fridge for up to 3 days. I think the flavors get even better by day two, but honestly, in my house it never lasts more than a day! If you want to reheat, pop a slice in the oven for 10 minutes—microwave works but the crust gets a little sad.
Serving It Up: My Favorite Ways
We do a big scoop of vanilla ice cream on top (sometimes two), or just pour the leftover caramel over each slice. My uncle likes it with a sharp cheddar wedge on the side, which I used to think was weird but it actually works. Family tradition, I guess.
Pro Tips I Learned (Usually The Hard Way)
- Don’t rush the caramel. I once tried cranking up the heat and, well, burnt sugar smells linger longer than you’d think.
- Let the pie cool. Seriously, or it just oozes everywhere. It’s worth the wait.
- Always put a baking tray under the pie, in case of drips. And if you forget, at least now you know how to clean oven caramel (soak, and more soaking).
FAQ: Real Life Questions I Get (Or Ask Myself)
- Can I use store-bought caramel? Technically, sure! But making it yourself isn’t much harder and tastes, well, more real.
- Do I have to peel the apples? Not at all. Sometimes I’m lazy and leave the skins on—gives a bit of texture, but not everyone likes it.
- Can I freeze this pie? Actually, yes, but it’s better to freeze it unbaked, then bake from frozen (just add 15–20 minutes to the baking time). Baked pie can get a bit soggy after freezing, but if you don’t mind, go for it.
- What’s the best apple? I mix tart and sweet, but honestly, whatever’s in the fruit bowl. Just avoid Red Delicious—they turn to mush. Trust me.
- Can I use a premade crust? Oh, absolutely. I do, more often than not. Life’s too short sometimes.
One Last Thing, Just Because
While testing this recipe, I ended up with a sticky phone screen, a flour-splattered shirt, and a kitchen that looked like a tornado came through. Was it worth it? Every single time. If you want more pie inspiration (plus, genuinely useful apple info), check out King Arthur Baking’s apple pie guide, or if you’re nervous about caramel, Sally’s Baking Addiction has a step-by-step caramel tutorial that’s saved me more than once.
Alright, now go make your kitchen smell like fall and sugar and all things cozy. And if something goes a bit sideways, just call it “rustic” and serve it with pride. We all do.
Ingredients
- 2 pie crusts (homemade or store-bought)
- 6 medium apples, peeled, cored, and sliced
- 1 cup granulated sugar
- 1/2 cup unsalted butter
- 1/4 cup heavy cream
- 2 tablespoons all-purpose flour
- 1 teaspoon ground cinnamon
- 1/4 teaspoon salt
- 1 teaspoon vanilla extract
- 1 tablespoon lemon juice
Instructions
-
1Preheat the oven to 400°F (200°C). Roll out one pie crust and fit it into a 9-inch pie dish.
-
2In a saucepan over medium heat, melt butter. Stir in flour to form a paste, then add granulated sugar and heavy cream. Cook, stirring constantly, until the mixture turns golden and thickens into caramel (about 5 minutes). Remove from heat and stir in vanilla extract.
-
3In a large bowl, toss sliced apples with lemon juice, cinnamon, and salt. Pour half of the caramel sauce over the apples and mix to coat.
-
4Transfer the apple mixture into the prepared pie crust. Drizzle the remaining caramel sauce over the apples.
-
5Cover with the second pie crust, seal the edges, and cut a few slits on top to vent. Bake for 50-60 minutes, or until the crust is golden brown and the filling is bubbling.
-
6Allow the pie to cool for at least 2 hours before slicing and serving.
Approximate Information for One Serving
Nutrition Disclaimers
Number of total servings shown is approximate. Actual number of servings will depend on your preferred portion sizes.
Nutritional values shown are general guidelines and reflect information for 1 serving using the ingredients listed, not including any optional ingredients. Actual macros may vary slightly depending on specific brands and types of ingredients used.
To determine the weight of one serving, prepare the recipe as instructed. Weigh the finished recipe, then divide the weight of the finished recipe (not including the weight of the container the food is in) by the desired number of servings. Result will be the weight of one serving.
Did you make this recipe?
Please consider Pinning it!!




