Let Me Tell You About Caramelized Onions (Oh Boy)
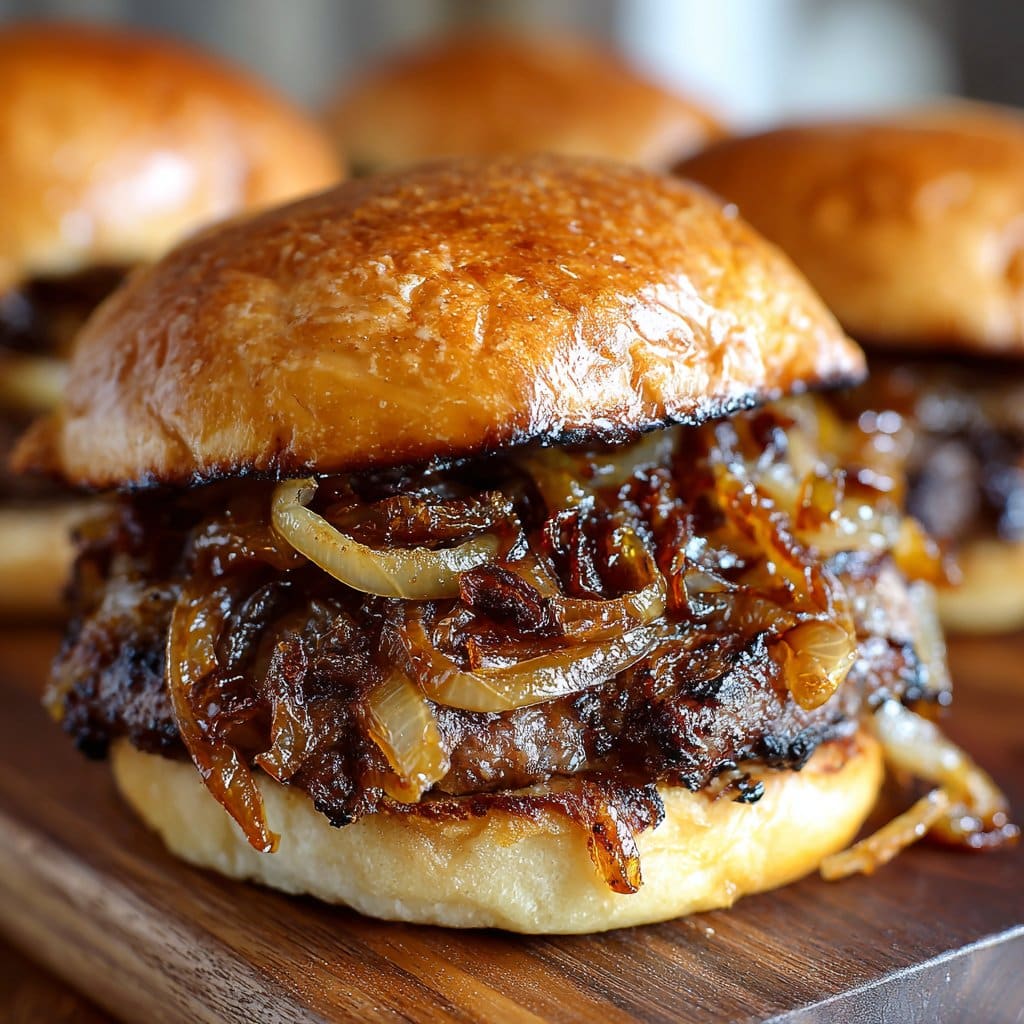
If you’ve ever slathered a juicy burger with sweet, glossy, tangled onions or plopped a forkful on steak and thought, “Why don’t I do this more often?”—hi, you’re my kind of people. I still remember the first time I tried caramelizing onions to impress my (then) boyfriend. Didn’t go as planned. Smoke alarm, tears, and a weird smell that stuck around until Thursday. But honestly, once you get the hang of it (and, sure, open a window), caramelized onions are the MVP move for dinner. They make you look like you’ve got it together even when you, well, don’t.
Why You’ll Love Making These (Or, Why I Do)
I make these whenever I want to turn something basic into “whoa, what’s your secret?” territory. My family goes totally bonkers for caramelized onions on burgers—especially when I don’t burn them (which, okay, used to happen more than I’d admit). They’re also my fix when I’ve got a steak and nothing else in the fridge except onions that are just starting to look a bit…tired.
Sometimes the onions get all jammy and sweet, and sometimes—if I get distracted by a cat video—they’re a little more crispy. And you know what? Every time, they vanish. That’s probably all that matters.
What You’ll Need (Swaps Welcome)
- 3-4 large yellow onions (Spanish, Vidalia, sweet onions—they all work. I’ve even snuck in red onions once when I was out!)
- 2-3 tbsp olive oil (Butter is classic if you’re feeling indulgent. My grandmother, bless her, always used salted butter. Any oil that isn’t too strong works, though.)
- Pinch of salt (Kosher or flaky is what I grab, but table salt is fine. Don’t stress it.)
- Optional: Splash of balsamic vinegar or a teaspoon of sugar if you like things extra sweet. Sometimes I skip these and it’s just as good.
How I Actually Make Them (With Honest Chaos)
- Slice your onions. I usually cut them in half, peel them, then slice into thin-ish half-moons. Don’t measure—just aim for even-ish. But if you want to see how the pros do it, check out this guide from Serious Eats (it’s honestly great, but I always end up improvising anyway).
- Get a big skillet (cast iron is my fave, but any pan that’s wide will do). Pour in your oil (or butter). Medium heat is your friend.
- Toss in the onions. Sprinkle a pinch of salt. Stir things around to coat them. At this point, it’ll look like way too many onions. Don’t panic—they cook down into almost nothing. I promise.
- Now, let them chill in the pan. Stir every so often, like every 5-10 minutes. At first, they’ll just get soft and sort of translucent. This is where I usually sneak a taste (and occasionally burn my tongue—wait a minute, let ‘em cool).
- After about 15 minutes, they’ll start to color. If they’re browning too fast, just lower the heat. If you’re standing there thinking, “Is this taking forever?”—yeah, it kinda is. Good things, you know?
- After 30-40 minutes (sometimes longer, sometimes less, depending on the universe apparently), the onions will be golden, soft, and sticky. Add a splash of balsamic or a sprinkle of sugar if you want, but honestly, I only remember this about half the time.
- Scoop them into a bowl. Try not to eat them all before they hit your burger or steak.
Things I Wish I’d Known (AKA My Notes)
- Don’t crowd the pan! Actually, on second thought, sometimes I do if I’m in a hurry. The onions just steam instead of caramelize, but they’re still tasty—just different texture.
- It’s OK if some bits get darker—that’s flavor, not failure.
- If you use a nonstick pan, the onions won’t get quite as brown. Not a disaster, just a heads up.
Some Wild Variations I’ve Tried
- Red onions with a splash of sherry vinegar (fancy, but really nice).
- Mixing in a handful of sliced garlic near the end—careful, it burns quick!
- Tried using coconut oil once because my friend swore by it. Tasted…odd. Wouldn’t do it again, but hey, maybe you love it.
What If I Don’t Have the Right Pan? (Equipment Chat)
If you don’t have a big skillet, just use the largest pan you own, even if it’s a soup pot. Takes a bit longer but works fine. I did this once in my student flat with a saucepan, and while it took ages, it still made my burger better than any takeaway.
How to Store (And How Long They Actually Last Around Here)
I keep leftovers in a jar in the fridge—should last 3-4 days. But honestly, in my house, it never survives more than a day with two teenagers and one onion-obsessed spouse. If you want to freeze them, go for it; they thaw fine, though maybe not as snappy.
How I Serve Caramelized Onions
Obvious move: pile them high on a burger (double cheese, extra pickles please). Or on top of steak with a spoonful of mustard. Sometimes, I even tuck them into a grilled cheese sandwich (trust me, it’s a winner). For a fancy dinner, I’ve swirled them into mashed potatoes—no one complained.
Lessons Learned the Hard Way (Pro Tips, Sort Of)
Once, I tried to rush the onions over high heat to “save time.” Ended up with bitter, burnt sad stuff. Just don’t. Low and slow is the only way, even if you’re impatient like me. And, just between us, don’t wander off for too long—the onions have a sixth sense for when you’re distracted.
A Few Real Questions I’ve Gotten (FAQ Time)
- Can I make these ahead? Oh, absolutely! I think they taste even better the next day, but around here that’s more theory than practice.
- Can I use pre-chopped onions? Sure, go for it, though they might not caramelize quite as evenly. But hey, nobody’s judging.
- Do I have to use oil? Nope, butter is gorgeous. I’ve even seen folks use ghee. And once I tried a splash of bacon fat—wow, that was next level (not exactly health food, but still).
- How do I keep them form burning? Keep the heat low, stir every so often, and if they start to stick, splash in a bit of water. That’s what I do when my phone distracts me and things get dicey.
- Where do you get those soft burger buns? Oh! I usually get mine from the local bakery, but lately I’ve been eyeing this homemade burger bun recipe from King Arthur Baking. Looks dreamy, right?
Anyway, give these onions a go. If you mess up, just call them “artisan” and pretend it’s on purpose. Works every time, at least in my kitchen.

Ingredients
- 3 large yellow onions, thinly sliced
- 2 tablespoons unsalted butter
- 1 tablespoon olive oil
- 1/2 teaspoon salt
- 1/2 teaspoon sugar
- 1/4 teaspoon freshly ground black pepper
- 1 tablespoon balsamic vinegar (optional)
- 1 teaspoon fresh thyme leaves (optional)
Instructions
-
1Peel and thinly slice the onions. Set aside.
-
2Heat the butter and olive oil in a large skillet over medium heat until melted and shimmering.
-
3Add the sliced onions, salt, and sugar. Stir to coat the onions evenly.
-
4Cook the onions, stirring occasionally, for 30-35 minutes until they are deeply golden and caramelized. Reduce heat if onions begin to burn.
-
5Stir in the black pepper, balsamic vinegar, and thyme (if using). Cook for an additional 1-2 minutes.
-
6Remove from heat and serve warm as a topping for burgers or steaks.
Approximate Information for One Serving
Nutrition Disclaimers
Number of total servings shown is approximate. Actual number of servings will depend on your preferred portion sizes.
Nutritional values shown are general guidelines and reflect information for 1 serving using the ingredients listed, not including any optional ingredients. Actual macros may vary slightly depending on specific brands and types of ingredients used.
To determine the weight of one serving, prepare the recipe as instructed. Weigh the finished recipe, then divide the weight of the finished recipe (not including the weight of the container the food is in) by the desired number of servings. Result will be the weight of one serving.
Did you make this recipe?
Please consider Pinning it!!




