So, About This Chai Cake—Here’s How It All Started
Let me tell you, I didn’t always like chai. There, I said it. My first brush with it was at a mate’s place in college—someone added what felt like half a spice rack to my tea, and oh boy, it was like drinking potpourri… but (I know!) times change. Fast forward: now, not only do I love chai, but I ended up trying it in cake, and suddenly my whole house smelled like a bakery in Delhi after a monsoon, if you know what I mean. If baking could be a warm blanket, this would be it. Honestly, the last time I baked this cake, my cat tried to swipe a still-warm piece right off the counter. Thief. And if you’re wondering: yes, I’ve also eaten it for breakfast with zero regrets.

Why You’ll Love This—Or At Least, Why I Do
I make this whenever someone’s having a rough week, or my niece wants to help and ends up more flour on her than the counter. My gran says it smells like her house in the 60s (except, you know, less tobacco). People go wild for it—I mean, it disappears in a flash at my book club (which is mostly just an excuse to eat cake and chat). It’s somehow both familiar and a little different, with those chai spices cozying up with tender crumb. Only one downside—I always want “just a sliver more” and then boom, it’s gone.
What You’ll Need (Ingredients!)
- 2 cups all-purpose flour (whole wheat works in a pinch—just a bit more rustic)
- 1 1/2 tsp baking powder (sometimes I use 1 tsp baking soda with lemon juice in a pinch, don’t tell!)
- 1/2 tsp baking soda
- 1/2 tsp salt
- 1 cup sugar (granulated, but honestly, brown sugar adds more depth—thanks for the tip, Auntie Mira!)
- 1/2 cup unsalted butter, melted and cooled (I’ve done it with coconut oil and it’s pretty lush)
- 2 large eggs (room temp if you remember; straight from the fridge if you forget, like me half the time)
- 1 cup plain Greek yogurt, or sour cream (my friend once used vanilla yogurt, and it wasn’t terrible?)
- 1/4 cup strong brewed chai tea (cooled—honestly, a teabag works fine, or go all out with homemade masala!)
- 2 tsp vanilla extract
- 2 tsp ground cinnamon
- 1 tsp ground cardamom (don’t stress if you only have pods—bash them up real good)
- 1/2 tsp ground ginger
- 1/2 tsp ground cloves
- 1/2 tsp ground allspice (if missing, skip—it’s not a dealbreaker)
- Optional: 1/2 cup raisins or chopped walnuts (kids tend to pick out the nuts, but they never miss chocolate chips… just sayin’)
How To Make It, More or Less My Way
- Preheat your oven to 350°F (about 175°C). Grease a 9-inch round pan, or line with parchment if you’re not in the mood to scrub later.
- In a big bowl, whisk together all the dry stuff: flour, baking powder, baking soda, salt, and all those spices. My favorite bit—hugely aromatic, try not to sneeze.
- In another bowl, beat together the sugar and cooled melted butter. Add the eggs, one at a time—no need to overthink it. Whisk in yogurt, chai tea, and vanilla. (This is usually when I forget the vanilla and have to dash for it—don’t be me.)
- Pour wet mix into dry. Stir gently. Don’t go at it like you’re making cement—just enough for the lumps to vanish. If you’re adding raisins/nuts/chocolate chips, chuck ‘em in now.
- Scrape into your pan. Smooth the top. Sometimes it looks a bit lumpy. Totally fine.
- Bake for 32-36 minutes, until a toothpick in the center comes out clean, though sometimes I wait a minute or two because my oven runs sort of cold. (Just don’t open the door every five minutes—hard learned lesson.)
- Let it cool! On a rack if you’ve got one; on the stovetop if you don’t. Sneak a warm bit from the edge—I always do.
Chef’s Notes—A Few Random Discoveries
- Honestly, this cake tastes even better the next day (if you can resist). Flavors get deeper.
- If you use brown sugar, the cake stays moist longer. Found that out by accident when I ran out of white sugar. Noted.
- Chai tea that’s too weak makes for a sad cake. Double up those teabags if you’re unsure!
Experimenting with Variations
- Swapped butter for olive oil once. It was… not my favorite (a bit grassy? stick to coconut oil for dairy-free!).
- Added a bit of orange zest—wow, that worked really well. Might be too zippy for little ones though.
- Gluten-free flour actually pulled it off—just needed an extra tablespoon of yogurt for moisture. But hey, your mileage may vary.
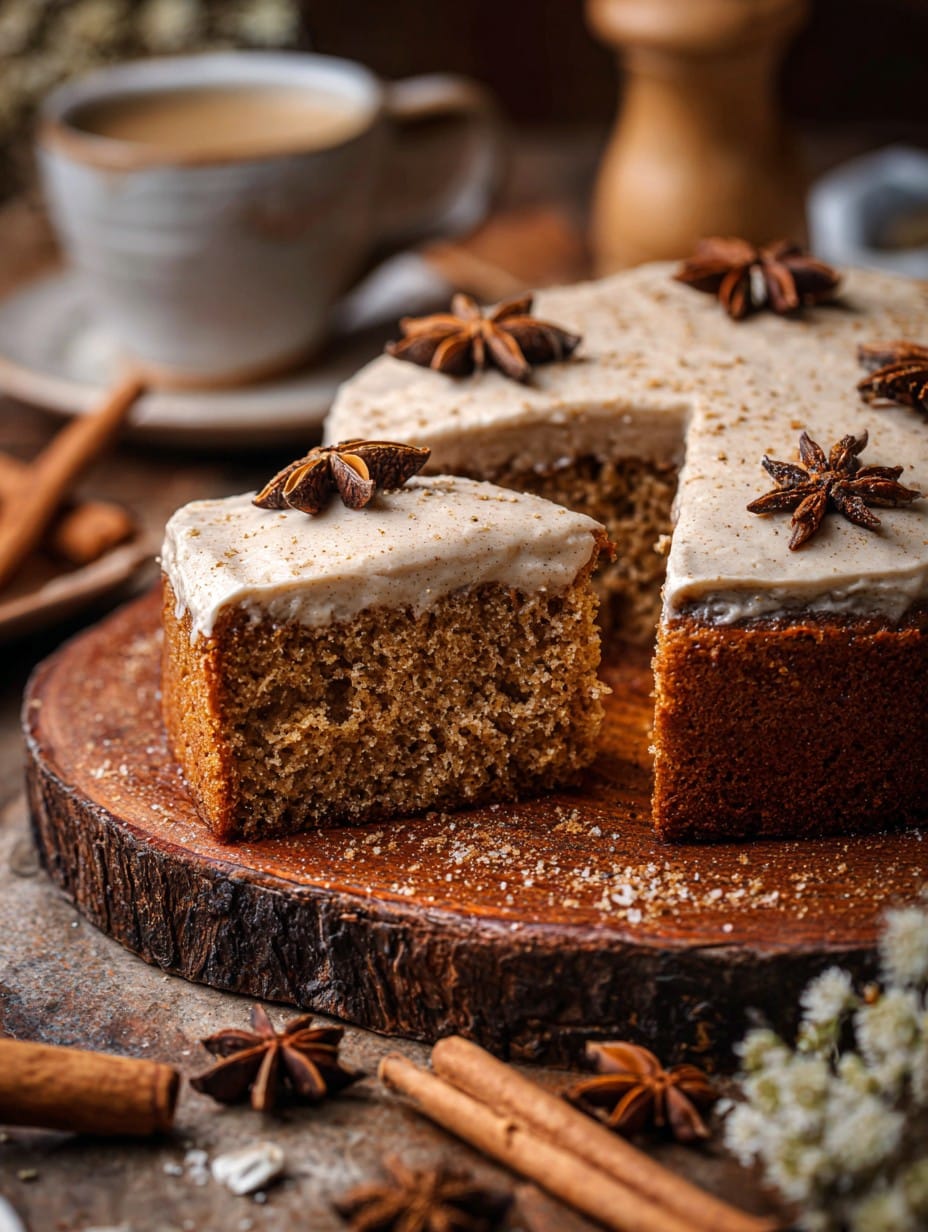
What You’ll Need to Bake (But Not Necessarily)
- Mixing bowls (I use two, but who am I to judge stacking it up in one?)
- 9-inch round cake pan (springform if you’re fancy, I’ve also made cupcakes, just bake for less time)
- A whisk or sturdy wooden spoon (hand mixer if you want, but totally not essential)
- Cooling rack (optional, honestly, a plate works fine—just takes longer)
How to Store (Or, Honestly, How Fast It Disappears)
Technically, you can keep this in an airtight tin or container at room temp for 2-3 days. But in my house, it’s usually finished within 24 hours. If it somehow lasts, fridge keeps it for another day or two—just let it come to room temperature before eating, unless you like it chilly with your tea, which is not my jam but hey, you do you.
Best Ways to Serve (According to My Family)
We go a bit extra—sometimes I dust with a silly amount of powdered sugar, just because it looks pretty in photos (even though I rarely take any). Lovely warmed up, with a dollop of Greek yogurt and a drizzle of honey, or if my nephew’s over, vanilla ice cream is suddenly “essential”. Once we even had it with hot custard because—well I was distracted, and someone got wild with the dessert menu.
From My Mess-Ups to You: Pro Tips
- Trying to rush the cooling? I once tried slicing too soon—ended up with a goopy mess. Patience really is a virtue here.
- Don’t skip greasing your tin (once I banked on my nonstick and, well… ripped cake city)
- If your batter looks thicker than oatmeal, add a splash more of the chai tea—trust your eyes!
Chai Cake Questions I Keep Getting
- Can I make this vegan?
Sure can! Swap eggs for flaxseed “eggs,” butter for coconut oil, and use plant yogurt. Someone did it for a potluck once and it worked out. - Could I use store-bought chai concentrate?
Honestly, yes, but it’ll be sweeter—maybe pull back on the sugar a bit. I’d go for a splash less. - What if I don’t have cardamom?
You’ll lose a little of that “chai-ness” but it’ll still be good. Some people use extra cinnamon or a pinch of nutmeg—worth a try. - Can I freeze it?
Actually, yes. Wrap slices well and freeze. Defrost on the counter with a cuppa—it’s like a hug form the past. - Can I double it?
I don’t see why not—but maybe use a bigger pan or two, and keep an eye on baking time (I overcooked a double batch once, oops!).
So there we go, my rambling chai cake adventure. If you give it a go, tell me how it turned out—unless it goes sideways, in which case, we’ll call it “deconstructed” and have another slice anyway. Cheers!
Ingredients
- 2 cups all-purpose flour
- 1 cup granulated sugar
- 1/2 cup unsalted butter, softened
- 2 large eggs
- 1 cup whole milk
- 2 tsp baking powder
- 1 tsp ground cinnamon
- 1 tsp ground cardamom
- 1/2 tsp ground ginger
- 1/2 tsp ground cloves
- 1/2 tsp ground black pepper
- 1/4 tsp salt
- 1 tsp vanilla extract
Instructions
-
1Preheat the oven to 350°F (175°C). Grease and flour a 9-inch round cake pan.
-
2In a medium bowl, whisk together the flour, baking powder, salt, cinnamon, cardamom, ginger, cloves, and black pepper.
-
3In a large bowl, cream the butter and sugar together until light and fluffy. Beat in the eggs one at a time, then add the vanilla extract.
-
4Gradually add the dry ingredients to the wet ingredients, alternating with milk, and mix until just combined.
-
5Pour the batter into the prepared cake pan and smooth the top. Bake for 35-40 minutes, or until a toothpick inserted in the center comes out clean.
-
6Allow the cake to cool in the pan for 10 minutes, then turn out onto a wire rack to cool completely before serving.
Approximate Information for One Serving
Nutrition Disclaimers
Number of total servings shown is approximate. Actual number of servings will depend on your preferred portion sizes.
Nutritional values shown are general guidelines and reflect information for 1 serving using the ingredients listed, not including any optional ingredients. Actual macros may vary slightly depending on specific brands and types of ingredients used.
To determine the weight of one serving, prepare the recipe as instructed. Weigh the finished recipe, then divide the weight of the finished recipe (not including the weight of the container the food is in) by the desired number of servings. Result will be the weight of one serving.
Did you make this recipe?
Please consider Pinning it!!




