If You Love Cheesecake, You Need to Try This
Alright, so let me tell you about the time I first made this cheesecake. It was for my cousin’s potluck—total spur-of-the-moment thing, because half my family claims they’re “not dessert people” (yeah, right). Anyway, I showed up with this cheesecake, and let’s just say not a crumb survived the evening; my uncle even scraped the base with his fork when he thought no one was looking. I actually do this at home, too, but shh. Oh and don’t get me started on the time I tried to carry it while chasing my dog out of the kitchen. Safe to say it’s a miracle this recipe survived at all!

Why I Keep Coming Back To This Recipe
I make this whenever I want to feel a bit fancy (without sweating buckets). My family goes completely bonkers for it, especially my dad—he likes to pretend he isn’t eyeing the fridge, but he totally is. Plus, this recipe is the only one I’ve found that doesn’t crack like crazy every time. Seriously, nothing makes you question your life choices more than that giant fissure down the center. And if you’ve ever felt like a cheesecake is out to get you, well, same here. But with this one, honestly, it mostly behaves!
What You’ll Need to Round Up (A.K.A. Ingredients)
- 1 1/2 cups (about 375ml or so) graham cracker crumbs (Sometimes I go wild and use digestive biscuits. My grandmother always insisted on Honey Maid—frankly, the no-frills store brand kinda rules.)
- 1/4 cup sugar (white, but brown sugar gives a slightly toasty flavor if you fancy bringing a twist)
- 1/2 cup (115g) unsalted butter, melted—I’ve used salted in a pinch; just tastes a bit more “grown-up”
- 24 oz (about 675g) full-fat cream cheese, softened (not low fat, please, unless you enjoy heartbreak)
- 1 cup sugar (or a scant cup if you prefer it less sweet—I won’t judge)
- 3 large eggs (room temperature, though I forget sometimes and it still works out okay)
- 1 tsp vanilla extract (double it if you love vanilla as much as I do—sometimes I use almond extract for a slightly nutty thing)
- 3/4 cup sour cream (greek yogurt fills in nicely, honestly)
- Pinch of salt (I add a bit more than a pinch, probably. I just love that balance)
Let’s Get Baking—Here’s What You Do
- Prep work: Preheat oven to 325°F (or 160°C, give or take). Grease a 9-inch springform pan—I’ve used a regular cake tin with foil around the bottom, too, but it’s… let’s call it “an experience.”
- Crust first! Mix graham crumbs, sugar, and melted butter. It’ll look a bit sandy; that’s normal. Press firmly into pan—don’t stress getting it perfect. Sometimes I even push a bit up the sides for extra crunch. Pop it in the oven for 10 minutes, then set aside (though, full disclosure, I always taste a tiny bite at this stage).
- Cheesecake filling time. Beat the cream cheese and sugar together. You want it smooth but, you know, don’t totally lose your mind if a lump or two sneaks in. Add eggs—one at a time, mixing gently. I know you’re supposed to avoid overbeating; just mix until it disappears, then stop. Add vanilla, sour cream, salt, and give it one last swirl.
- Pour into the crust. If it looks too full, that’s fine—it’ll settle. Give it a gentle tap. Here’s where I usually mutter a hopeful prayer or two.
- Bake with a water bath, if you like living on the edge. Wrap the pan’s bottom with foil, put it into a bigger pan, and pour hot water around it. (Ooor, just bake it straight. Occasionally I skip the water bath and, alright, I get a crack. But then I just dollop whipped cream on top—out of sight, out of mind, right?) Bake 50-60 mins or until the center sort of jiggles if you tap it. Don’t overthink the jiggle; if the edges are set, you’re there.
- Turn off, cool slooooowly. Crack the oven open a bit, and let your cheesecake chill as the oven does. This is apparently magic for no cracks (but sometimes I get distracted and yank it out early—no disaster so far, touch wood).
- Chill in fridge—minimum 4 hours, overnight is best (I eat my first slice for breakfast; don’t judge). Release from pan, and you’re off to the races!
A Few More Notes from My Kitchen Fiascos
- Room temp cream cheese is best—I once tried to rush with cold cheese and, well, the filling looked like scrambled eggs (not my finest moment).
- If the crust seems too sandy, add a smidge more butter. Or, honestly, just push harder—sometimes that’s all it needs.
- Don’t panic over cracks. That’s what toppings are for (plus, rustic desserts are in, right?).
If You Want to Mix it Up—Here’s What I’ve Tried
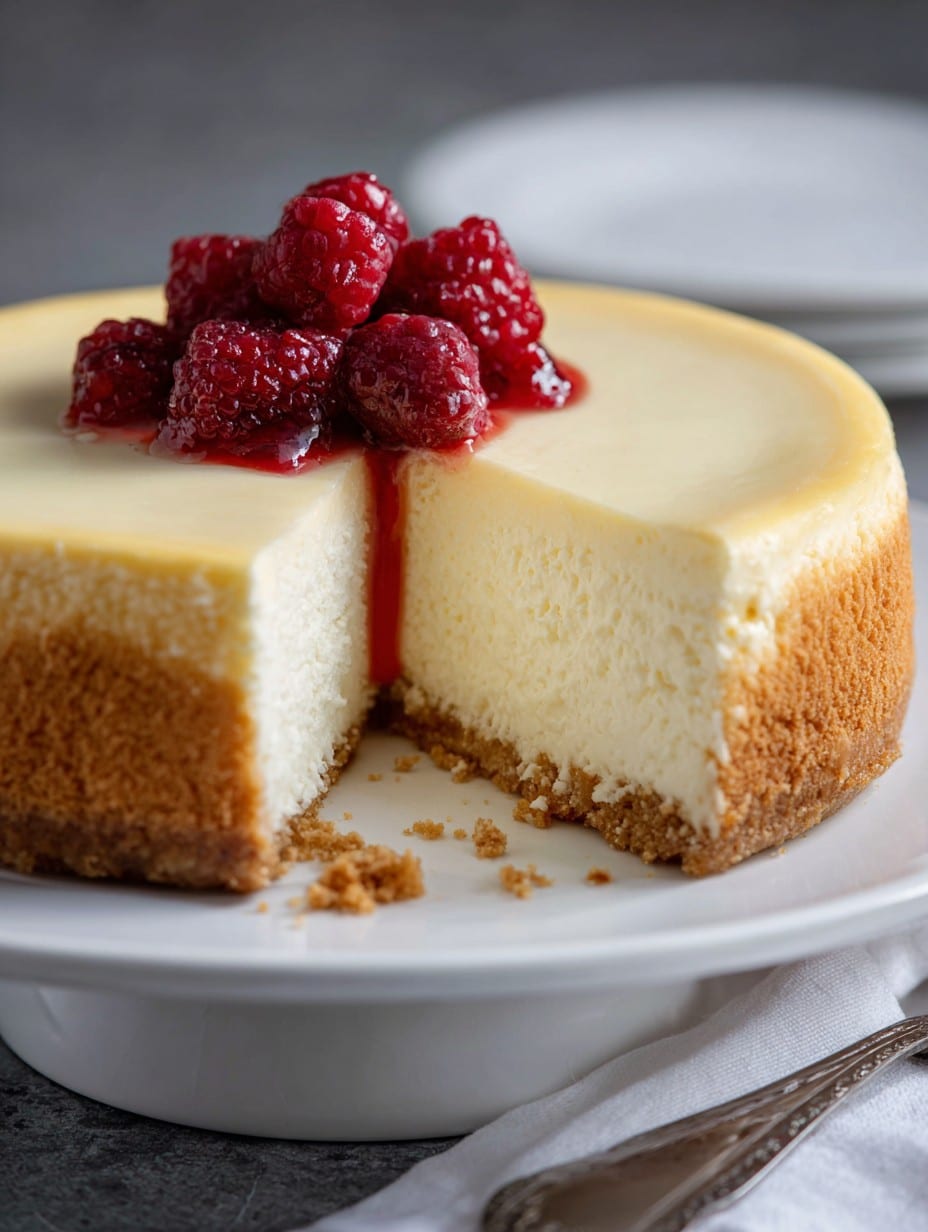
- Swirling in raspberry sauce pre-bake works and looks impressive—if you don’t go totally wild with it (ask me how I know…)
- Oreos instead of graham crackers for the crust? Yessss. But, chocolate cookies once turned out a bit dry—guess I should’ve added more butter, but hey, live and learn!
- Lime zest in the filling makes it oddly refreshing. Once tried peanut butter swirls and honestly, I’d give that one a miss—unless you’re really committed.
Gear You Need—And What to Use if You Don’t Have It
- Springform pan: Yes, it’s ideal, but don’t panic if yours is lost to the ages; I’ve managed with a regular tin lined with greased parchment and heavy optimism.
- Electric mixer: I prefer it, but a solid whisk and elbow grease will get you there. Maybe pace yourself, though.
- Big roasting pan for water bath: Or skip it and just cross your fingers about cracks. Worked for me, sort of.
How to Store This (Assuming Any Survives)
Wrap leftovers (if, miracle of miracles, there actually are any) in cling film or throw them in an airtight container. Keeps in the fridge for up to 4 days, but in my house it never lasts more than a day! Oh, and you can totally freeze slices—just wrap ’em tight; they’ll keep for about a month, though I always get tempted long before that.
If You Want to Show It Off—Serving Ideas
Honestly, I love this plain, but my brother swears by strawberry jam on top. Sometimes, I set out a mix of quick-cooked berries, a bit of whipped cream, and let everyone pile on their own toppings. For birthdays, we go the full Monty: sparkly candles and chocolate drizzle (bit extra, but so what?). In summer, it’s all about the blueberries.
Things I Wish I’d Known Earlier (a.k.a. Pro Tips)
- I once tried to cool a cheesecake on the counter in 20 minutes; turns out, patience is kind of a virtue here. It fell apart—looked, um… deconstructed?
- If you overbeat the eggs, the texture goes a bit rubbery, so really, don’t fuss too much. Gently wins the day, as my aunt always says.
- Check your oven doesn’t run hot—mine totally does (found out the hard way when the top went “golden” way too quickly)
Quick FAQ from Folks Who’ve Texted Me in a Panic
- Can I skip the water bath?
- Probably, yes. You’ll get a few cracks, but as I keep saying—toppings are your friend! I actually never used to bother and survived just fine.
- Low-fat cream cheese—does it work?
- Meh, it’s alright, but it’s no showstopper. Tastes a bit “wobbly” and texture’s off in my opinion.
- Do I really have to wait overnight?
- Technically, yes, but I’ve cut into it early plenty. Just don’t expect super clean slices—and hey, isn’t that half the fun?
- Can I add fruit inside?
- Sure! Tossing in a handful of fresh berries works. Wish I’d measured once, but about a cup seems fine. For canned fruit… eh, drain it well or you might get a soggy middle!
P.S. Does cheesecake count as breakfast? Asking for a friend, obviously.
Ingredients
- 2 cups graham cracker crumbs
- 1/2 cup unsalted butter, melted
- 3 (8-ounce) packages cream cheese, softened
- 1 cup granulated sugar
- 1 teaspoon vanilla extract
- 3 large eggs
- 1 cup sour cream
- 1/4 cup all-purpose flour
- 1/4 teaspoon salt
Instructions
-
1Preheat the oven to 325°F (163°C). Grease a 9-inch springform pan.
-
2In a medium bowl, combine graham cracker crumbs and melted butter. Press the mixture firmly into the bottom of the prepared pan to form a crust.
-
3In a large bowl, beat the cream cheese with sugar and vanilla extract until smooth. Add eggs one at a time, beating well after each addition.
-
4Mix in sour cream, flour, and salt until just combined. Pour the batter over the crust in the springform pan.
-
5Bake for 55-60 minutes or until the center is set but slightly jiggly. Turn off the oven and let the cheesecake cool inside with the door ajar for 1 hour.
-
6Remove cheesecake from the oven and refrigerate at least 4 hours or overnight before serving.
Approximate Information for One Serving
Nutrition Disclaimers
Number of total servings shown is approximate. Actual number of servings will depend on your preferred portion sizes.
Nutritional values shown are general guidelines and reflect information for 1 serving using the ingredients listed, not including any optional ingredients. Actual macros may vary slightly depending on specific brands and types of ingredients used.
To determine the weight of one serving, prepare the recipe as instructed. Weigh the finished recipe, then divide the weight of the finished recipe (not including the weight of the container the food is in) by the desired number of servings. Result will be the weight of one serving.
Did you make this recipe?
Please consider Pinning it!!




