Let’s Talk Truffles: Where My Sweet Tooth Meets Lazy Genius
So, picture this: it’s a dreary Thursday afternoon, rain’s coming down sideways, and I desperately want something chocolatey. But, you know that feeling when turning on the oven just seems like overkill? That’s pretty much how these chocolate hazelnut no-bake truffles were born in my kitchen. Actually, it all started because I found a rogue jar of hazelnut spread lurking in the cupboard (I won’t name names, but you know the one!). Anyway, it’s become my rescue recipe for everything from surprise guests to my own snack attacks. Once, my nephew grabbed one, declared them better than ‘store stuff,’ and I practically grew an inch taller on the spot.

Why I Keep Coming Back to These (And You Might Too)
I make these when the chocolate craving won’t take “later” for an answer. My family goes a little wild for them—especially if I stick them in the fridge behind the leftover broccoli (don’t judge me). They’re quick, I barely get any extra dishes dirty (hallelujah), and hey, it doesn’t feel like cheating because there’s real chocolate and nuts. Oh, and if your hands get a bit messy rolling them? Welcome to the club. It just adds to the fun, until you inevitably lick your fingers and remember you told yourself not to. (Oops.)
What Goes Into My Chocolate Hazelnut No-Bake Truffles
- 1 cup chocolate hazelnut spread (Honestly, I’ve used fancy stuff and the bargain jar; the difference is, well, not as major as you’d expect.)
- 1/2 cup finely chopped hazelnuts (Sometimes I sub with almonds if the hazelnuts have vanished. Works just fine.)
- 3/4 cup graham cracker crumbs (Or digestives, or even the tail end of a box of vanilla wafers. Whatever’s getting stale.)
- 1/2 cup chocolate chips (I go dark, but hey, if you’ve only got milk, live a little.)
- Pinch of salt (Never skip this. Learned the hard way.)
- Cocoa powder, for dusting (Optional, but it hides most imperfections. My little hack.)
How I Make ‘Em: Chill Steps, Literally
- Grab a big-ish bowl. Toss in hazelnut spread, chopped hazelnuts, and the cracker crumbs. Mix with a spatula or just go for it with clean hands. (This is the bit where I usually sneak a taste. For quality control.)
- Melt the chocolate chips in the microwave in 20-second bursts, stirring each time. Don’t fret if it’s still slightly lumpy; residual heat smooths it out. (I’ve microwaved it into oblivion before—don’t be me, take it slower.)
- Stir the melted chocolate and pinch of salt into the mixture. It’ll look a little suspect—kind of like playdough gone fancy. That’s normal.
- Scoop out small lumps (about a tablespoon each, but I don’t bother measuring), and roll into balls. If it’s too sticky, pop the whole bowl into the fridge for 15 minutes; makes the world of difference.
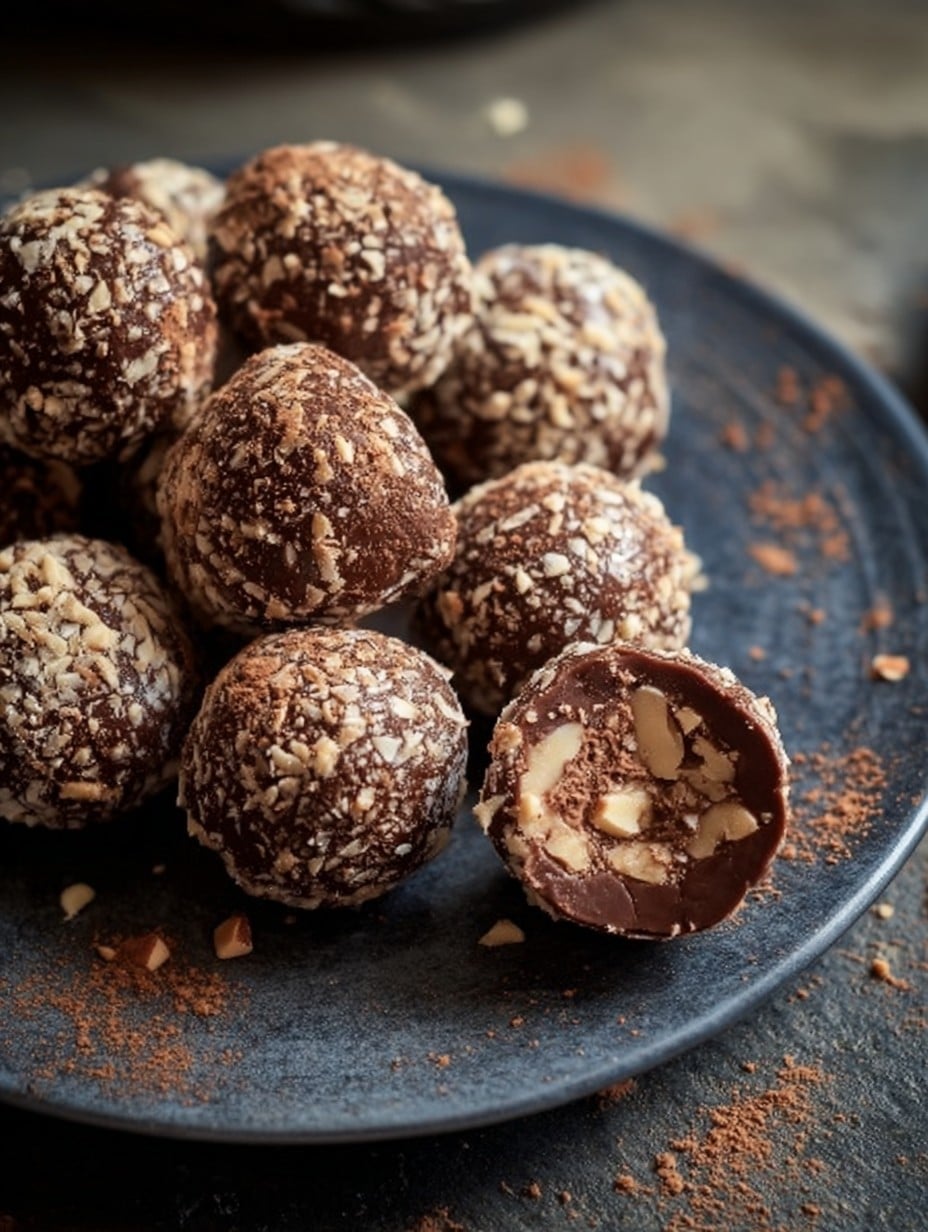
- Roll the truffles in cocoa powder or extra chopped nuts, or just leave ‘em as is if you can’t wait any longer.
- Chill for at least 30 minutes, though honestly, they taste just as good straight from the mixing bowl… not that I’m encouraging that. (OK, I sort of am.)
Notes From the Trenches (a.k.a. My Countertop)
- Sometimes the mix gets too loose. I just add crushed crackers a little at a time, and if I overdo it, a quick zap in the microwave softens things again. See? No disasters, only detours.
- Once I swapped graham crumbs for shredded coconut—turned out great, if a bit chewy. But in a pinch, why not?
- Hazelnuts are classic, but if allergies are a thing try sunflower seeds. Just chop small, nobody really notices.
Truffle Experiments and Oddball Ideas
Okay, so I did try to roll these in sprinkles once. Looked amazing, tasted like I’d dropped them in a candy store (not in a good way—too sweet). Dipping them in white chocolate, though? Now you’re cooking with gas. Or for a grown-up twist, a splash of hazelnut liqueur is chef’s kiss.
You Don’t Need Fancy Kit (& Maybe Improv Works Best)
You can use a food processor for nuts, but if you’re like me and can’t find the blade (where do those things hide?), just use a sandwich bag and the flat end of a rolling pin. For melting the chocolate—microwave all the way. No double boiler, no drama.
How I (Try To) Store Them
I pop these in a lidded tub in the fridge; they stay fresh about 4 days, unless my lot find out where I put them. Real talk: they rarely last more than a day before disappearing.
Serving These Little Beauties
I love to put them out with after-dinner coffee; my best mate swears by snacking on them with ice cream. On special days, I’ve piled them in gift boxes. Wrapping them in parchment makes them look way fancier than the effort deserves (but hey, take the win).
Lessons Learned… Usually the Hard Way
- Don’t try to speed up chilling by stashing them in the freezer for just a “few mins”—you’ll get truffle cubes, not balls.
- Mixing when the chocolate’s too hot just sort of melts everything into a gooey swamp. Let it cool a bit first, trust me.
- If you’re out of cocoa powder, powdered sugar works, but it gets sticky quicker than you’d think.
Real Questions (and the Answers I Usually Text Back)
Can I use peanut butter instead?
Yup, though it’ll give you a totally different vibe. Works if you’re in a pinch or feeling adventurous.
Do I have to chill them?
Technically, no, but good luck trying to roll them, mate! They set better in the fridge.
Are these crazy sweet?
If you use milk chocolate chips and sweet hazelnut spread, maybe. I go for darker chocolate when I’m feelin’ fancy.
Can I freeze them for later?
Yup—just defrost in the fridge, not on the counter. Unless you like truffle puddles… Learned that the hard way.
What if my mix is too crumbly?
Add a spoonful more hazelnut spread. Happens to me all the time, no drama.
A Little Off-Topic (But Not Really?)
Funny story, once I was making these and the dog decided the cocoa powder was his new toy. Let’s just say, chocolate pawprints and suspiciously empty bowls were involved. Guess he’s a truffle fan too—don’t worry, he didn’t eat any (I think?).
Ingredients
- 1 cup chocolate hazelnut spread (such as Nutella)
- 1 cup finely crushed chocolate graham crackers or cookies
- 1/2 cup finely chopped hazelnuts
- 1/4 cup cocoa powder (for dusting)
- 1/2 teaspoon pure vanilla extract
- Pinch of salt
- 2 tablespoons unsalted butter, softened
- 1/4 cup mini chocolate chips (optional)
Instructions
-
1In a medium mixing bowl, combine the chocolate hazelnut spread, crushed cookies, chopped hazelnuts, vanilla extract, salt, and softened butter.
-
2Mix all the ingredients together until fully combined and a thick dough forms.
-
3If desired, fold in the mini chocolate chips for extra texture.
-
4Scoop out small portions of the mixture and roll into 1-inch balls using your hands.
-
5Roll each truffle in cocoa powder until evenly coated.
-
6Chill truffles in the refrigerator for at least 1 hour before serving.
Approximate Information for One Serving
Nutrition Disclaimers
Number of total servings shown is approximate. Actual number of servings will depend on your preferred portion sizes.
Nutritional values shown are general guidelines and reflect information for 1 serving using the ingredients listed, not including any optional ingredients. Actual macros may vary slightly depending on specific brands and types of ingredients used.
To determine the weight of one serving, prepare the recipe as instructed. Weigh the finished recipe, then divide the weight of the finished recipe (not including the weight of the container the food is in) by the desired number of servings. Result will be the weight of one serving.
Did you make this recipe?
Please consider Pinning it!!




